


How to Pickle Cucumbers
Making pickles is a great first-time canning project; it's easy, safe and odds are good that you already have everything you need to get started right at home.


Derek R. Trimble
Pickle How-to
Vinegar-brined pickles require a process known as water-bath canning. Water-bath canning is the simplest and safest way to preserve most vegetables and pickles are no exception. If you're looking to make a large batch of pickles to give to friends or stock your pantry, or you just want to make a few jars with cucumbers you have on hand, this process is for you. In one weekend, you can easily can enough pickles to stock your pantry for a long time. The great thing about water bath canning is that you can do as much or as little as you'd like in any size jar.

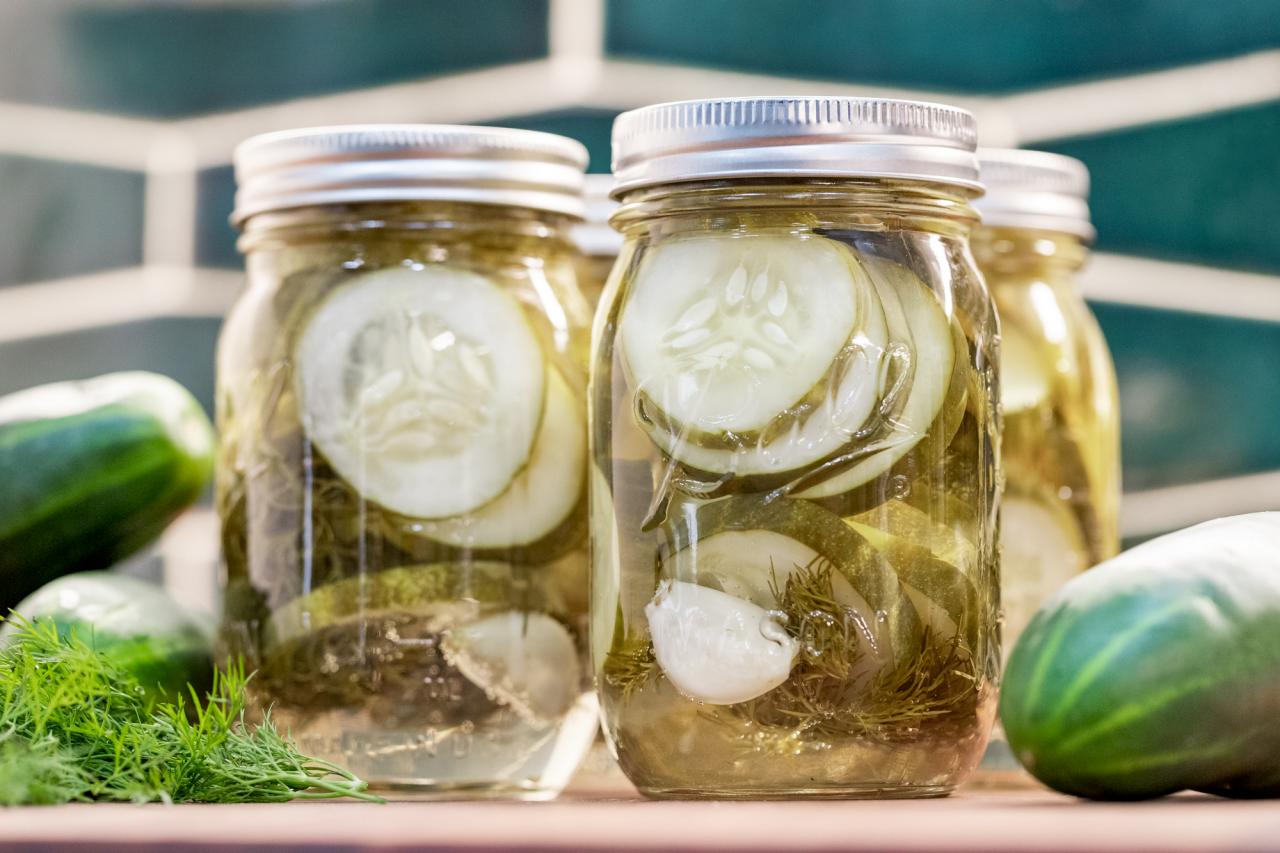
This recipe makes four pints of dill pickles using the most basic ingredients, but don't be afraid to get creative. Toss in a hot pepper or mix a little spice into your vinegar brine; maybe cut your pickles into spears instead of slices if you prefer. This recipe is simply a starting point, so have fun and make it your own.
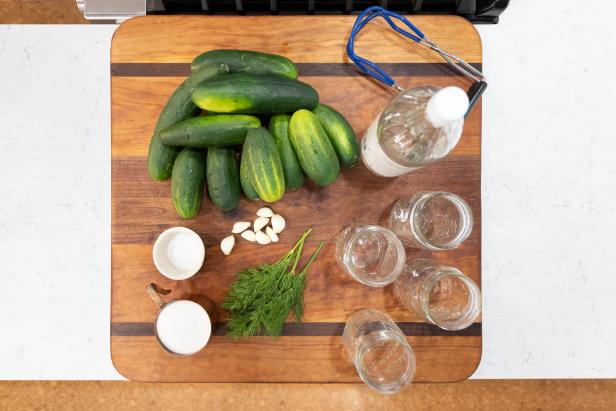
Pickle Recipe
Yields 4 pints
- 8 lbs. fresh cucumbers – pickling varieties are best, but any will work
- 4 garlic cloves
- 1 bunch fresh dill
- 4 cups distilled white vinegar
- 1 cup water
- 1 cup sugar
- 4 teaspoons salt
- large boiling-water canner or a stock pot deep enough to submerge your jars
- 4 pint-sized glass preserving jars with new lids and screw-on bands
- basic kitchen items: wooden spoons, ladle, oven mitts, etc.
- non-reactive sauce pan; enamel or stainless steel. Do not use aluminum!
- small sauce pan for sterilizing lids
- jar-lifting tongs
- magnetic wand
- canning funnel
Derek R. Trimble
Step 1 – Organize Your Space
While you're making pickles, it's important to stay organized and be safe. You're dealing with lots of hot water and really hot jars, so making sure you have enough elbow room and the appropriate tools for the job are essential. If you intend on doing a big batch of pickles, we highly recommend purchasing a water-bath canning kit with all the utensils you need. Jar tongs and a canning funnel at minimum are exceptionally helpful and make handling scalding hot jars a lot safer and easier.
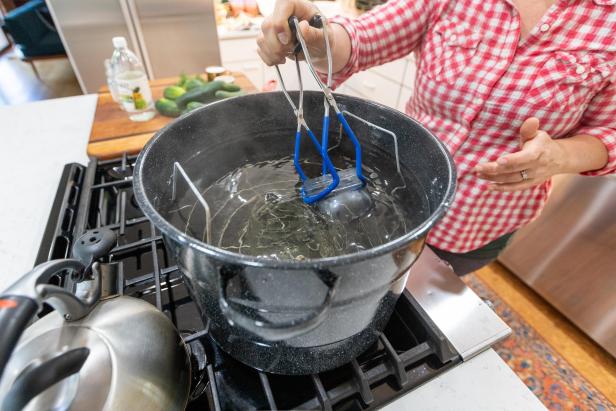
Step 2 – Sterilize the Jars and Lids
Fill your water-bath canner or stock pot with enough water to completely submerge your jars while making sure you don't over fill. Leave enough room so that when you submerge jars, there's still a few inches of space left below the lip of the pot.
Next, put your pot on the farthest stove burner from you and heat the water to just below boiling. Slowly submerge your jars with jar tongs or if you're using a water-bath canner you can lower your jars slowly using the included lifting rack. This sterilizes the jars.
Take your small sauce pan and fill it with all of your lids and enough water to cover them. Heat that pan over a rear burner just enough to get it hot and keep it there. You'll need the lids further on down the road, but for now, keep them hot and out of the way. This will ensure you have clean, bacteria-free lids when it's time to put them on.
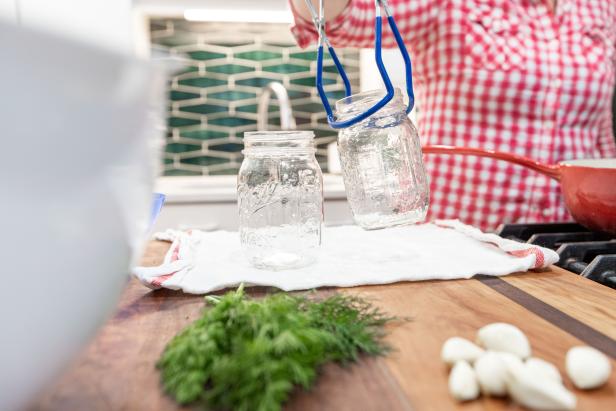
After about ten minutes, remove your jars from the water bath using tongs or the lifting rack and set them down on a clean dishtowel. Keep them relatively close together so that you'll be able to easily and neatly move from one to the other as you're filling them.
Derek R. Trimble

Derek R. Trimble
Derek R. Trimble
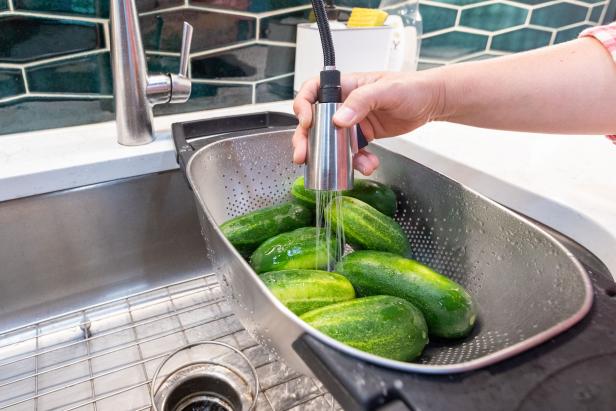
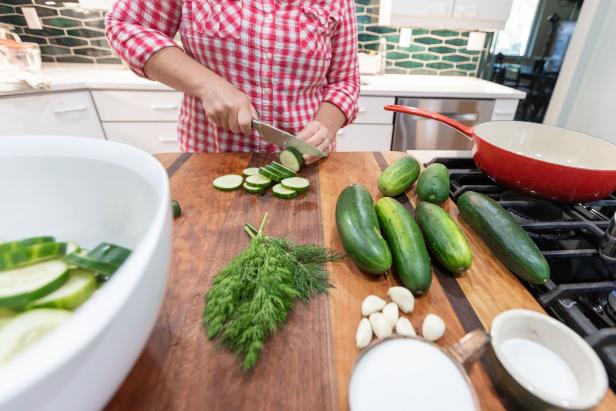
Step 3 – Wash and Prep Your Cucumbers
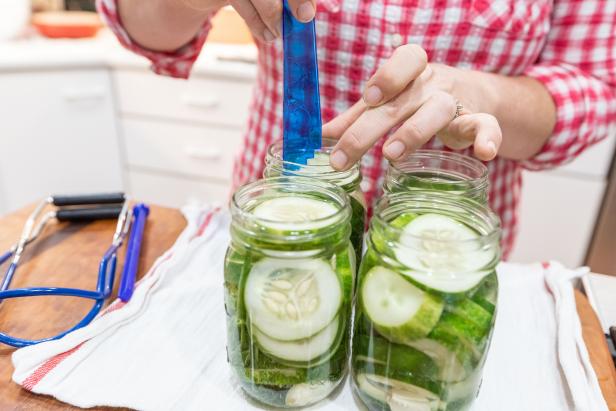
Because you place your cucumbers directly into the jars, it's essential that they're clean and that the ends are trimmed off. Wash your cucumbers thoroughly and give them a gentle scrubbing with your hands to ensure that they're clean. Once everything is clean, it's time to slice all of your cucumbers into the desired shapes for your pickles.
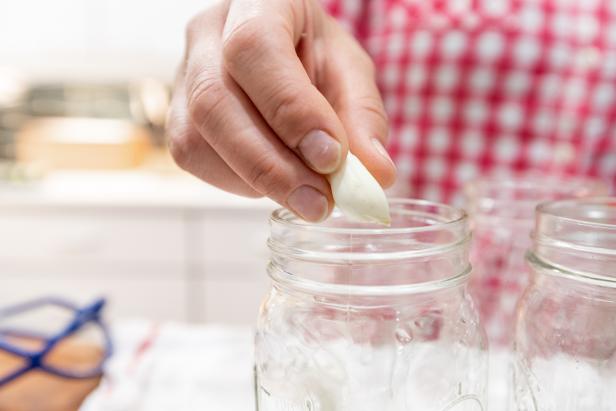
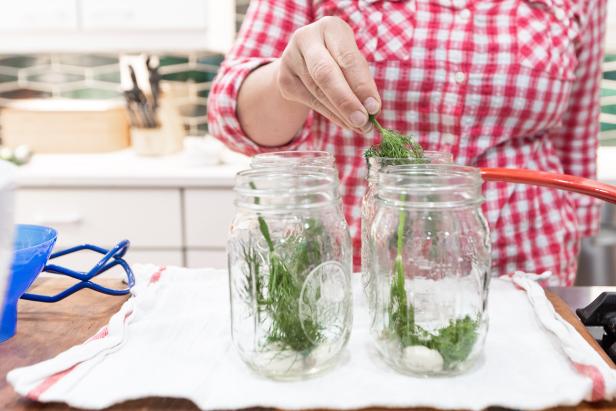
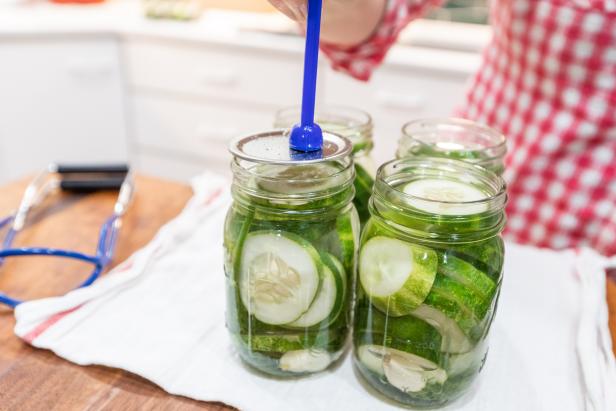
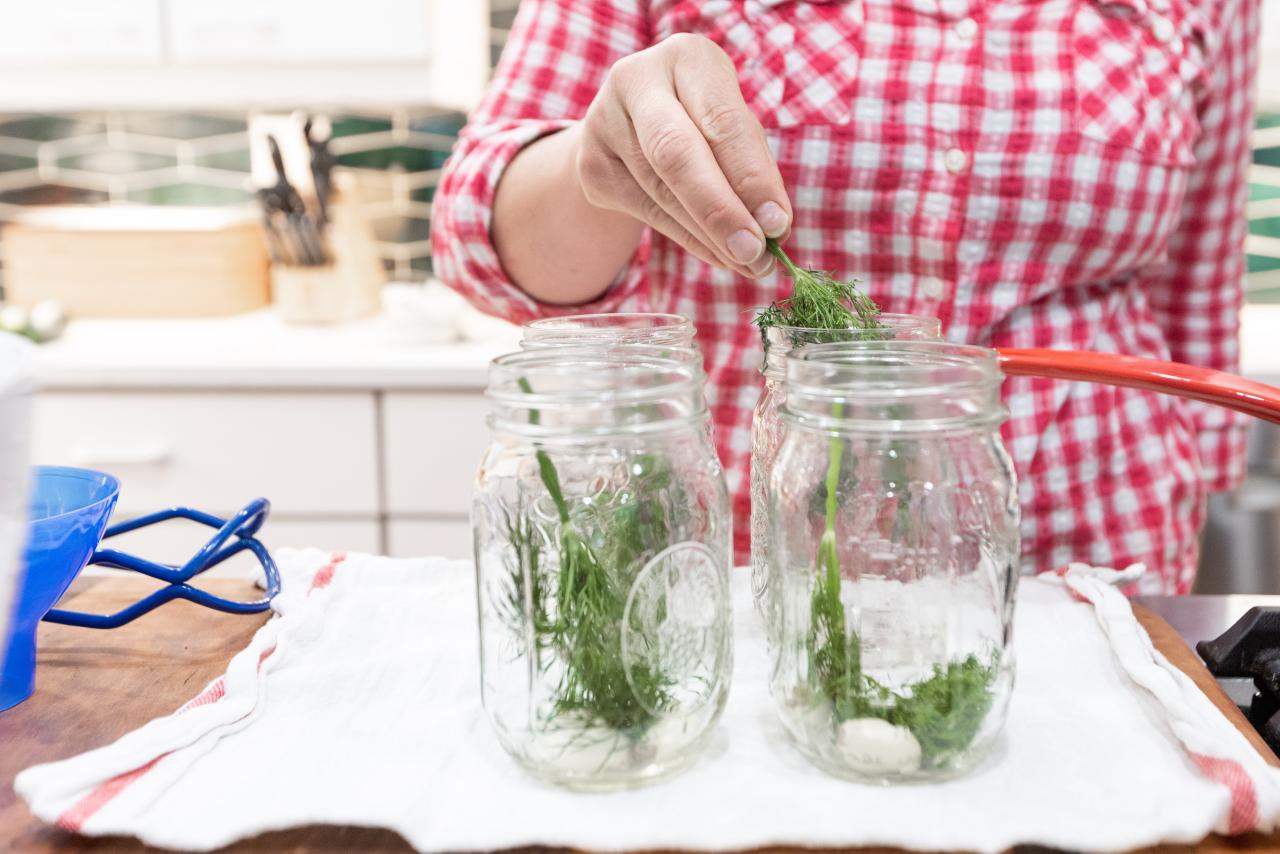
Add one peeled garlic clove and a generous bunch of dill to each one of your sterilized jars. Loosely pack the cucumbers into your jars, leaving enough space for about a cup of brine along with a little bit of head space at the top of the jar.
Derek R. Trimble
Derek R. Trimble
Derek R. Trimble
Derek R. Trimble

Derek R. Trimble
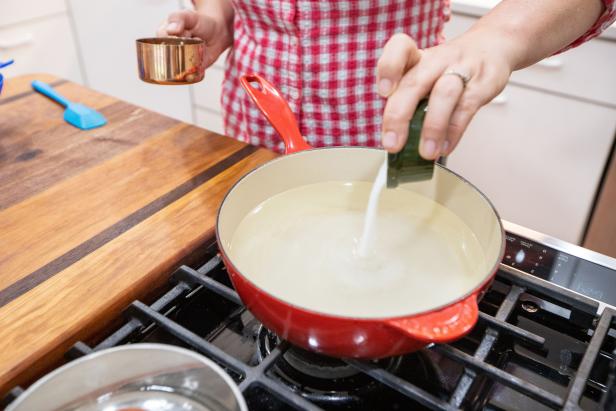
Step 4 – Mix Your Vinegar Brine
Combine your vinegar, salt, water and sugar into your non-reactive sauce pan and heat everything together until it's hot enough for the solids to dissolve. Turn the heat all the way down so that your brine remains hot, and does not reach a boil.
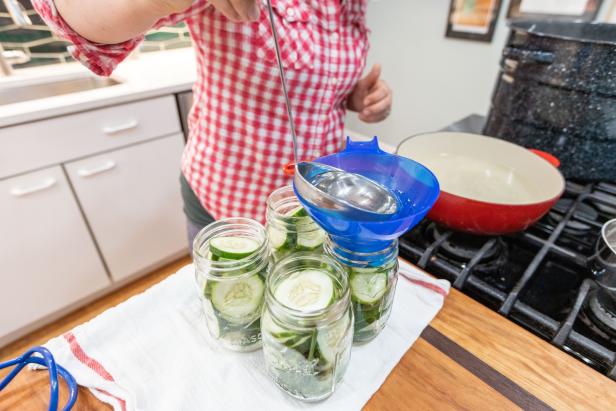
Using a canning funnel and a non-reactive ladle, pour enough brine into each jar to cover the cucumbers. Make sure to leave at least a half inch of head space at the top of the jar, and use a plastic (non-reactive) knife or spoon to push out air bubbles and move any slices under the brine.

Derek R. Trimble

Derek R. Trimble
Derek R. Trimble
Derek R. Trimble
Derek R. Trimble
Step 5 – Sealing and Processing
With all of your jars full, take a clean paper towel and dampen it with a bit of the vinegar. Wipe around the lip and threads of all of the jars to remove any germs or food particles that might be hanging out. You want nice clean seals in order to safely preserve your pickles.
Next, take a pair of tongs or your magnetic wand and remove your lids from their hot-water bath on the rear burner. Take care not to touch the underside of the lid or any of the seals with your bare hands. You want to keep those surfaces pristine. Place a lid on each jar as shown, and screw it down firmly with the rings that came with your jars.
Derek R. Trimble

Derek R. Trimble
Step 6 – Hot Water Bath
Place your jars back into your large pot for the final step known as processing. Once all of the jars are in the bath, bring the water back up to a rolling boil and leave them there for at least 10 minutes (a little longer at higher elevations).
After that time has passed, remove your jars from the water bath and set them on a dishtowel to cool off. As they cool, you'll hear the lids make a loud "pop" as the lids compress. This lets you know that the jar has sealed, and at this point you can remove the bands and clean around the threads one last time.

Derek R. Trimble

Derek R. Trimble

Derek R. Trimble

Pickle It! 17 Unconventional and Surprising Things You Can Pickle 17 Photos
Blueberries! Lemons! Garlic! Grapes! Find out the astounding array of garden produce that lends itself to pickling.
If you find that your jar lids are flexing, or if they come off when you remove the bands it means your jars did not seal and that you need to try again with a new lid. If your lids are firmly in place you can put the lid rings back on and store your pickles in the cupboard until you're ready eat them! Like any other pickle, make sure to refrigerate them after you've unsealed them.


