


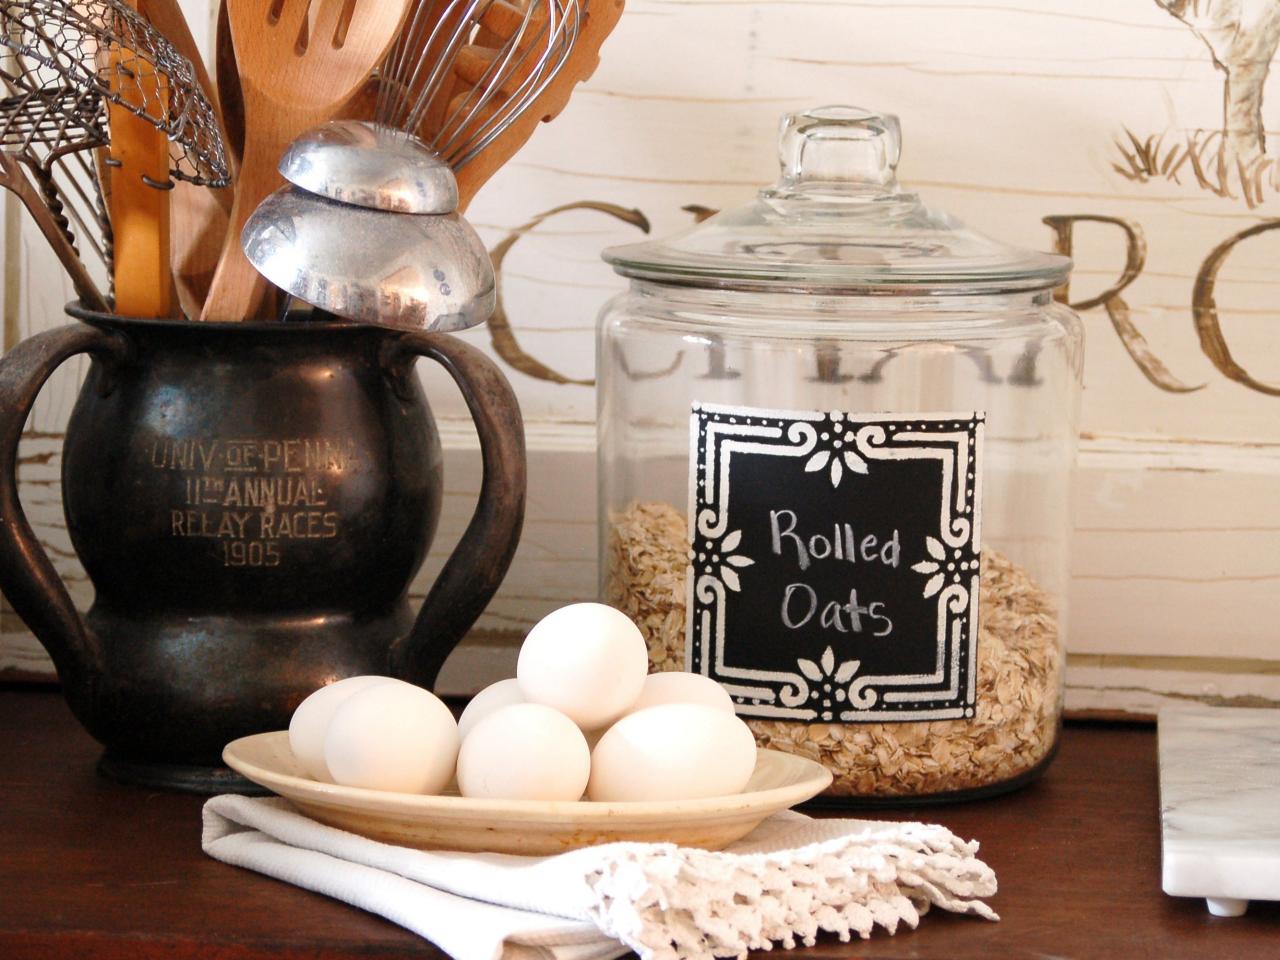
Chalkboard Kitchen Canisters
Glass canisters are practical, inexpensive and readily available, but can be a bit boring. Chalkboard paint and an easy-to-apply stenciled detail will transform them into a unique accessory for any kitchen.


Materials Needed:
- glass canister(s)
- flexible measuring tape
- painters' tape
- glass-etching cream
- 1" paint brush
- chalkboard spray paint
- square or rectangular stencil that fits canister
- 2" foam brush
- latex or acrylic craft paint
Clean Canister
Clean each glass canister with soap and water then thoroughly dry with a clean cloth or towel.
Measure and Tape
Using painters' tape, make a square on the outside of the canister to the dimensions of the stencil. Make sure the taped-off area is level and centered on the canister. Tip: A flexible measuring tape used for sewing will be easier to use on the curved surface of the canister than a metal measuring tape.

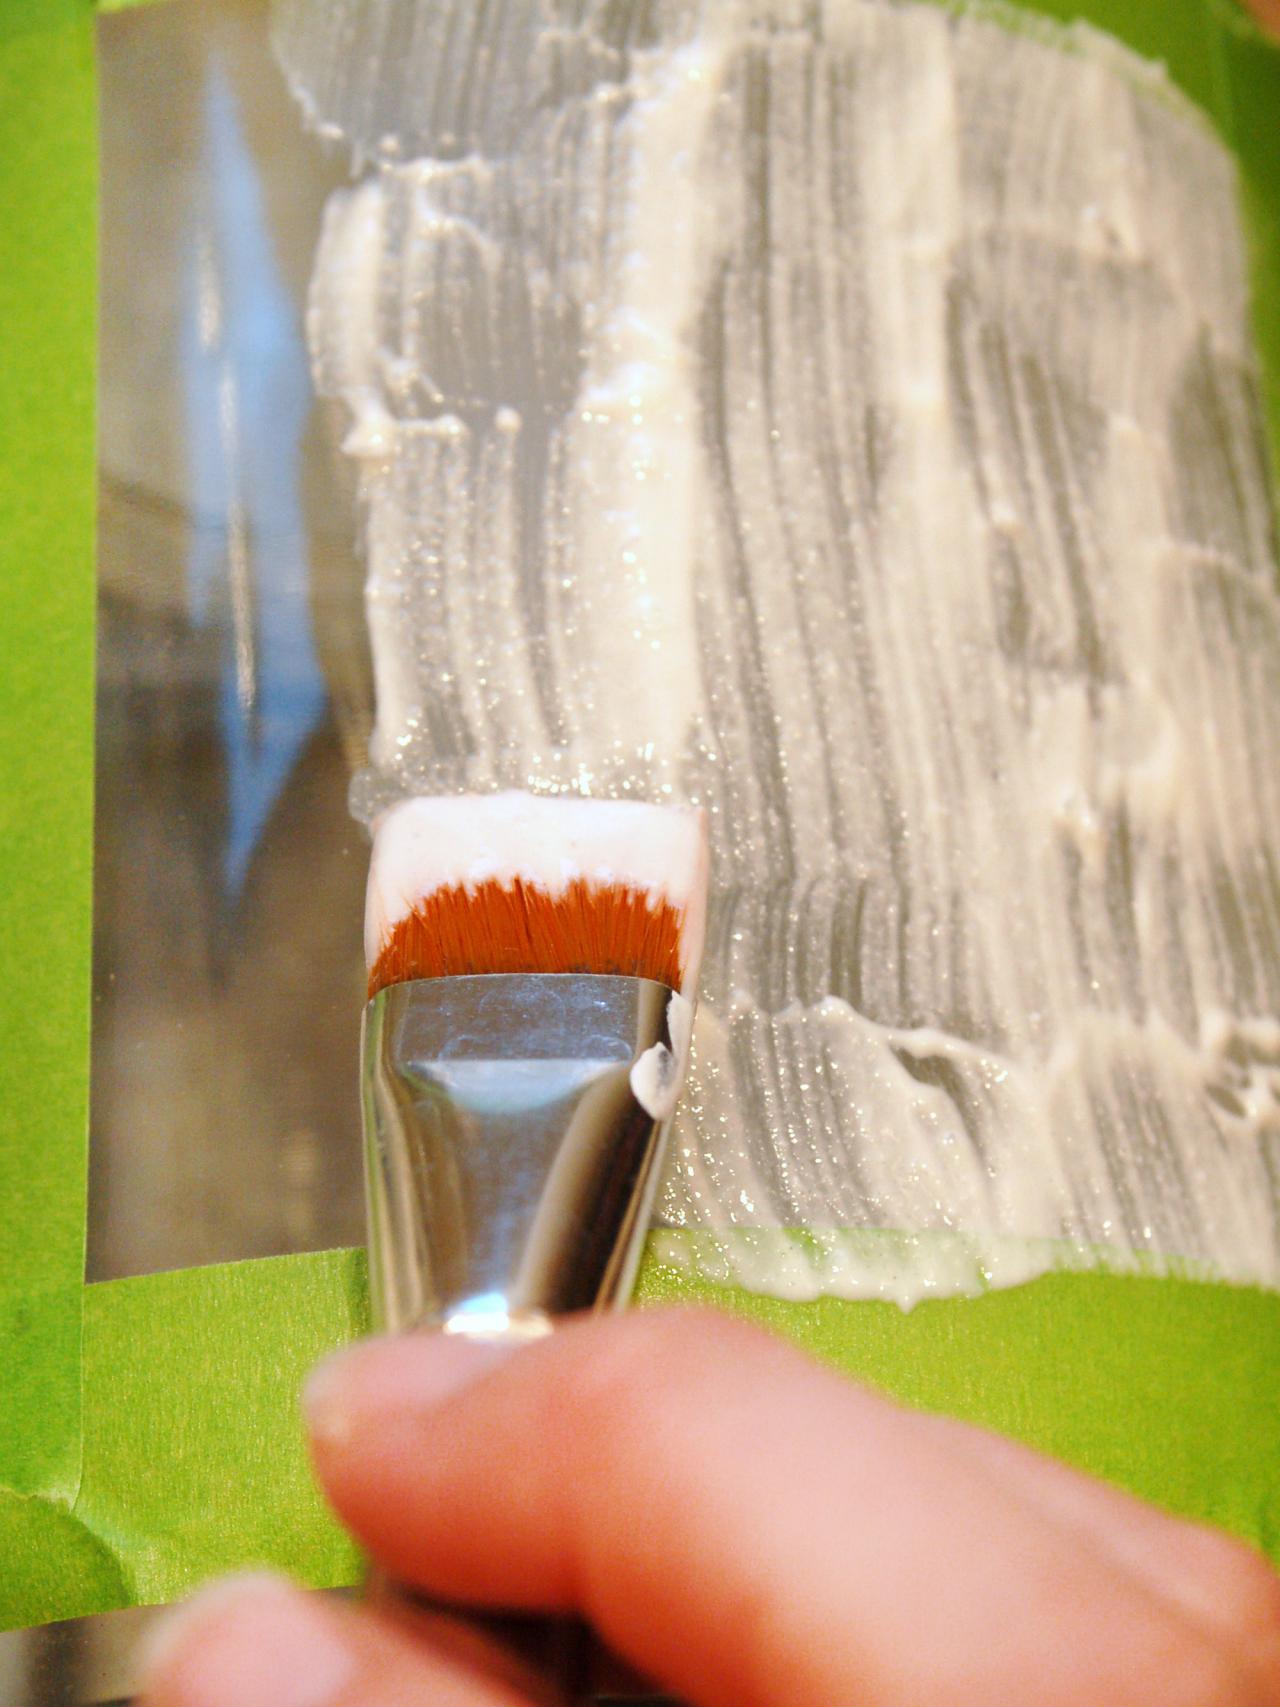
Apply Etching Cream
Brush on a thick coat of etching cream inside the taped area using a one-inch wide paint brush. Etched glass will provide tooth for better paint adhesion. Follow manufacturer's directions for activation time and etching cream removal procedure. Remove painters' tape after rinsing the etching cream. Thoroughly dry canister with a clean towel. Tip: Make sure to use etching cream, not a product that frosts glass or only simulates etching.

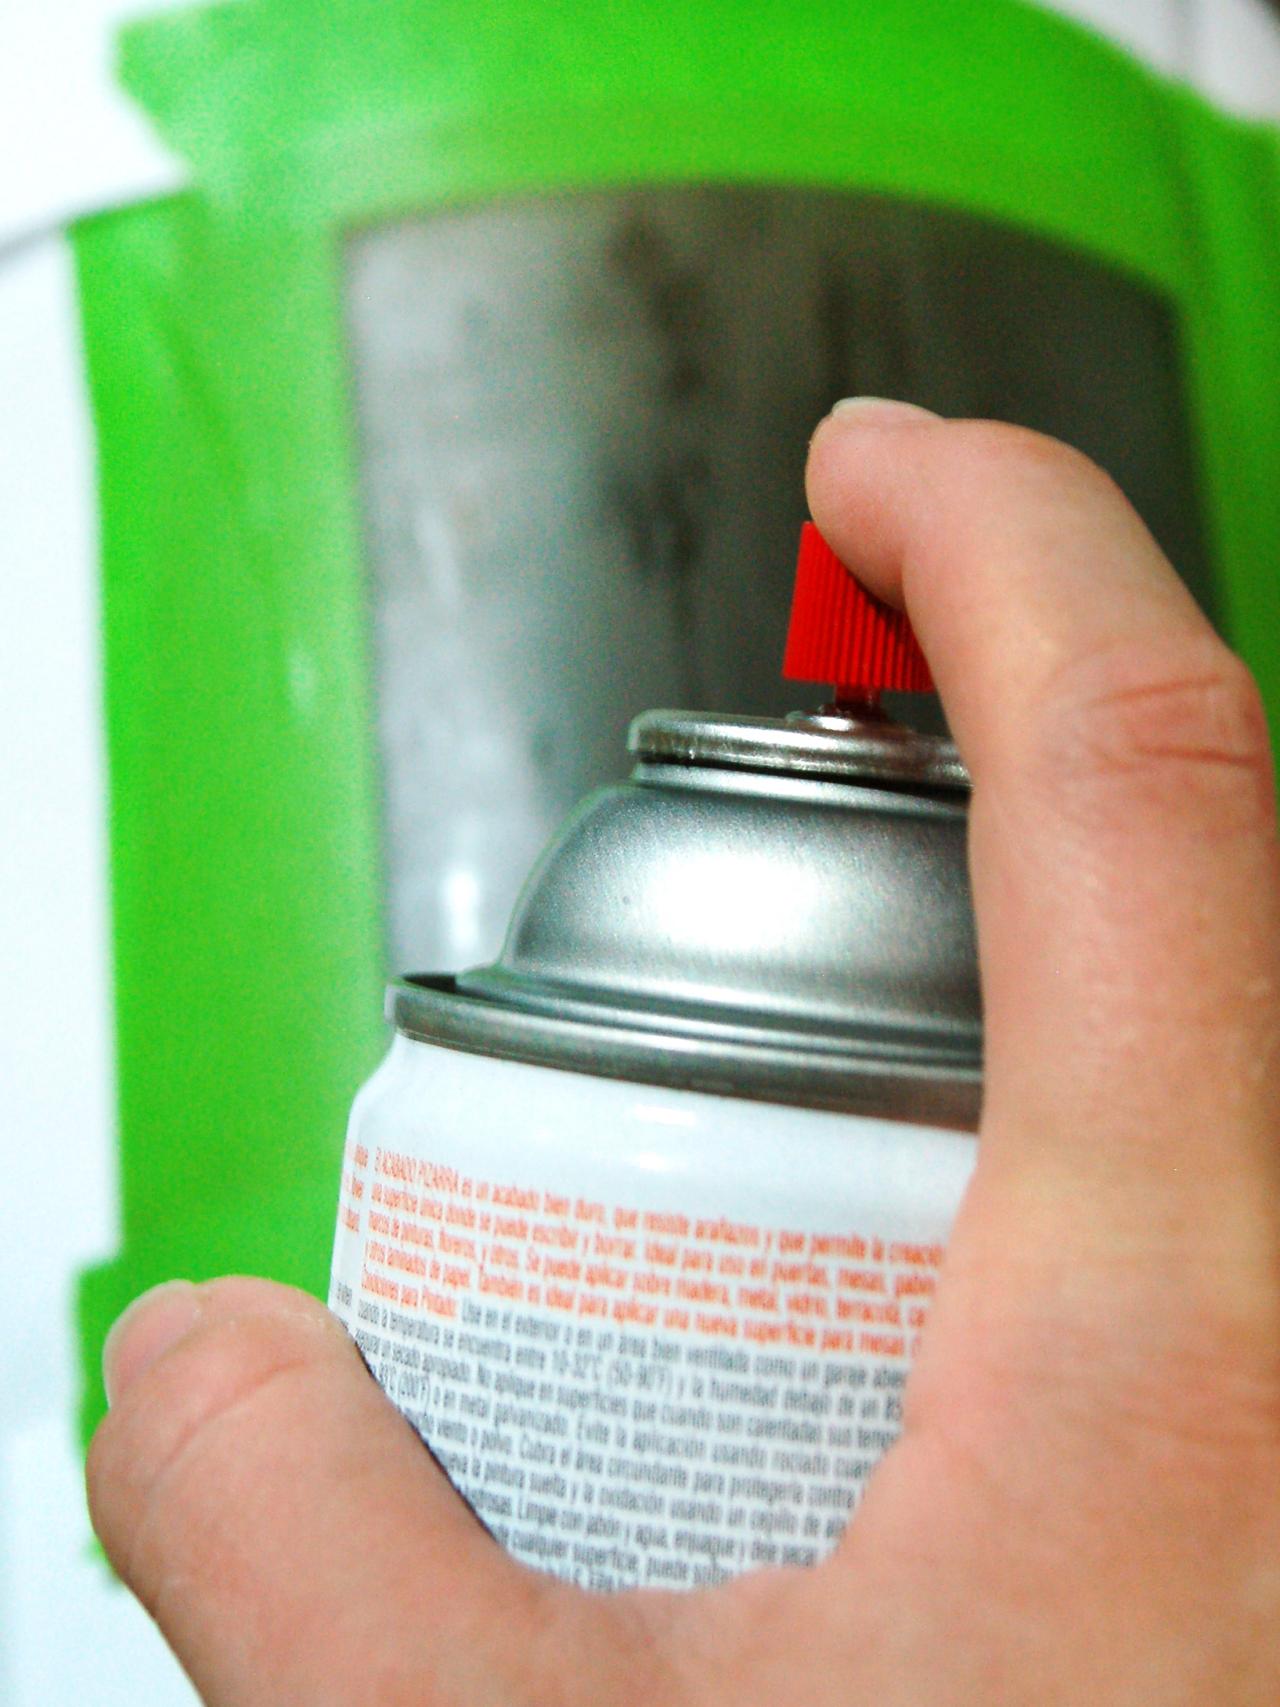
Spray Chalkboard Paint
Apply clean painters' tape surrounding the etched area and cover the rest of the canister in newspaper to protect it from overspray. Using long, steady strokes, apply the chalkboard spray paint in a thin coat to prevent drips. Allow ample drying time, then apply a second coat in the same manner as the first and repeat a third time if needed for full coverage. Carefully remove paper and painters' tape before the last coat is dry.

Season Chalkboard
When the chalkboard paint has fully dried, rub a piece of chalk over the entire painted surface to season the chalkboard. This step will prevent writing from being burned into the surface. Clean chalkboard with a damp cloth and dry thoroughly.

Marian Parsons
Paint Decorative Border
Tape stencil into place. Dip a two-inch foam brush into acrylic or latex paint and remove excess on a paper towel, leaving just a small amount on the sponge. Using this dry-brush technique will reduce the risk of paint bleeding under the stencil. Apply paint perpendicular to the stencil surface in a pouncing motion. Carefully remove the stencil, lifting it directly off the canister, so paint doesn't smear. Tip: When using a stencil multiple times, rinse between uses. Allow time for paint to fully dry, then fill canister with kitchen staples and use chalk to label jar's contents.


