
.-Battle-on-the-Beach-courtesy-of-HGTV.-.jpg.rend.hgtvcom.196.196.suffix/1714761529029.jpeg)


How to Use a Caulk Gun
It’s finally time to replace that dingy, discolored caulk that keeps cracking around your sink. Skip the call to the handyman because everything you need to know about caulking and how to use a caulking gun is right here.

Jalynn Baker

Caulking is something every homeowner should learn how to do. To put it simply, caulk is just a flexible material that seals cracks while still allowing for a home’s natural expansions and contractions. A new bead of caulk around a countertop or sink can make the whole space feel clean and refreshed in just a few minutes. Like many other DIY tasks, caulking can be a little intimidating at first, but once you get the hang of it, you’ll want to do it everywhere. All you need is a steady hand, a little patience and a few tools to get the job done right.
Choosing Your Caulk Gun
The first and most obvious thing you need is a caulk gun. We recommend skipping the cheap ones and paying a little extra for a nicer one. They’re much easier to use and will save you a lot of frustration in the long run. For a good caulk gun, look for features like a quality spout cutter, a stout metal frame and a thumb tab that releases pressure on the tube of caulk. The main disadvantage of a caulk gun with no thumb tab is its tendency to force caulk out of the tube even after you’re done squeezing the handle.
Choosing Your Caulk
Next, it’s time to pick your caulk. There are hundreds of different types of caulk and adhesives for everything from adhering landscaping blocks to sealing up traditional log homes. Before you get overwhelmed by the infinite options, figure out what you need it for and pay attention to the labels. Caulking around a bathtub? Look for a good quality silicone rated for tub and tile adhesion. Just caulking some gaps in your home’s trim before painting? Go for an all-purpose, paintable caulk with a quick dry time.
Prepping and Loading the Tube
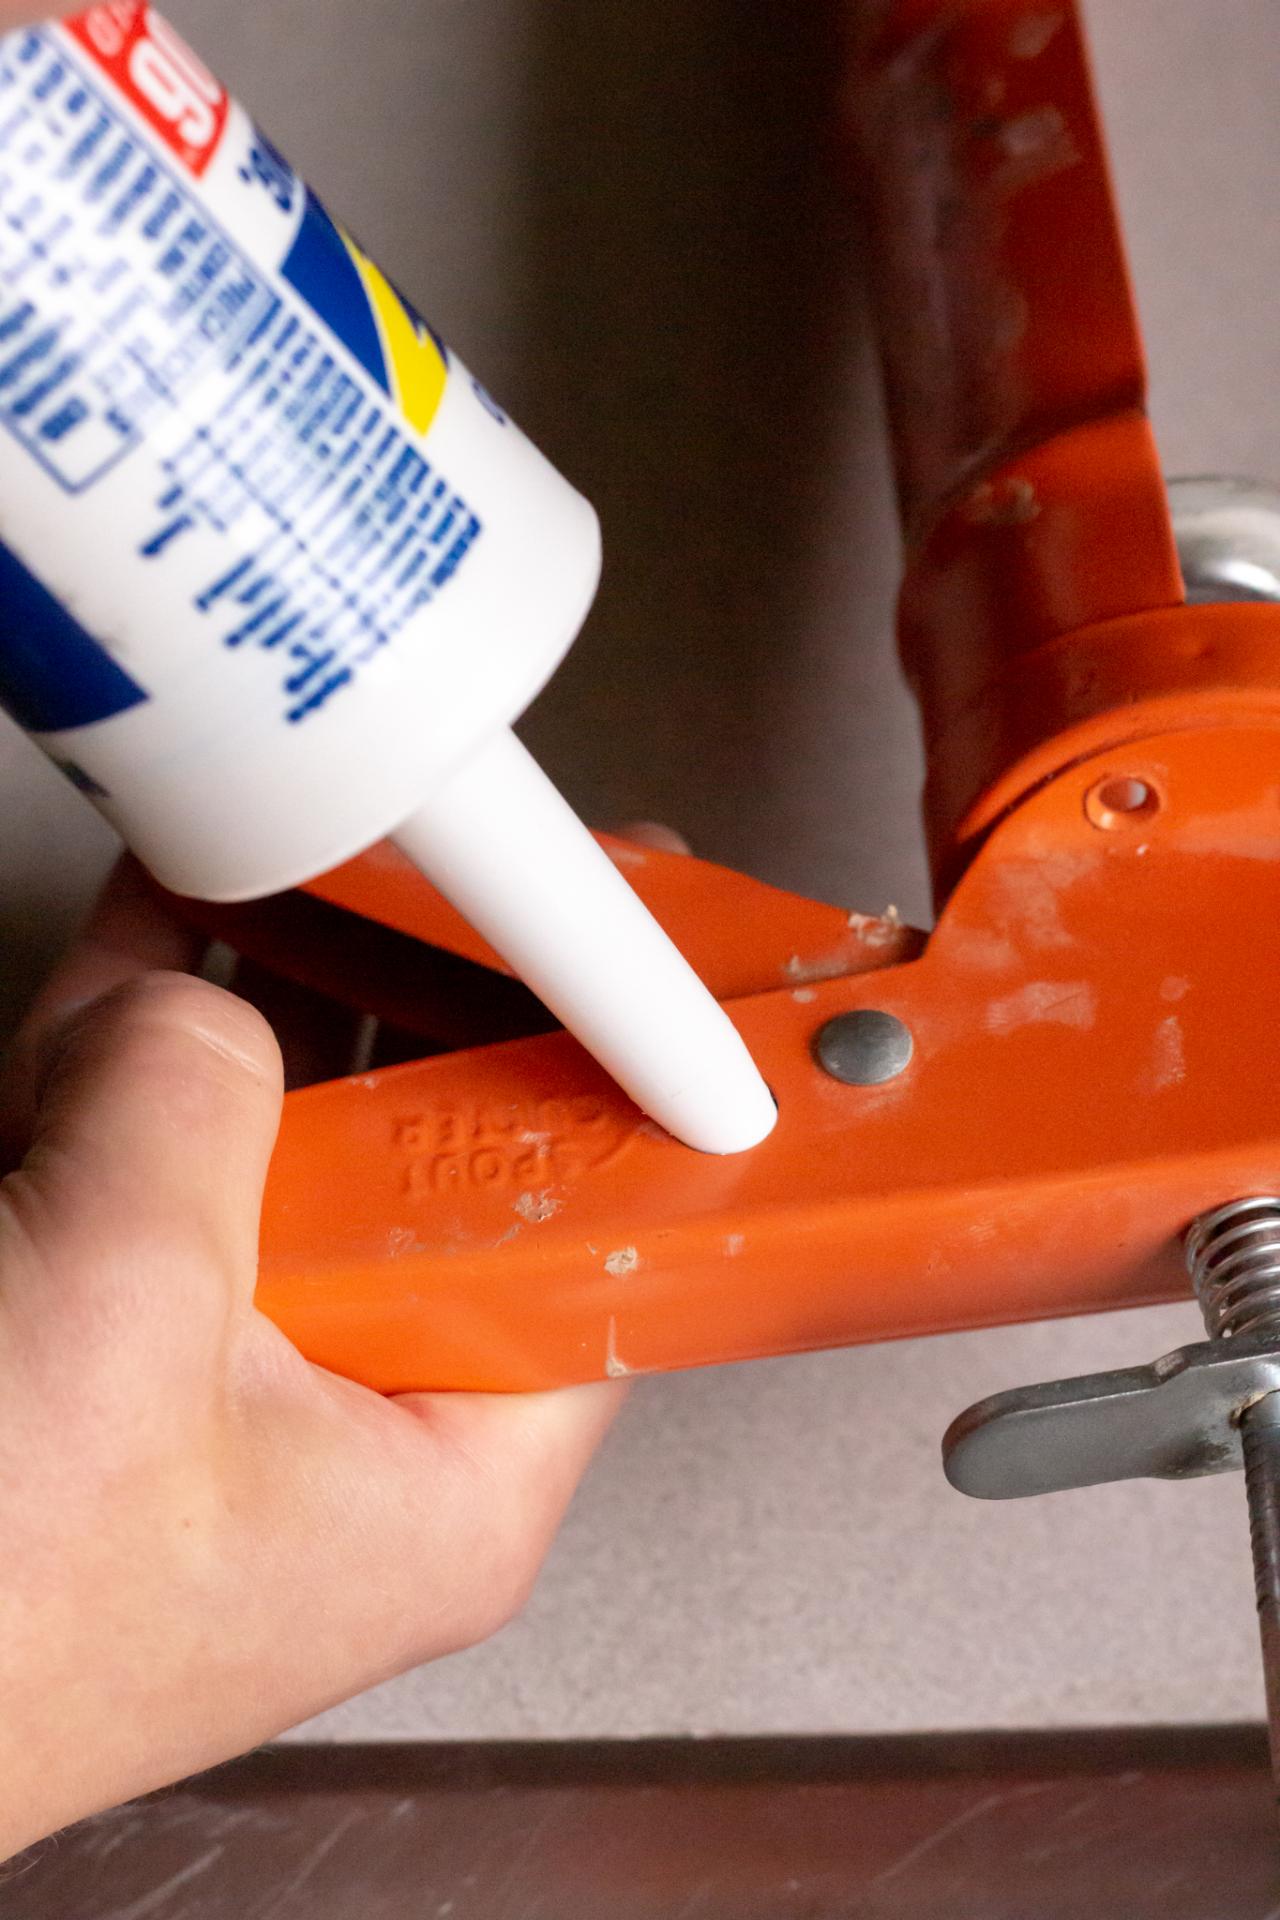
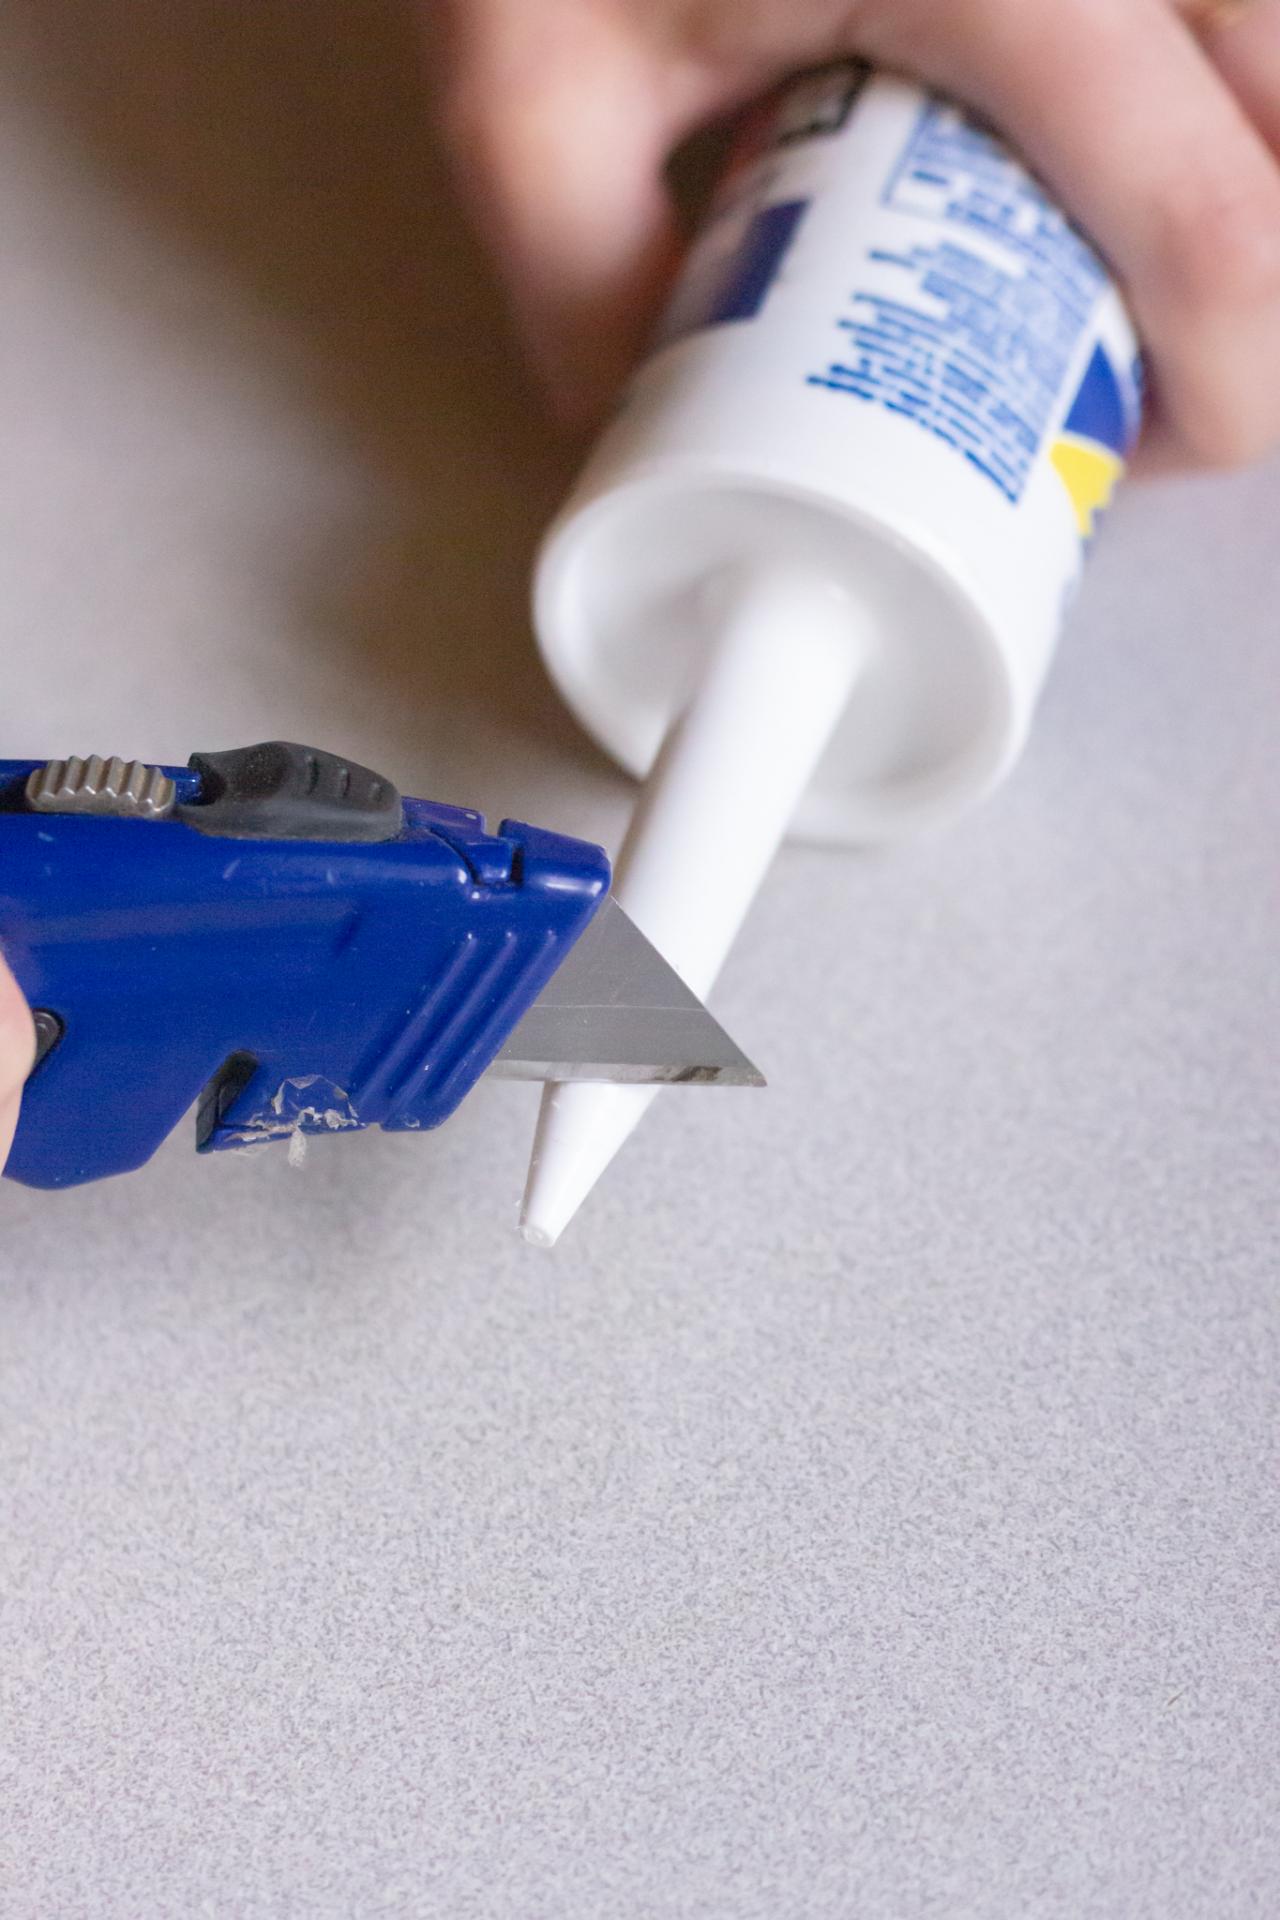
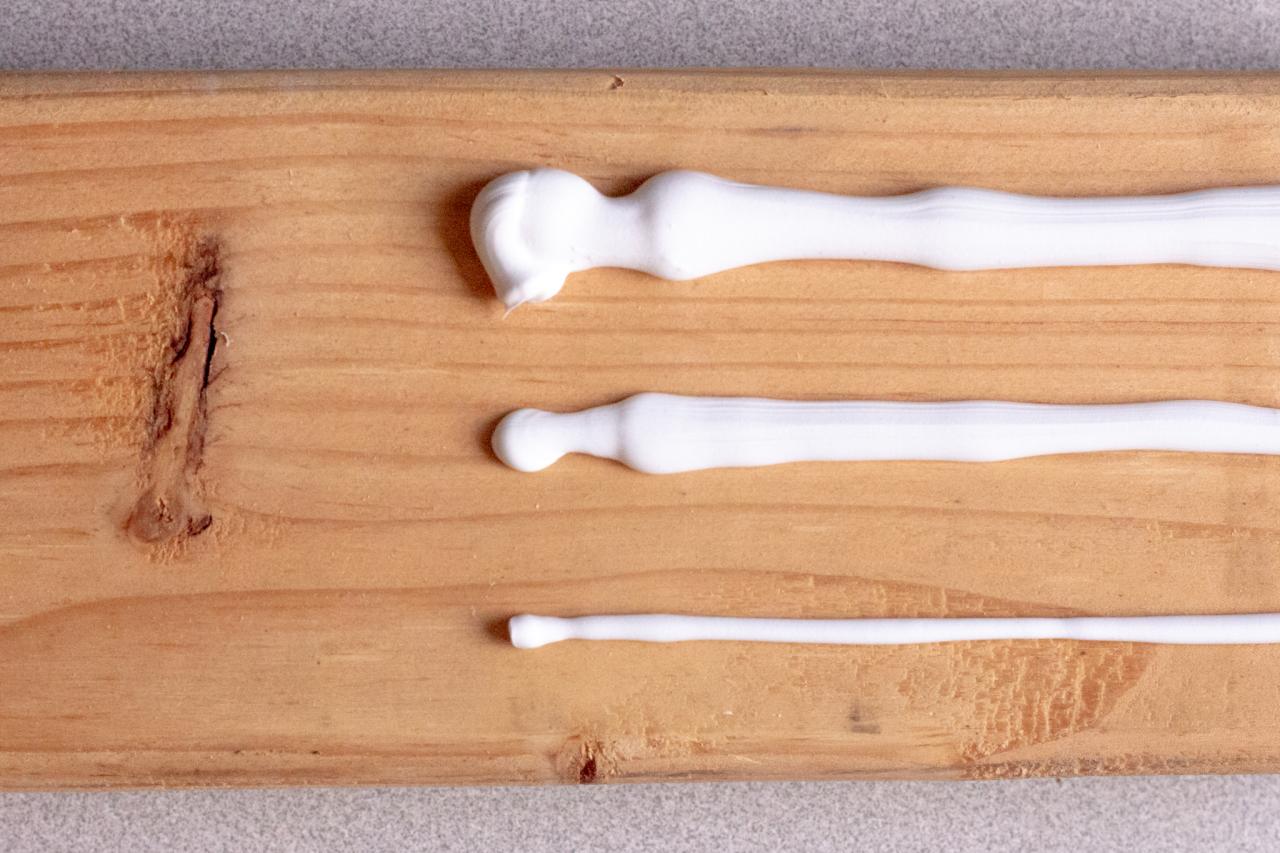
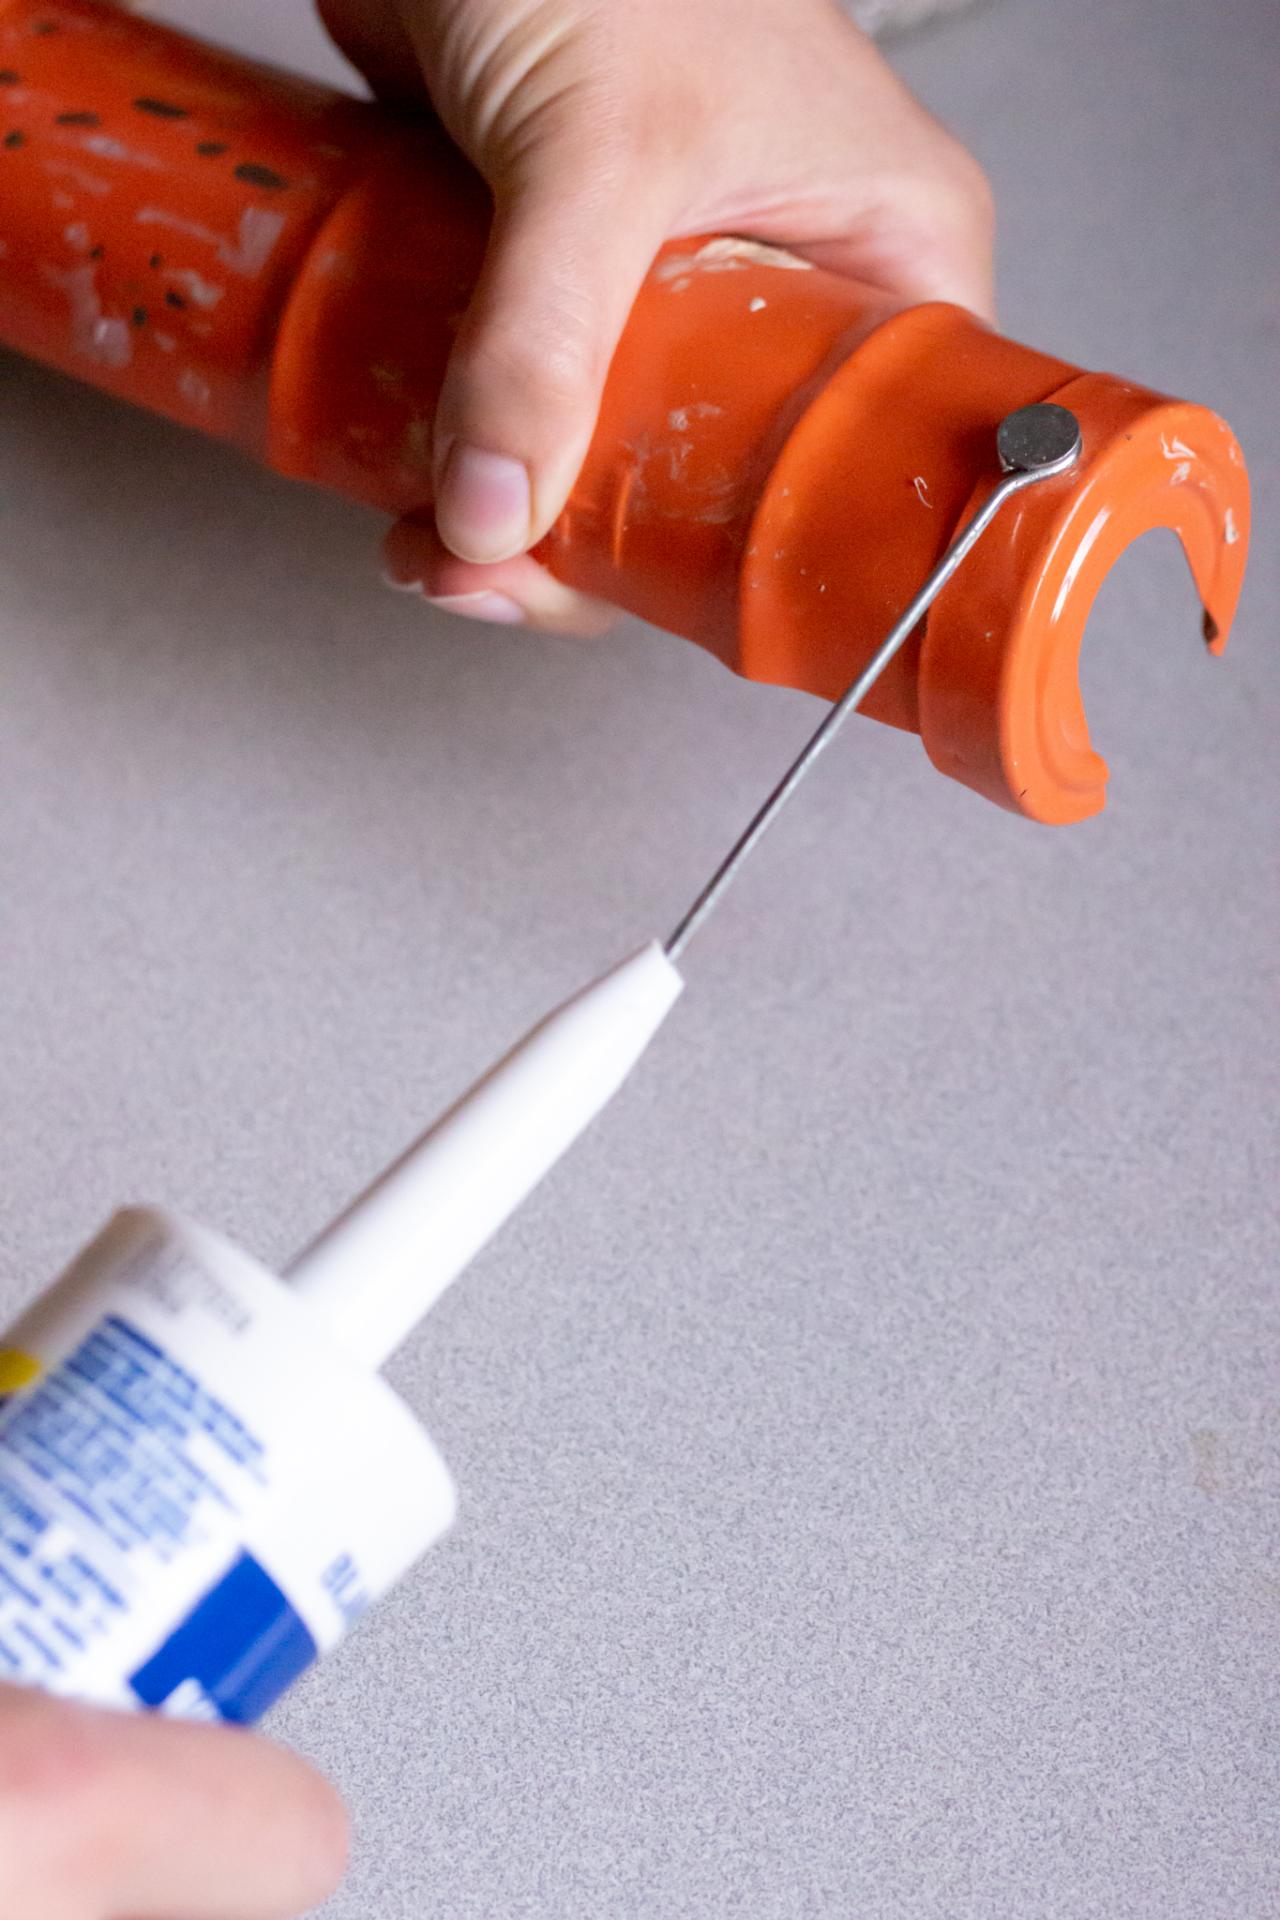
Before you load the caulk into the gun, you first need to cut the tip and break the seal. If you have a spout cutter on your gun, simply stick the tip in and cut (Image 1). If not, a utility knife will do the trick (Image 2). Remember, you can always cut a larger hole, but cutting a larger hole than your gap requires will create a big mess. Start small, and if the flow is too small for your gap, open the tip a bit more (Image 3). Once you’ve cut the tip, pull the seal punch out of the gun and place it into the spout to break the seal (Image 4). Once the seal punch is back in place, load the tube into the frame by sliding the plunger into the end of the tube first, then dropping the spout into place.

Kamron Sanders

Kamron Sanders

Kamron Sanders

Kamron Sanders
Pro Tip: Some people prefer to cut the tip at an angle while others prefer straight across. This is all preference. Experiment with both and do whatever works best for you and the space you’re caulking.
Applying the Caulk
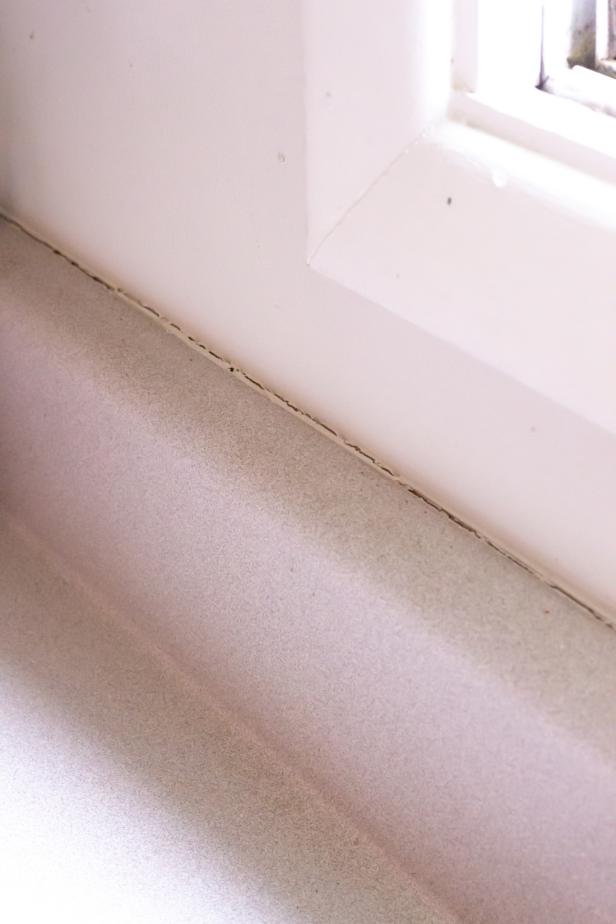
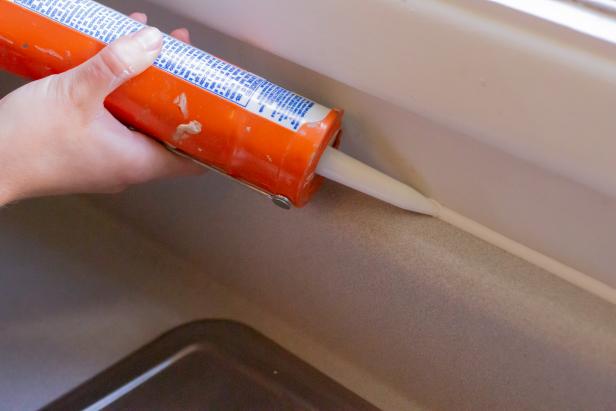
Before you apply the caulk, double-check that your area is clean and remove any medium that could get into your caulk or compromise its adhesion (Image 1). Once clean, begin applying your caulk by steadily squeezing the trigger as you move the tip along the gap (Image 2). Focus on maintaining fluid motion and creating a consistent bead. This will aid in the finishing steps. Ideally, the entire length of the gap should be covered before lifting the caulk gun away.
Kamron Sanders
Kamron Sanders
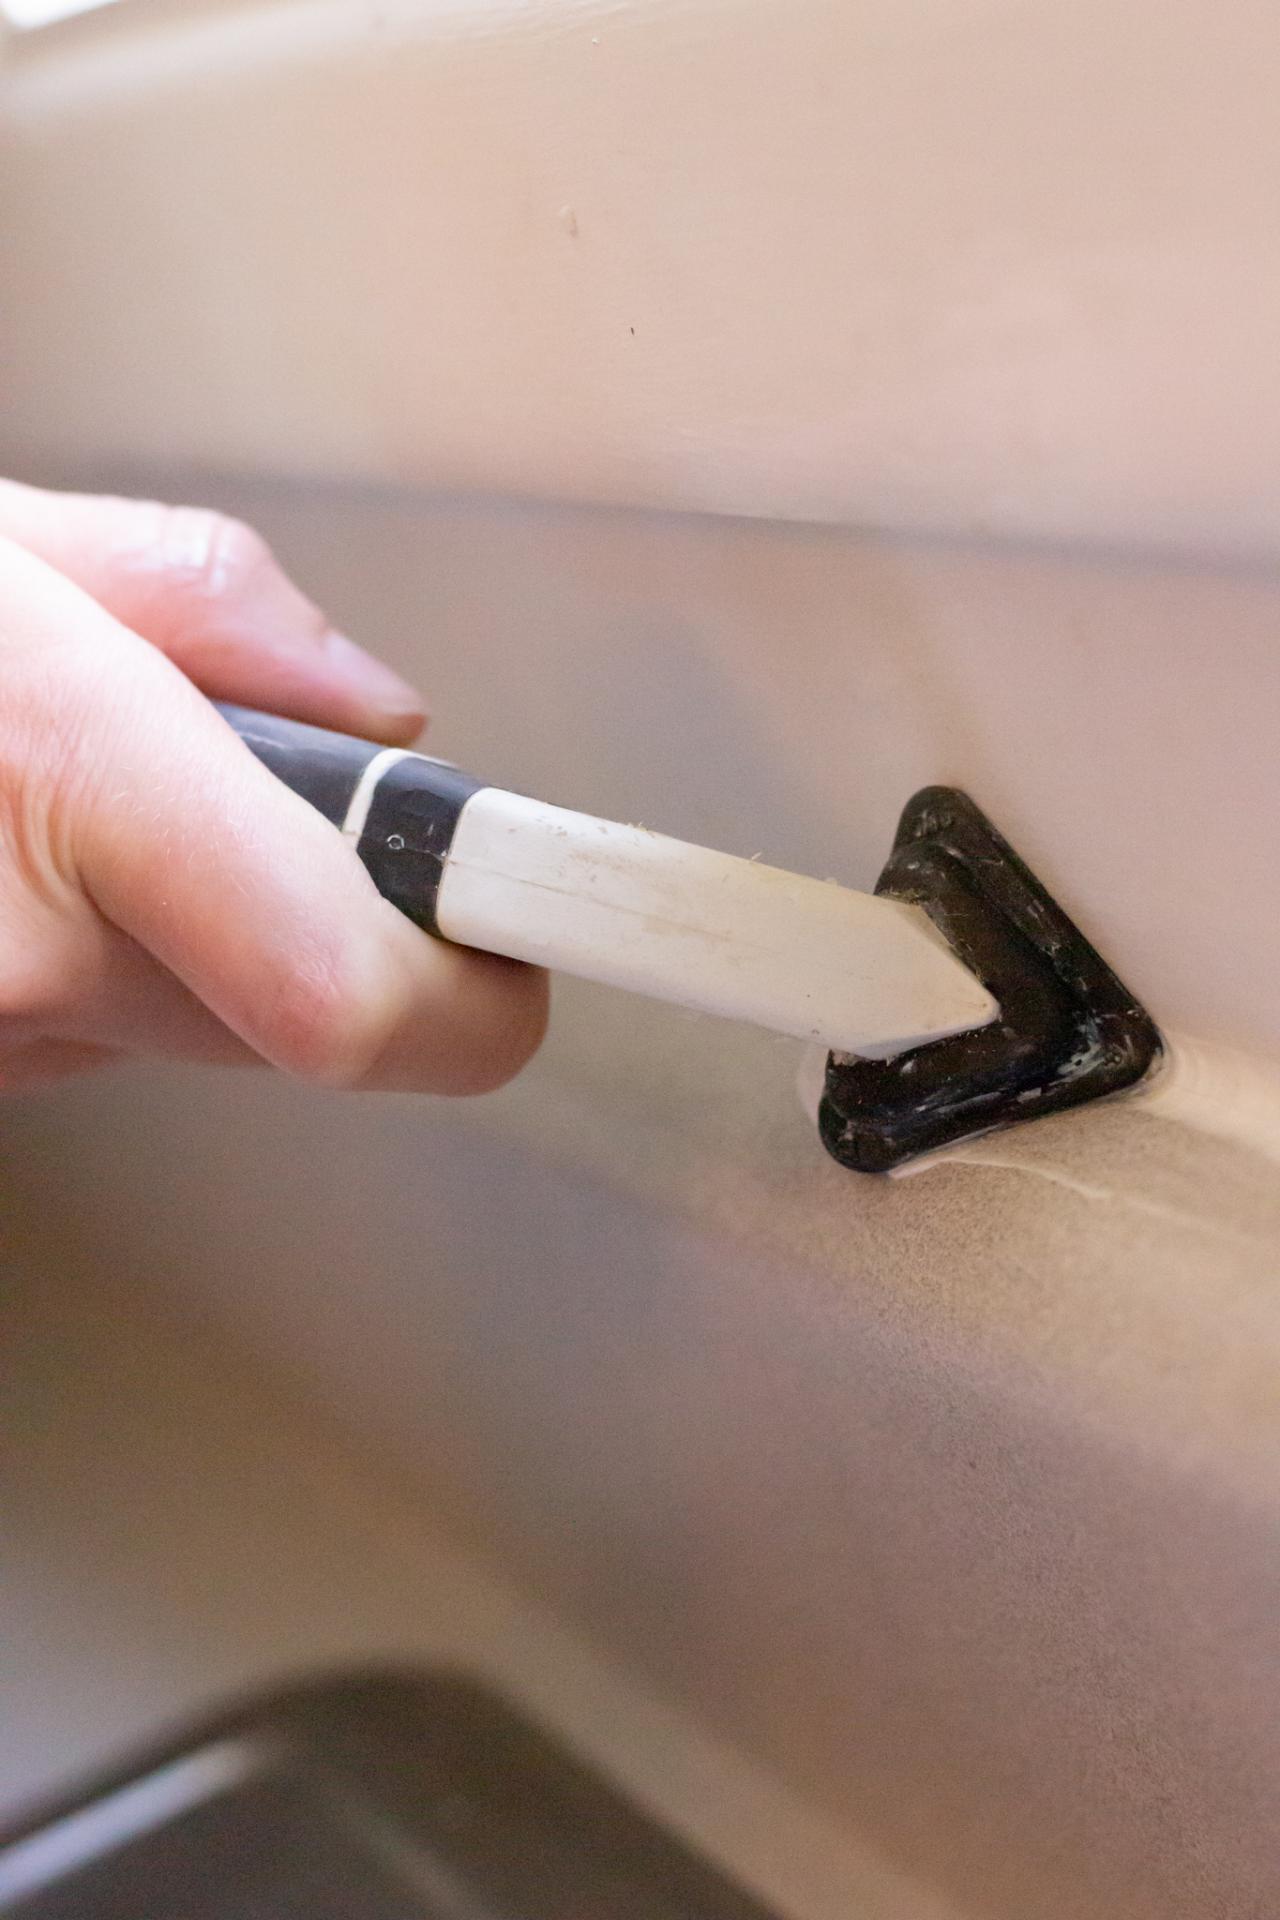
Smoothing the Caulk Joint
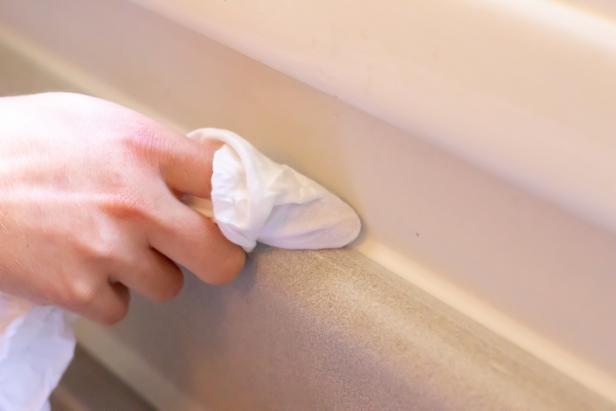
Once you’ve applied your caulk, it’s time to smooth the bead. There are several ways to do this, and it seems everyone has a different preference, so you may have to experiment to see what works best for you. Some people prefer to lightly run their finger along the caulk to smooth it into the crack. While this may be effective, it can be very messy, and we don’t advise intentionally exposing your skin to the various chemicals in caulk. The easiest way to get a consistent caulk joint is with a caulk tool (Image 1). This tool features a triangular rubber head that is great for skimming along the surface and smoothing the caulk. The only drawback of this tool is that it is bulky and hard to use in tight areas or irregular joints. The tried-and-true way most professionals smooth caulk is with a wet rag. Choose a tight-knit material like a painter’s cloth and grab a bucket of water. Wet the cloth, ensuring it’s wet but not dripping, and skim it along the bead of caulk (Image 2). The water helps to smooth the caulk’s surface while also cleaning up any unwanted caulk residue around the gap.

Kamron Sanders
Kamron Sanders
Pro Tip: Be patient, don’t overwork your caulk and don’t expect perfection at first. If you get your bead smooth with a few imperfections, it is best to just leave it. Caulk gets harder to work with the more it dries, and you will often end up creating a bigger mess by trying to fix imperfections. Sometimes, it’s smartest to walk away and fix the imperfections by filling in with new caulk once it dries.
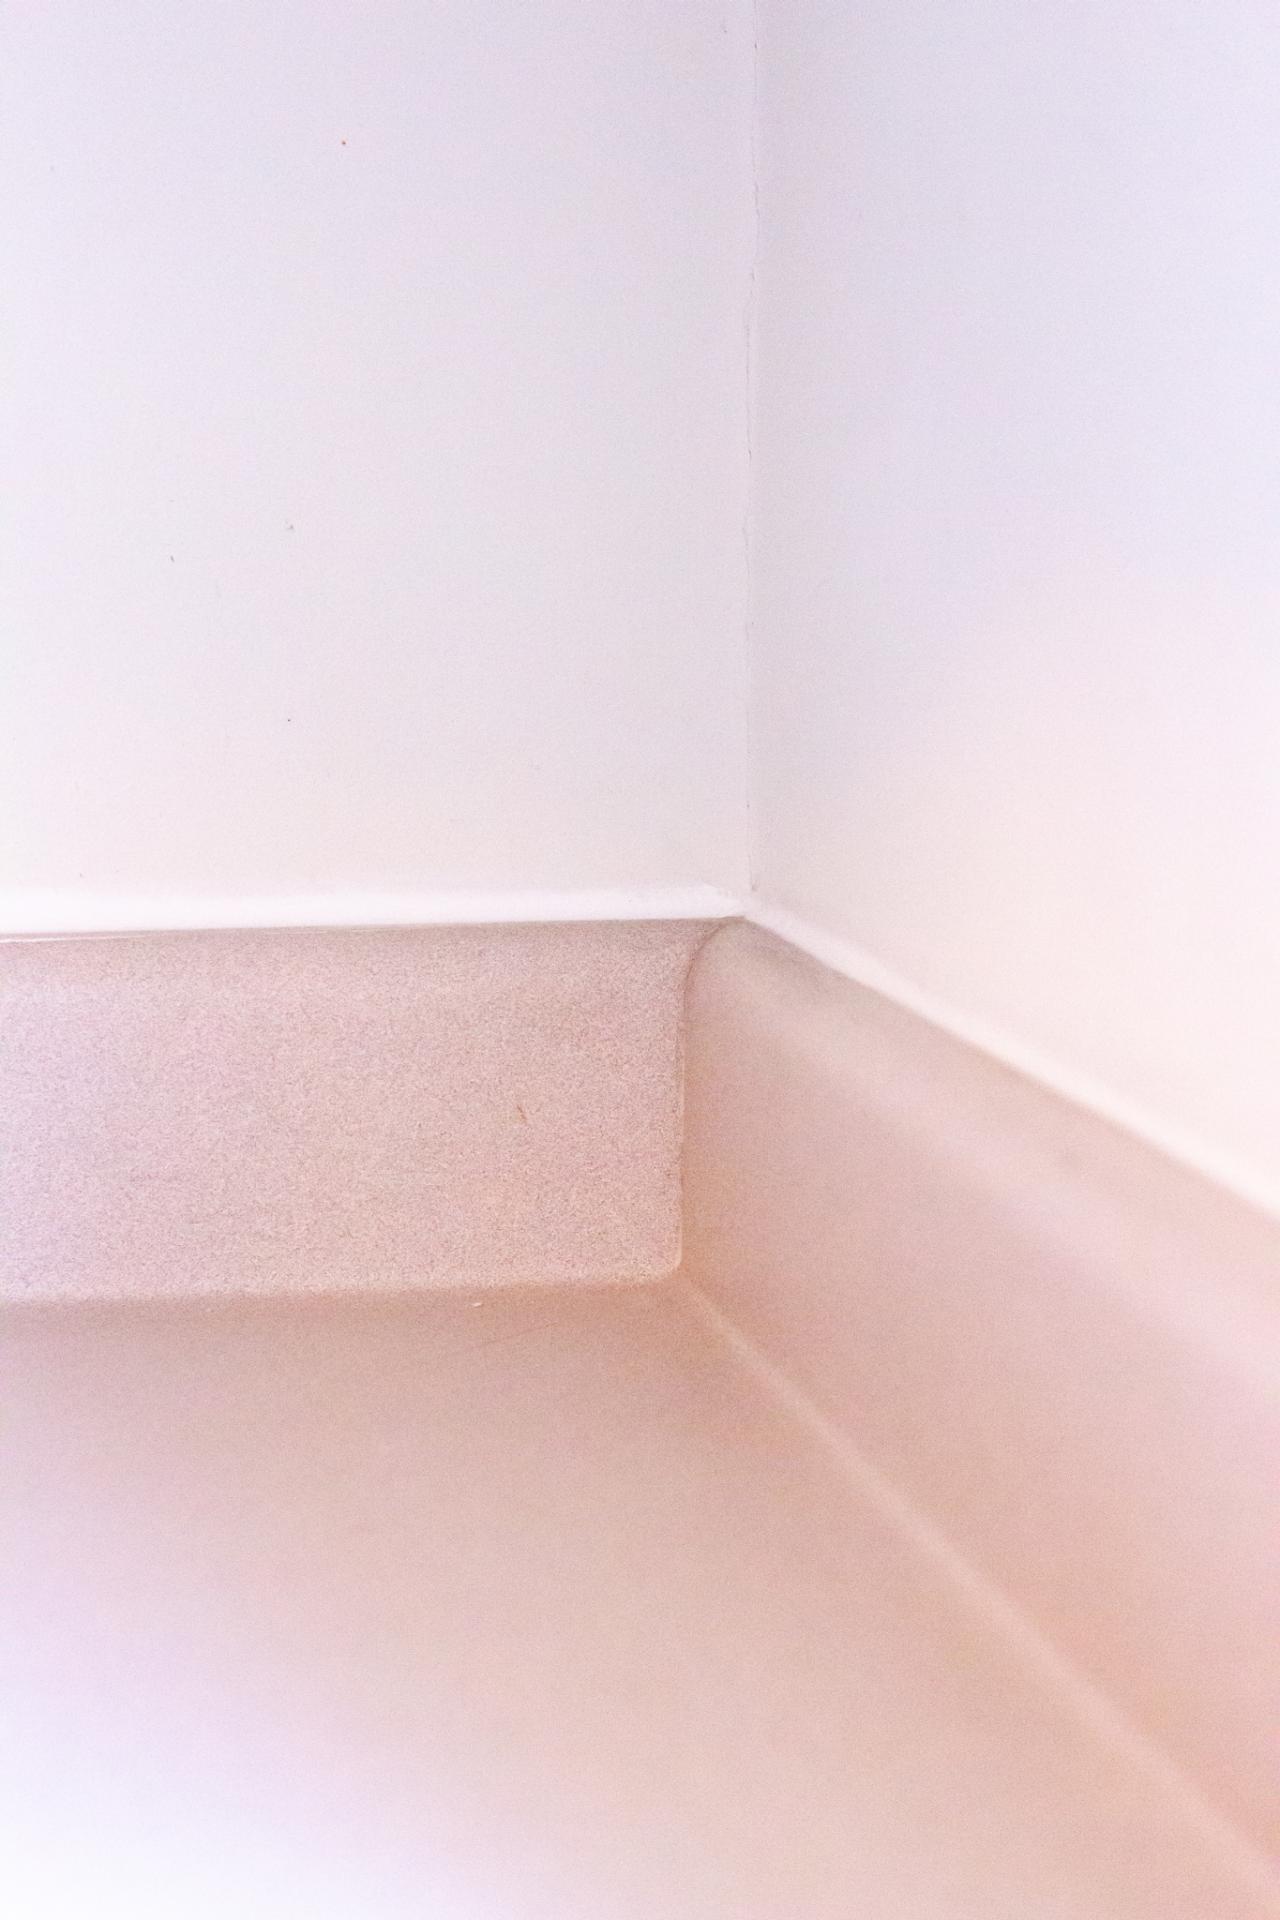
Caulking Corners
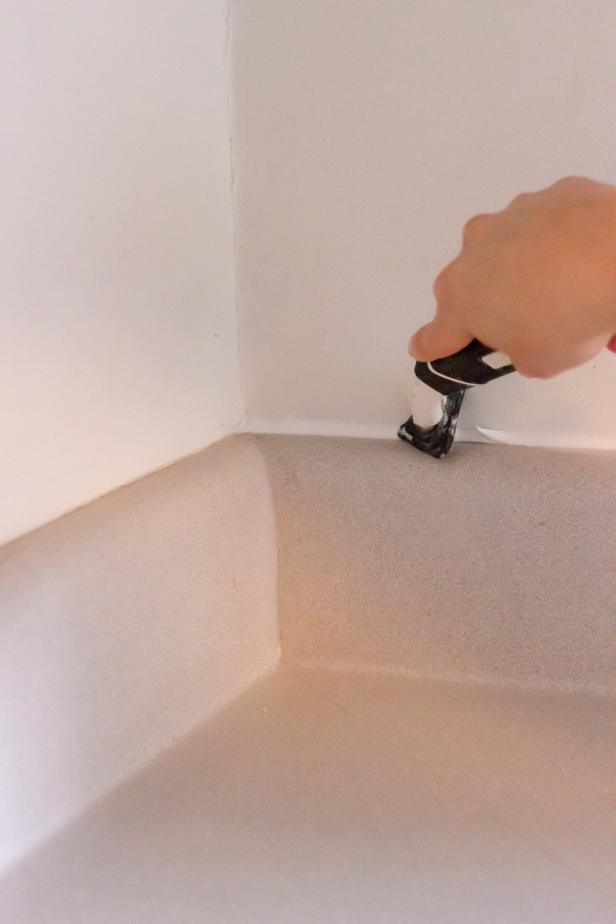
Caulking corners can be especially difficult for beginners. Ideally, you would run a consistent bead around a corner and smooth the corner in one motion, but this can be very hard without ruining your bead. To make things easier on yourself, apply one side of your corner, smooth it and let it dry (Image 1). Once it’s dry, come back and repeat on the other side of the corner (Images 2 and 3). This will keep you from damaging the first side and ensure a clean corner every time (Image 4).
Kamron Sanders

Kamron Sanders

Kamron Sanders

Kamron Sanders
Storing Caulk
When it comes time to store your caulk or adhesive, there are a few tricks that will save you money and time once you need it again. You can prolong the life of most products even after you use them by finding a good way to plug the top. If your hole is small enough, a screw, nail or even a golf tee make for a good plug. For bigger holes, some doubled-up plastic wrap and a tight rubberband will often do the trick. On many silicone tubes, the tip is threaded. This allows you to plug the end with the silicone itself, creating a water-tight barrier that can easily be removed by unscrewing the top and pulling out the plug. For all caulks and adhesives, it's wise to store out of direct sunlight, in a consistently moderate environment.


