


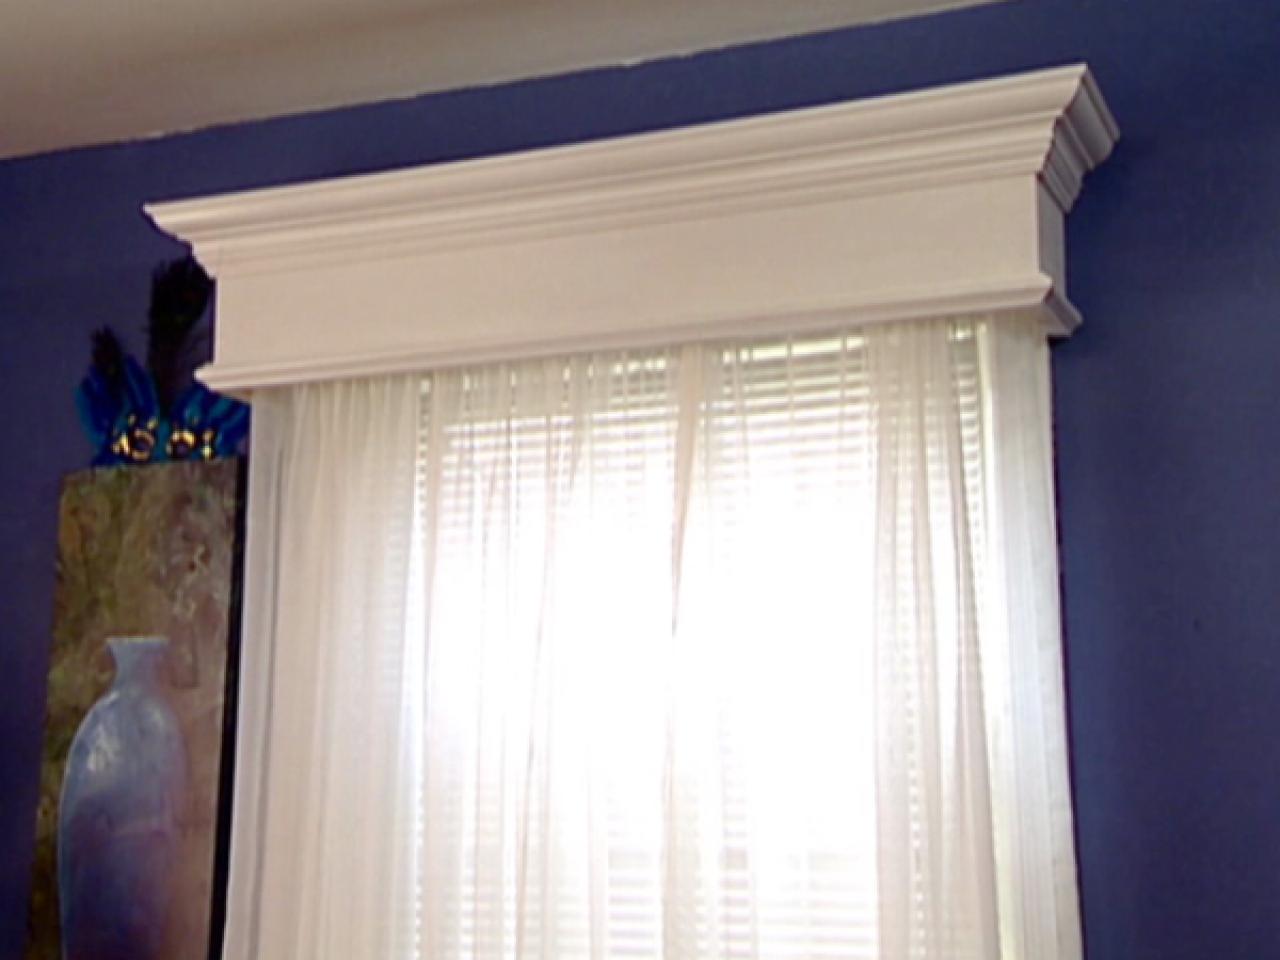
Weekend Projects: Construct a Homemade Window Valance

Materials and Tools:
poplar wood
nail gun and nails
glue
primer and paint
paintbrush
putty
miter saw
crown molding
small detail molding
Steps:
1. Make the basic rectangle for the valance. Cut one piece of poplar to the desired length and two pieces for the sides. Attach the three pieces with glue and a nail gun.

2. Add size- and style-appropriate molding to the valance. We used crown molding on the top of the valance and small decorative on the bottom. Cut the molding at a 45 degree angle, making sure the corners fit snugly. Attach each piece with a nail gun and wood glue.
3. Apply a coat of primer on the valance, let it dry completely then apply a coat of paint.
4. Attach the valance directly to the old window casing with the nail gun. Or you can use an L-bracket to attach the valance to the wall. Make sure the bracket is secured to a stud.


