


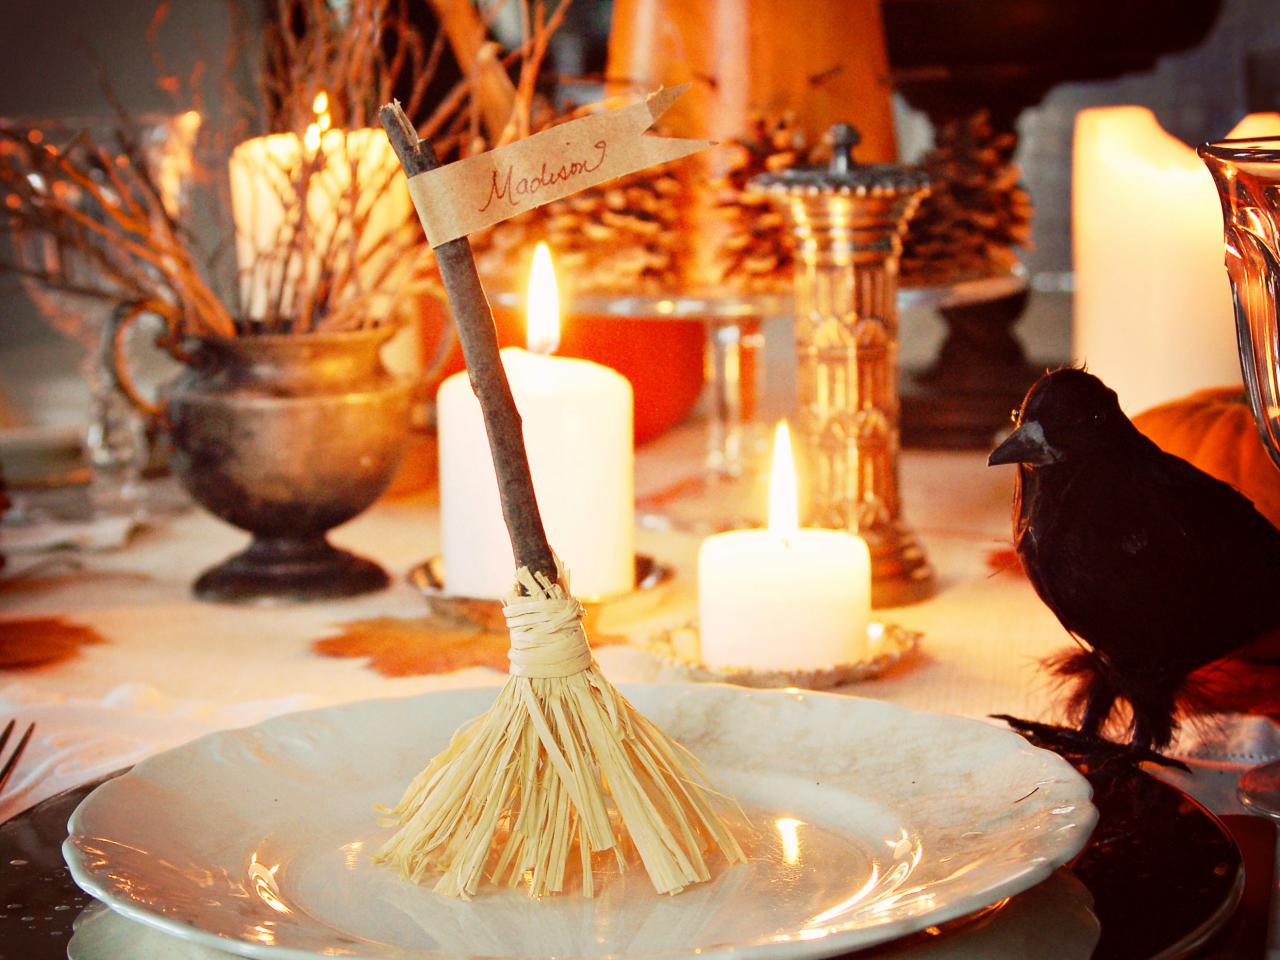
Witch's Broom Halloween Place Card Holders

Witch's Broom Place Card Holder
These diminutive brooms add an enchanting touch of whimsy to any Halloween get-together, plus they make great party favors for guests.

Materials Needed:
- twigs, approximately 6" long
- 1 package natural raffia
- hot glue gun and glue sticks
- scissors
- brown paper bag
- brown fine-point permanent marker
Gather Twigs
Take a stroll outside to gather clean, dry twigs. Cut or snap them to a six-inch length.

Witch's Broom Place Card Holders Step 1
Take a stroll outside to gather clean, dry twigs and get a bundle of natural raffia. Cut or snap them to a six-inch length.
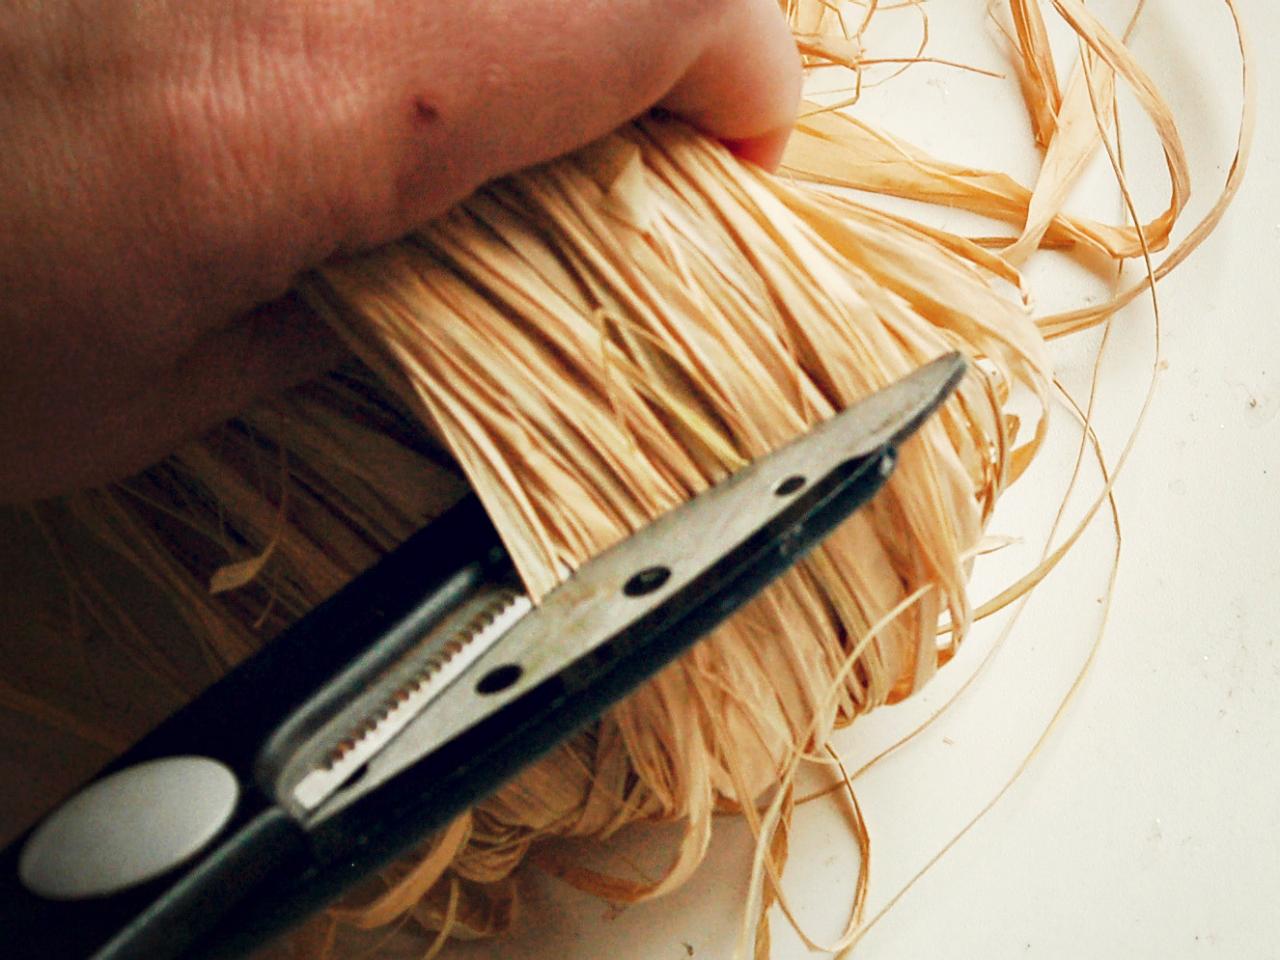
Cut Raffia
Cut a handful of raffia into a two-inch bunch.

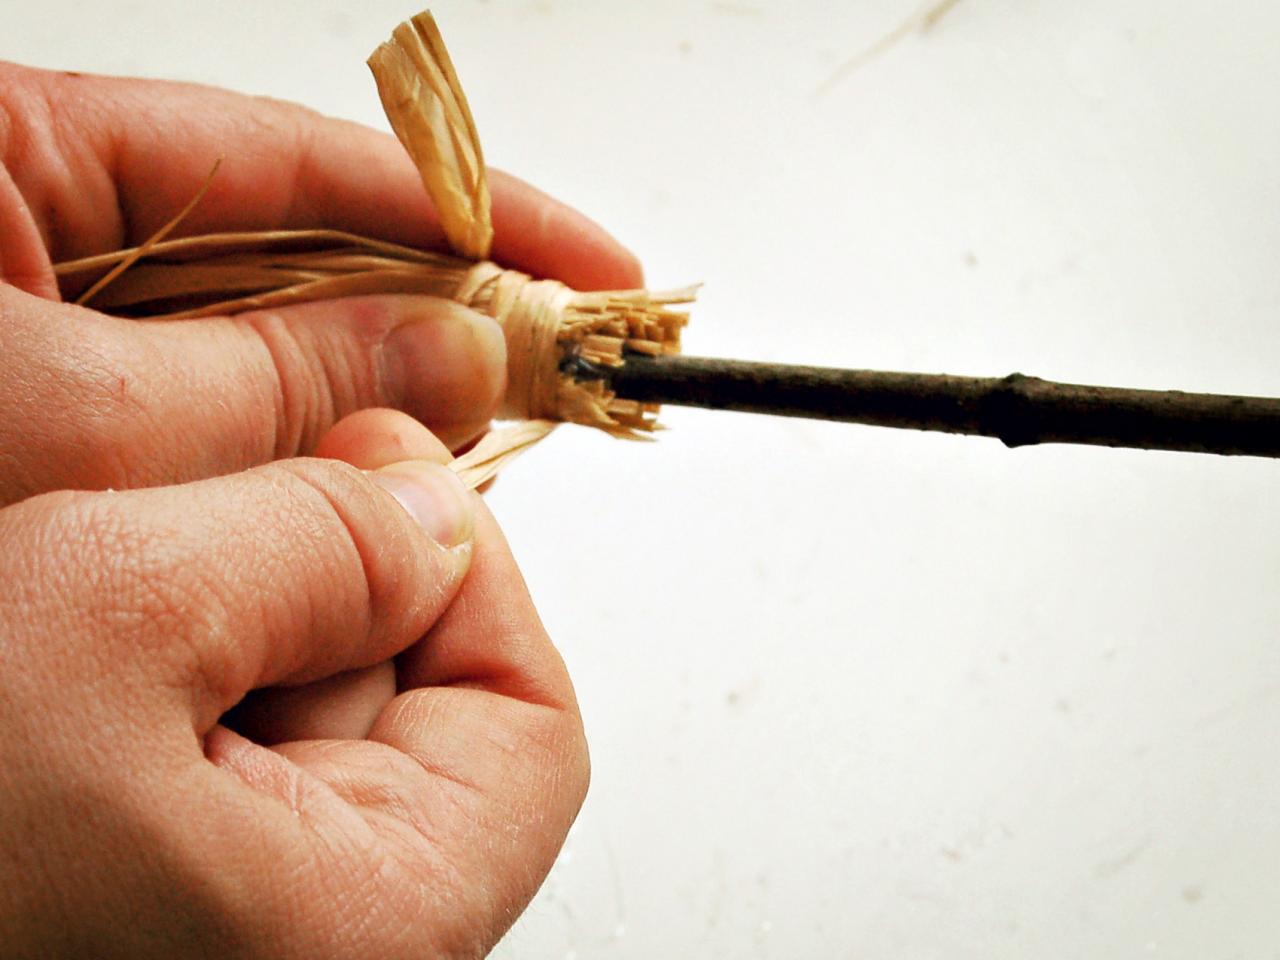
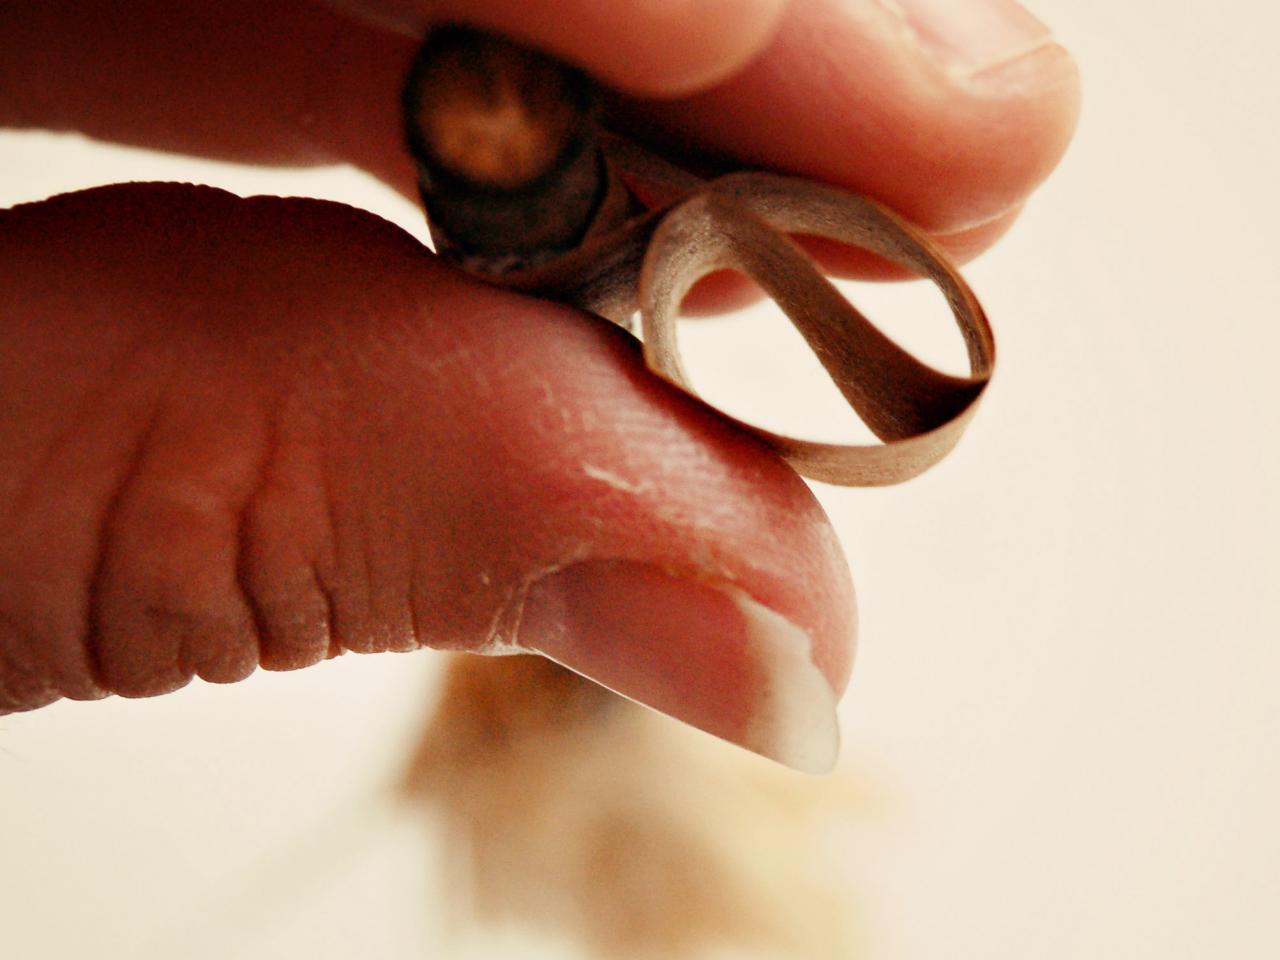
Affix Raffia to Twig
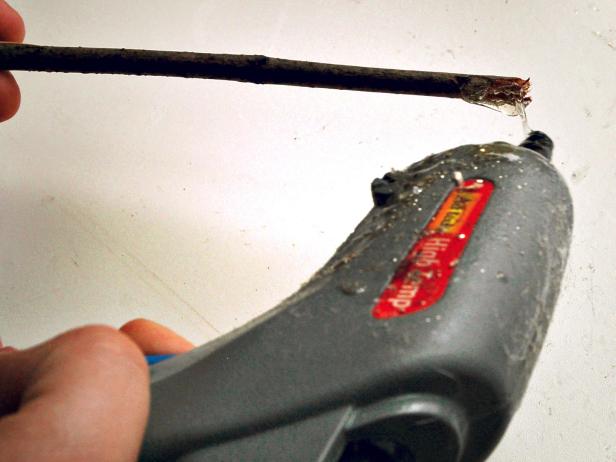
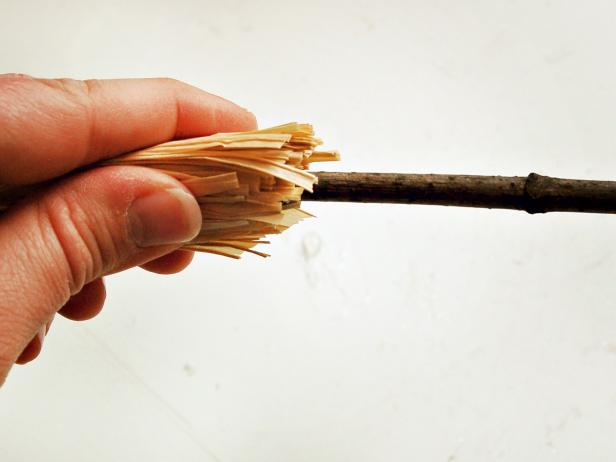
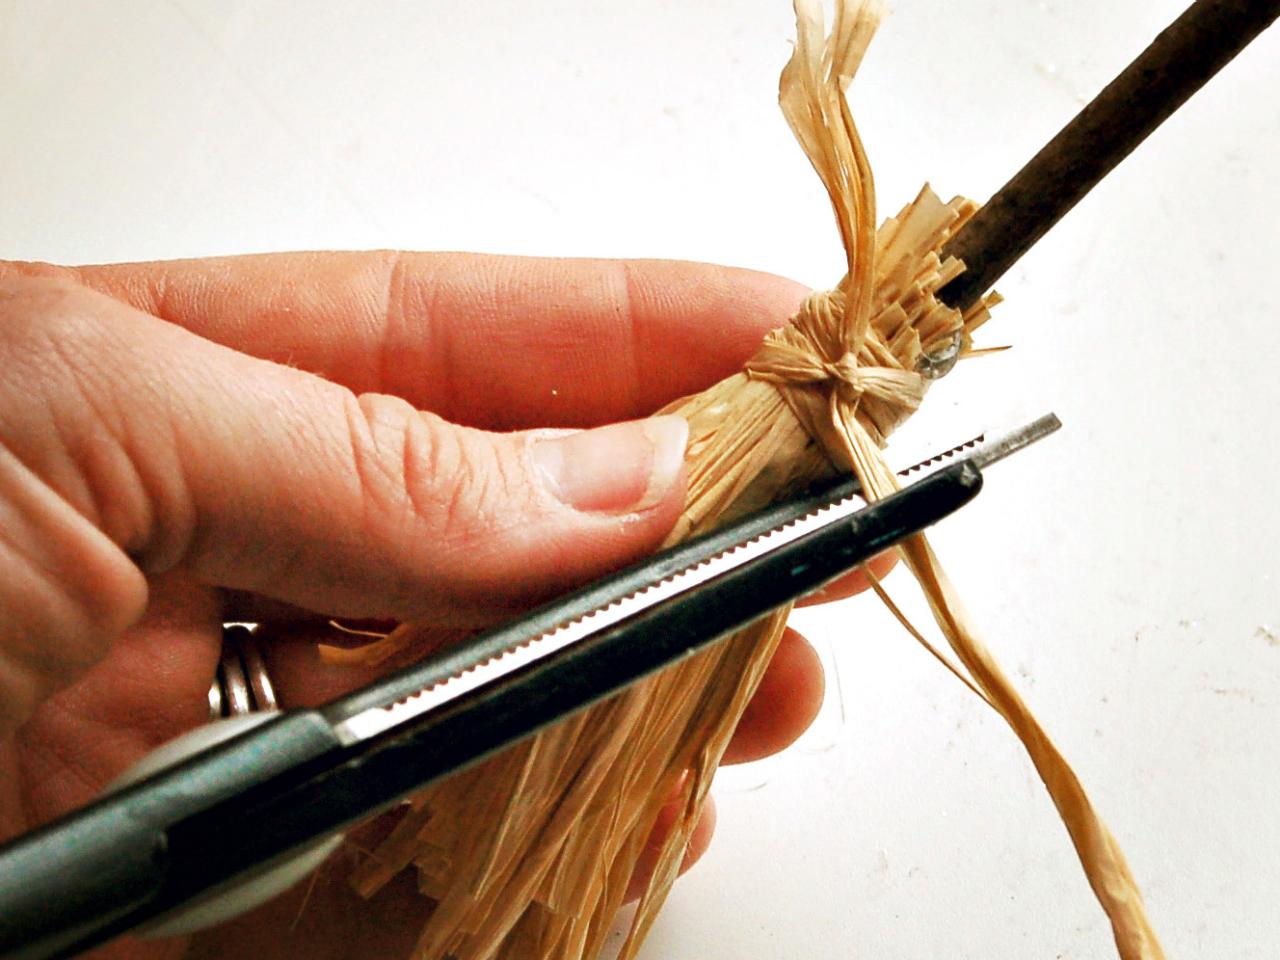
Apply a bead of hot glue around bottom of stick (Image 1) and insert stick into center of raffia bunch, ensuring raffia is evenly distributed around twig. Hold until glue has set (Image 2). Wrap a long piece of raffia around top of bunch, tying in a knot to fully secure (Image 3).

Witch's Broom Place Card Holders Step 3
With a hot glue gun apply a bead of hot glue around bottom of stick in order to insert the stick into center of raffia bunch, ensuring raffia is evenly distributed around twig.
Witch's Broom Place Card Holder Step 4
Apply a bead of hot glue around bottom of stick and insert stick into center of raffia bunch, ensuring raffia is evenly distributed around twig. Hold until glue has set.
Witch's Broom Place Card Holders Step 4
Wrap a long piece of raffia around top of bunch, tying in a knot to fully secure the raffia to the twig.
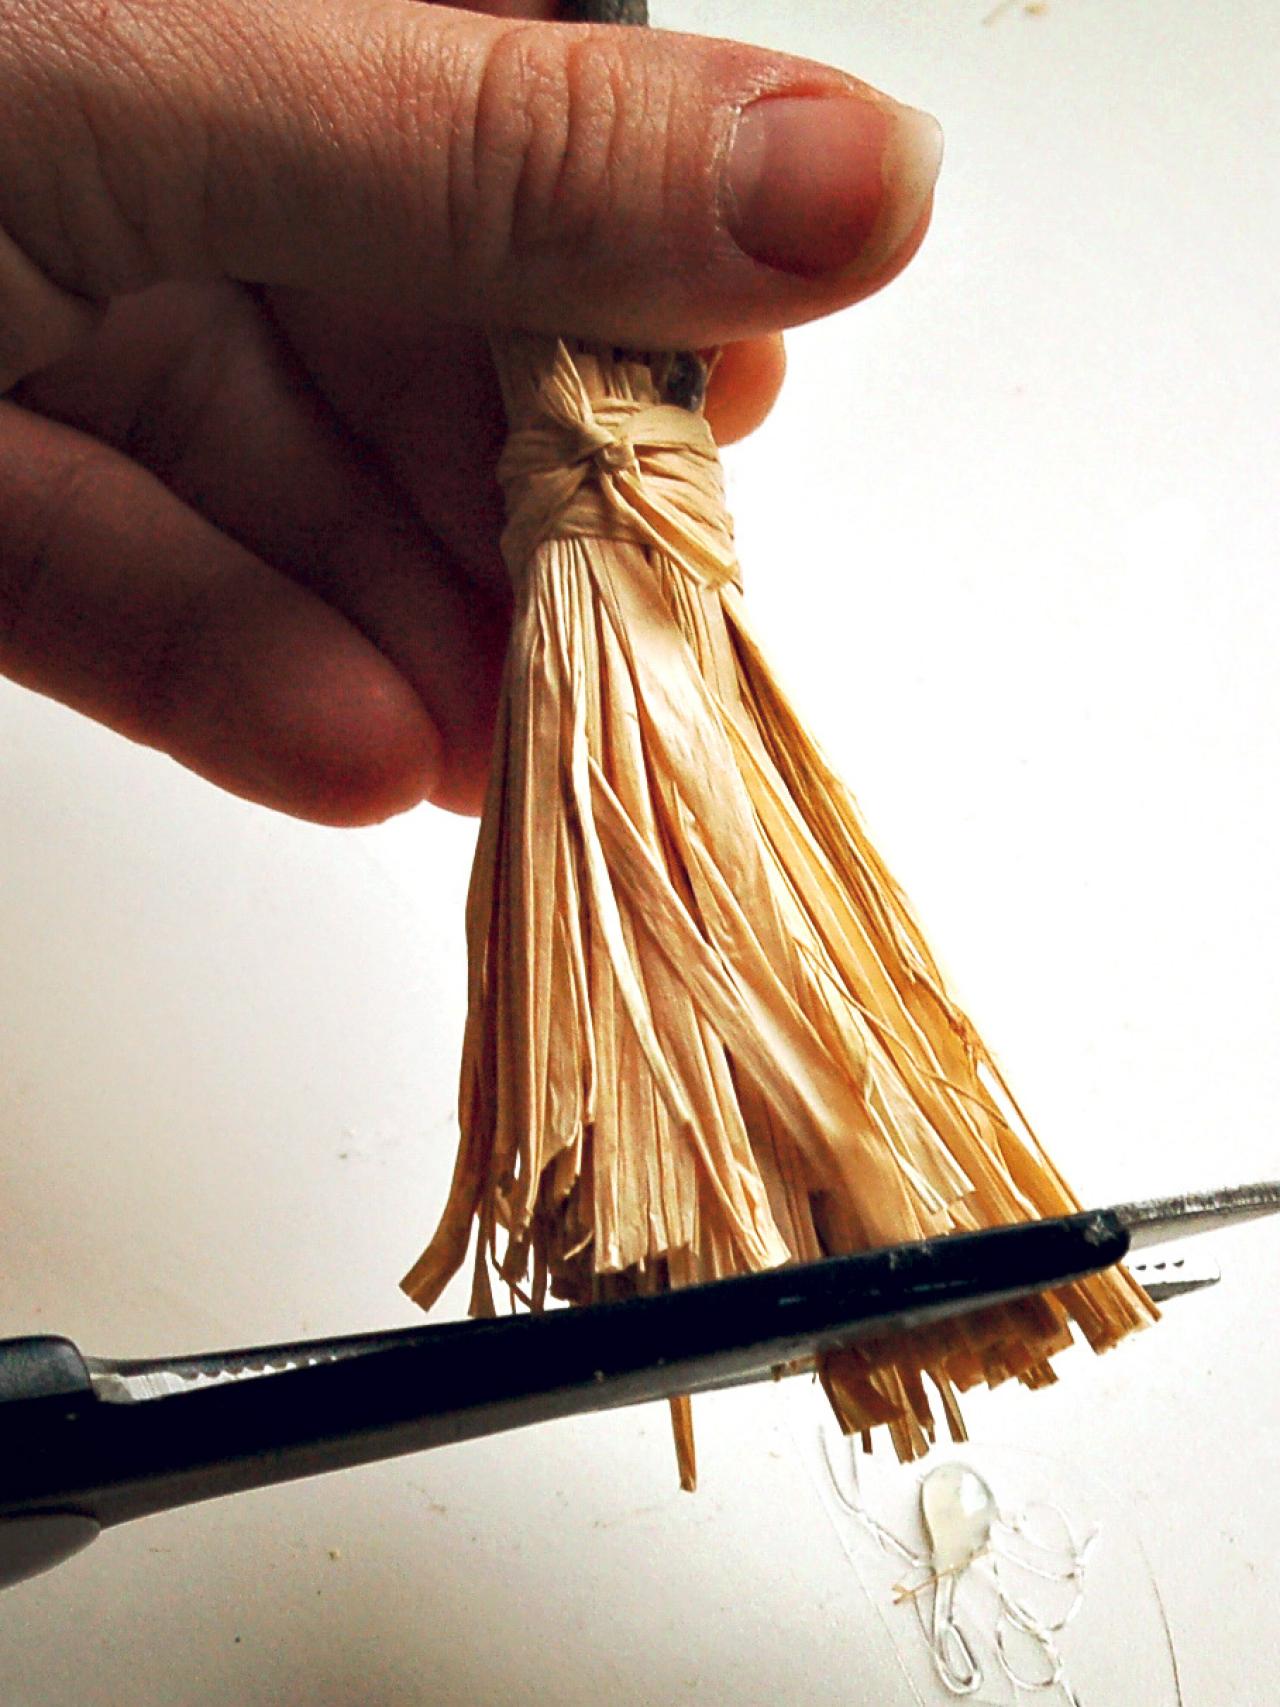
Trim Broom
Cut excess raffia used to secure bunch to twig (Image 1). Trim bottom of broom (Image 2).


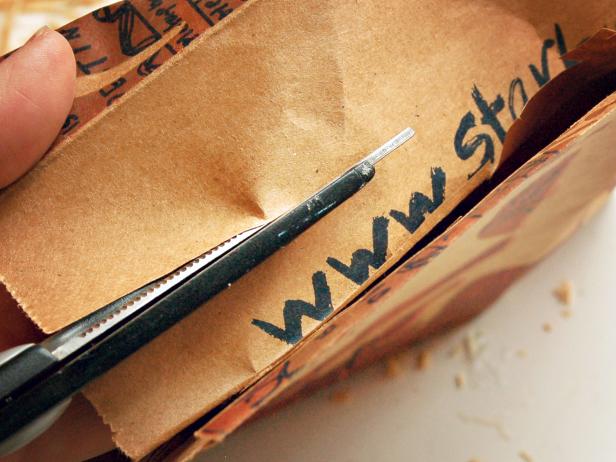
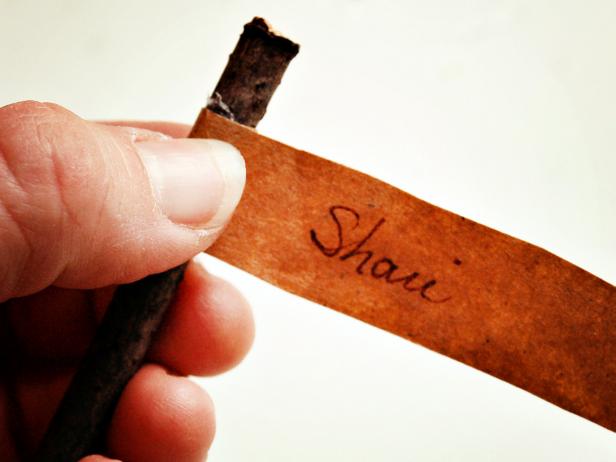
Make Paper Name Card
Measure and cut a 3" x 3/4" pennant-shaped piece out of a brown paper bag (Image 1) and cut a small triangle out of right end (Image 2). Write guest's name on card using a fine-tipped permanent marker (Image 3).

Witch's Broom Place Card Holders Step 8
Measure and cut a 3" x 3/4" pennant-shaped piece out of a brown paper bag and cut a small triangle out of right end.
Witch's Broom Place Card Holders Step 9
Measure and cut a 3" x 3/4" pennant-shaped piece out of a brown paper bag and cut a small triangle out of right end.
Affix Place Card
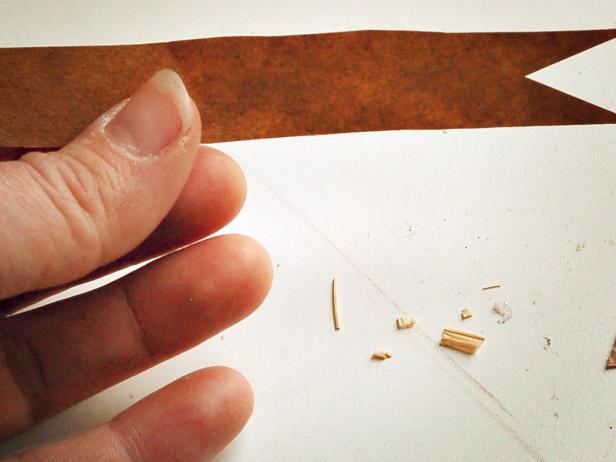
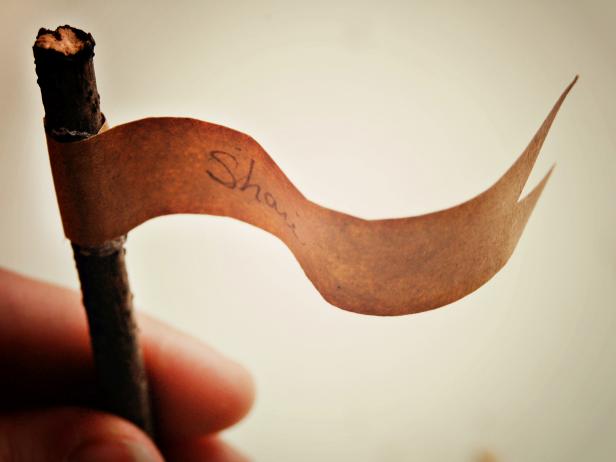
Apply bead of hot glue to top of twig (Image 1). Wrap left end of place card around twig, holding it in place until glue sets (Image 2). Tip: If desired, form paper banner into "S" shape by squeezing it gently with fingers (Image 3). This will give the flag the appearance of movement (Image 4).


Witch's Broom Place Card Holder Step 13
If desired, form paper banner into "S" shape by squeezing it gently with fingers.
Witch's Broom Place Card Holder Step 14
If desired, form paper banner into "S" shape by squeezing it gently with fingers. This will give the flag the appearance of movement.


