How to Build a Laundry Cabinet With a Countertop
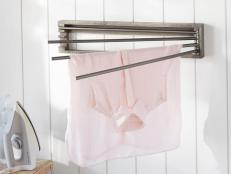
Today, most homes are built with attached laundry rooms for convenient cleaning, but the rooms are often no-frills in terms of style. With this project, you can upgrade your laundry room into an attractive work and storage space with cabinets and a tiled countertop.
Materials and Tools:
measuring tape
circular saw
safety glasses
dust mask
oak plywood for counters
½-inch plywood
2-by-6-inch boards
1-by-4-inch boards
2-by-4-inch boards
trim pieces
cabinet doors
pneumatic nailer
2-inch screws
screw gun
level
drill with paddle bit
jigsaw
miter saw
finishing nails
drop cloth
water-based stain
3-inch paintbrush
towels
small notched trowel
countertop adhesive
tiles
plastic spacers
grout
grout bag
wet saw (available for rental at home stores)
sponge
Steps:
1. Measure the laundry room. Measure the depth of the washer and dryer to determine the depth of the countertop. Leave about 6 inches for the water-hose connections and the dryer vent. Measure for the height of the counter, leaving about an inch between the counter and the appliances.
2. Remove the washer and dryer from the room. Rip the first piece of plywood to length. Cut the two side pieces of the cabinet from this piece of oak plywood. Cut a 2-by-6 to the desired lengths, and attach the lumber to the base of the cabinet. These will serve as supports for the bottom shelves of the cabinet.
3. Wearing eye protection, use a pneumatic nailer to assemble all the pieces. Attach a couple of 1-by-4’s to the cabinet to act as supports for the countertop.
4. Since the countertop will cover any holes you knock in the wall, you can use a hammer and nail to locate wall studs if you don’t have a stud finder. Attach the cabinet to the wall with 2-inch screws, securing the screws into the studs.
5. Make a mark at the location for your nailer and draw a level line across the length of the wall. Set the 1-by-4 nailer onto the wall, lining it up with the level line, and secure it to the wall with 2-inch screws driven trough the nailer and into the studs.
6. Secure three 2-by-4’s to another nailer and then secure this assembly to the wall and on top of the base cabinet to serve as your countertop framing. This support system will bear the weight of the countertop.
7. Wearing safety goggles and a dust mask, cut the ½-inch plywood to size with a circular saw. Set the plywood on top of the countertop framing. Secure the plywood with 1½-inch screws, driving them through the countertop and into the 2-by-4 framing.
8. Mark the location for the sink cutout. Drill an opening in the cutout with a drill and paddle bit, and then cut out the opening with a jigsaw.
9. Measure around the perimeter of the base cabinet to establish the lengths of trim. Cut all the trim pieces to length with a miter saw. Secure the trim to the cabinet with a hammer or pneumatic nailer and finishing nails. Use a piece of tile when installing the trim so that the trim will be flush with the tiles when they’re installed.
10. Throw down a drop cloth and apply stain, starting from the inside of the cabinet. Wipe off excess stain with a towel.
11. Spread adhesive on the countertop with a small notched trowel. Draw a line and begin setting tiles into the adhesive, using plastic spacers to keep them evenly spaced. Use a slight twisting motion to seat tiles into the adhesive.
12. Use a wet saw to cut tiles to fit. Keep the reservoir in the saw full, and change the water occasionally to get rid of sediment that could clog the circulating pump.
13. Mix the grout according to the manufacturer’s directions; use a mixing paddle and a drill to make mixing easier. Fill the bag and apply the grout to the grout lines. Use the trowel to force the grout into the grout lines. Remove excess grout.
14. After the grout begins to cure, wipe across the surface with a wet sponge to remove any of the excess grout along the edge of the tiles and to clean up the countertop.
15. Install the new sink and faucet, and attach the doors to the front of the cabinet.