


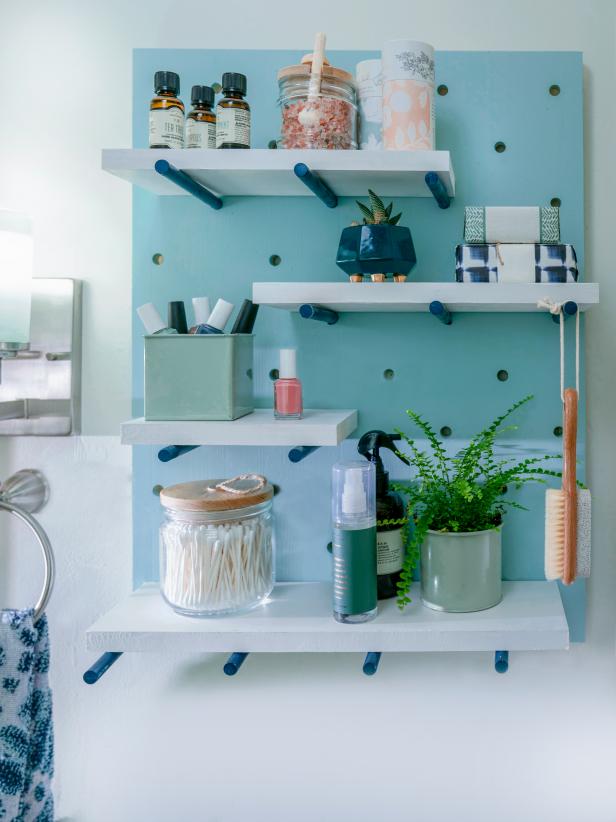
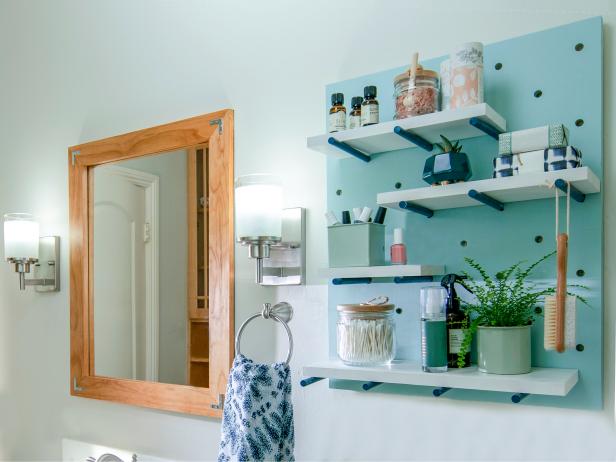
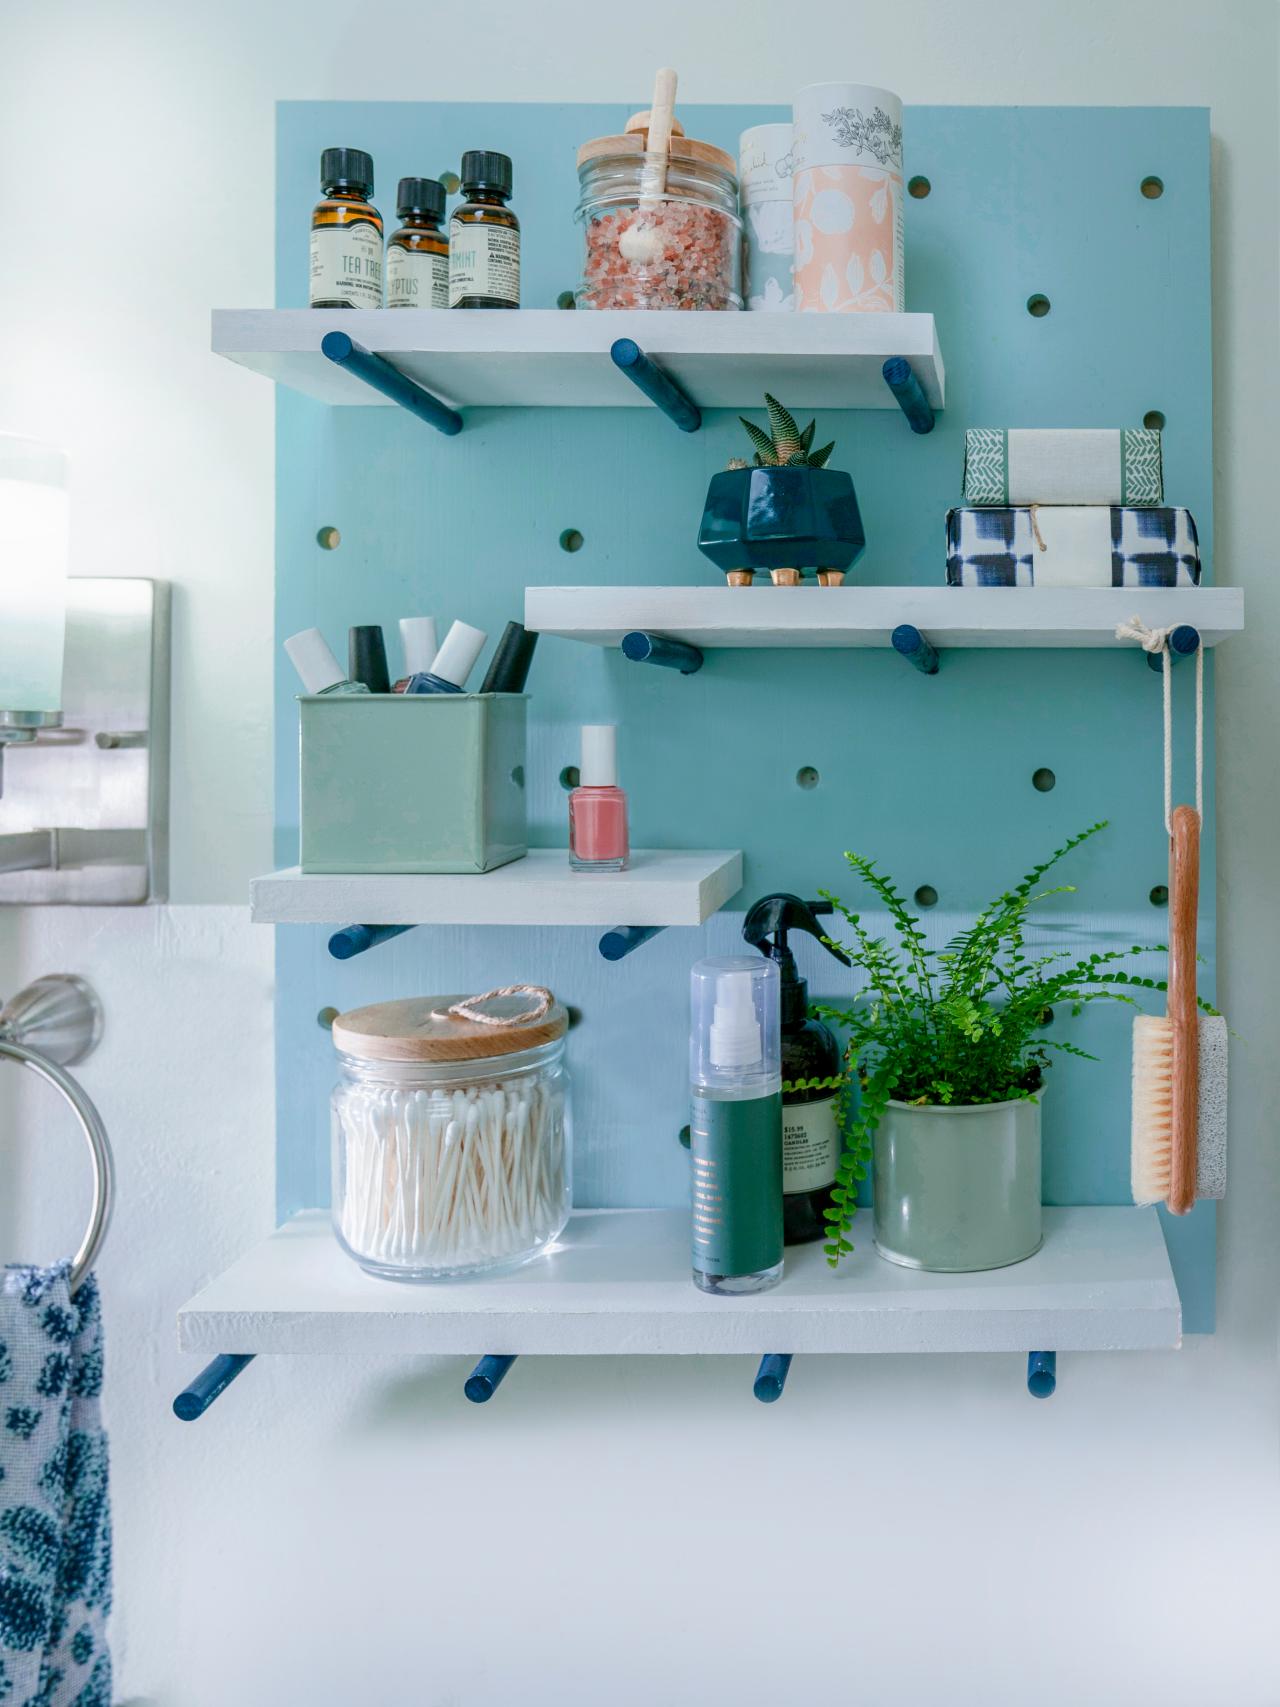
How to Make a Decorative Pegboard Shelf
Need wall storage but can’t find just the right shelving unit? Try this modern take on an old-school storage idea. It’s easy to build and you can customize the colors however you’d like.
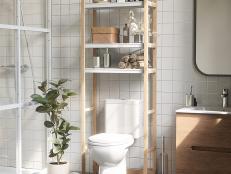
We installed our pegboard shelf in a bathroom, but it would also look adorable in a kitchen, foyer or kid’s room.
Gary Payne
Tools and Materials
- 1/2” dowels
- (1) 1x6 x 8'
- 1/2” forstner or spade bit
- 1” x 18” x 24” craft board or plywood
- measuring tape
- pencil
- straight edge
- spray primer
- spray paint
- miter saw, circular saw or hand saw
- graph paper
- D-rings
- screwdriver
- painter's tape
Skill Level: Beginner
Estimated Time: 1 day
Estimated Cost: $200

Gary Payne
Gary Payne
Gary Payne
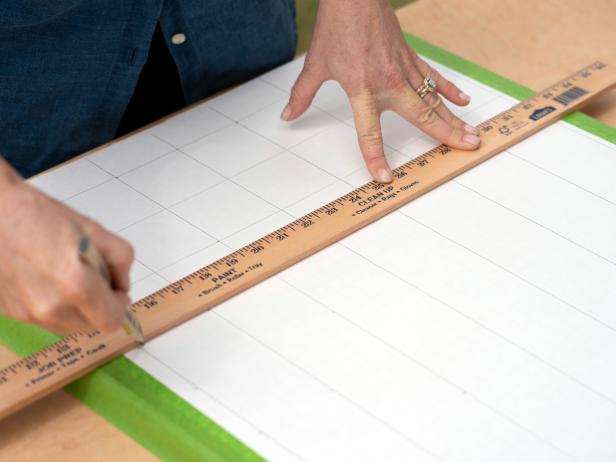
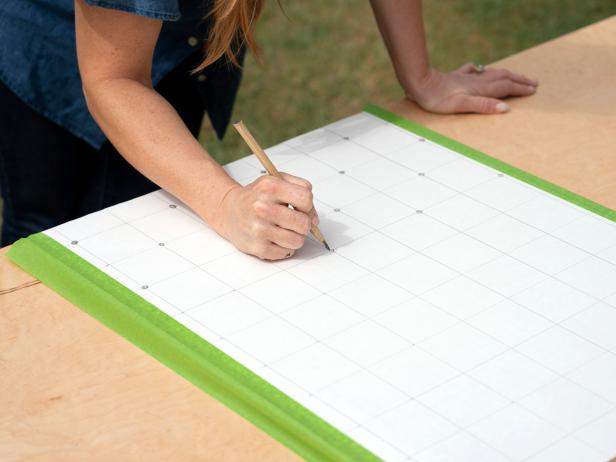
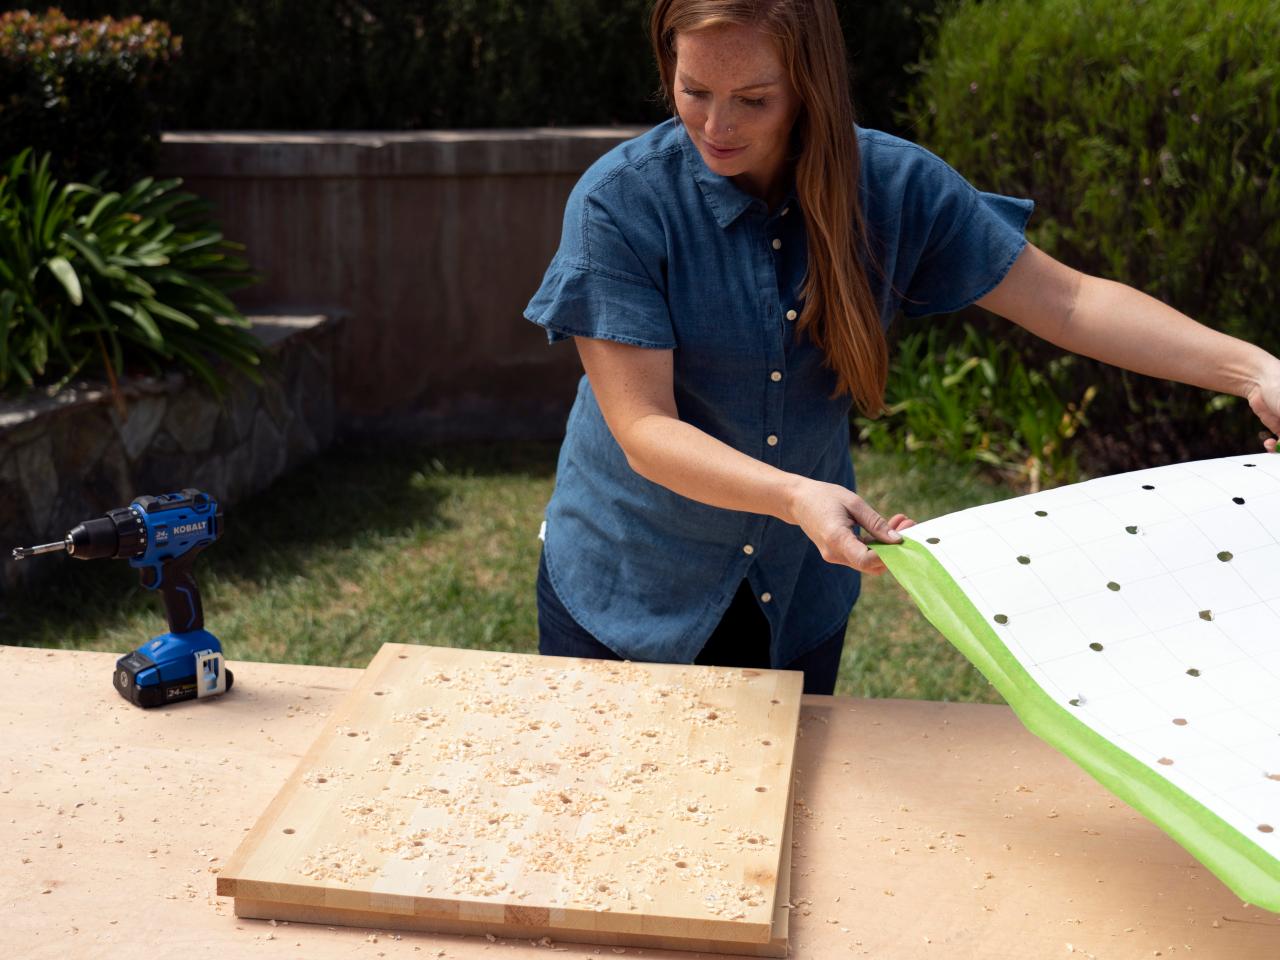
Step 1: Mark Pattern on Pegboard
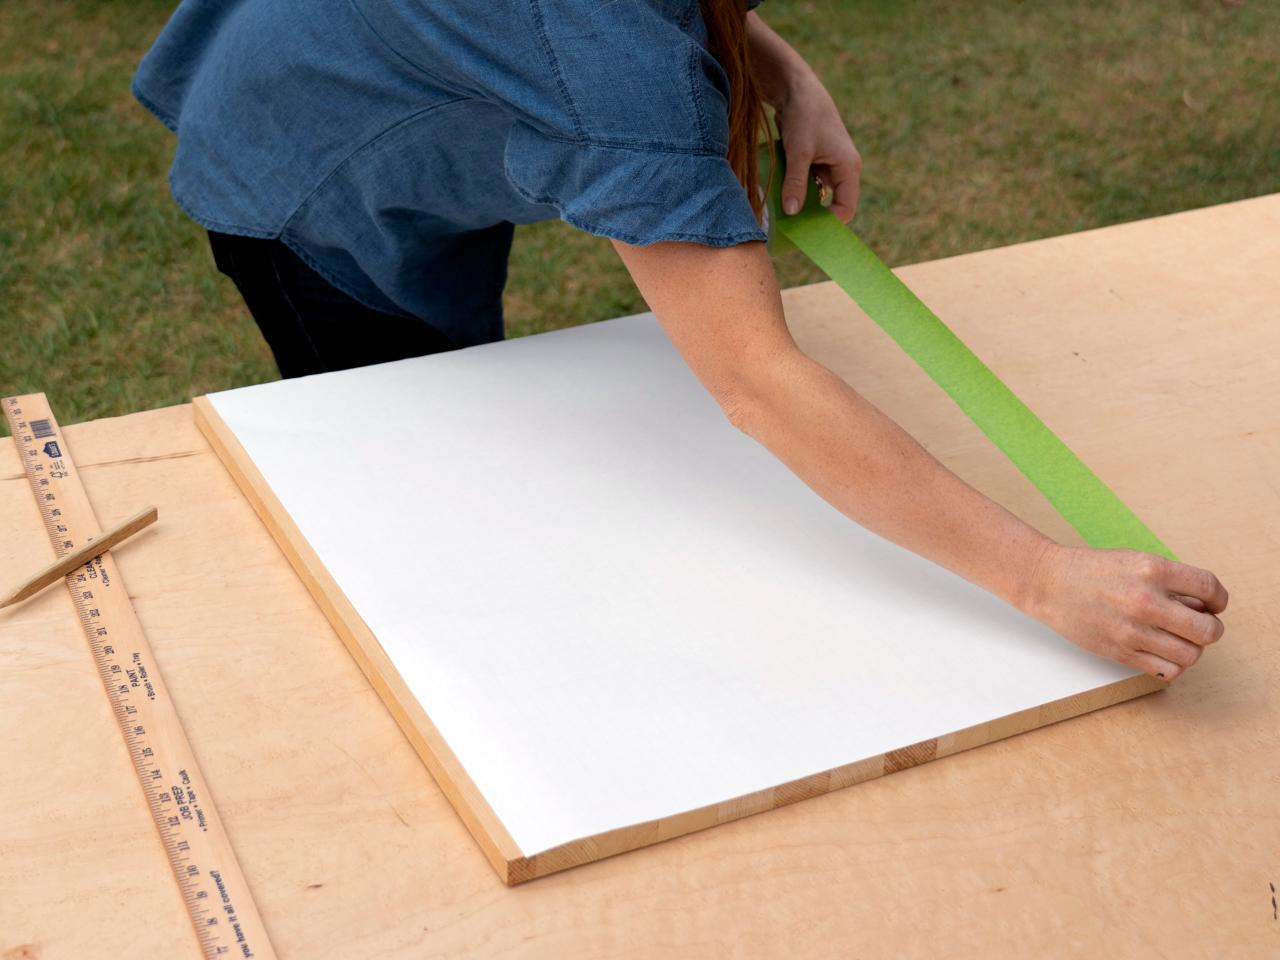
We used a ready-made 1”-thick craft board but you could cut a piece of plywood to whatever size you wish. Tape a large piece of graph paper on the craft board to mark the pattern for the peg holes. Start by drawing lines on the graph paper to create a grid then mark for the holes every three inches, staggering them on every other line.

Gary Payne

Gary Payne

Gary Payne
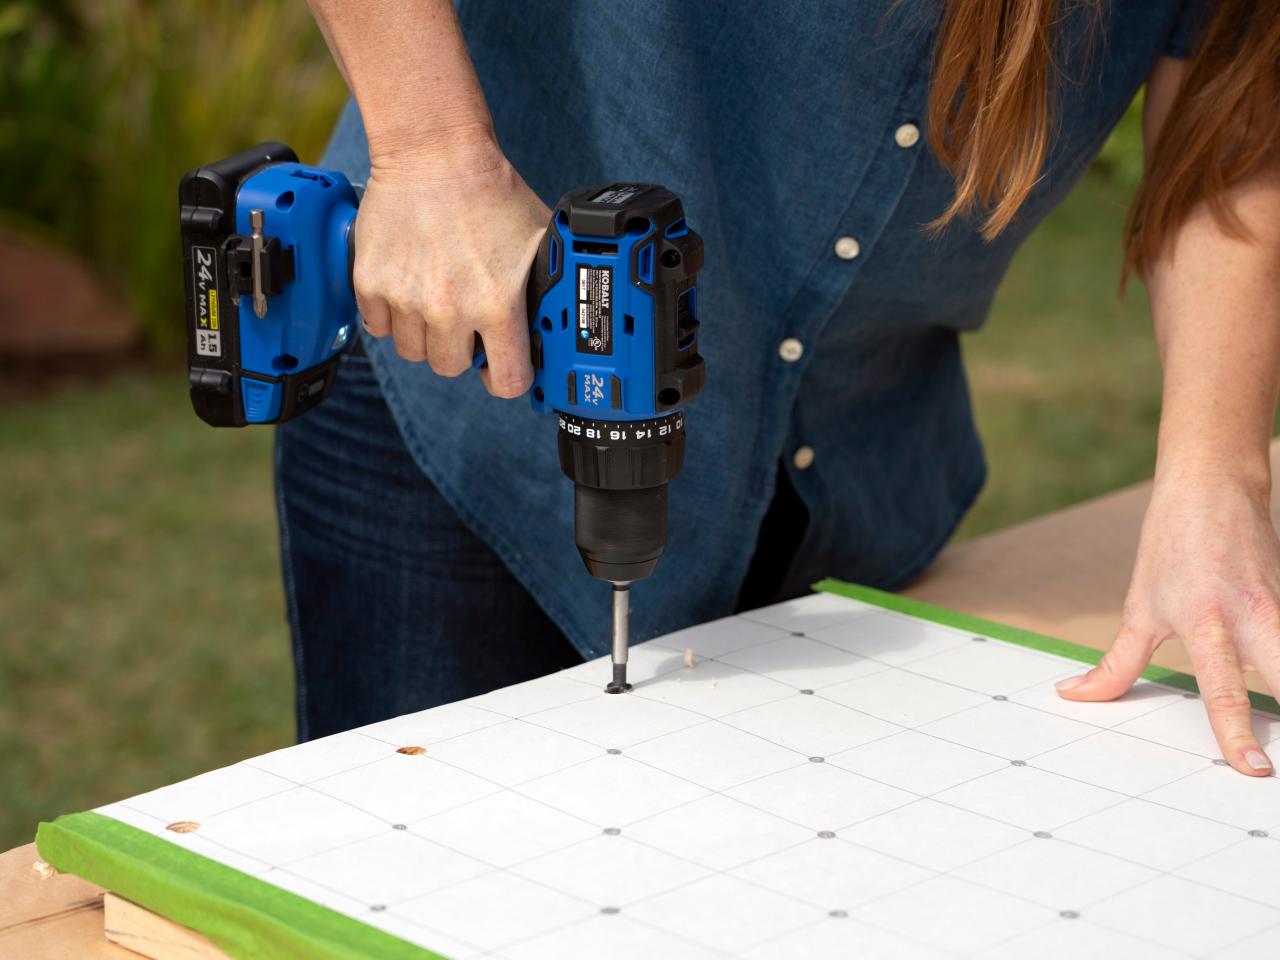
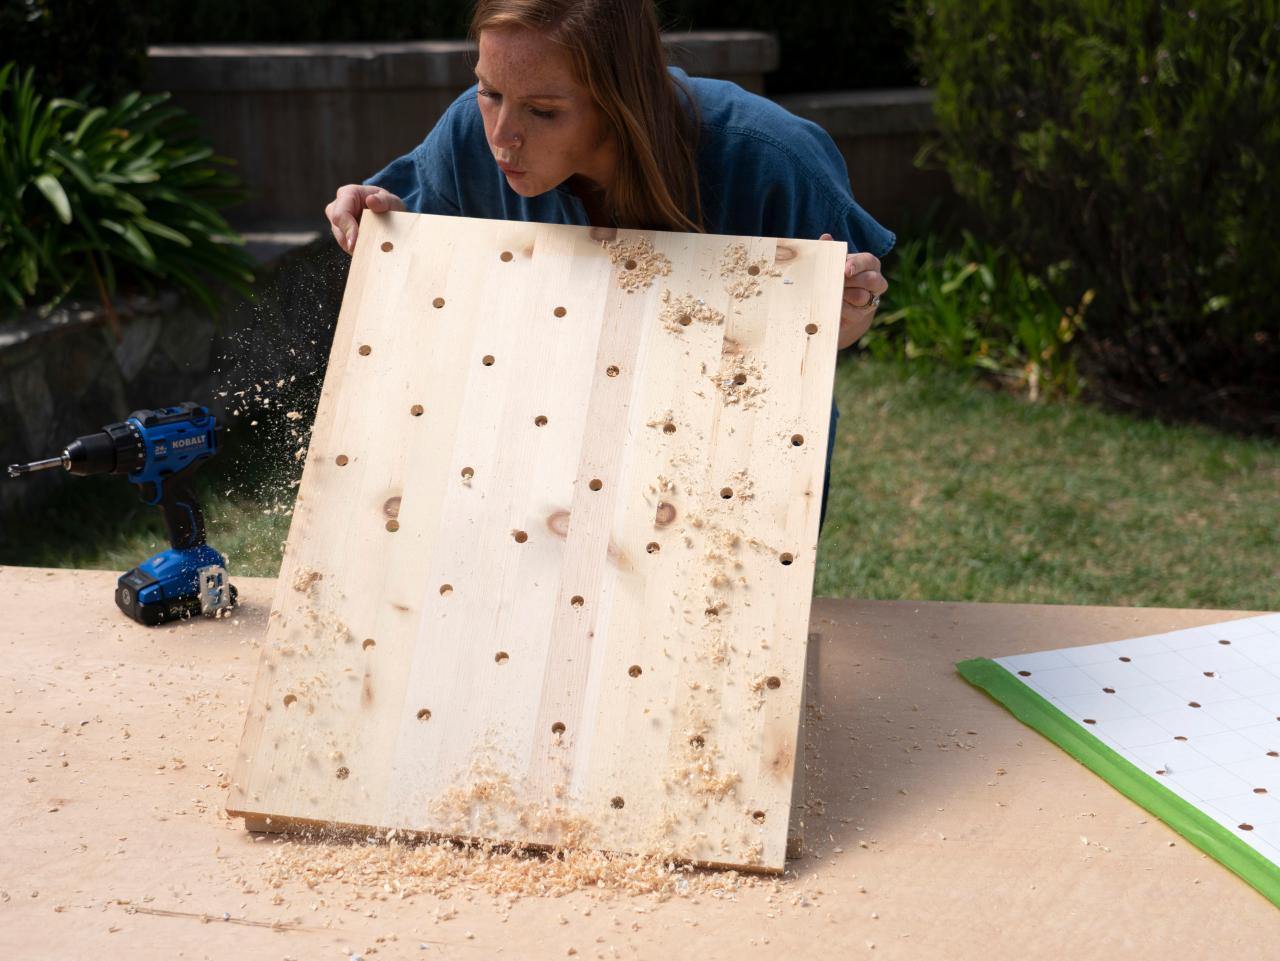
Step 2: Drill Holes
Use a forstner bit to drill the holes directly through the graph paper. Make sure your drill bit matches the size of the dowel. Keep the drill at 90° to ensure the holes will be straight. When drilling, use a backer board behind the pegboard to prevent blowout.
Gary Payne

Gary Payne
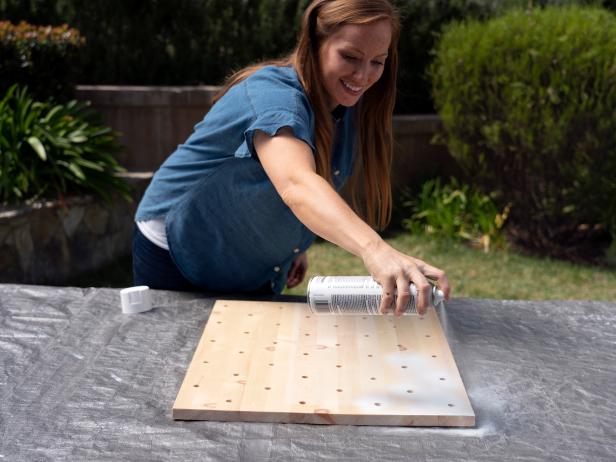
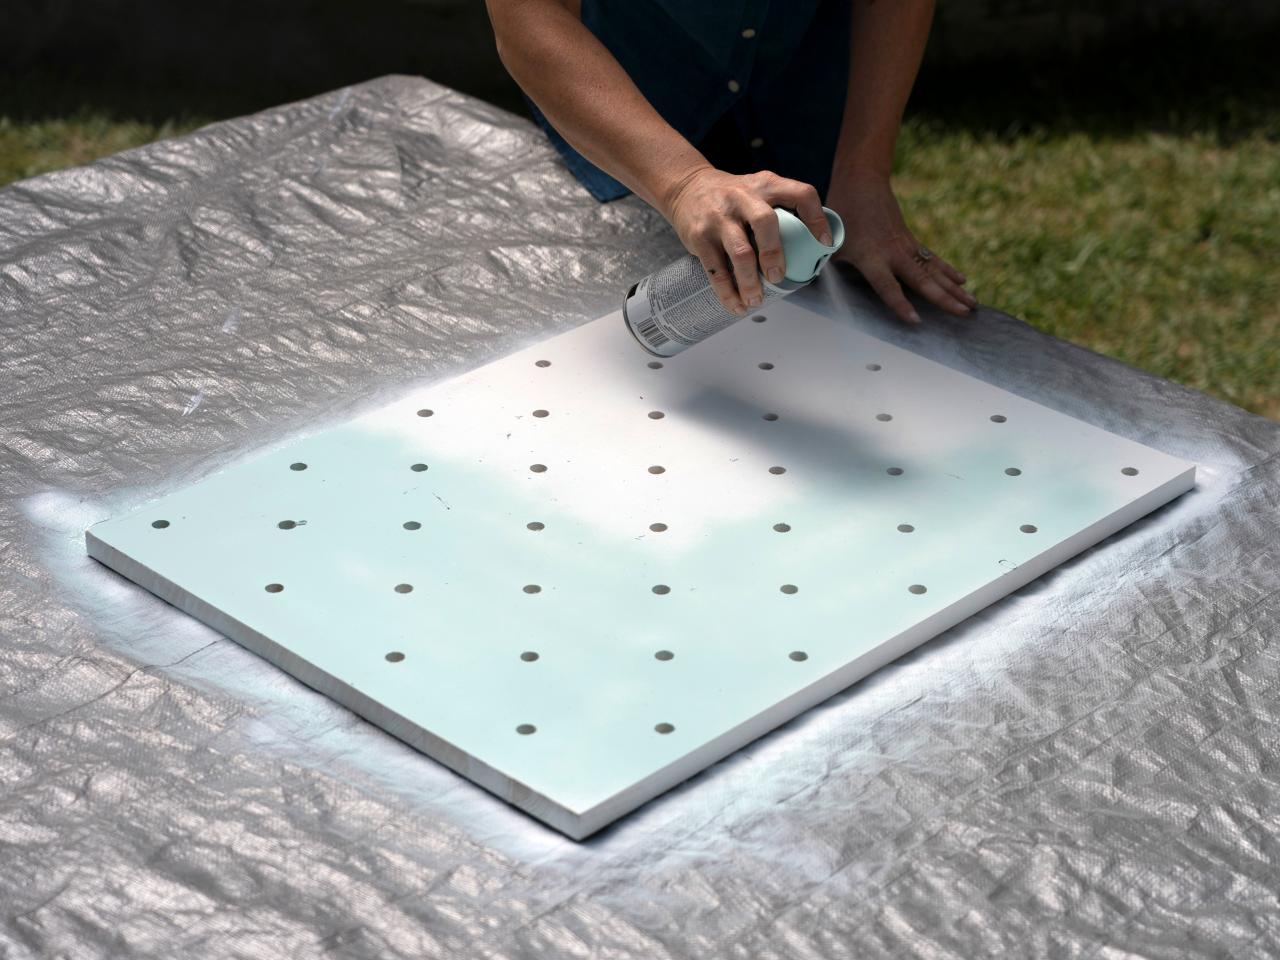
Step 3: Paint Pegboard
Use spray primer on the pegboard then apply a coat of paint. Make sure you paint inside the holes too. We’re putting our shelf in the bathroom, so a good coat of primer and paint will help protect the natural wood in the moist environment.
Gary Payne

Gary Payne
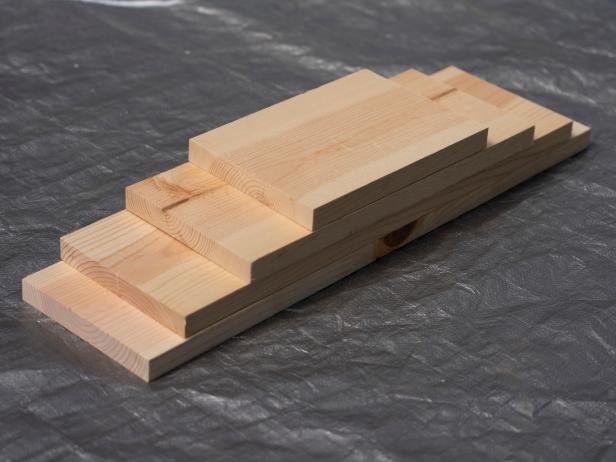
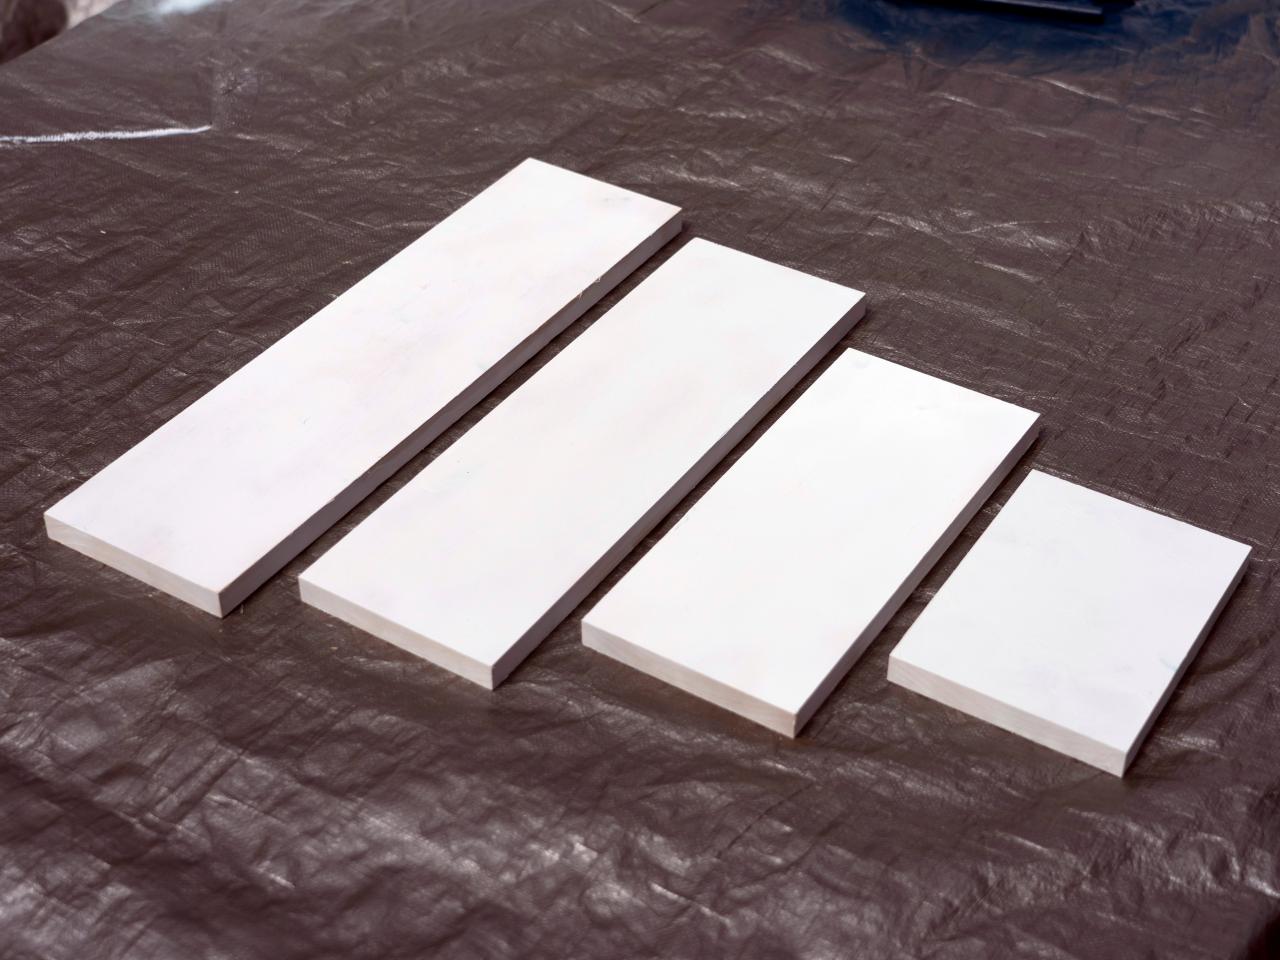
Step 4: Cut + Paint Shelves
Various shelf lengths will give you more design flexibility; we used four different sizes. Be sure to allow for a 1” to 1-1/2” overhang on either side of the pegs. Prime and paint the shelves.
Gary Payne
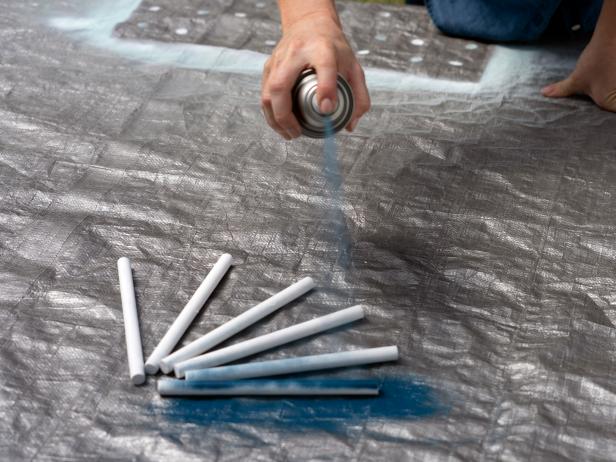
Step 5: Cut + Paint Pegs
The pegs should be cut to 6-1/2” long to be inserted completely into the holes and extend about 1/4” past the front edge of the shelf. Prime and paint the pegs.

Gary Payne
Step 6: Add Hanging Hardware
Add D-rings to the back of the pegboard and then hang it up.

Gary Payne
Gary Payne
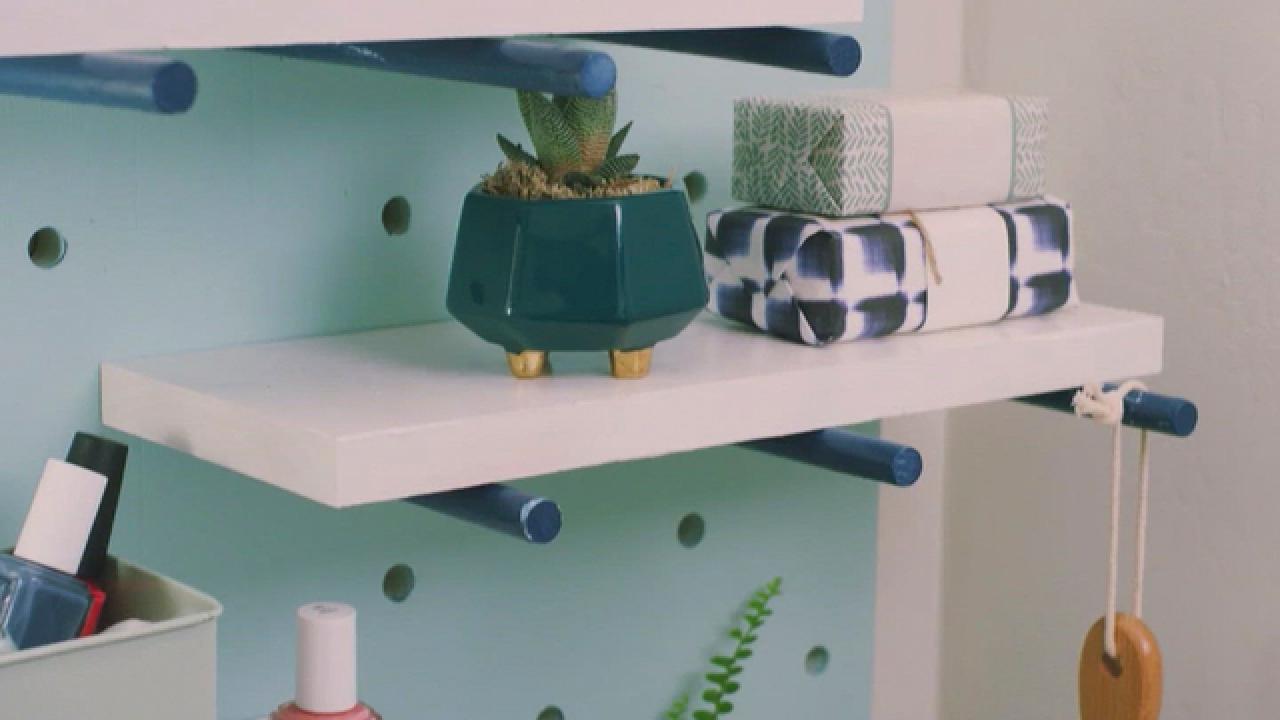
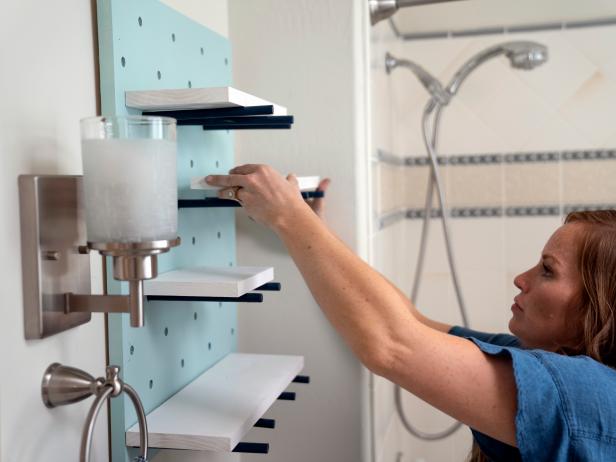
Step 7: Insert Pegs + Lay Shelves
Gary Payne
Arrange the pegs and shelves as desired, then enjoy the added storage.


