


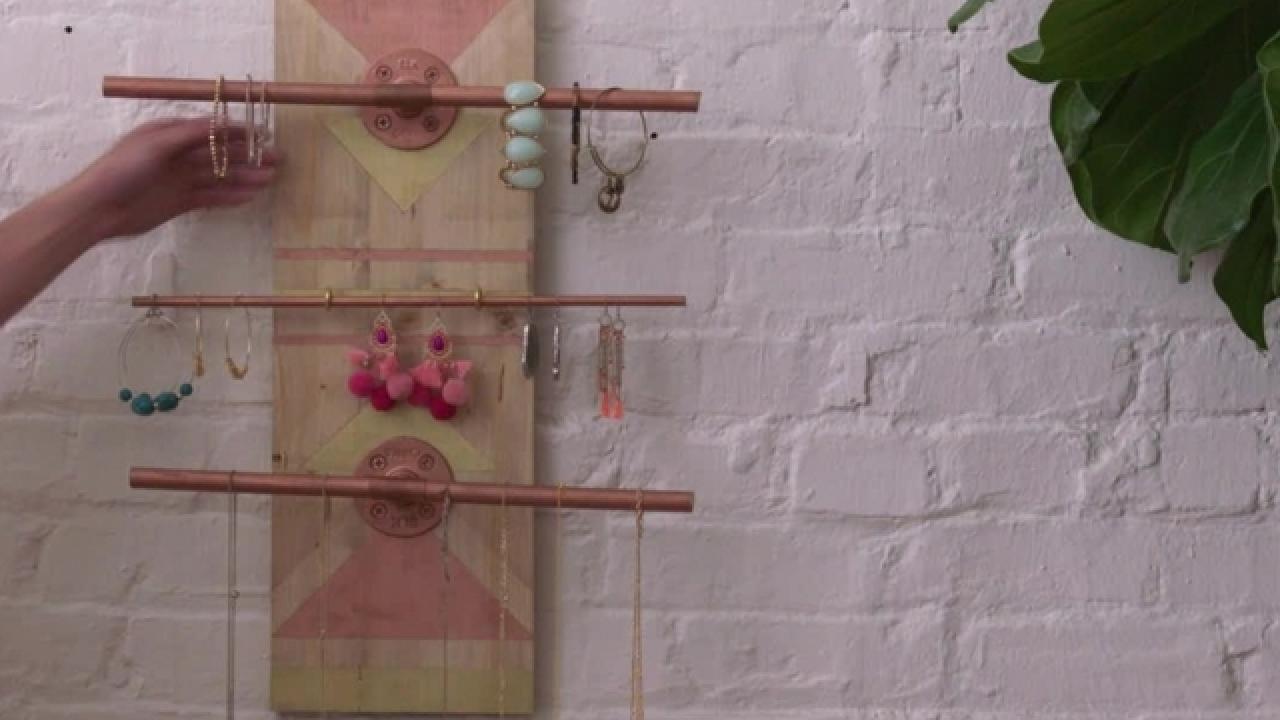
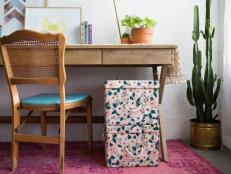
Hang Up Your Jewelry With This Stylish DIY Wall Organizer
If you currently store your jewelry in a tangled mess on your dresser, tidy it up with this trendy hanging organizer. It’s an easy DIY project you can do in a day.

Cassidy Garcia Photography

Watch How It's Made
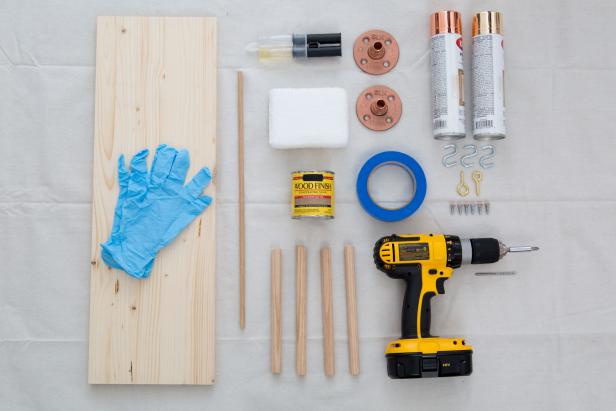
Materials Needed
- (1) 7” x 1” x 19” board
- (1) pint of stain in desired color
- (4) 5/8” x 8” dowel rods
- (1) 12” dowel rod the width of eye hook
- (2) 1-1/8” eye hooks
- (2) 2.7" x 1/2” plumbing floor flanges
- (2) 1/2” galvanized T’s
- (8) wood screws
- (2) cloths
- pair of latex gloves
- painter’s tape
- drop cloth
- drill/drill bit
- gold and copper spray paint
- pencil
- epoxy
Cassidy Garcia Photography
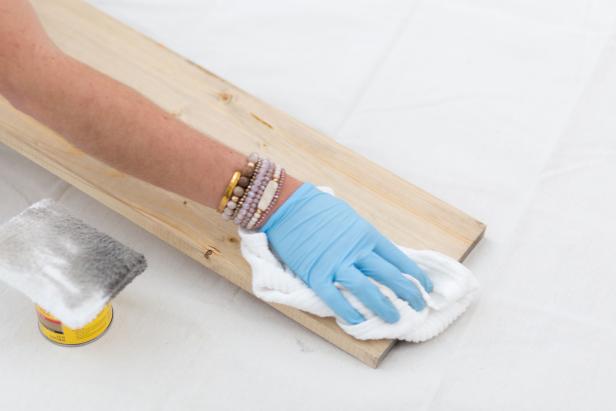
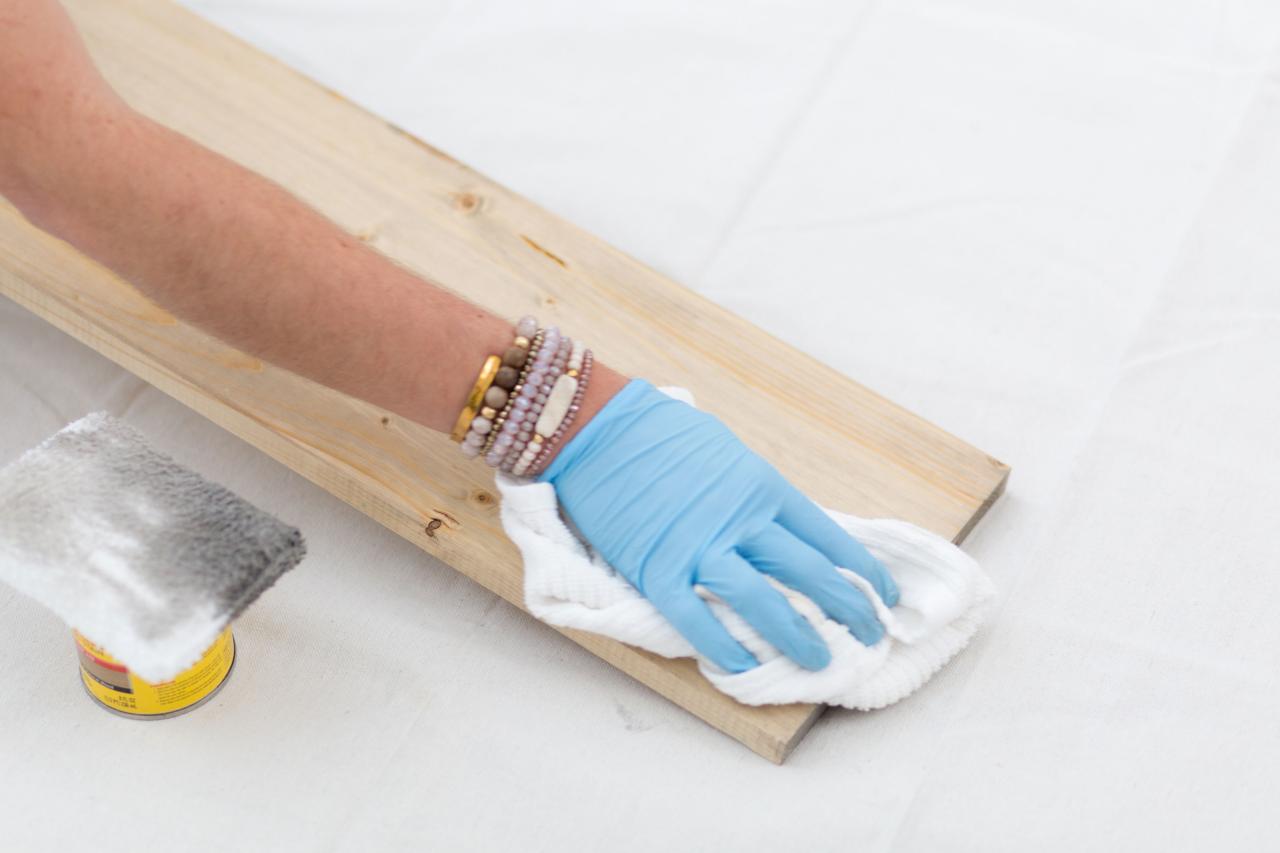
Stain Wood
Lay out 7” x 1” x 19” piece of wood on a drop cloth on a sturdy surface. Use a cloth to apply stain along the grain of the wood. Wear latex gloves to avoid staining your hands.

Cassidy Garcia Photography
Use the second cloth to rub off excess stain.
Cassidy Garcia Photography
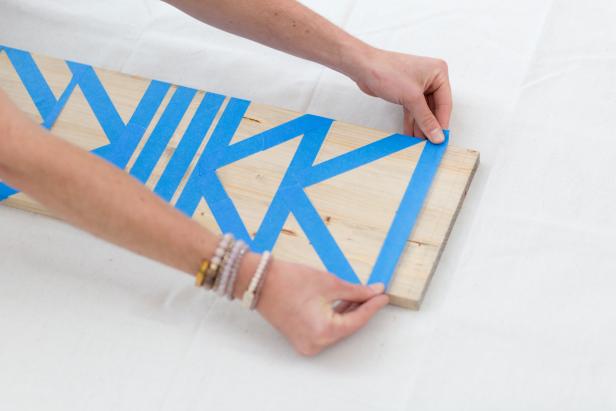
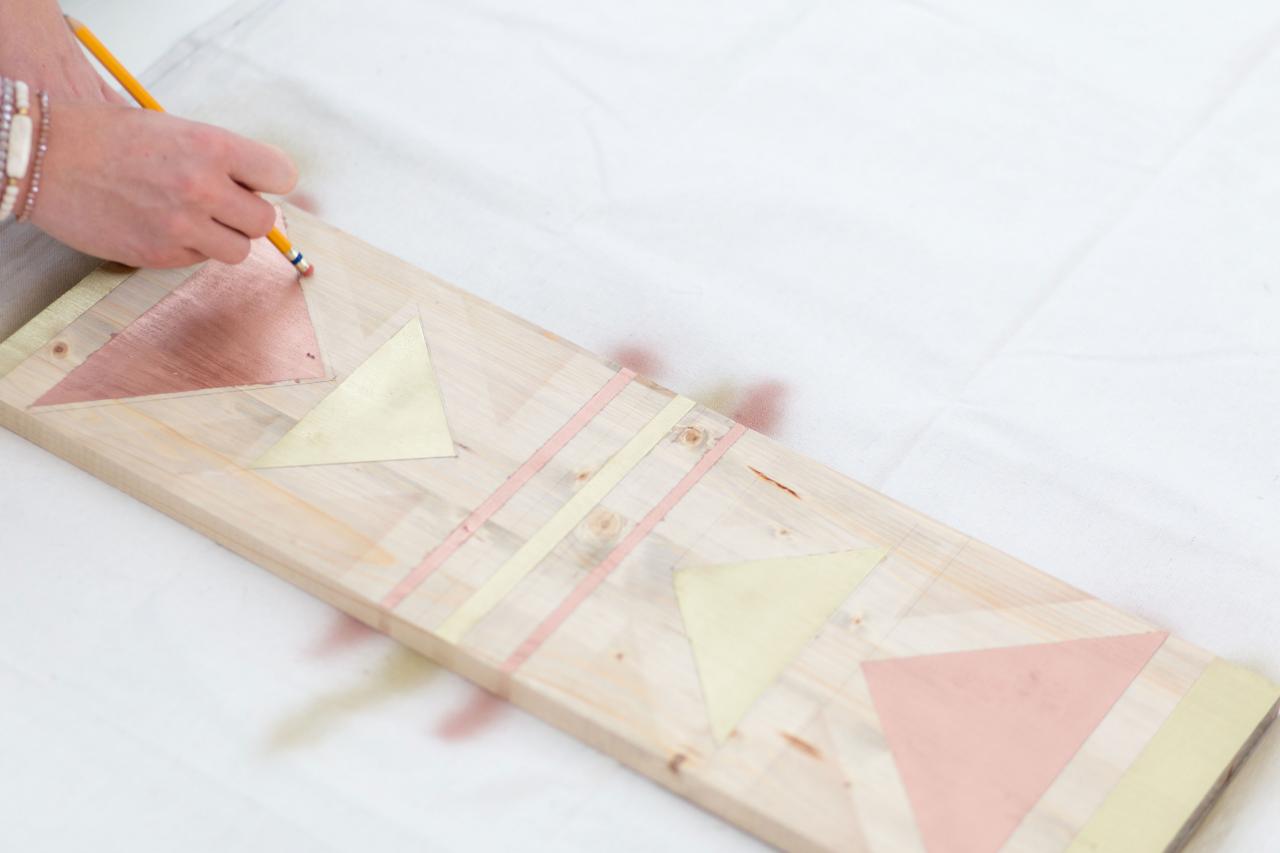
Draw Design
Allow the stain to dry, then draw out your own design on the wood using a pencil. We drew a geometric design featuring triangles and horizontal lines.

Cassidy Garcia Photography
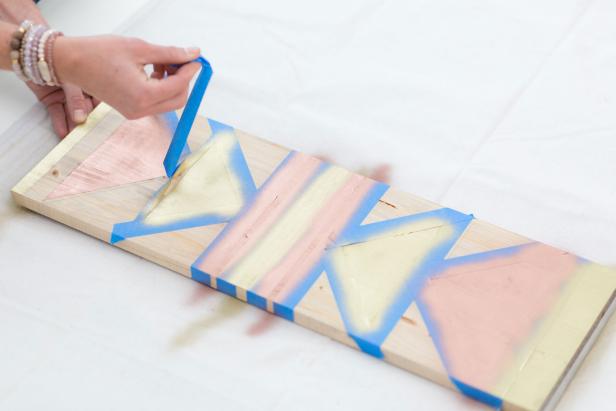
Apply the painter’s tape to tape off your design. Be sure to thoroughly smooth the tape down.
Cassidy Garcia Photography
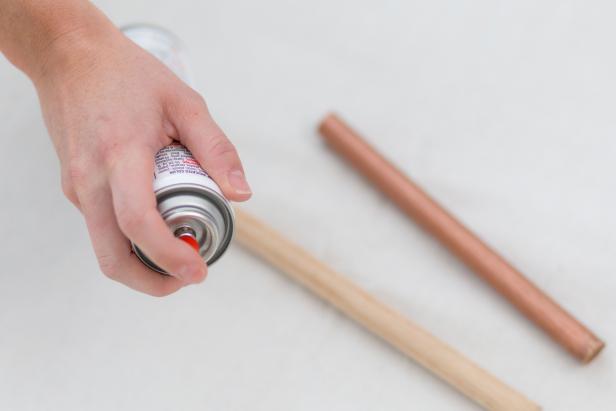
Spray Paint Materials
In a well-ventilated area, spray paint wood board with your design.

Cassidy Garcia Photography

Cassidy Garcia Photography
Gather dowel rods and wood screws and spray paint them at this time. Apply two coats, letting the paint dry completely between each coat.
Cassidy Garcia Photography
After the paint has dried, slowly remove the painter’s tape to reveal your design.
Cassidy Garcia Photography
Erase any visible pencil marks.

Cassidy Garcia Photography
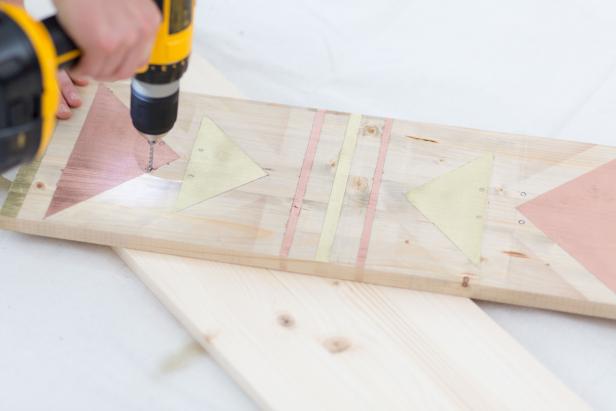
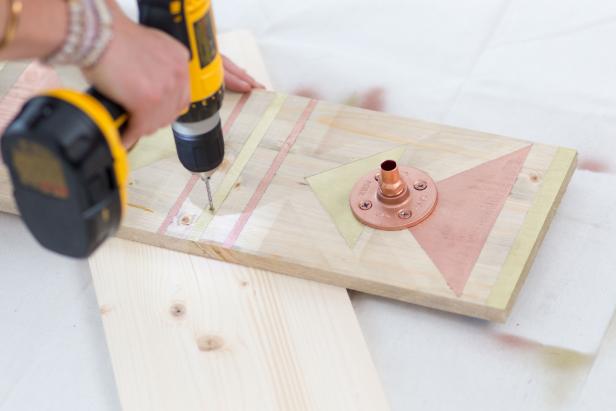
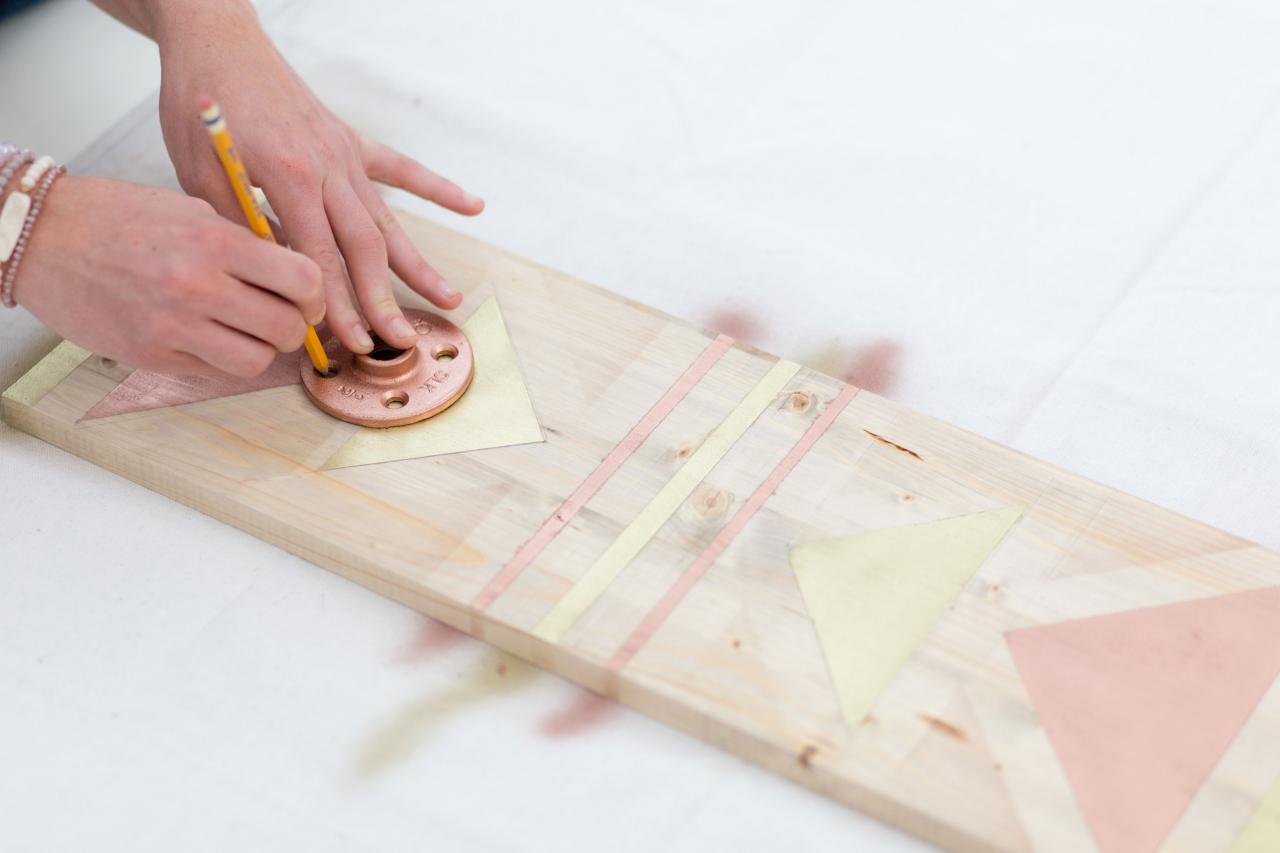
Attach Hardware
Using a pencil, mark the spots where you will need to pre-drill holes to attach the plumbing floor flanges.

Cassidy Garcia Photography
Pre-drill the holes.
Cassidy Garcia Photography
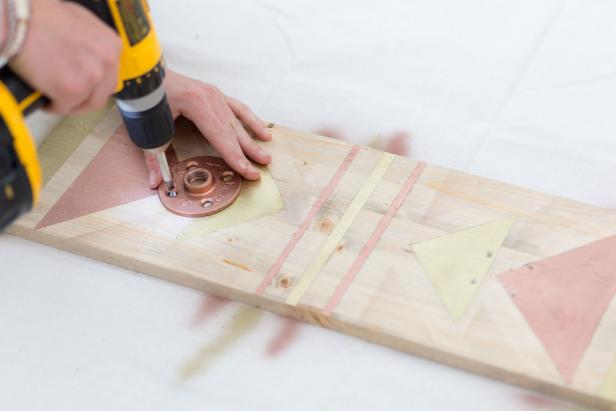
Attach the two floor flange bases with four wood screws each.
Cassidy Garcia Photography
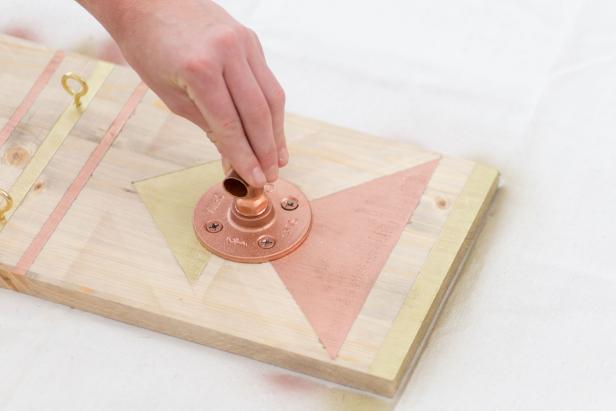
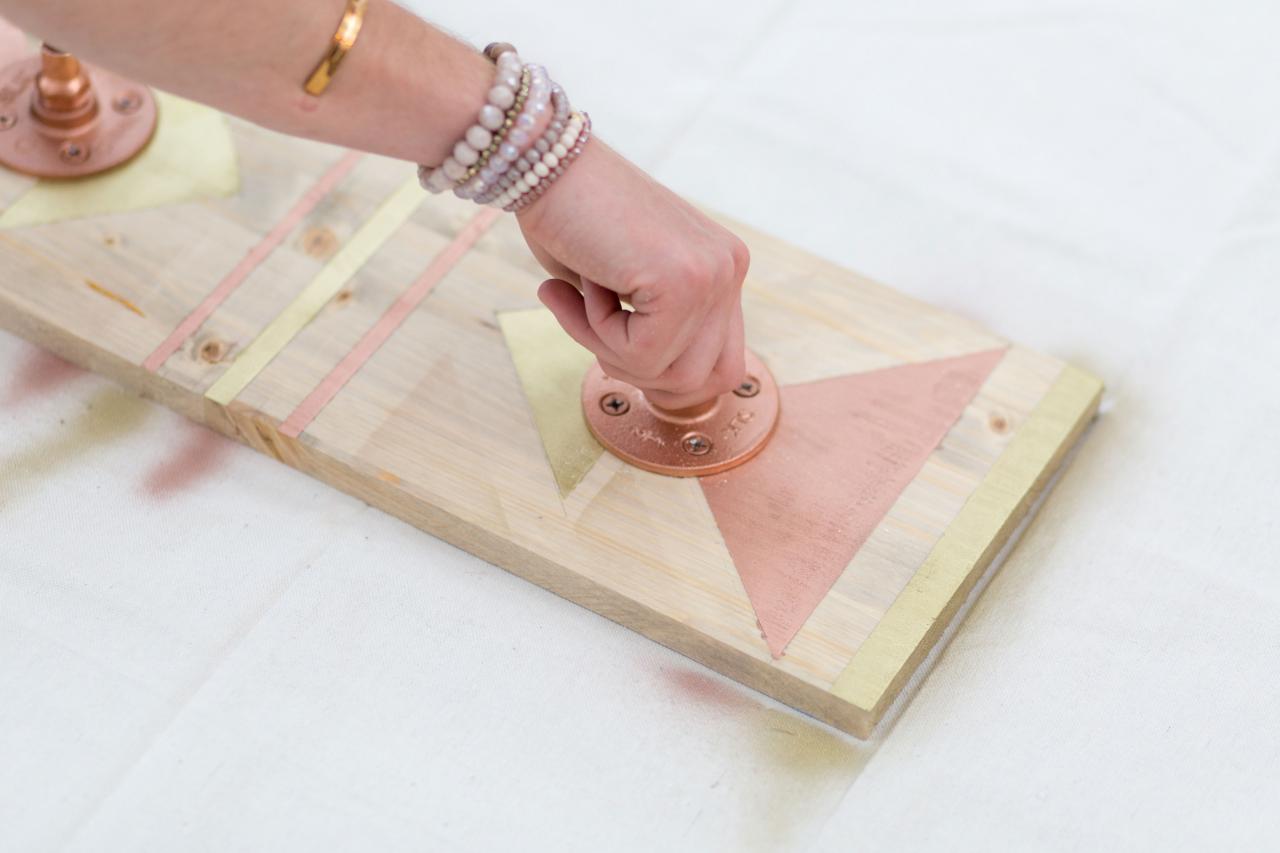
Line up the plumbing flange inserts, turning them until securely affixed in place.

Cassidy Garcia Photography
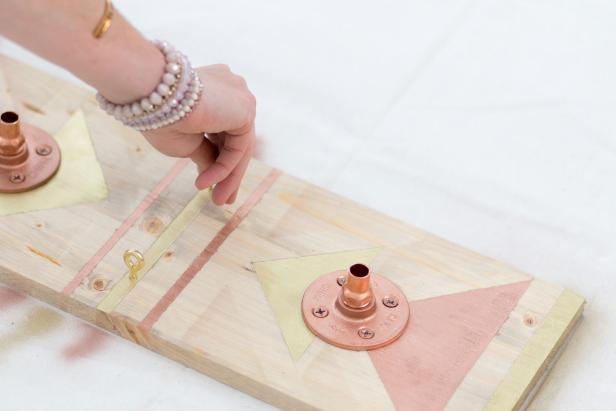
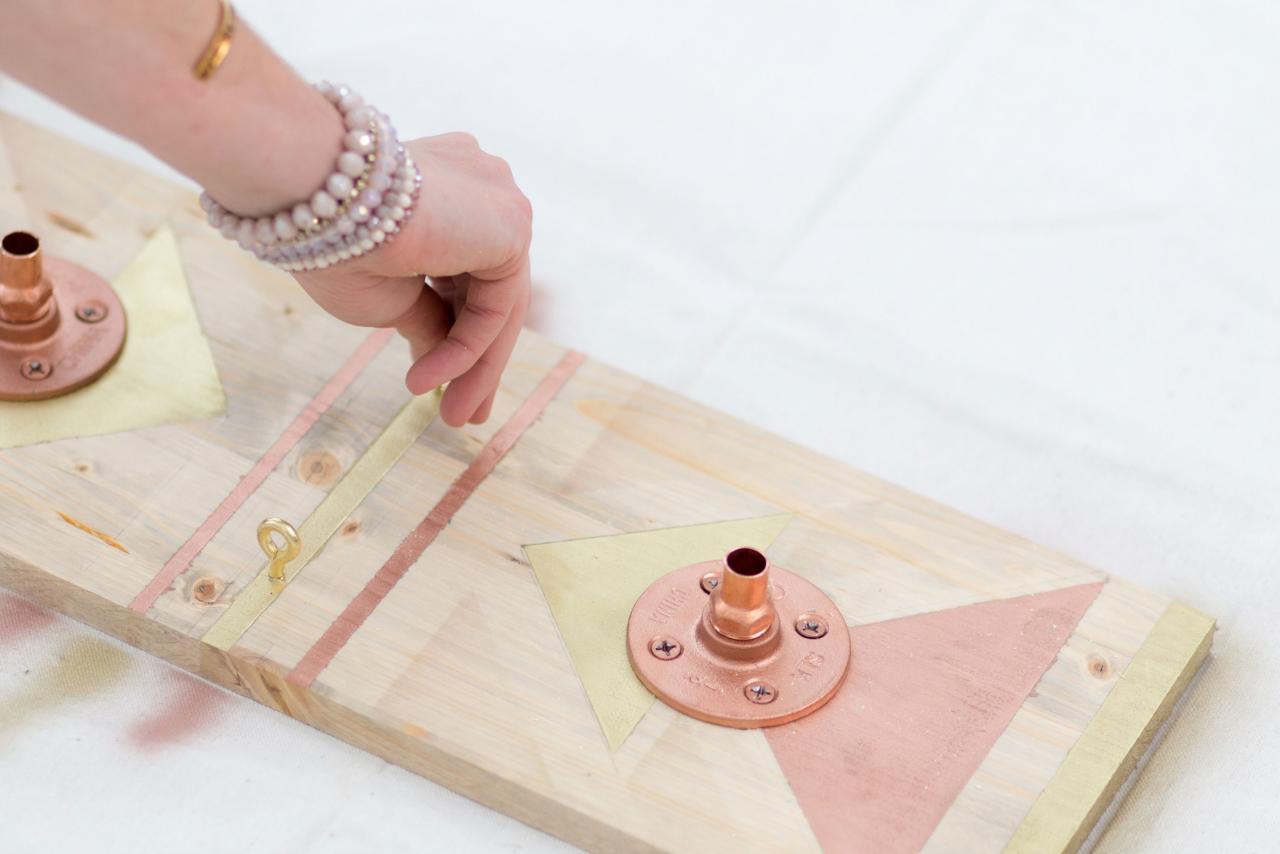
Pre-drill holes for the eye hooks between the two flanges.
Cassidy Garcia Photography
Screw both eye hooks into the pre-drilled holes firmly.
Cassidy Garcia Photography
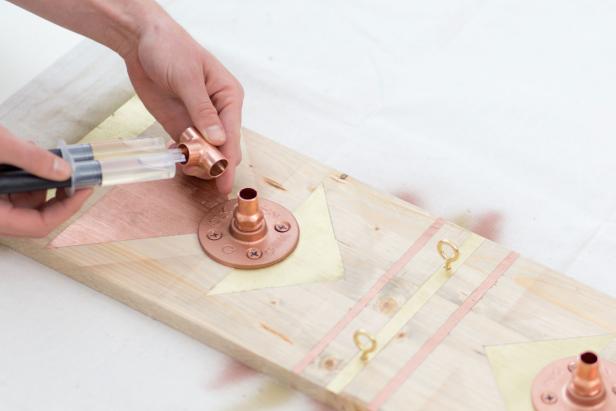
Add Finishing Touches
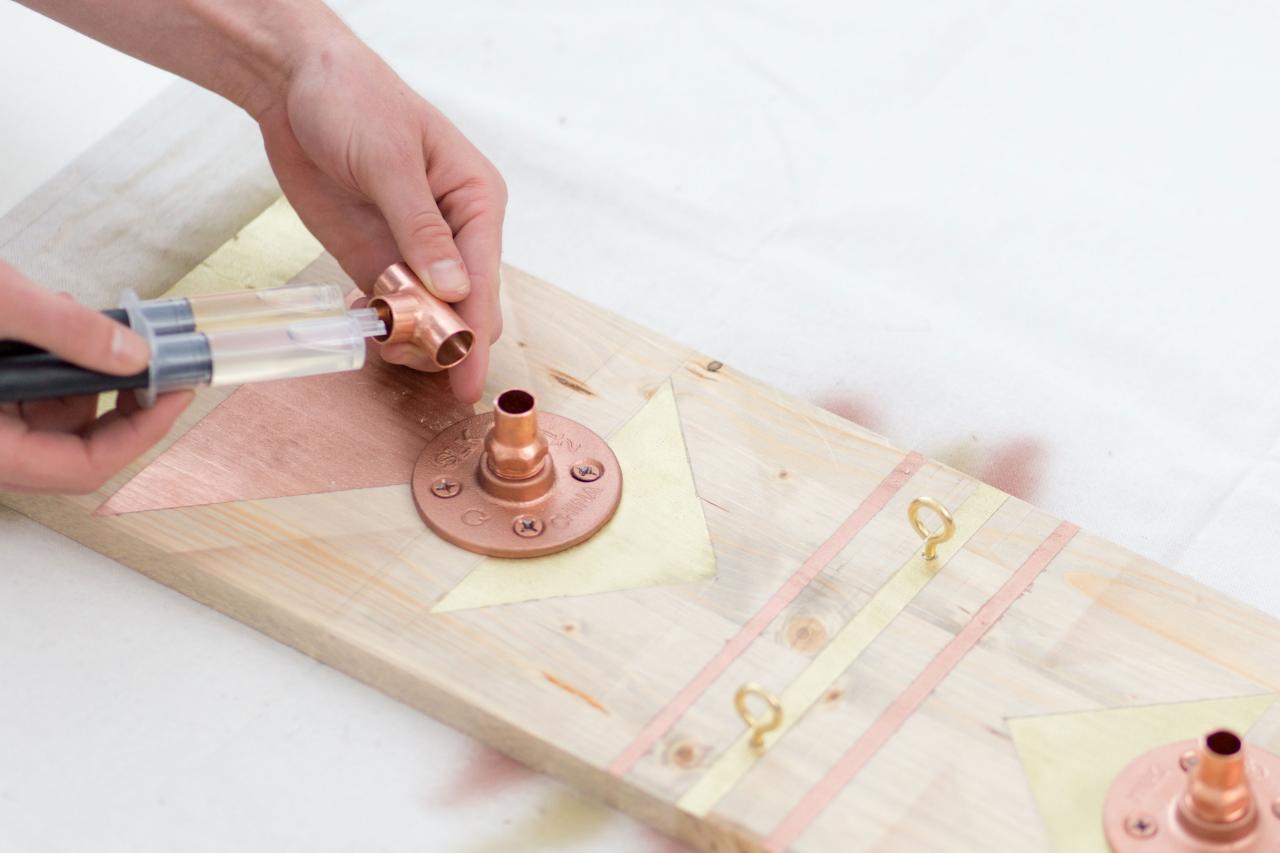
Use the epoxy to attach the galvanized T’s to the two plumbing floor flanges. Allow the epoxy to dry for a few minutes.
Cassidy Garcia Photography
Cassidy Garcia Photography
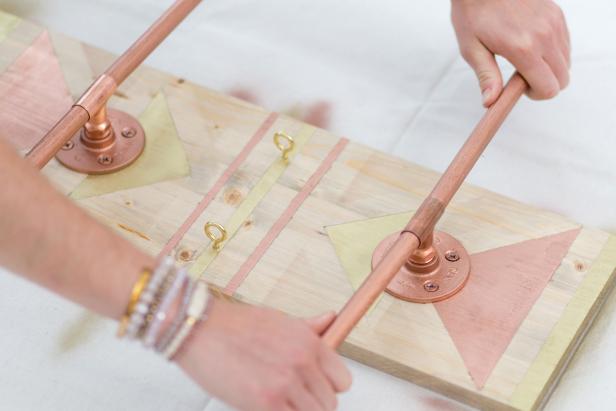
Once the epoxy has dried, gather the 5/8” x 8” dowel rods. Dab a small amount of epoxy on the end of one of the dowel rods, as well as the inner ring of the galvanized T. Then, insert the epoxied side of the dowel rod into the galvanized T. Repeat this step for the other three dowel rods and allow them to dry.
Cassidy Garcia Photography
Slide the final 12” dowel rod through the eye hooks to complete.

Cassidy Garcia Photography
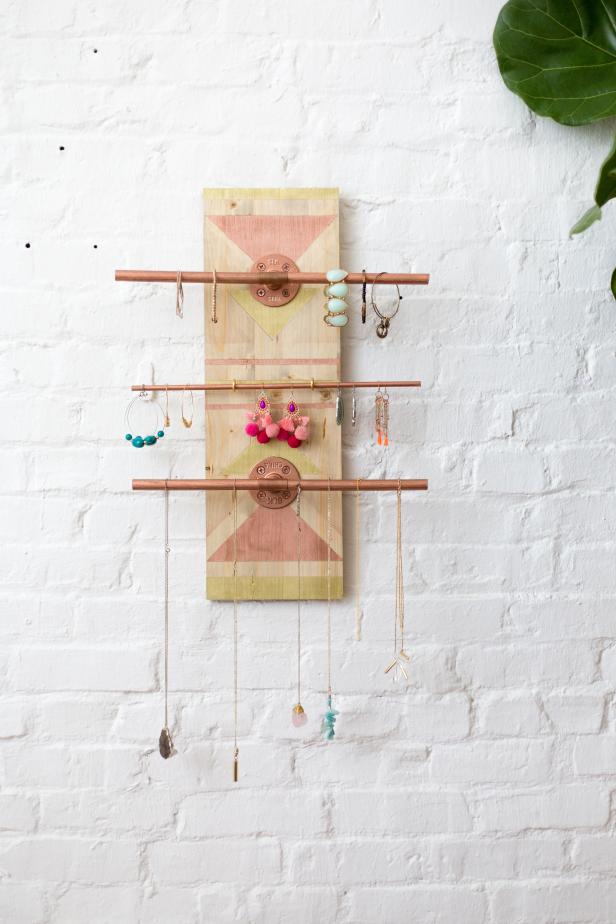
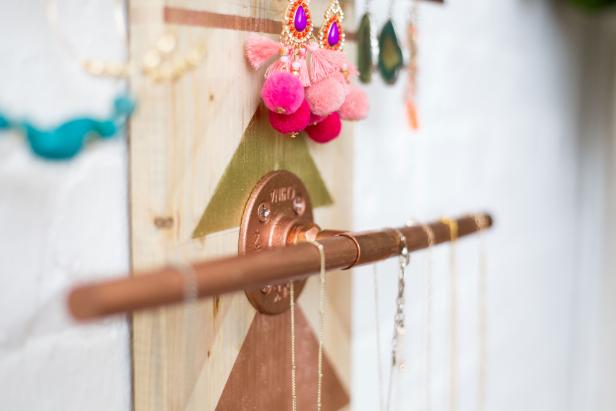
No more messy jewelry! Hang this stylish, affordable organizer on your wall, and find all of your favorite accessories with ease.
Cassidy Garcia Photography
Cassidy Garcia Photography


