


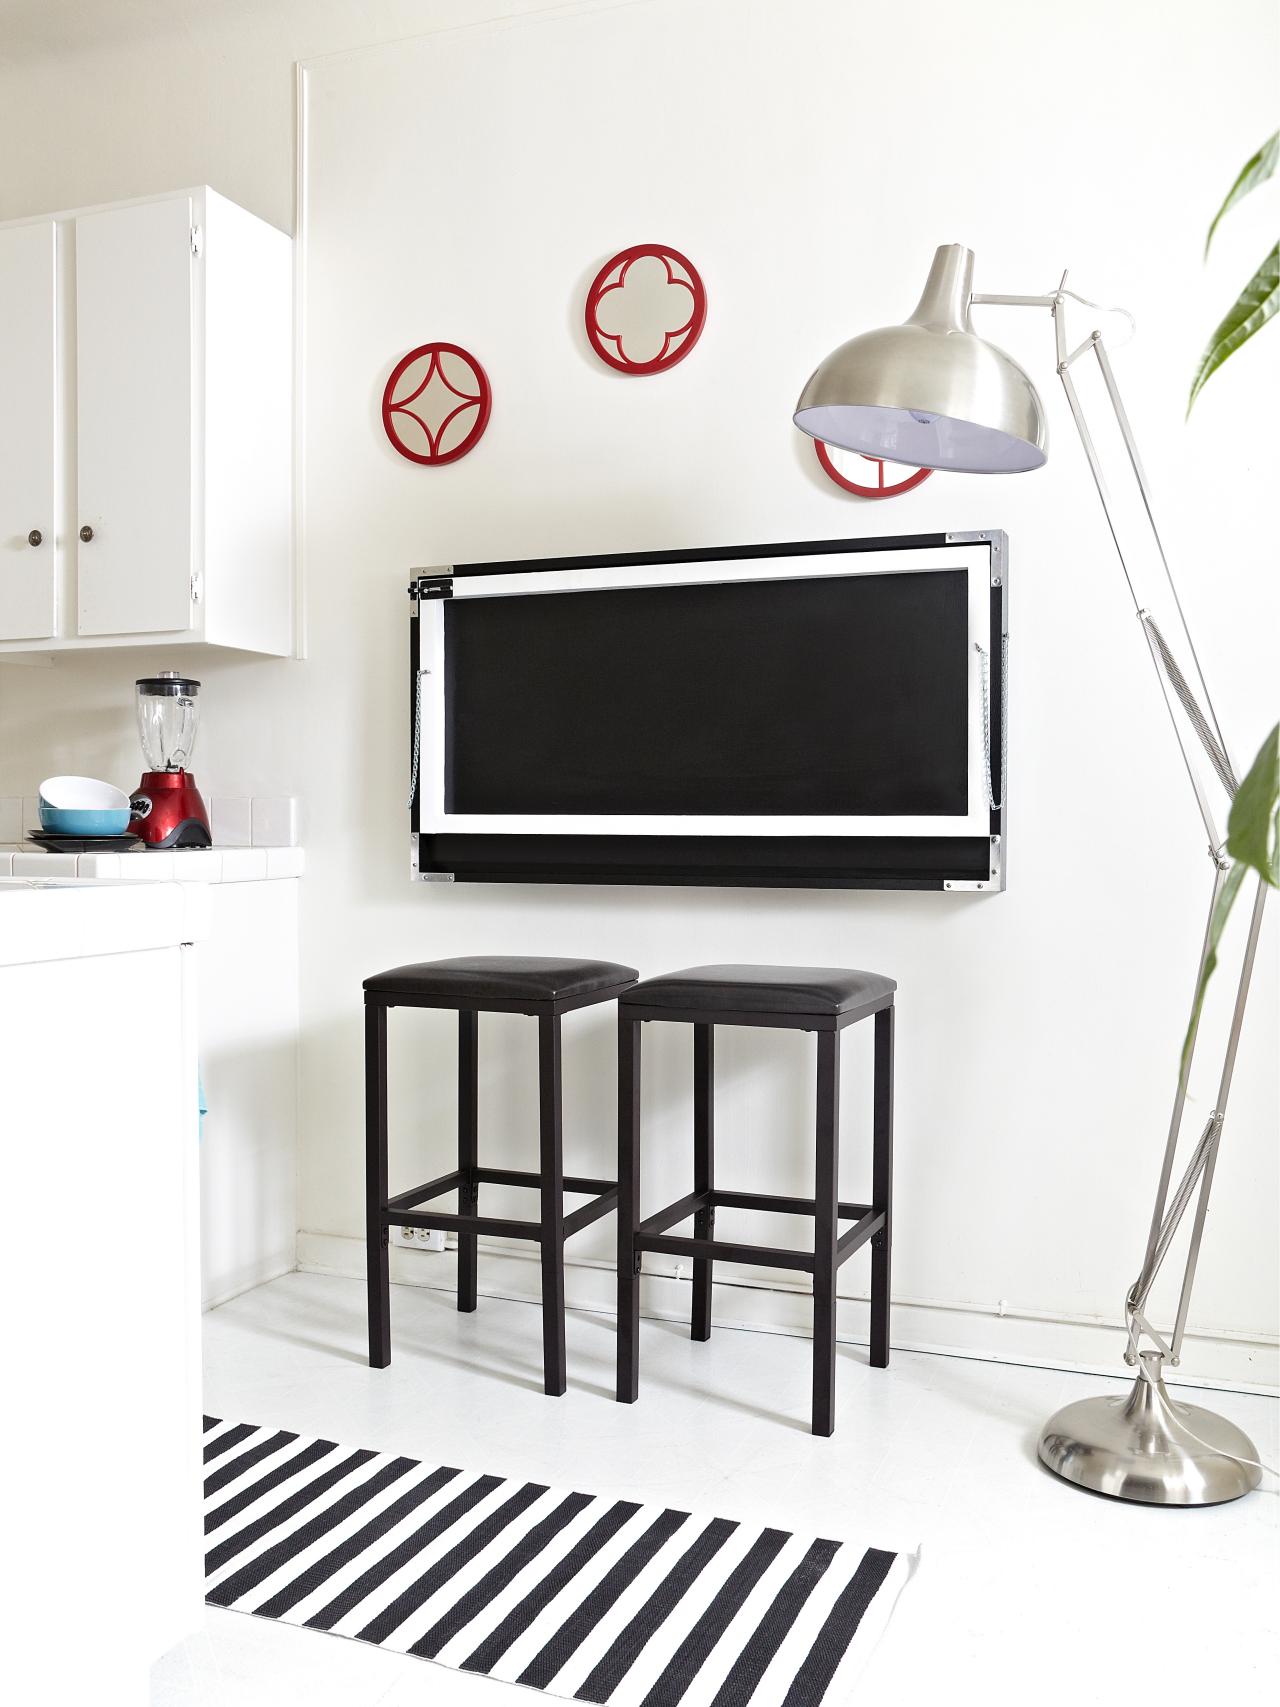
Build a Flip-Down Kitchen Table


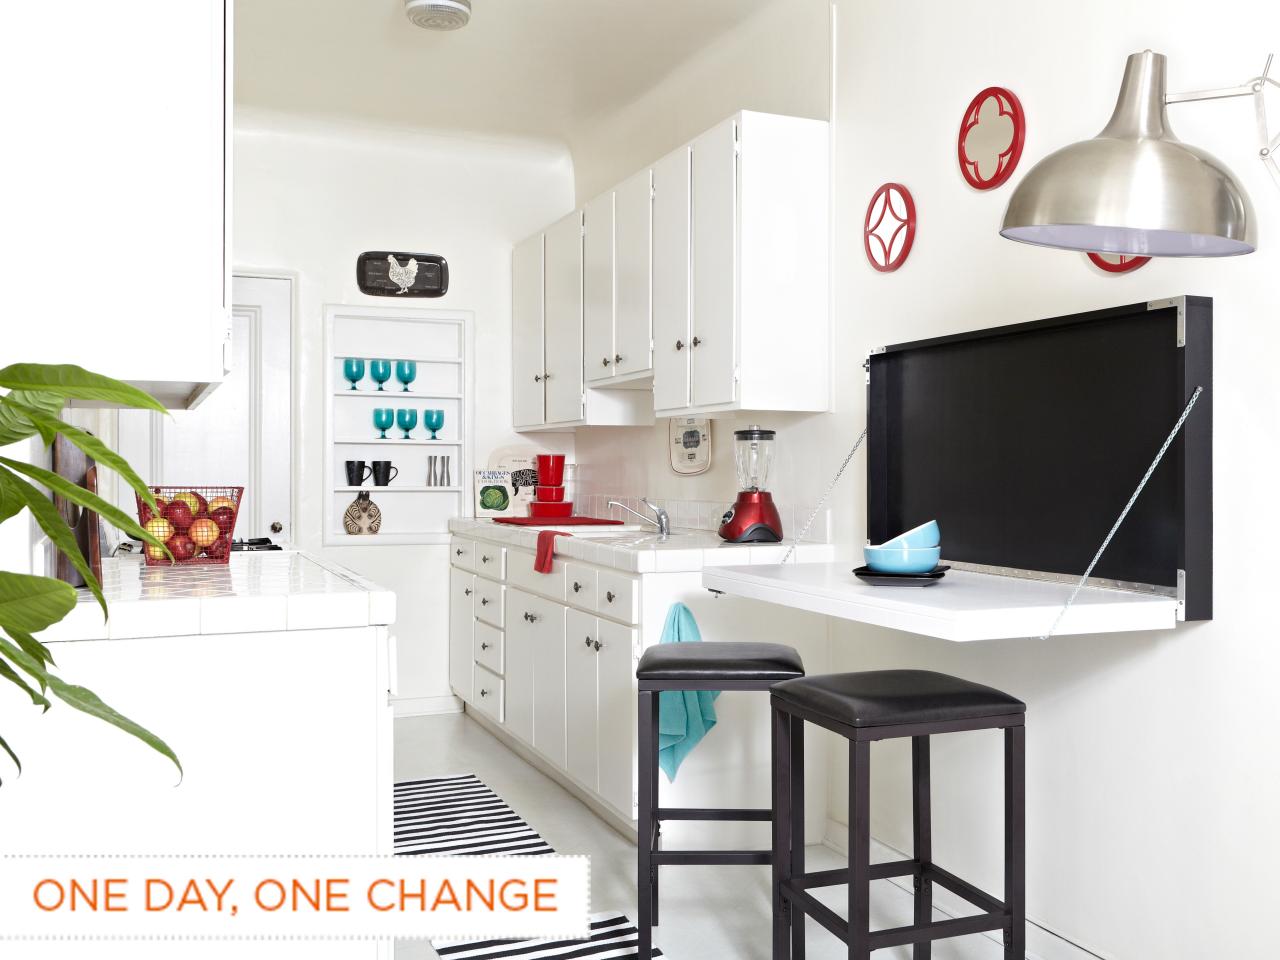
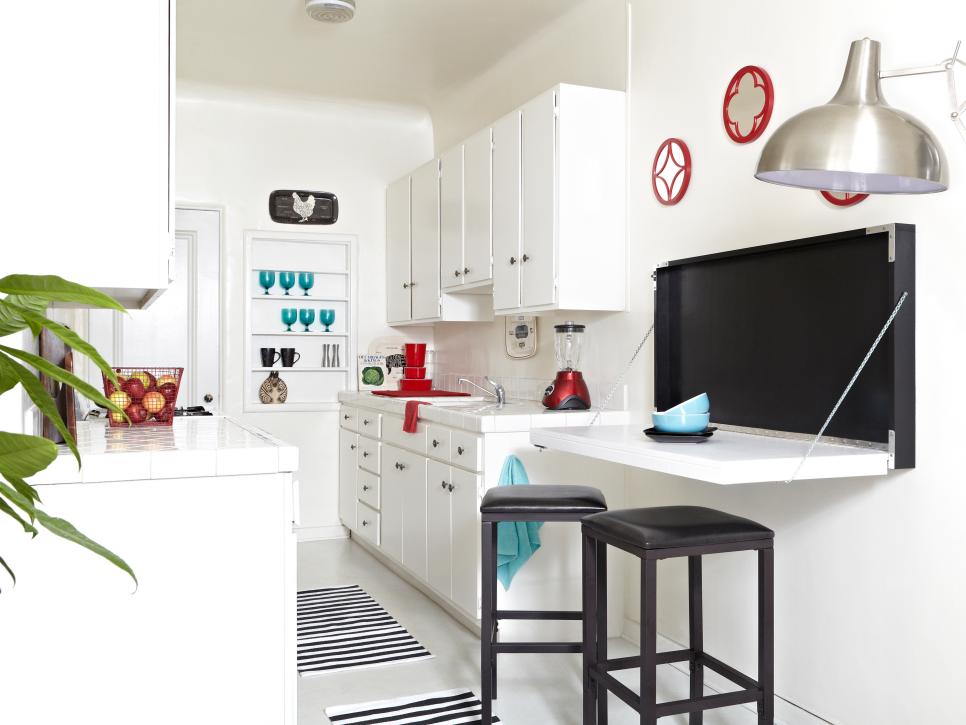
The two roommates in this 1920s apartment didn't stand a chance of fitting a standard-sized table in their tiny kitchen. In less than one day, and on a budget of $200, we created a simple fold-down dining table. I recruited a handy carpenter and friend, Thad Mills, to help out.


Get Started: Build, Paint and Mount
Determine the size of table you want to create. Anything around 22" to 24" deep is a good dimension for people to eat comfortably. This table seats two and is 23" deep and 47" wide.
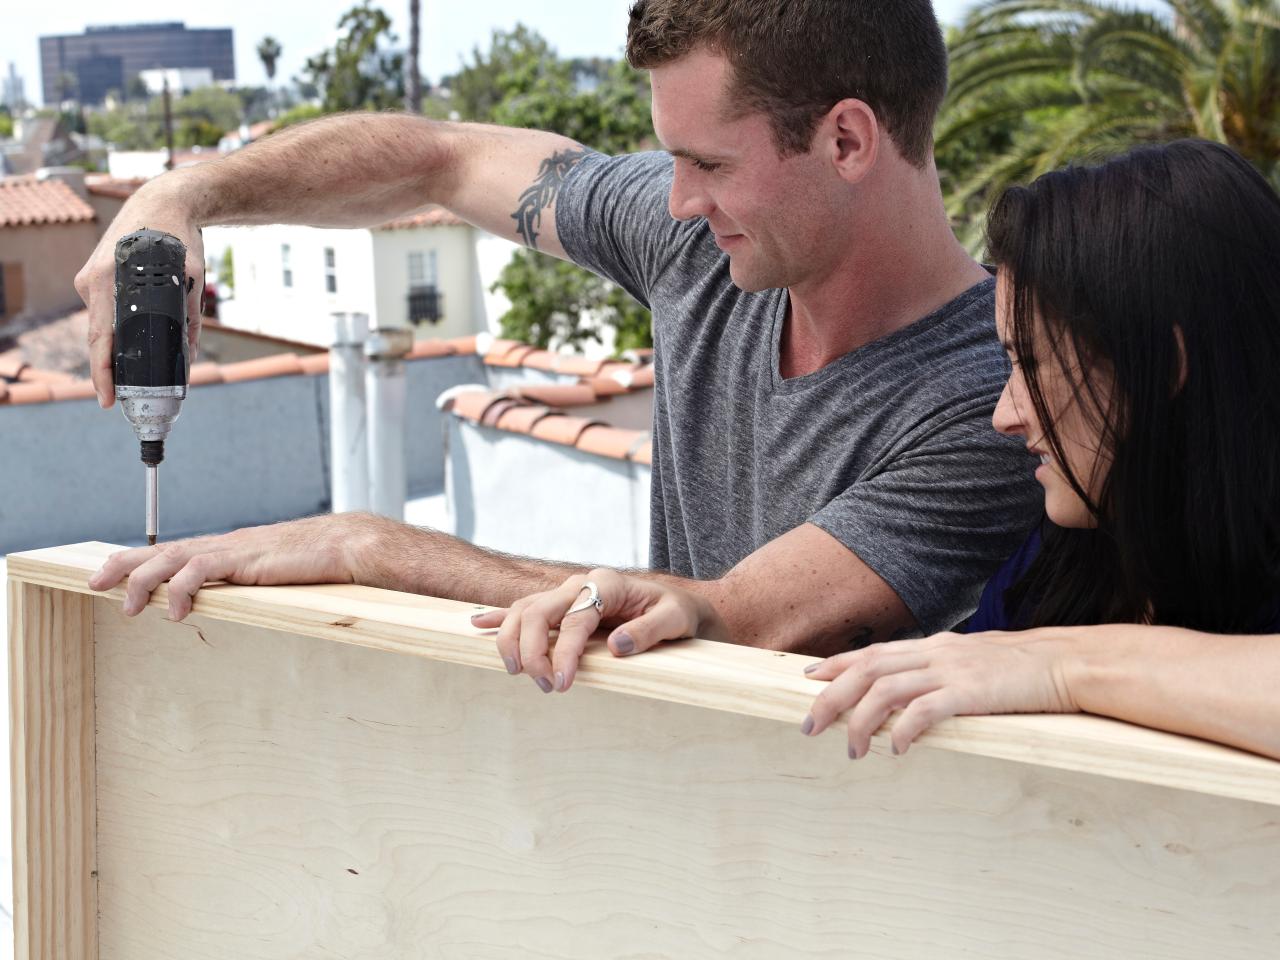
Build the Frame and Table
Transfer your measurements to a sheet of 3/4" plywood and use a 4' level or straight edge to connect marks to make straight cutting lines. For this table, we cut one piece at 48" x 24" for the back, and one piece at 47" x 23" for the tabletop.
Build the Table Wall Frame
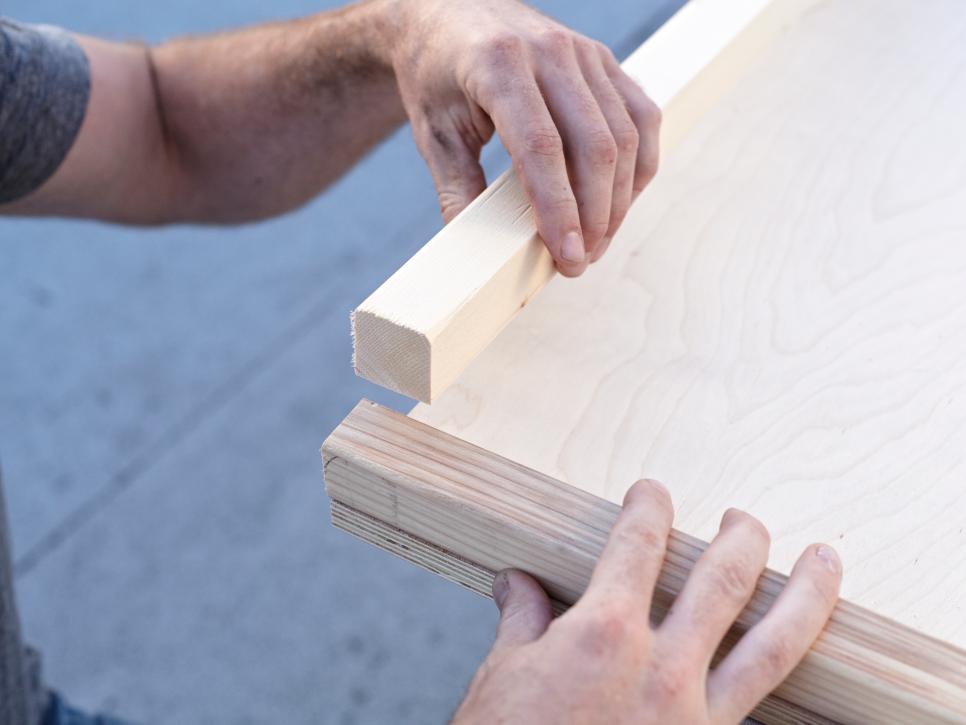
Use a circular saw to cut out the back of the table frame. Cut 1" x 4" pine boards to frame your plywood. For this frame, we cut two board lengths at 48" long and two board lengths at 22 1/2" long.
Apply wood glue to the edges of the plywood and attach the 48" boards first to the top and bottom, then the 22 1/2" sides to the perimeter using 1 5/8" screws.

Build the Table
This tabletop is made from a 23" x 47" cut piece of plywood. To avoid a flimsy tabletop, cut four pieces out of 2" x 2" pine boards and line the perimeter under the sheet of plywood. Our cuts are two pieces at 2" x 2" x 21 1/2" and two pieces at 2" x 2" x 47".
Apply wood glue to the edges of the plywood and attach the two 47" boards to the top and bottom, then the 21 1/2" sides using 1 5/8" screws.
Prep for Paint
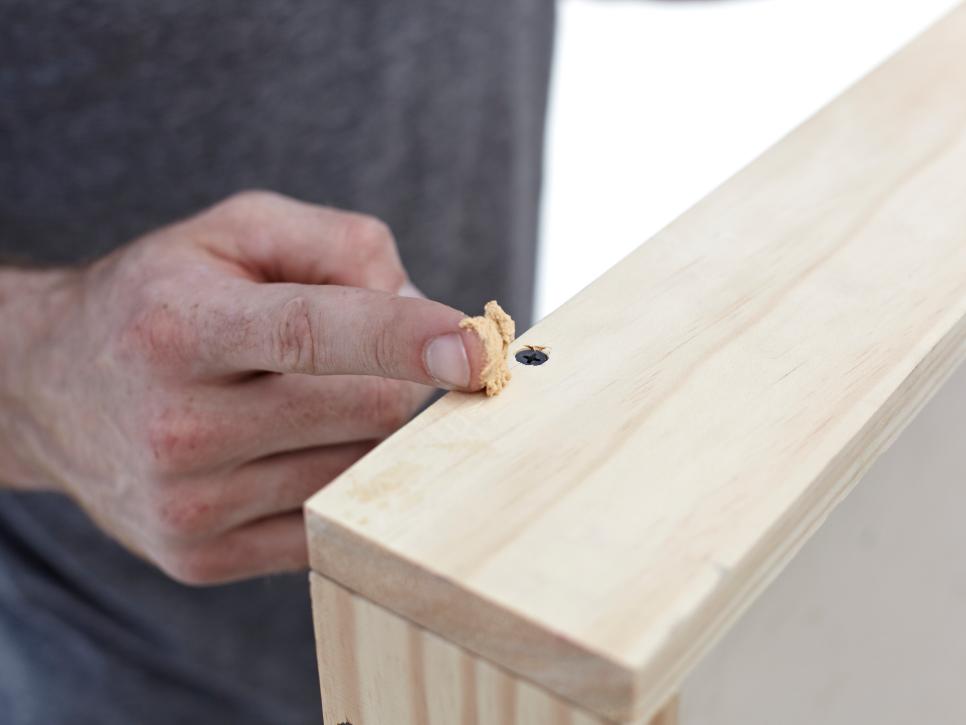
Sand all edges of the frame and tabletop until smooth and fill in screw holes with wood putty.
Paint the Table
Lightly sand wood putty to make an even surface. Prime all parts of the table, but try to avoid getting paint on the piano hinge. When primer is dry, paint your table the desired color. For the best protection against spills, use semigloss or full-gloss paint.
How to Build a Flip-Down Table
See All Photos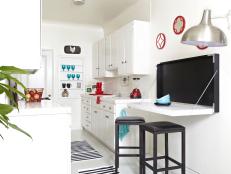


Mount the Table and Add Finishing Touches
Using the 4' level, measure and mark the wall where you want the table to be installed. Find the studs inside the perimeter of the frame outline.
Have a friend hold the assembled folding table on the wall over the marks and attach the frame to the wall where your studs line up with the frame on the top and bottom using 3-inch screws.

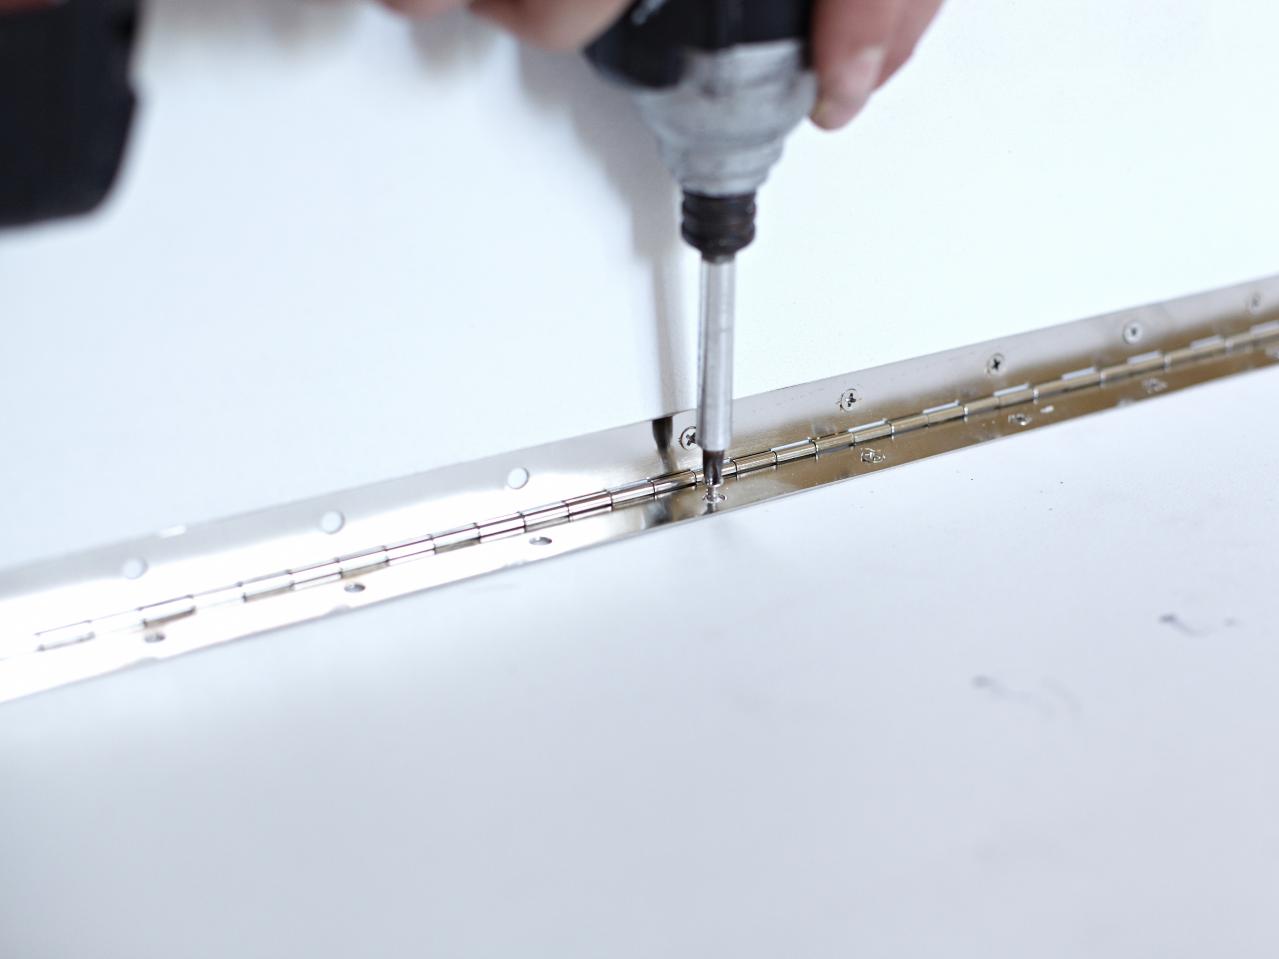
Attach the Piano Hinge
Cut piano hinge with a hacksaw to the length of your tabletop; it's easier than it sounds. Place the tabletop in the frame as if the tabletop is folded down in a finished state and screw the piano hinge to the back of the frame.

Attach the Support Chains
Let the table fold down until it is at a 90-degree angle from the wall and frame; attach the 25" chains to each side, starting with the top end of the chain, and attaching the bottom side where it has comfortable tension on the chain, supporting the weight of the table.
Install the Lock
Fold the table back up in the frame and install the gate lock on the top left- or right-hand corner to secure the tabletop to the frame when not in use.


