


How to Build a Window Box
Window boxes add charm and a splash of color to a home's exterior. This project is ideal for a novice DIYer and can be completed in a day.

Tools
- electric drill
- drill bits
- hammer
- tape measure
- clamps
- 2-1/2" sash brush
Materials
- 3/4" cypress or cedar boards
- 2-3/4" concrete screws
- wood filler
- 1 quart primer
- pressure treated 2x4s
- 1-1/4" exterior wood screws
- 1-1/4" rustproof nails
- medium-grit sandpaper
- 1 quart exterior paint (oil or latex, but same as primer)

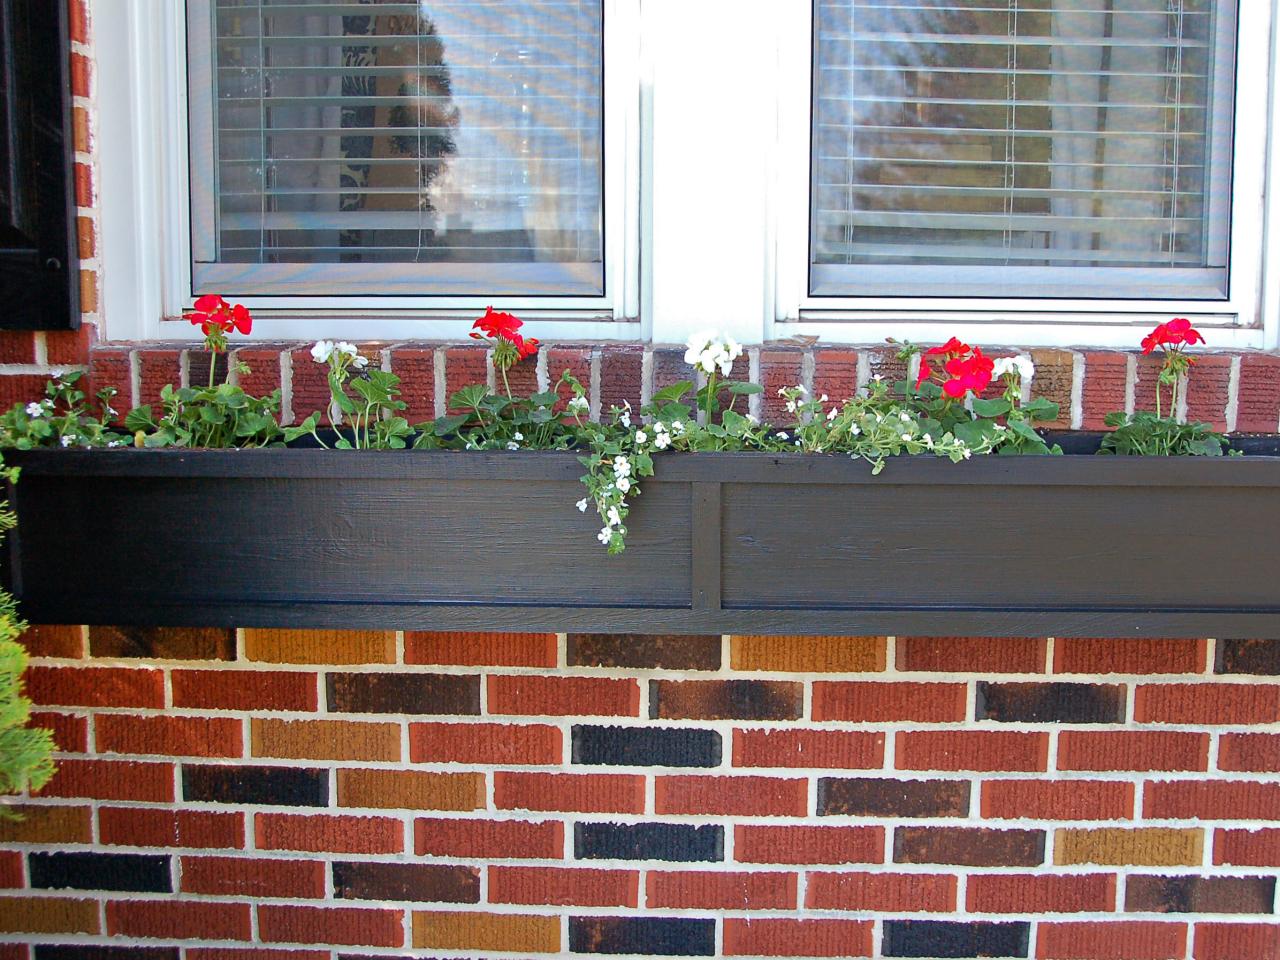
Exterior Shot of Window Box
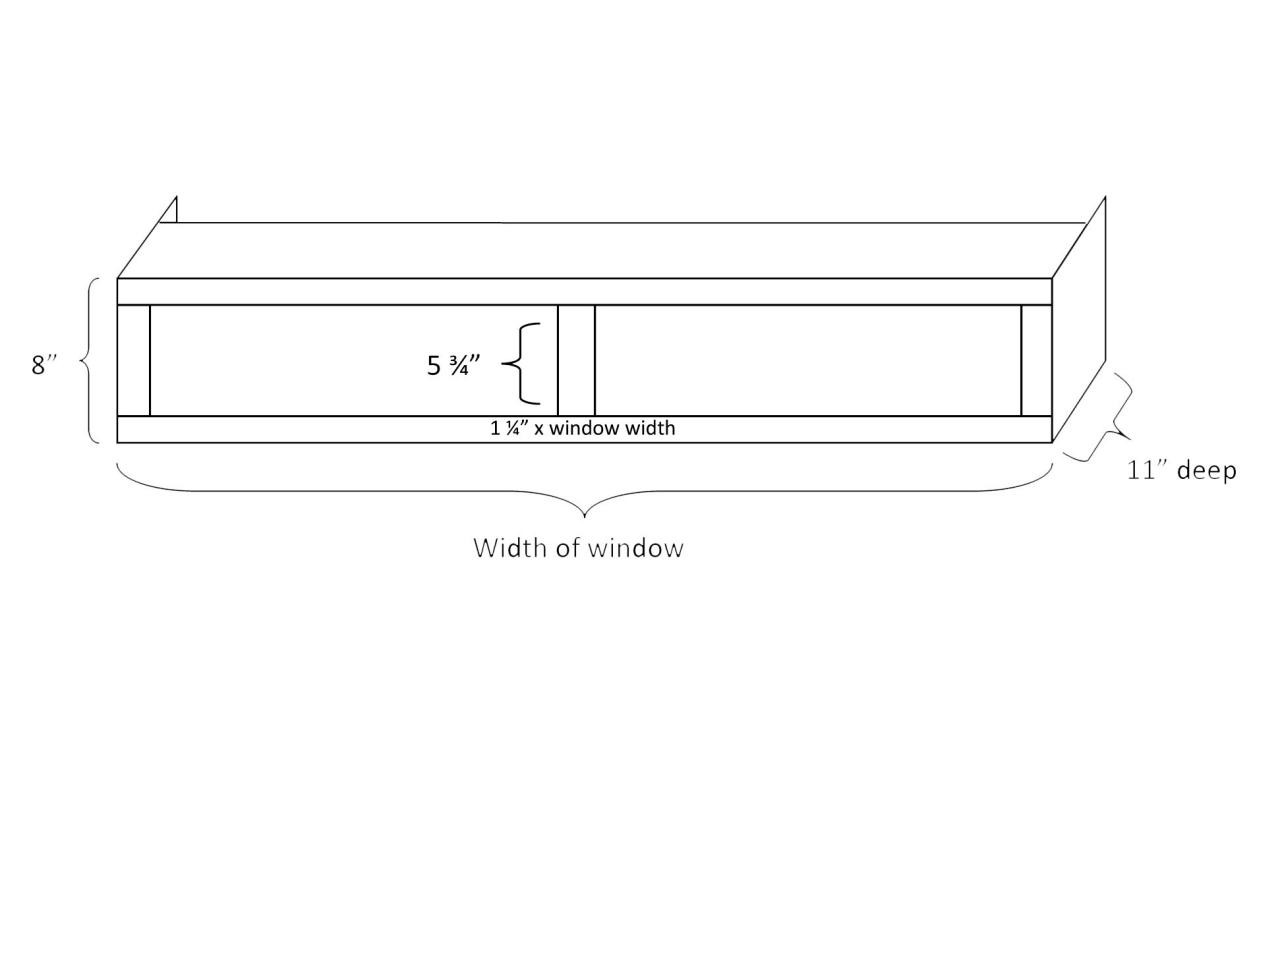
Step 1: Cut List
Cut 3/4"-thick cypress or cedar boards to following dimensions:
(3) 8" wide x window length
(2) 1-1/4" wide x window length
(3) 1-1/4" wide x 5-3/4" long
(2) 8" wide x 11" long
Cut 2" x 4" pressure-treated lumber into three (3) 8"-long pieces.
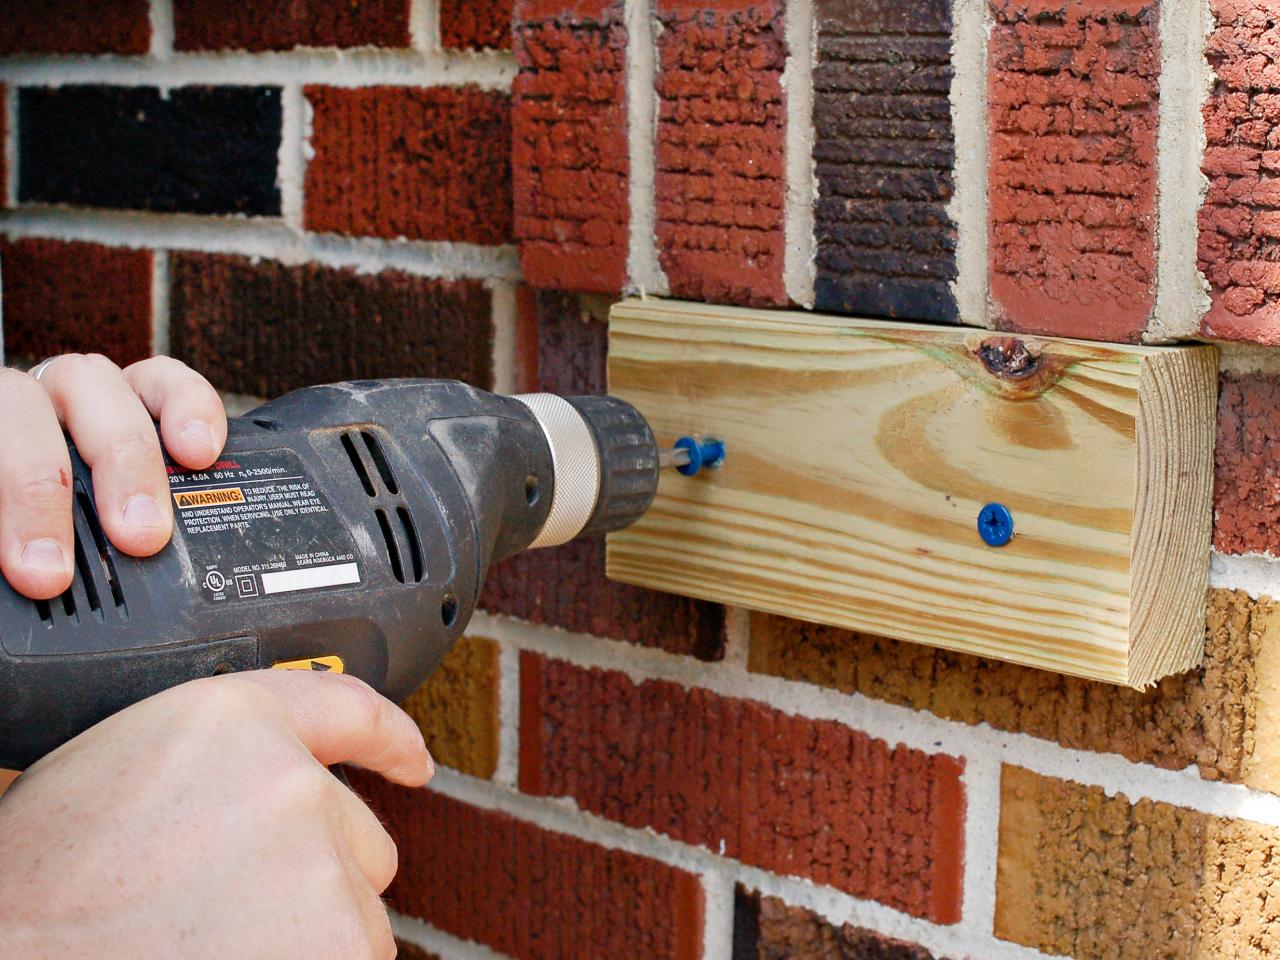
Step 2: Secure the Cleats


Window Box Template
Window Box Levels
Drilling in Screws
When it's full of plants and soil, a window box can be very heavy. The best way to mount it is to properly secure it to the exterior wall using cleats. To create cleats, cut three 8" pieces of pressure-treated 2x4. Hold the 2x4 tightly against the exterior wall and drill two pilot holes where you'd like screws (Image 2). Drive two 3/4" concrete screws through pilot holes to secure cleat to wall (Image 3). Repeat process on other cleats.
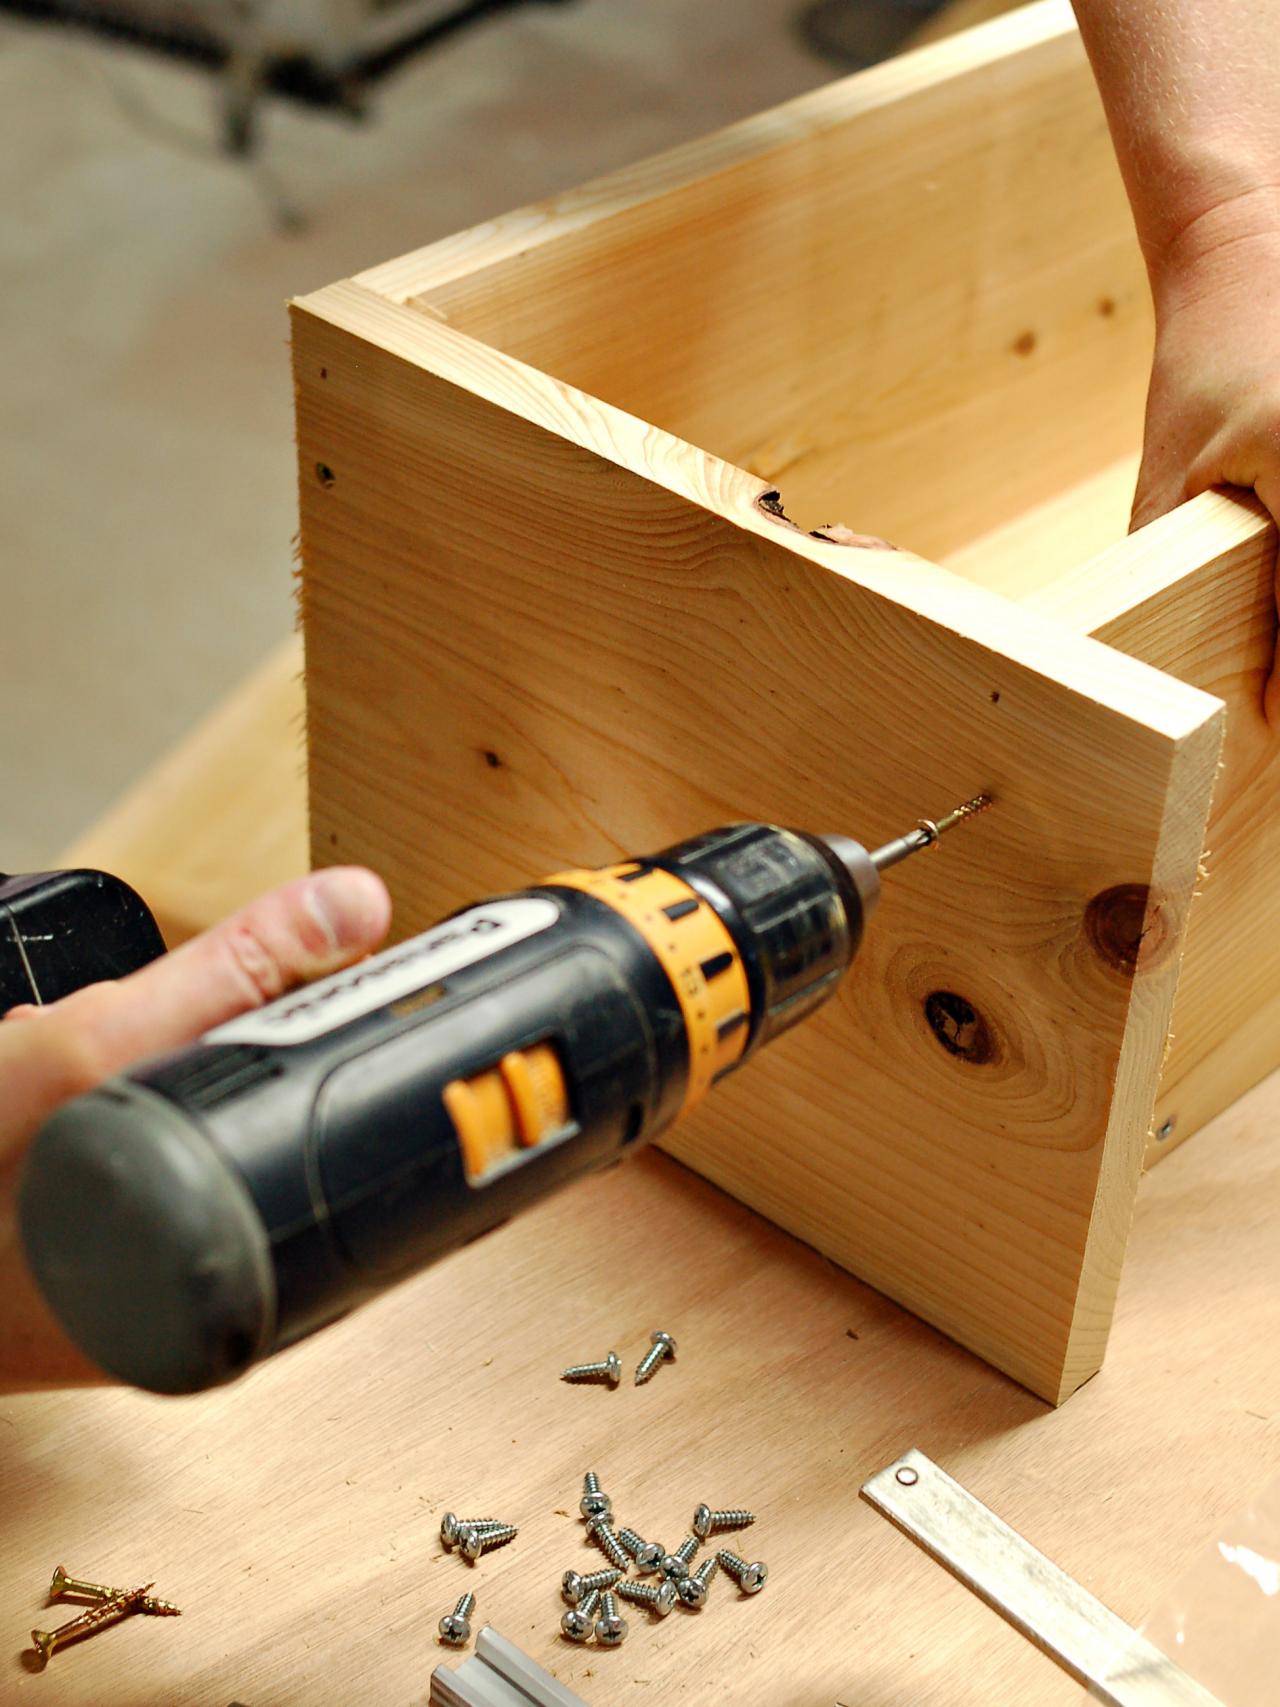
Step 3: Assemble Front and Back

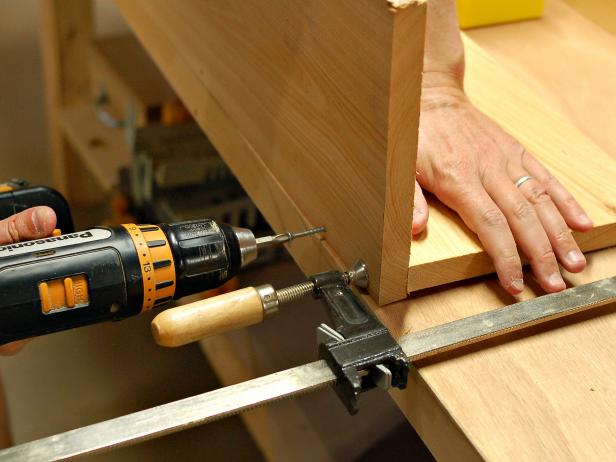
Place bottom of window box flat on work surface. Stand front of box on end and press tightly against side of box bottom. Clamp or hold in place, then drill pilot holes every eight inches using 1/8" drill bit (Image 1). Insert 1-1/4" screws into pilot holes (Image 2). Remove clamps (if used) and repeat on back side of box.
Step 4: Assemble Sides

Drill Needed for Window Box Project
When measuring dimensions of side panels, allow an extra 1-1/2" overhang on back side to cover up exposed cleat on house. Attach sides to planter using 1-1/4" wood screws.
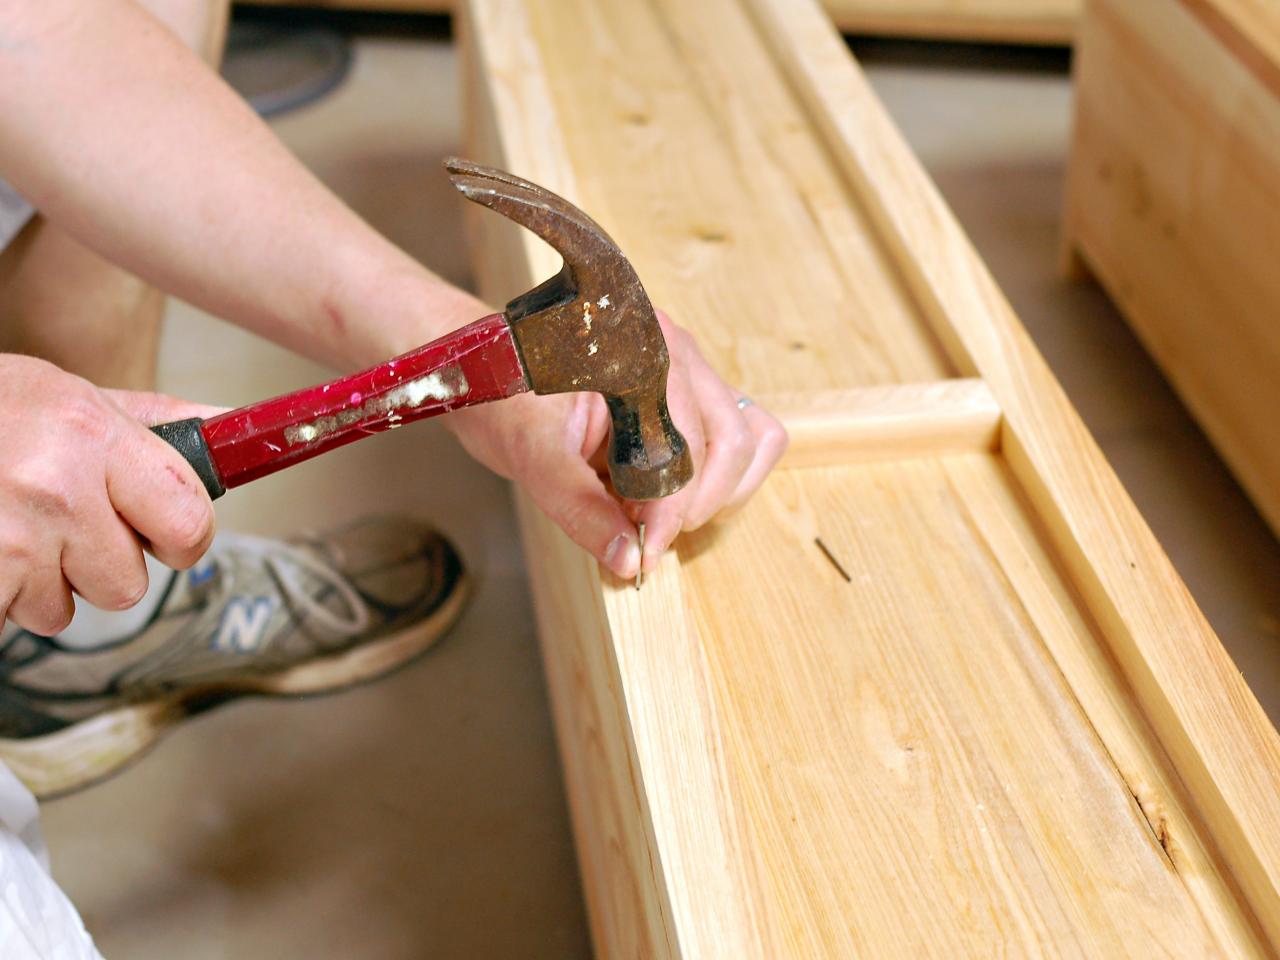
Step 5: Attach Trim

Cut two 1-1/4"-wide trim pieces to exact length of front panel of window box. Make sure that each trim piece is flush with top and bottom of front panel, then tap into place with nails. Position three 1-1/4"-wide x 5-2/4"-long pieces on left and right side of box and one centered. Tack into place with nails.
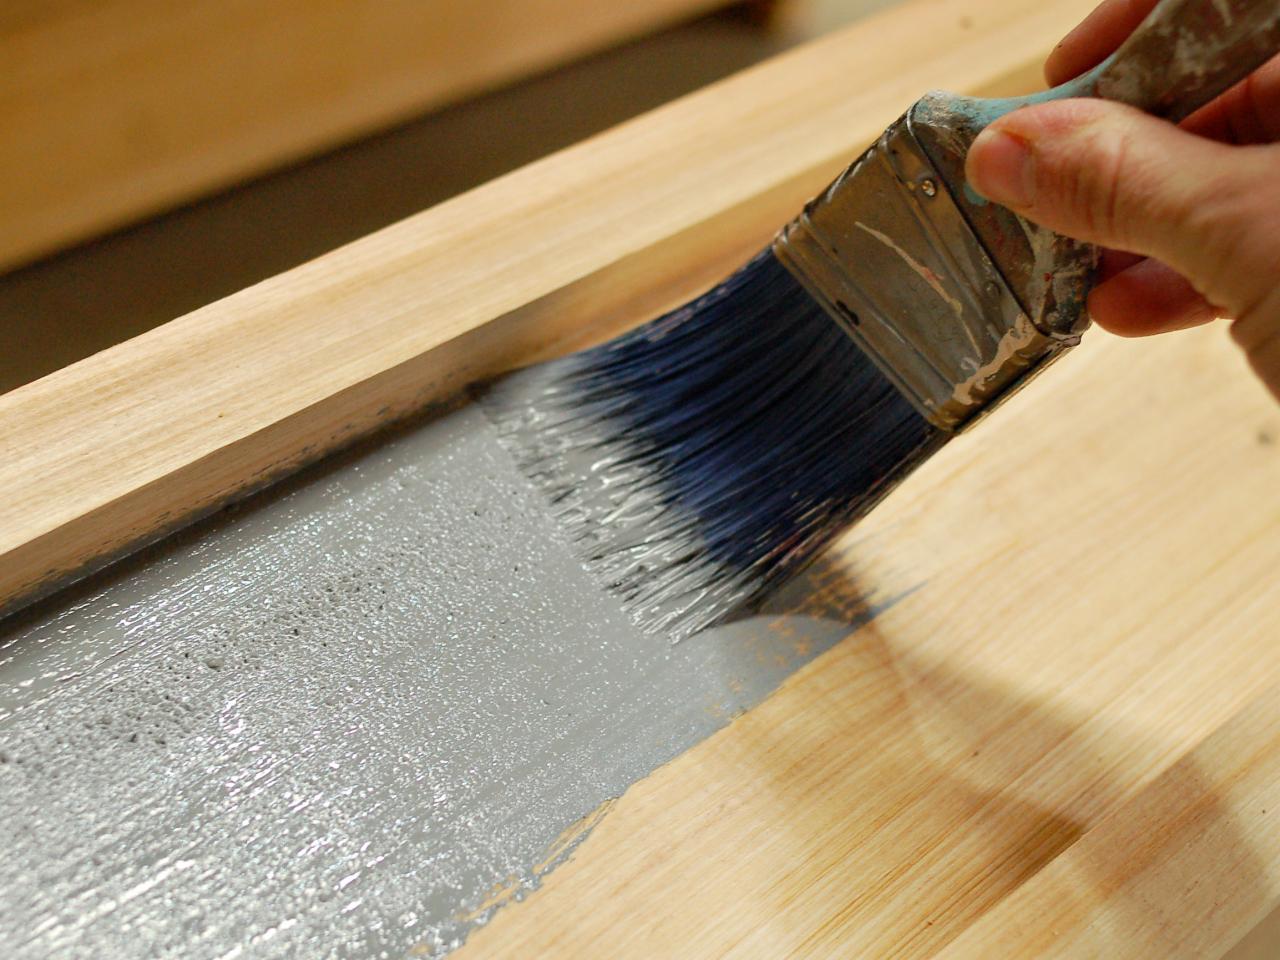
Step 6: Prime and Paint

Using a sash brush, apply primer to window box. If using a dark color like red or black, start with a tinted primer coat for better coverage. Allow primer to dry, then apply one to two coats of exterior semi-gloss paint.
Pro Tip: For a smooth finish on the window box, fill nail and screw holes with wood filler before painting. Allow to dry, then sand entire box with medium-grit sandpaper. As this is an exterior project, this finishing step is optional.
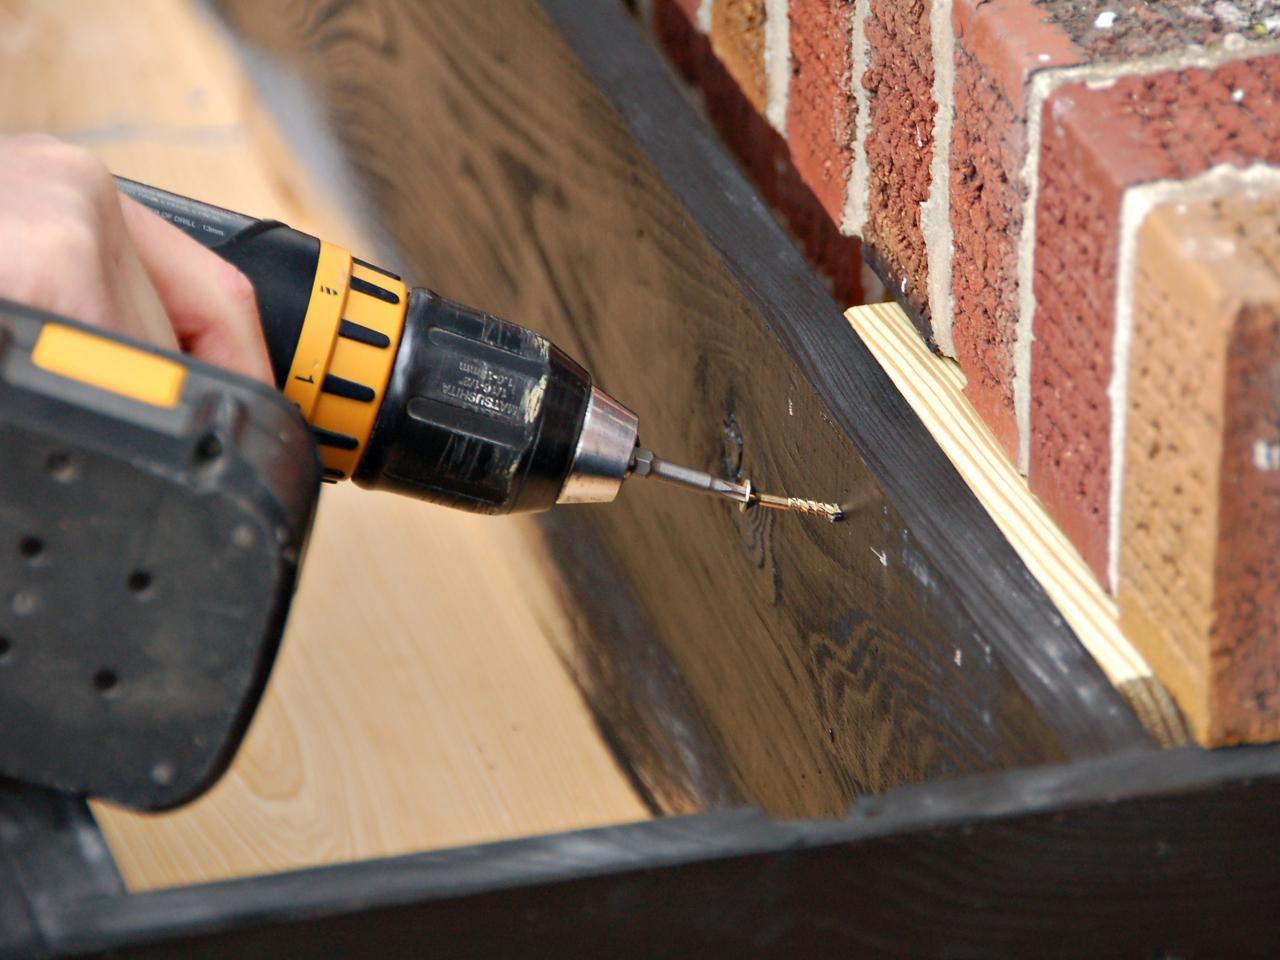
Step 7: Hang the Window Box

Holding window box in place against cleats, drive four screws through back panel into each 2" x 4" block.
Pro Tip: If you wish, decorative brackets can be added under the window box for additional support and architectural detail.
Step 8: Create Drainage

Using a 3/8" drill bit, drill holes straight through bottom panel to allow for drainage. Drill one hole roughly every six square inches.
Step 9: Fill Window Box
Add a 1" to 2" layer of gravel in the bottom of window box, to allow excess water to drain. Cover gravel with potting soil, filling box to about an inch from top. Add plants and thoroughly water.
More on Window Boxes

Window Box Edibles 14 Photos
Improve your views with window boxes brimming with garden-fresh flavors. Learn which edible plants grow best in boxes.

Window Box 101 10 Photos
Add views of gorgeous spring greenery inside and outside your windows with these simple window box planter tips.


