


The 10 Essential Steps to Planting Perennials
Get your perennials off to a solid start and they’ll reward you with many seasons of color.

Julie Martens Forney
Focus on perennials as the backbone of your garden, and you’ll savor a show of flowers, textural leaves and eye-catching seedheads. Perennials offer a wide range of diversity, from the amount of sunlight they prefer to bloom time. But there’s one thing they all have in common: They grow best when they’re planted correctly. By honing your planting technique, you give your perennials a strong foundation, which is key to everything that comes after.
Technically, you can plant perennials any time your soil is workable. Practically, the best times to plant perennials are spring or fall. These seasons allow plants to get settled and grow new roots before summer’s hot, dry weather arrives. Planting in summer is okay, but you’ll need to water frequently. By planting in spring or fall, you work with nature’s cycles to give plants ideal growing conditions. Follow these 10 simple steps for successful planting.
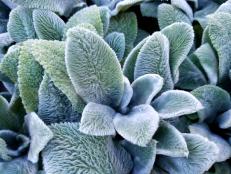
1. Buy Your Plants
Gather the perennials you’ll be planting. If you’re installing a new bed, try to assemble as many of the plants as you can to make the process smoother. Smaller perennials in 4-inch pots cost less and catch up to larger perennials within one year after planting. The best time to buy perennials is in fall, when garden centers are trying to reduce inventory before winter. You’ll often find BOGO deals at this time of year.

Julie Martens Forney
2. Prepare Soil
Add as much organic matter to your planting area as you can. Use things like compost, old leaves, mushroom compost, shredded bark mulch, bark fines or composted manure. Perennials live in the same spot for many years. Adding lots of organic matter creates a base that helps plants thrive. Tackle this task a few days, months or even a whole season ahead of planting. Many gardeners prep soil in fall and follow with a spring planting. If you can take the heat, prepare soil in summer for fall planting.
3. Test Your Design
If you’re planting a bed, arrange plants in the beds prior to planting. Try to do this a few days ahead of planting, so you can tweak the design as needed. This gives you a chance to observe the garden layout at different times of day and from different vantage points — inside and out. Keep plants watered while pots are out in the bed.

Julie Martens Forney
4. Water the Plants
Water the perennials you’ll be planting before you start digging any planting holes.
5. Dig Planting Hole
Dig a planting hole that’s slightly deeper than the pot the plant is in and twice as wide. Toss a handful or two of organic matter into the hole. If the soil in the bed is dry, water the hole prior to planting. When planting a large bed, dig planting holes one at a time to prevent soil in the hole from drying out once it's uncovered.
6. Tease Roots
Remove the plant from the pot. If roots are thick and heavily conformed to the pot shape, tease and break up the base of the root ball. This encourages new roots to form. Toss broken roots and soil into the planting hole — it adds organic matter.

Julie Martens Forney
7. Check the Depth
Set the plant in the hole. Look to make sure you have it facing the way you want (many plants have a better side, especially if they were in a crowded display). Check the planting depth. Aim to position the plant, in the hole, so that it’s at the same depth it was in the pot. Avoid burying the crown, the spot where roots and stems meet. An easy way to test planting depth is to lay a stick or tool across the planting hole from surrounding soil to the perennial root ball. A level tool equals success.

Julie Martens Forney
8. Fill the Hole
Mix organic matter like compost into the soil you excavated from the hole. Add a little granular low-nitrogen organic fertilizer if you want. Toss it all together like a salad, and begin to fill the hole. When the hole is halfway filled, water to help settle the soil. Finish filling the hole, gently firming the soil around plant. Use your hands for this task, not your feet.

Julie Martens Forney
9. Water In
Water the newly planted perennial. Soak soil thoroughly, so that water soaks as deeply as the root ball.
10. Mulch
Cover soil with a 2- to 3-inch layer of mulch. Perennials thrive with organic mulch, like compost or triple ground shredded hardwood bark mulch. This type of mulch breaks down over time, helping to nourish and build soil. Avoid piling mulch against perennial plant stems or covering the crown (this leads to rot). Keep mulch pulled back from around perennial stems so it forms a donut with the plant in the hole.
Watch 'Em Grow
Perennials establish well and grow quickly when you take the time to prepare soil and plant carefully. This photo shows that little 4-inch perennial after one growing season. The plant shown in this story is Liatris pycnostachya ‘Eureka,’ also known as prairie blazing star. It’s the tall plant with the purple spikes in the foreground of the photo.

Julie Martens Forney
This next photo shows the same plant during its second growing season. The number of flowering stems doubled from Year 1 to Year 2, and each stem was thicker. The first year flower stems were thin, spindly and needed staking. The second year, they stood on their own. The rapid increase in size is due to careful soil preparation and good planting technique. It’s a one-two punch guaranteed to make perennials thrive.
Julie Martens Forney


 Growing in a garden")


")


