


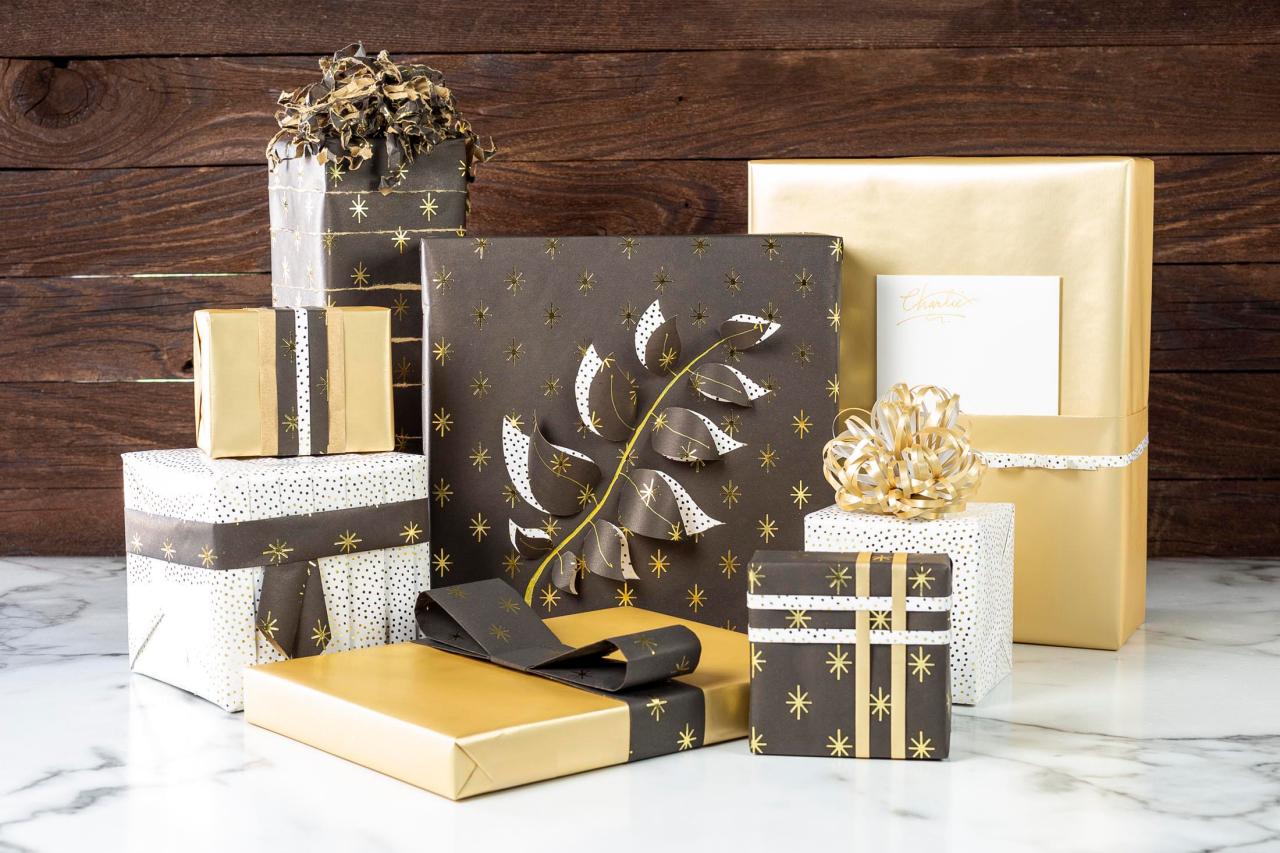
8 Designer Tricks for Gifts That Are Dressed to Impress
Make the most out of your wrapping paper with creative wrapping techniques and handmade embellishments ... no extra bows or ribbons needed!


Save the hassle and expense of buying spools of ribbon and pre-made bows. By carefully selecting coordinating wrapping papers, you already have everything you need to create beautifully wrapped packages. Start by deciding on your color scheme. Then choose one solid, one larger print, and one smaller print. The common dotted guides on the back are great, but if you can find at least one paper with a solid back it’s like getting two papers in one. Then let your imagination take control. For a little inspiration, we offer the following simple techniques.
Materials Needed:
- 3 coordinating wrapping papers
- scissors
- tape
- pencil
- ruler
- craft knife
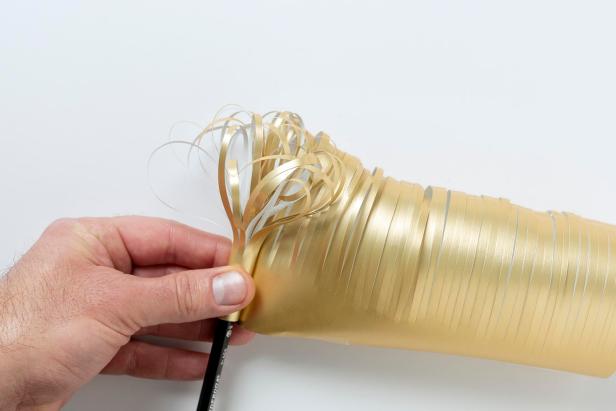
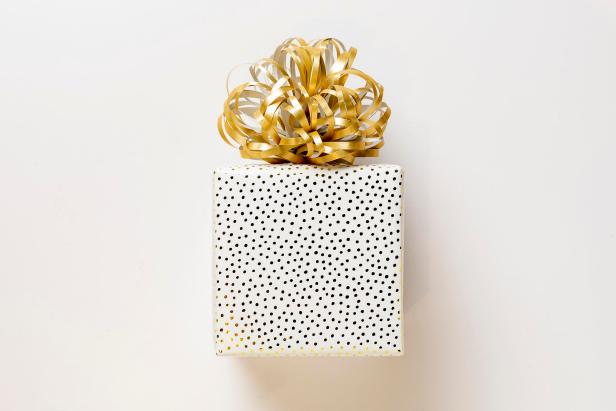
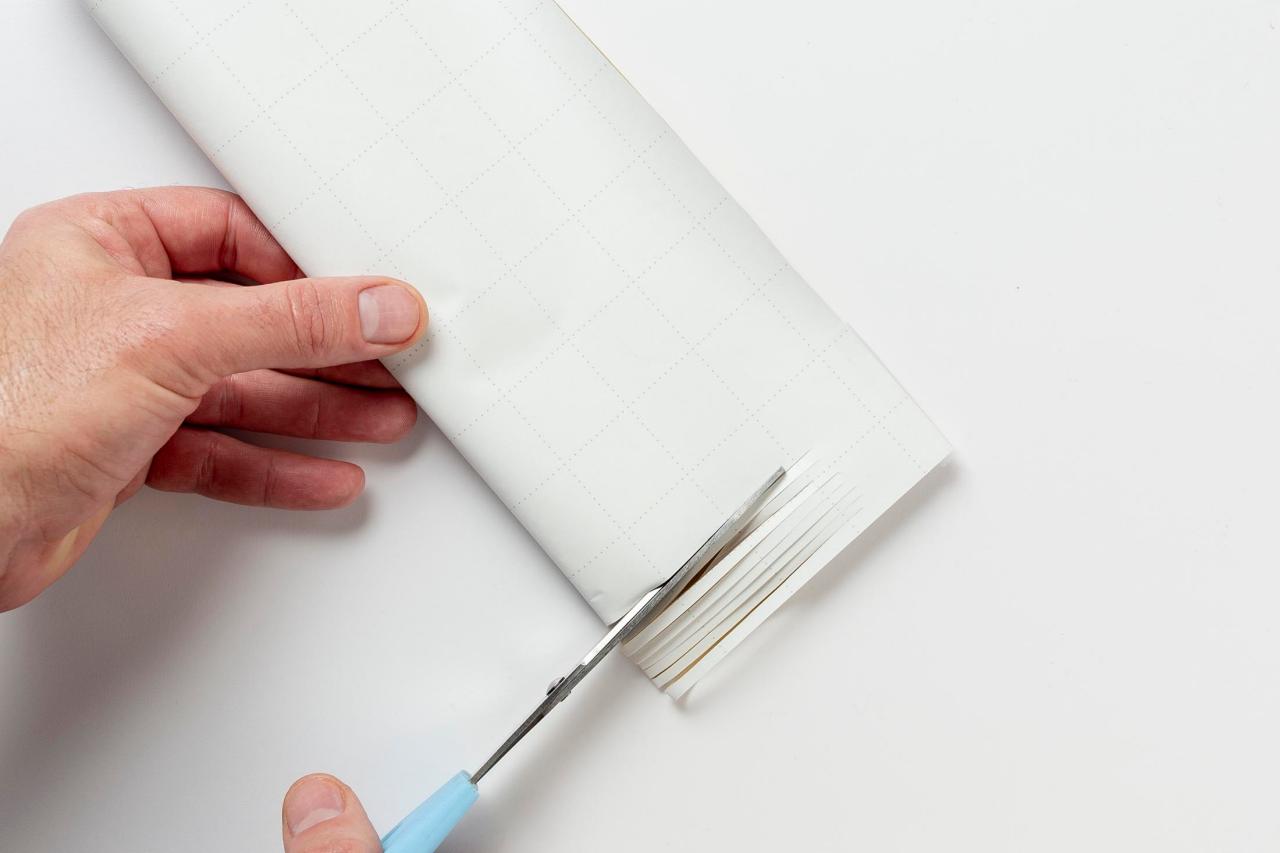
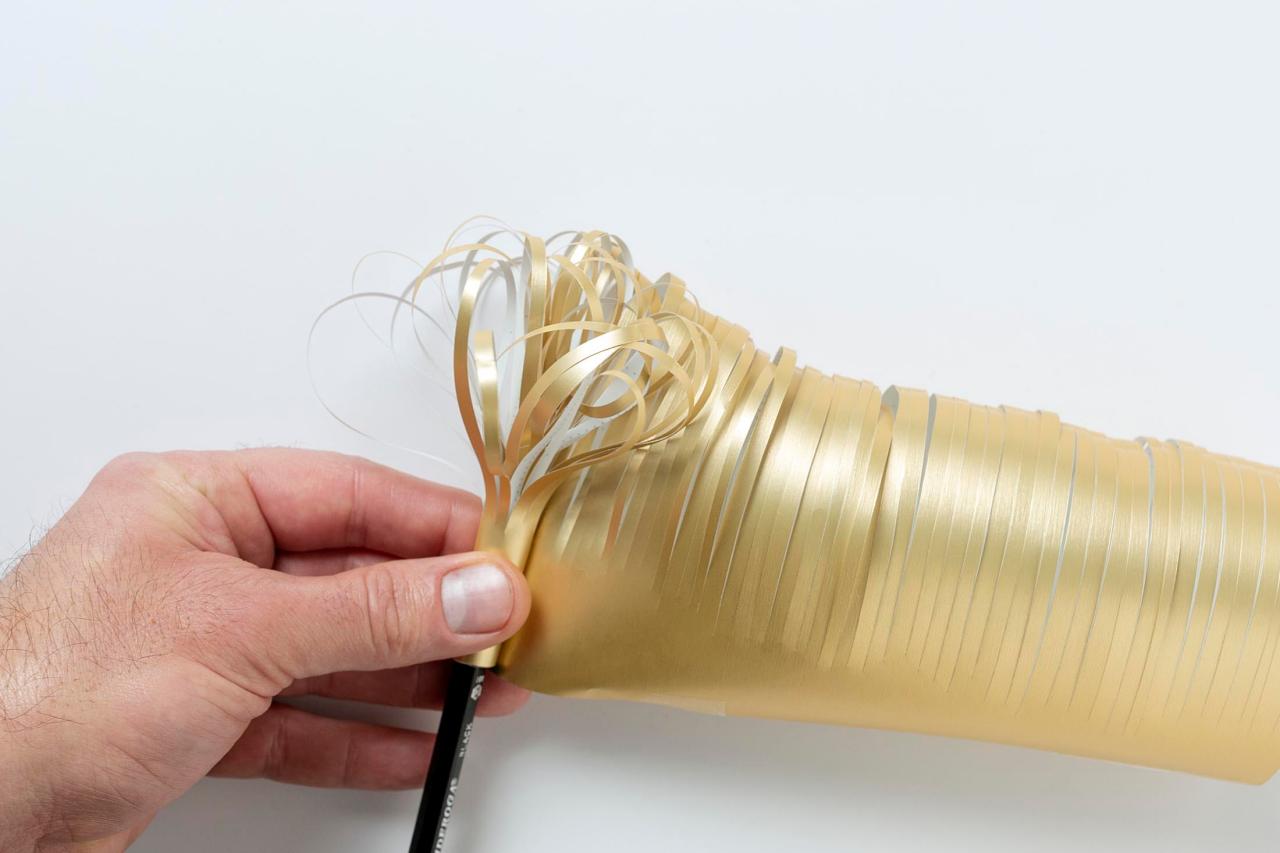
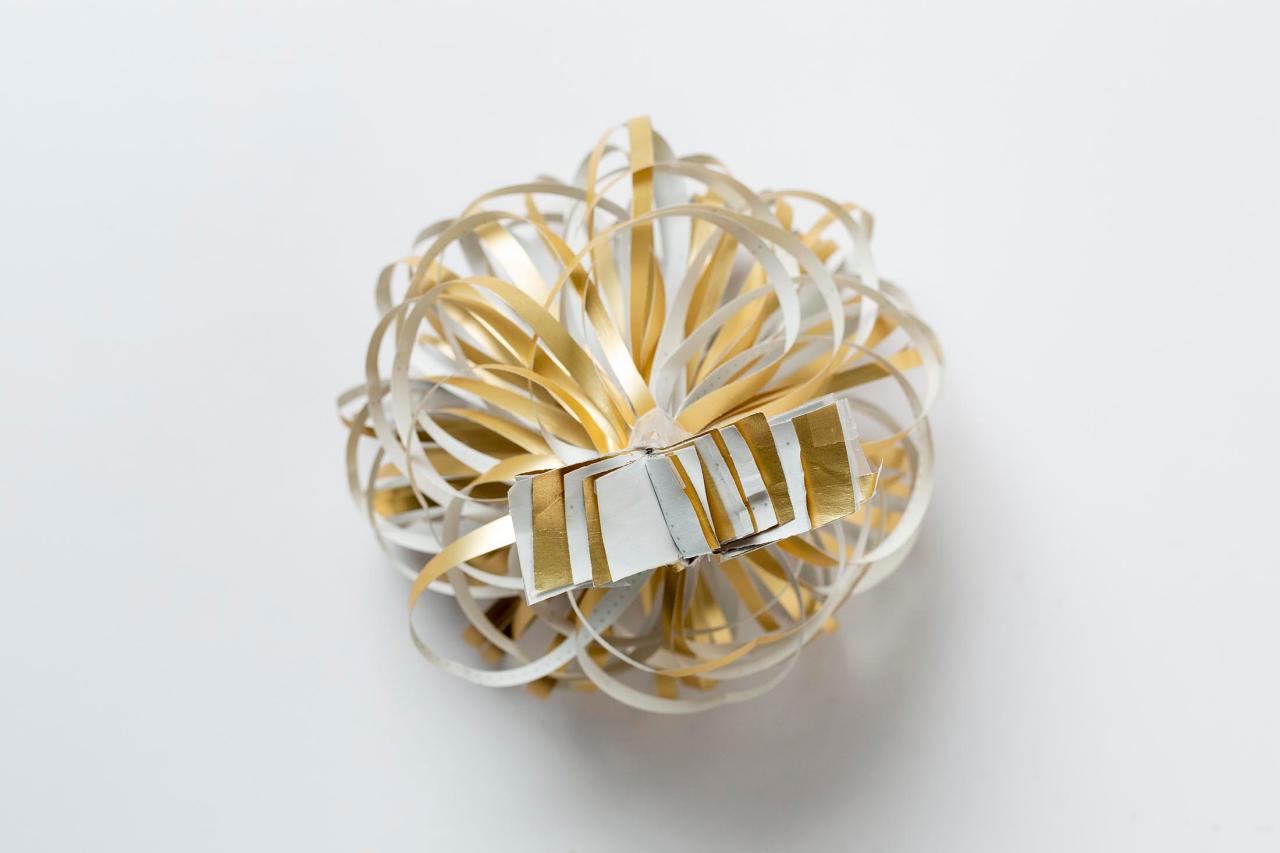
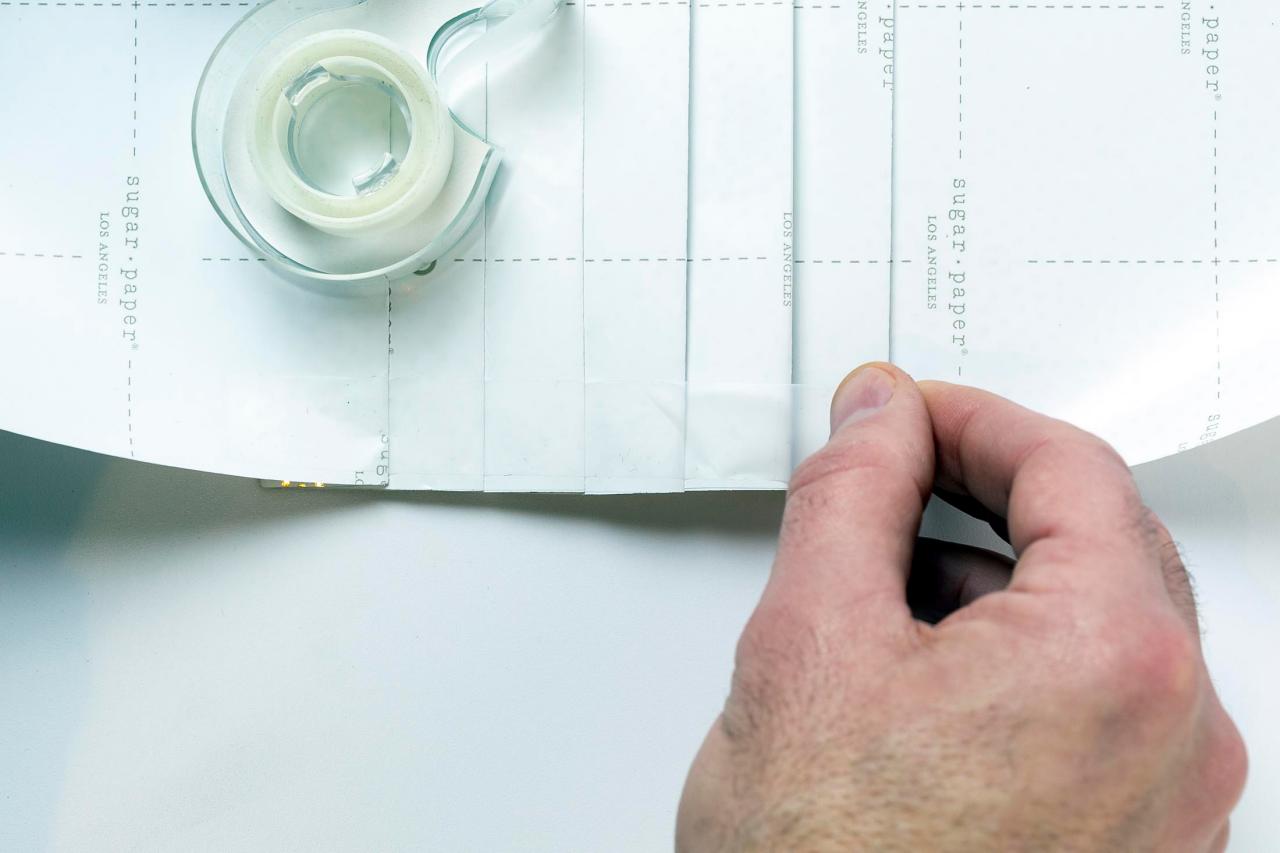
Bows: Looped Bow
Cut a piece of wrapping paper to the size of letter paper. Fold it over lengthwise (Image 1) with the good side facing in. Tape the corners together with a small piece of tape that you will remove later. Cut thin lines along the entire folded edge to about 1" from the open edge (Image 2). Carefully remove the tape from the corners and open the paper. Gently bend out any creases that have occurred. Fold the paper again with the good side facing out. Tape the corners again to keep everything aligned. Starting at one end, roll the paper around a pencil tightly (Image 3). At the other end, tape the roll together, press the roll together with your fingers and cut a line on both sides with scissors. Bend the two flaps outward (Image 4) and use them to attach the bow to the package with tape (Image 5).


Bows: Wide Bow
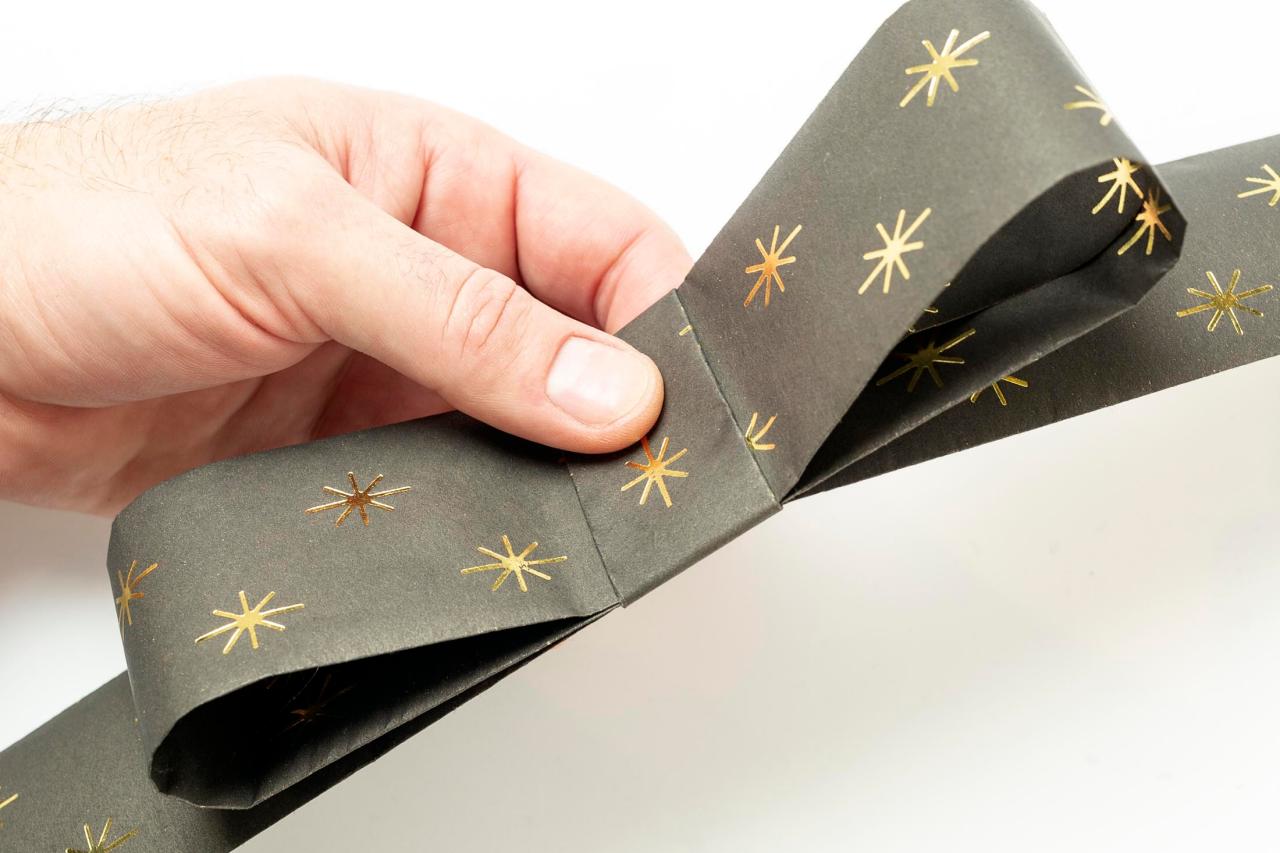
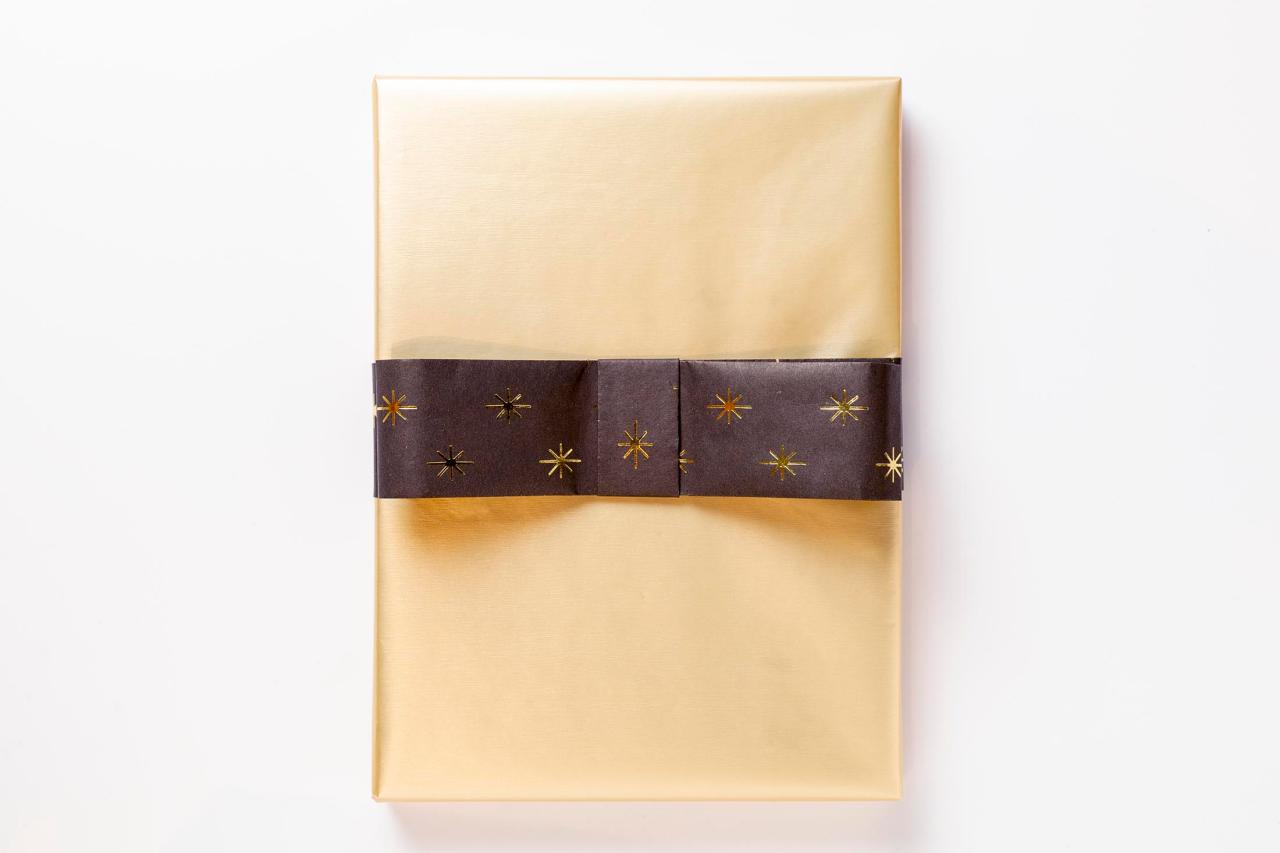
Cut a long strip of wrapping paper 8-1/2" wide. Fold it over at 3" lengthwise and then fold it over again (Image 1). Cut the band long enough to wrap around the package. Use the remaining band to make a loop for the bow. Repeat the band making process with a piece of wrapping paper that is 4" wide and fold it over at 1-1/2". Cut a piece of the smaller band to wrap around the loop and ribbon at the center of the ribbon. Tape it in place on the back of the ribbon (Image 2). Attach the ribbon to the package by taping it in the back. Use your fingers to finesse the bow and make round loops at the ends (Image 3).


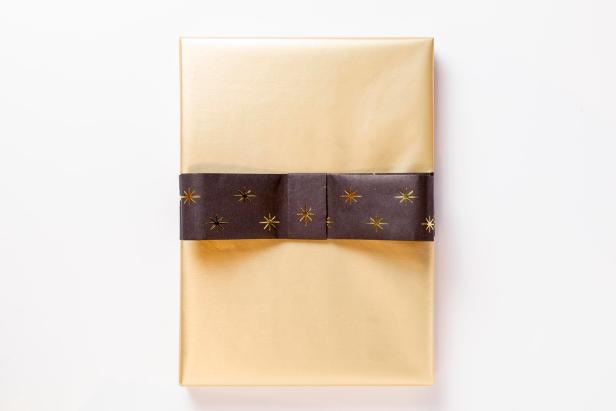
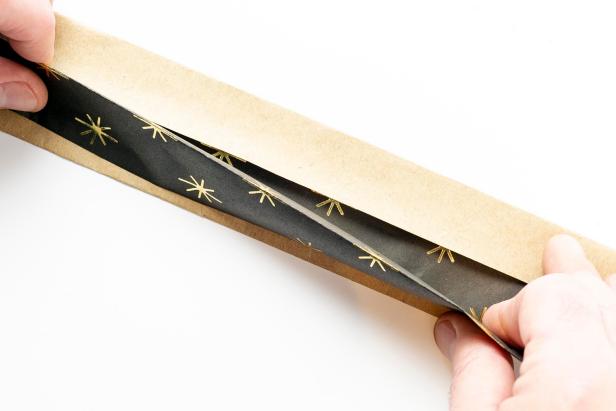
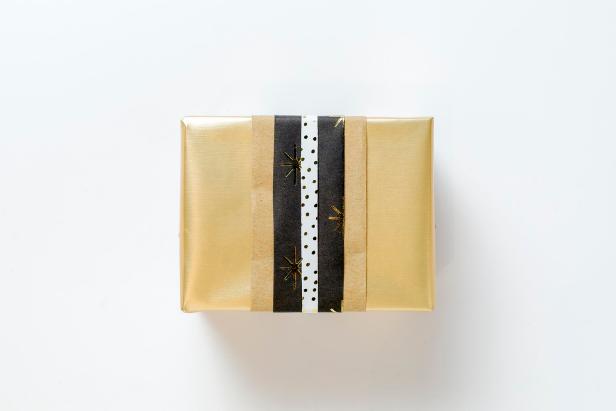
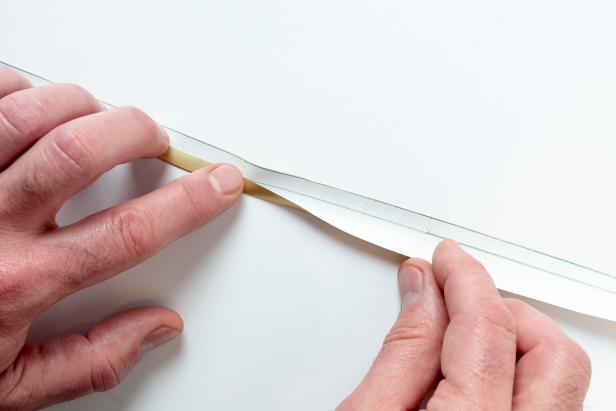
Ribbon: Two-Sided Ribbon
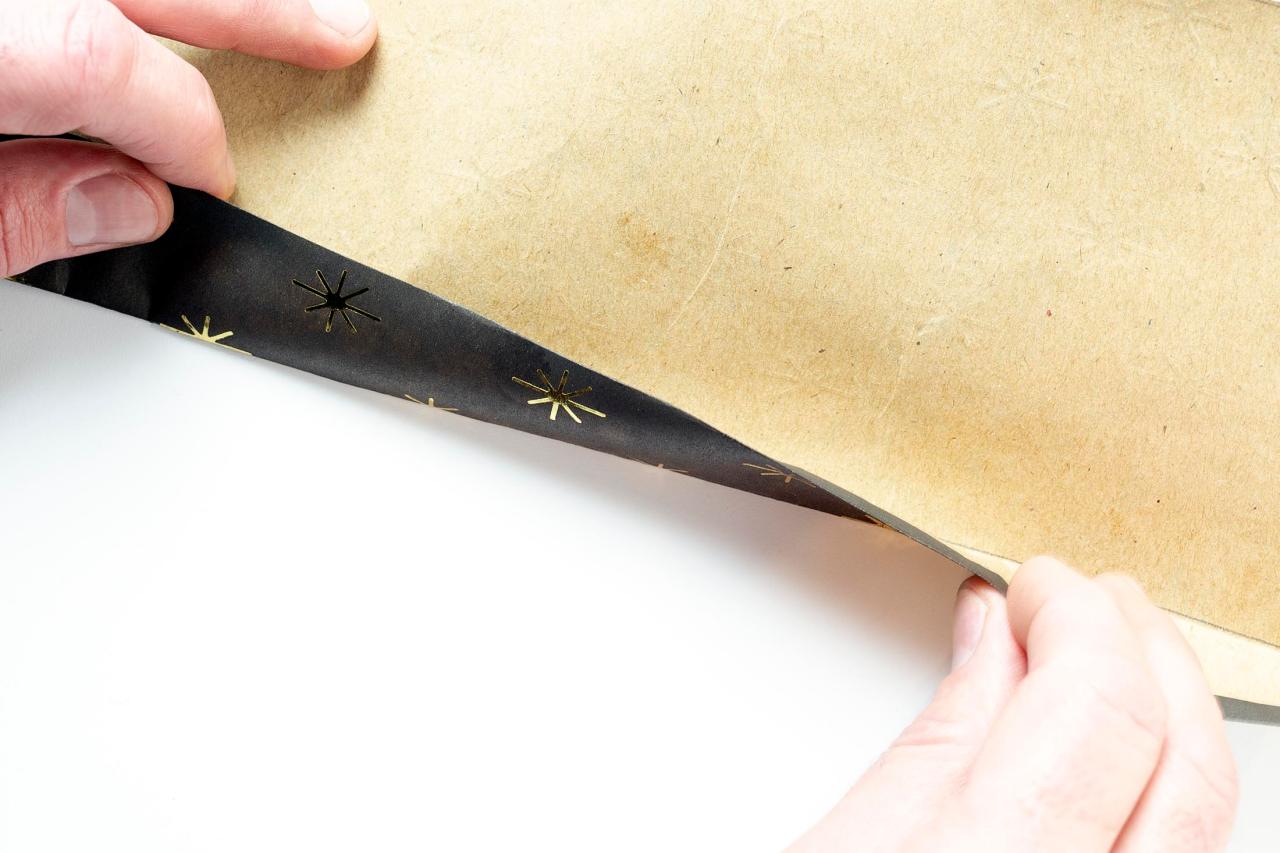
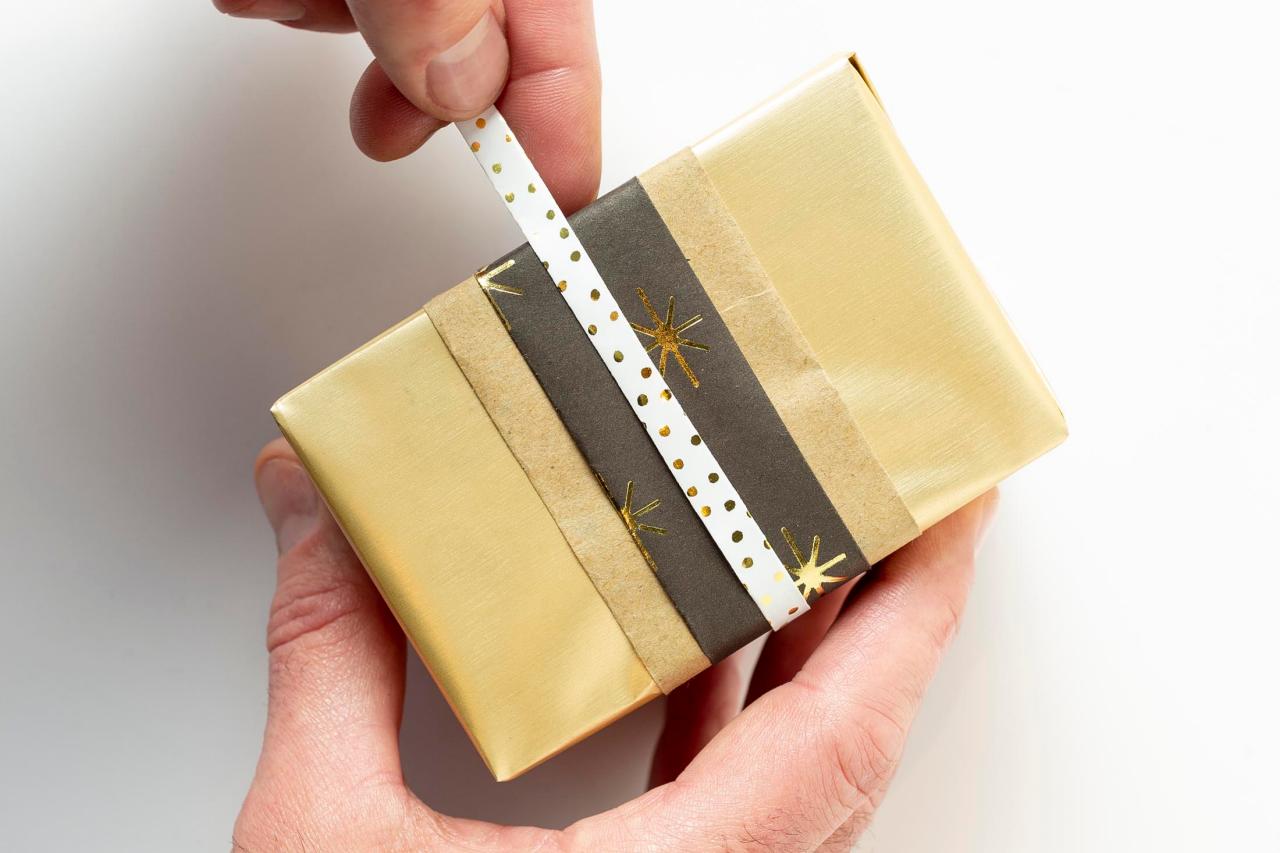
Using two-sided paper, cut a long piece of wrapping paper 6" wide. Fold the front side edge over 1/4" away from you and crease. Fold it away from you again about 1-1/4" from the folded edge (Image 1). Fold the back side of the paper under about 1/2" from the edge of the front side edge (Image 2). The unfolded edge of the front side of the paper will be closest to you. At 1/2" from the folded band, fold the front side of the paper down so the back side of the paper shows (Image 3). Place the back side of the paper under the folded band and press. Cut the band long enough to wrap around the package and secure it in place with tape on the back or bottom. Make another thin band of paper with a coordinating paper and cut it to size. Wrap it over the first band (Image 4) and secure it with tape in the same place as the first band (Image 5).


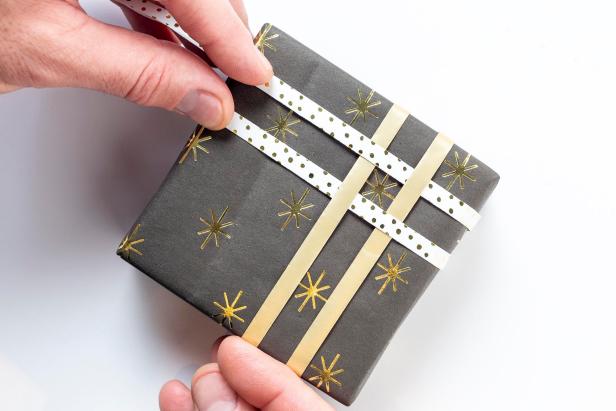
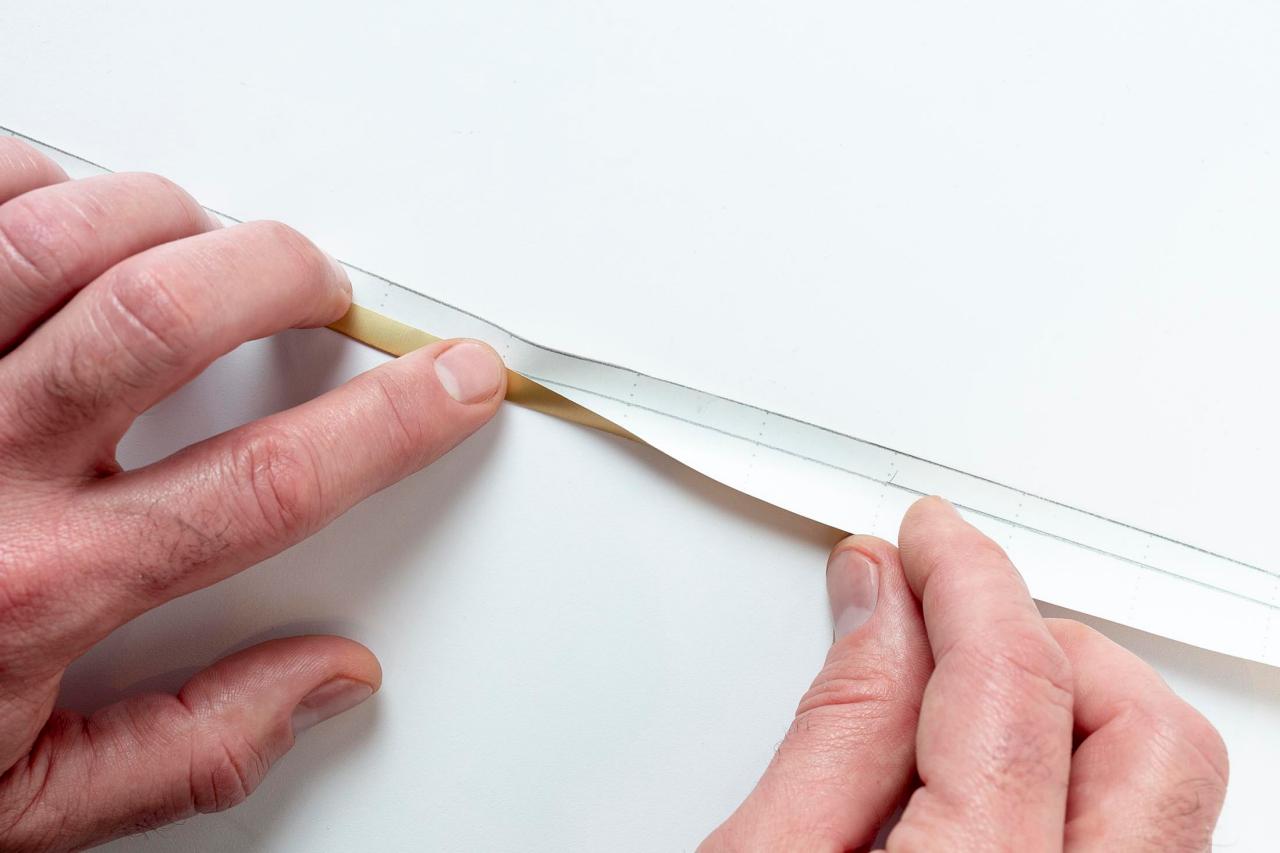
Ribbon: Woven Ribbon
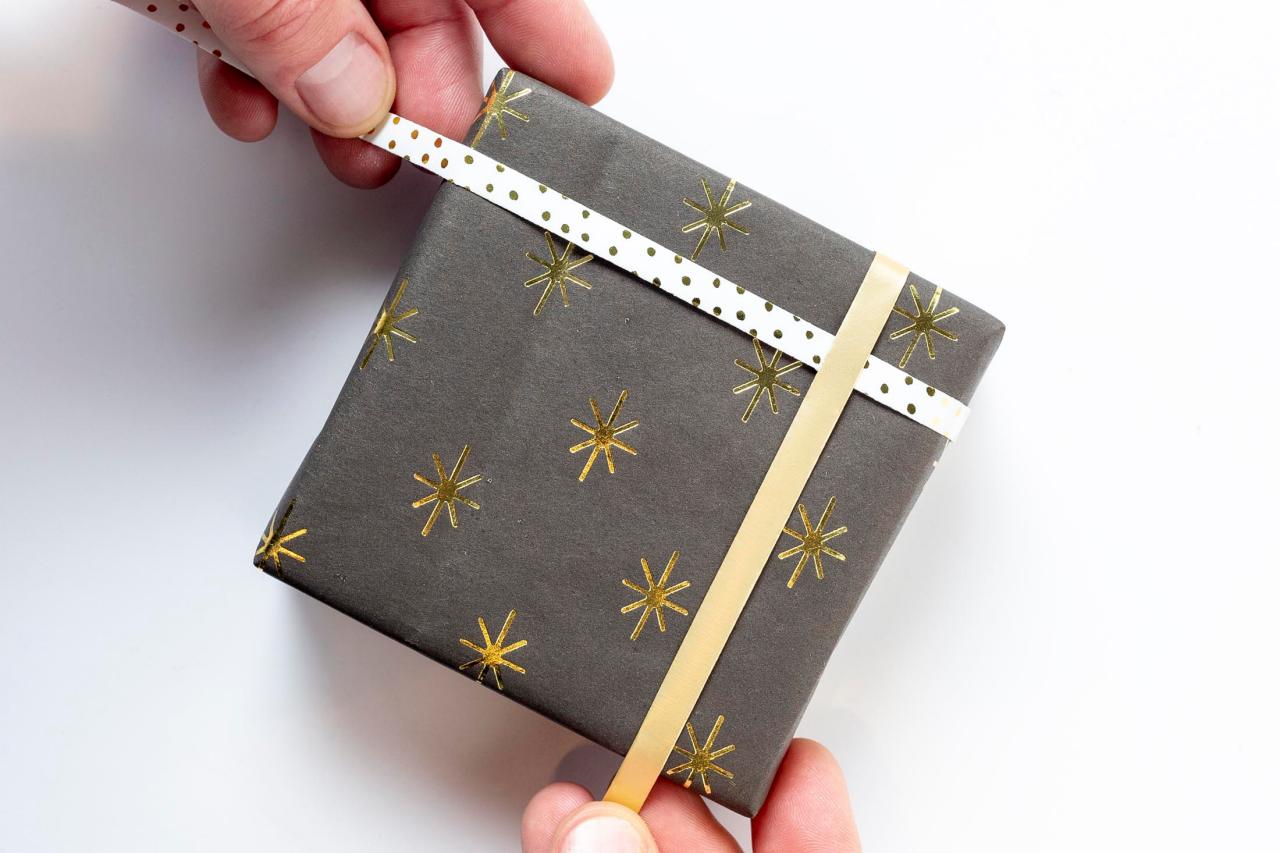
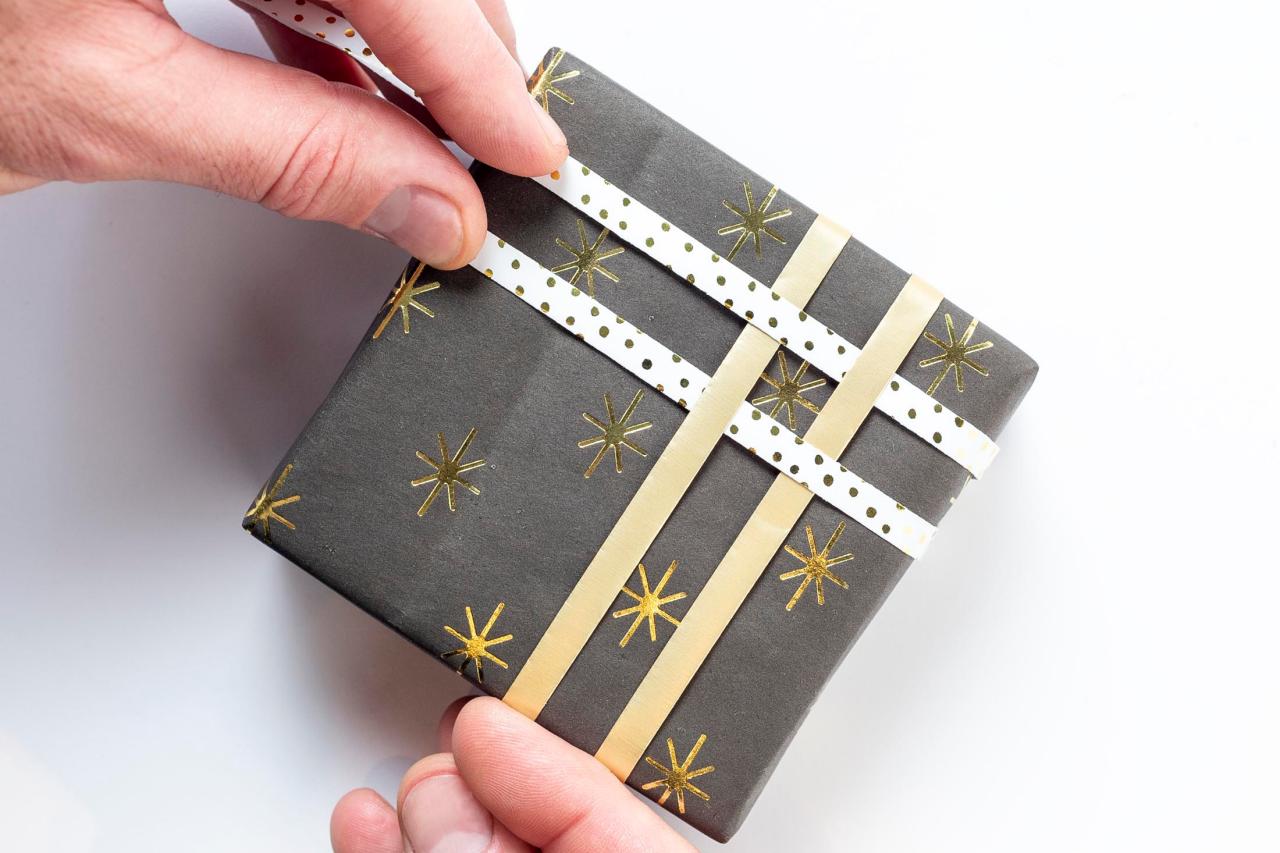
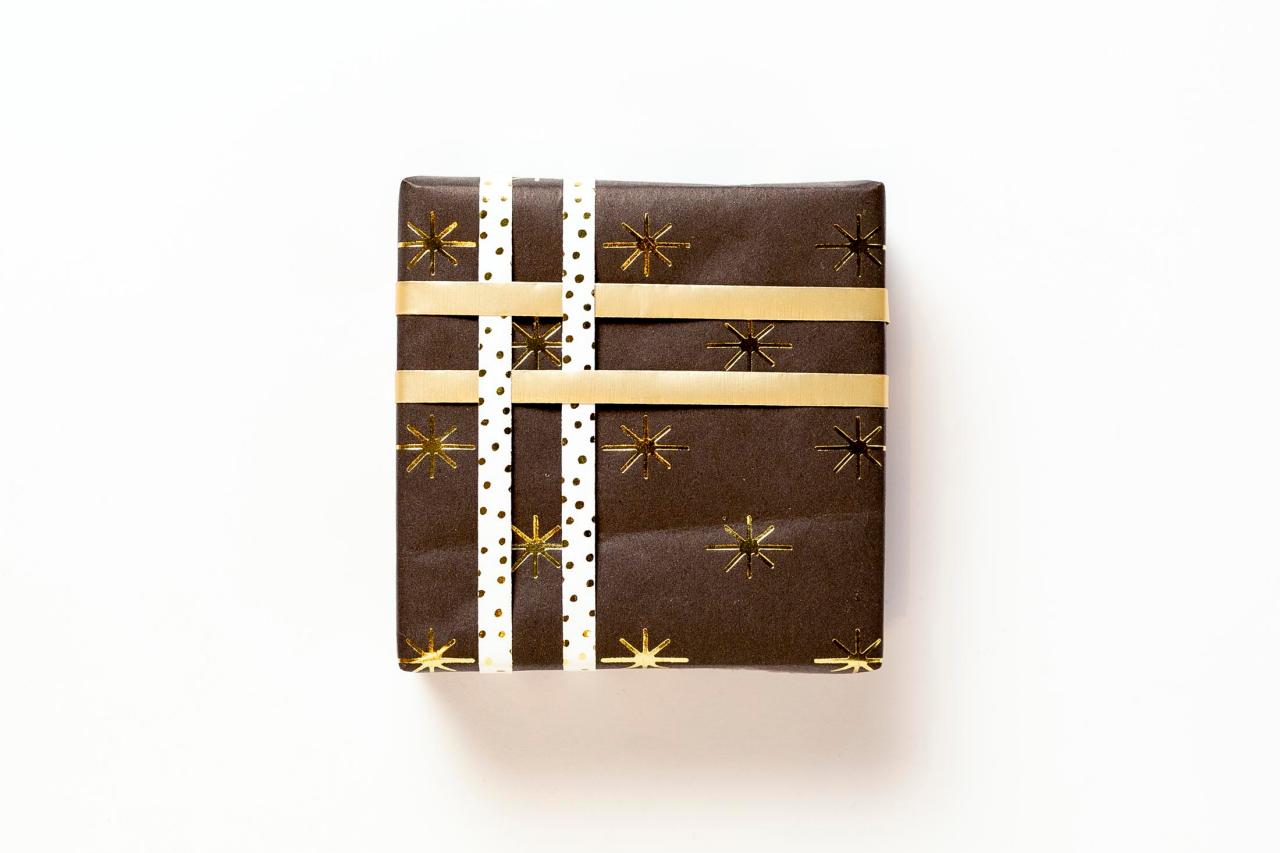
Make thin bands of paper by cutting long strips 3/4" wide. Fold them over at 1/4" and fold again (Image 1). Make enough to wrap around your package 2 times in each direction. Attach one set of ribbons at one corner of the package, overlapping them in opposite directions (Image 2). Secure them at the back or bottom of the package with tape. Add a second set of ribbons, placing them over or under the first set to create a woven look (Image 3). Attach them to the package with tape at the back or bottom (Image 4).


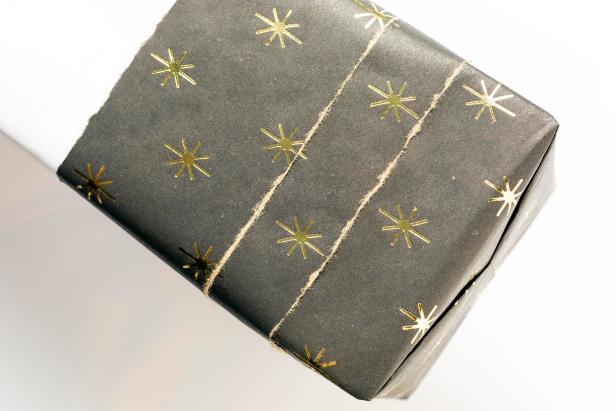
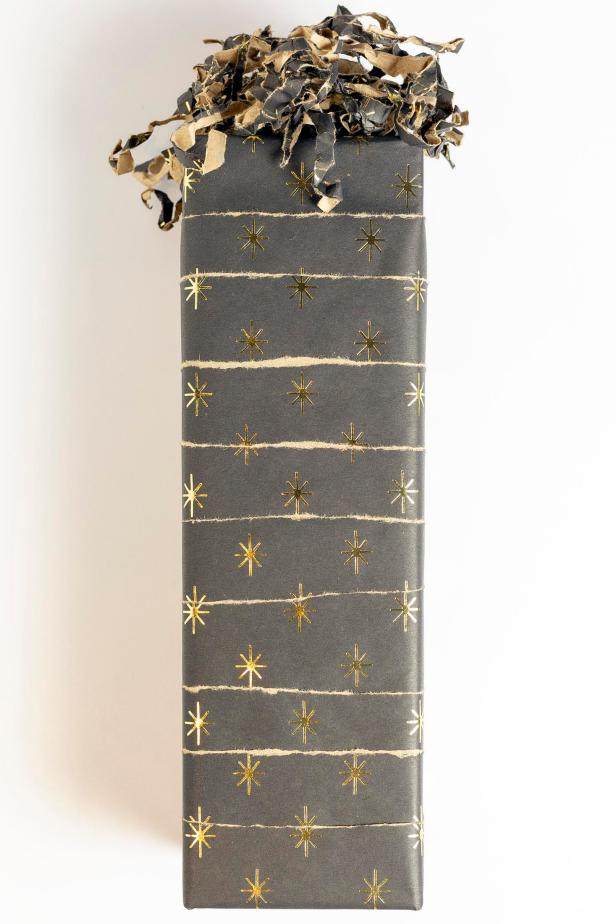
Texture: Raw Edges
Cut wrapping paper long and wide enough to wrap one end of your package and cover about 3" on the front and sides (Image 1). Carefully tear strips of paper by pulling the paper toward you, long enough to wrap around your package and about 3" wide. Wrap the strips around the package and secure in the back (Image 2). Overlap the pieces by 1" to 1-1/2" each time. At the opposite end, tear one piece of paper wide enough to finish covering the front and sides and enough to cover the opposite end of the package.

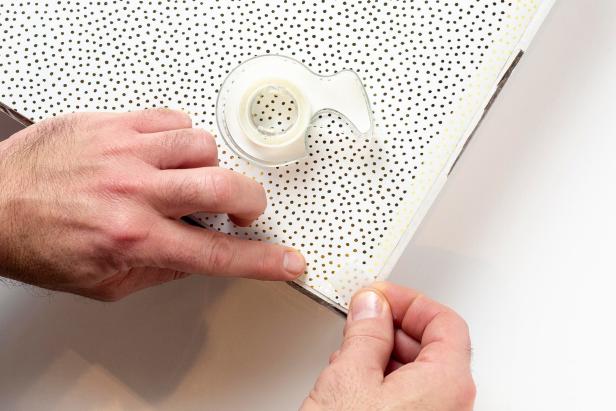
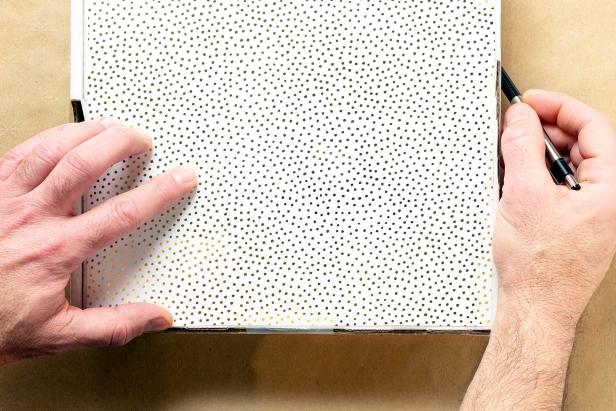
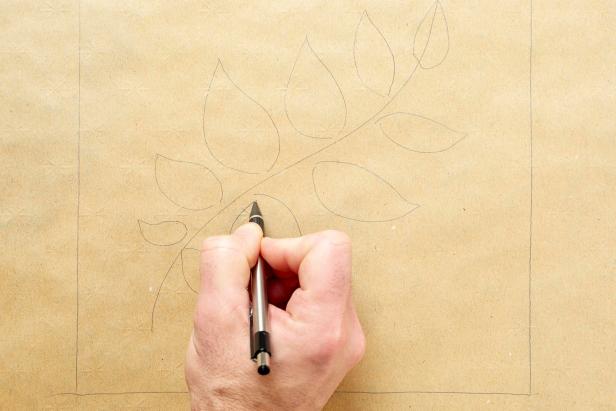
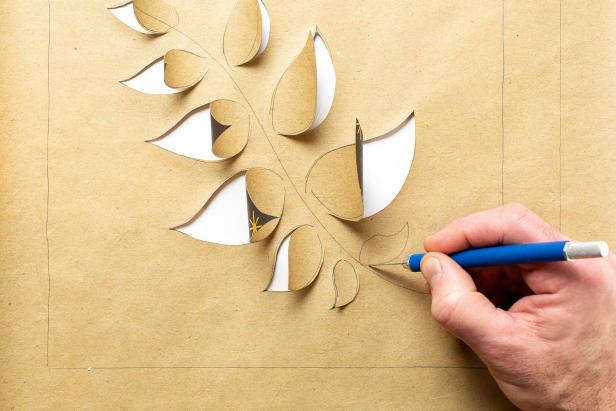
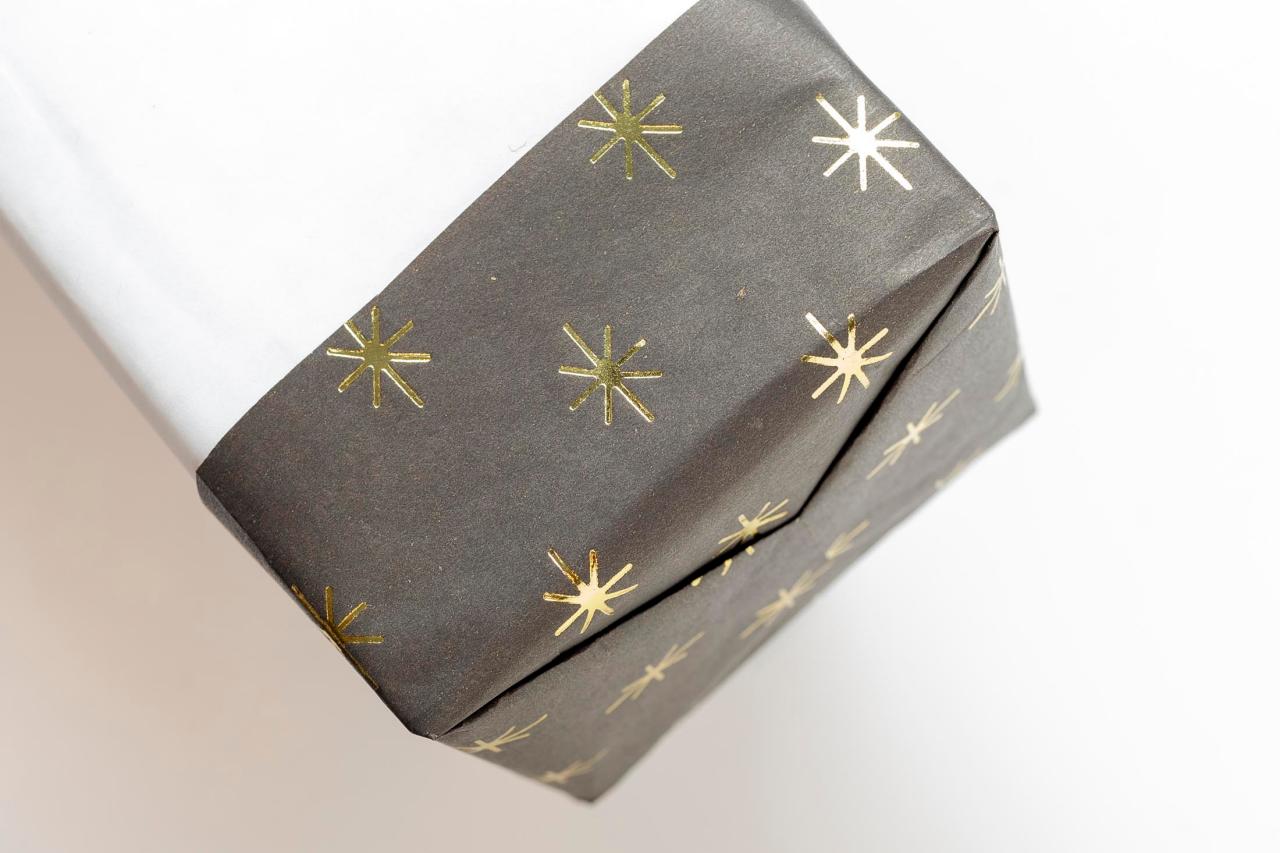
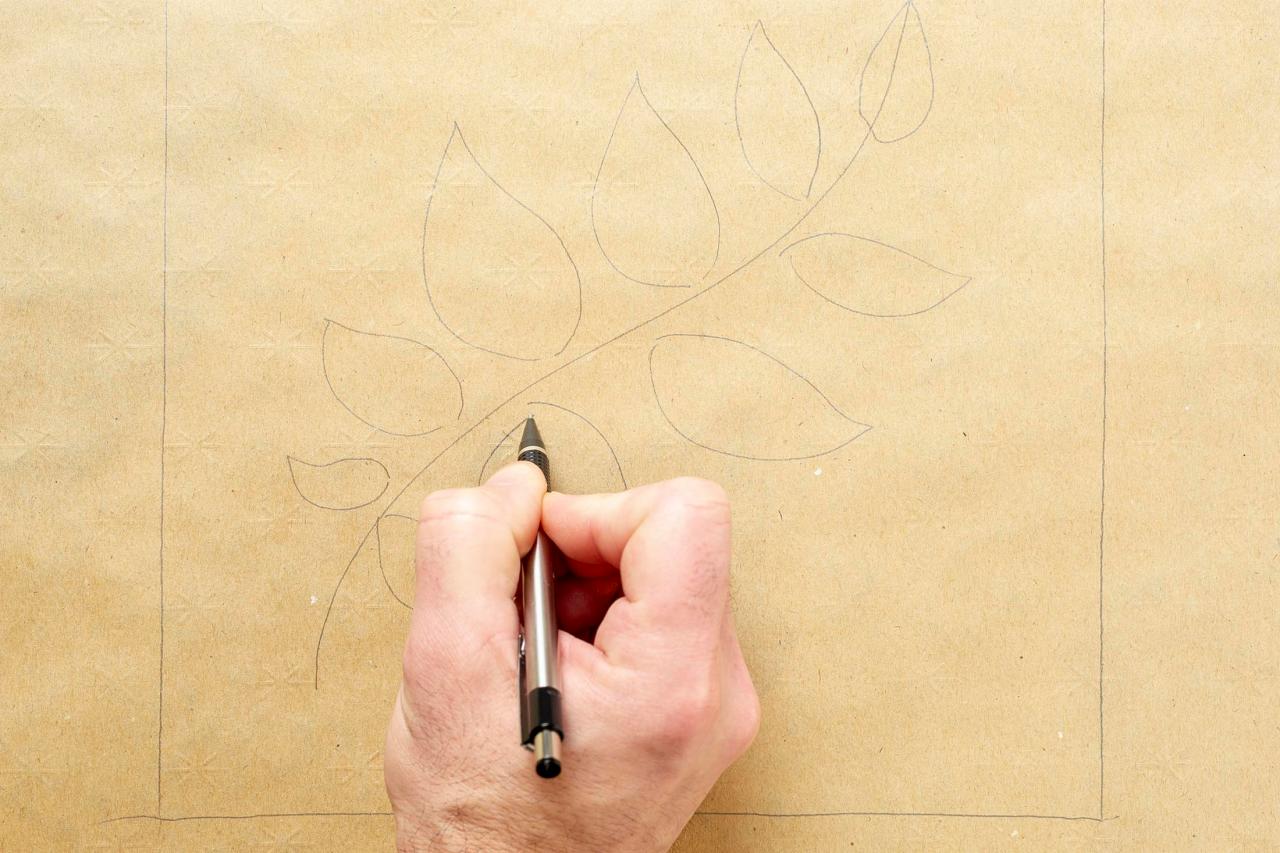
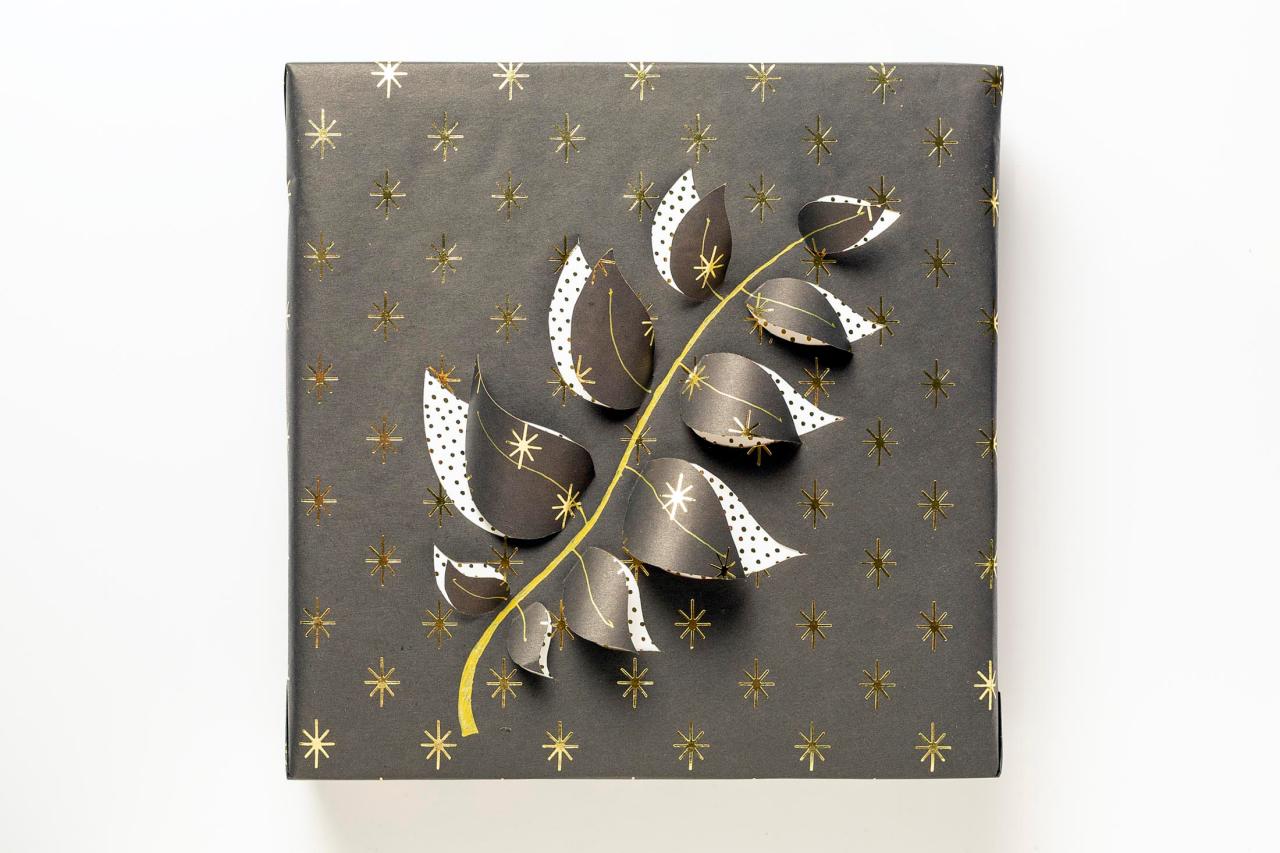
Texture: Cutouts
Place your package on a paper that will be your accent paper. Outline the shape of the side that will be the front. Cut out the shape slightly smaller than the outline and attach it to the side that will be the front with tape (Image 1). With the front facing up, place the package on the paper that will be the final wrapping paper with enough space around to wrap the package fully. Draw an outline around the package (Image 2). Draw a design on the back side of the wrapping paper (Image 3). Place a cutting board under the design and cut out the shapes using a craft knife (Image 4). Leave enough of the shape uncut so that it can be folded up on the other side. Wrap the gift with the cut-out on the front of the package. Then fold up the cut-out shapes to reveal the coordinating paper below (Image 5).

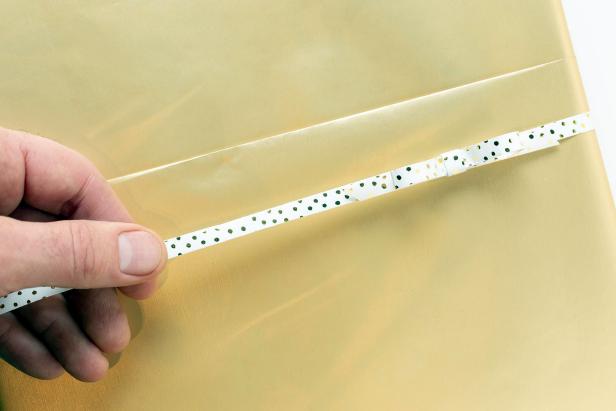
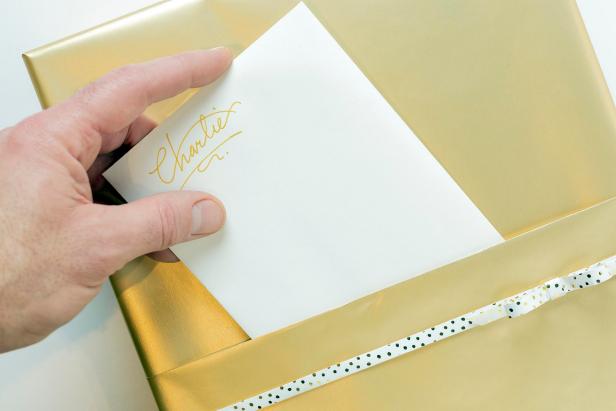
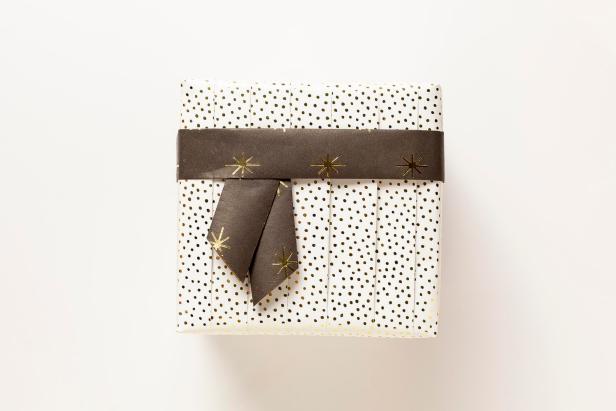
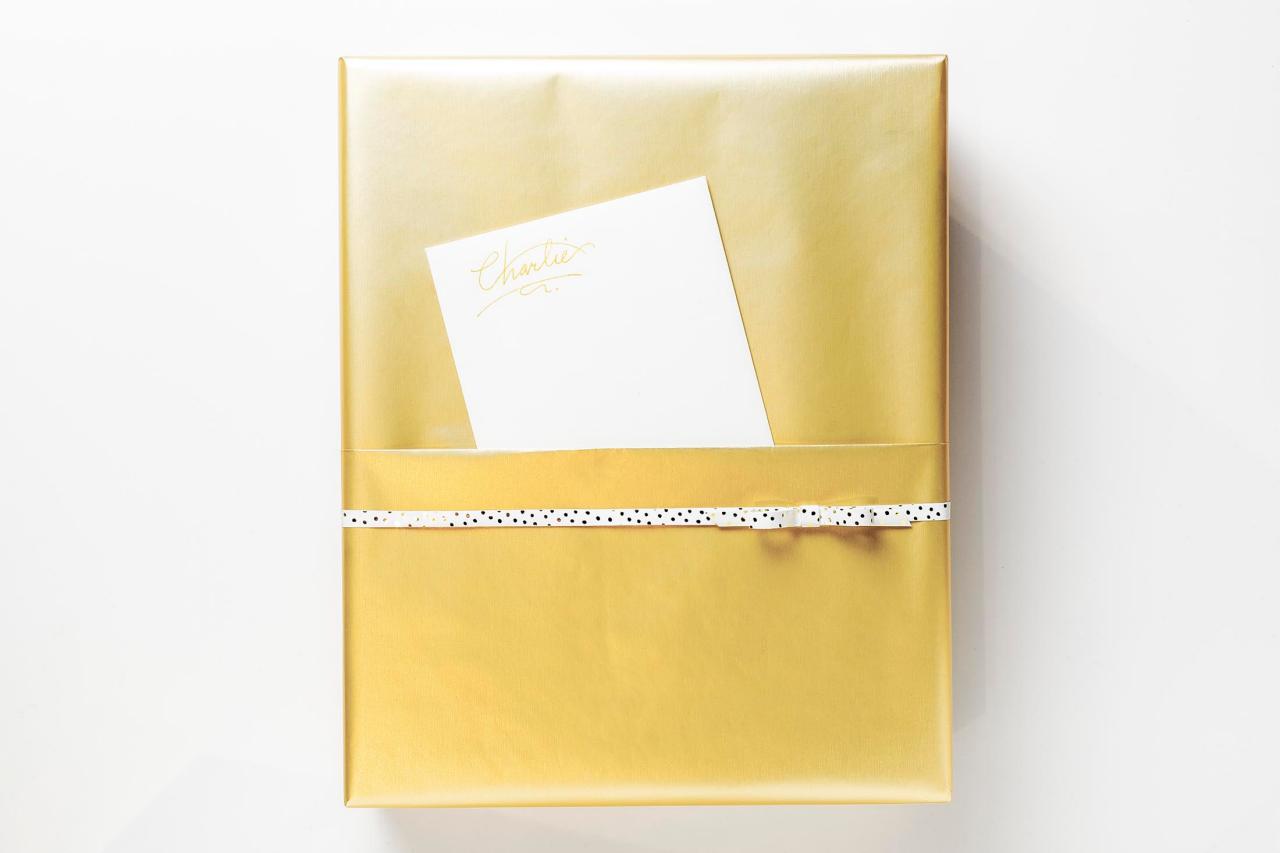
Folds: Card Pocket
Determine the width and height you will need to wrap your package. Add 6" to the height. With the front side of the paper face down, make a fold at about half the distance of the height of the paper. Lift the fold up slightly and fold it again 6" from the folded edge (Image 1). Wrap the package with the folded edge pointing upward. Place a thin band of paper just under the fold to highlight it (Image 2). Insert a greeting card or gift card into the pocket (Image 3).


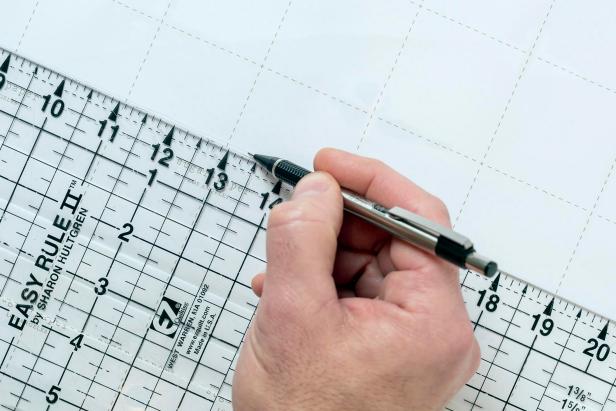
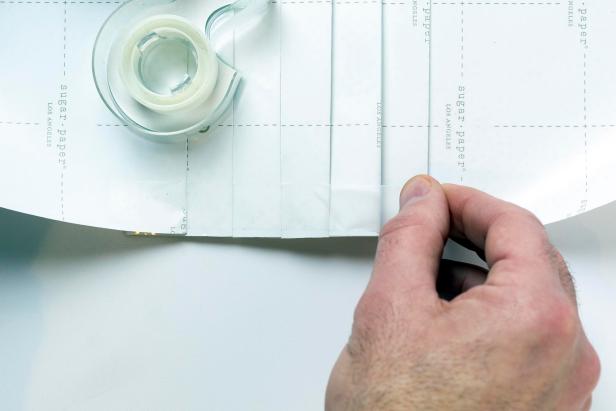
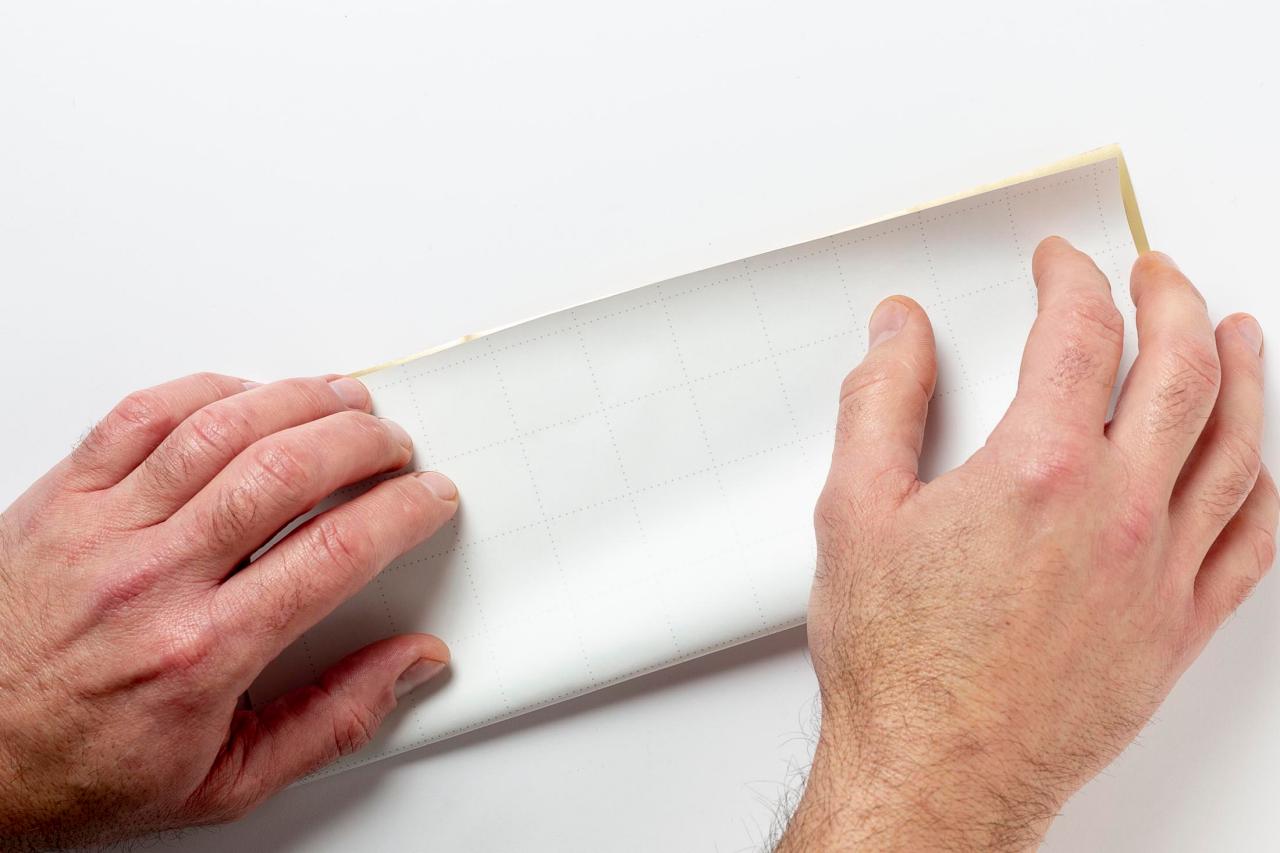
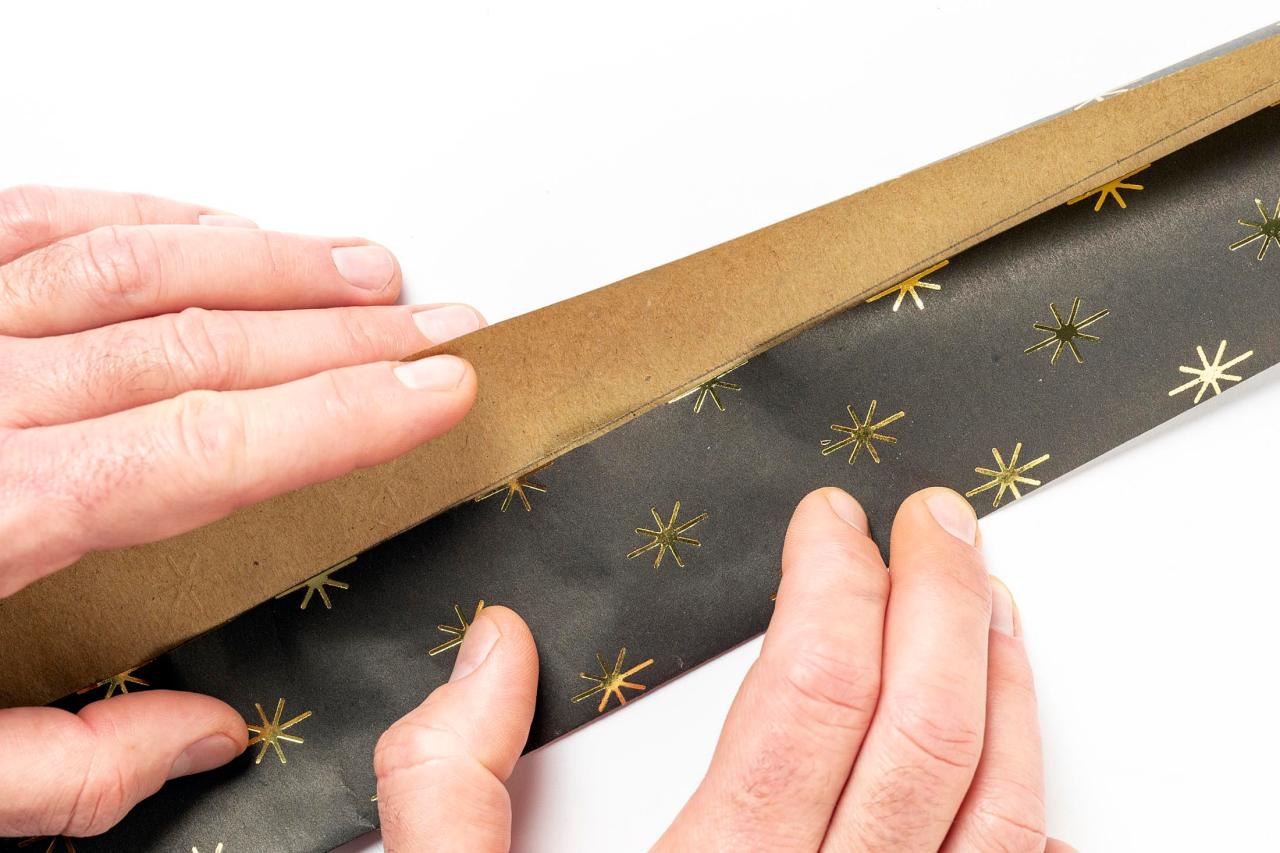
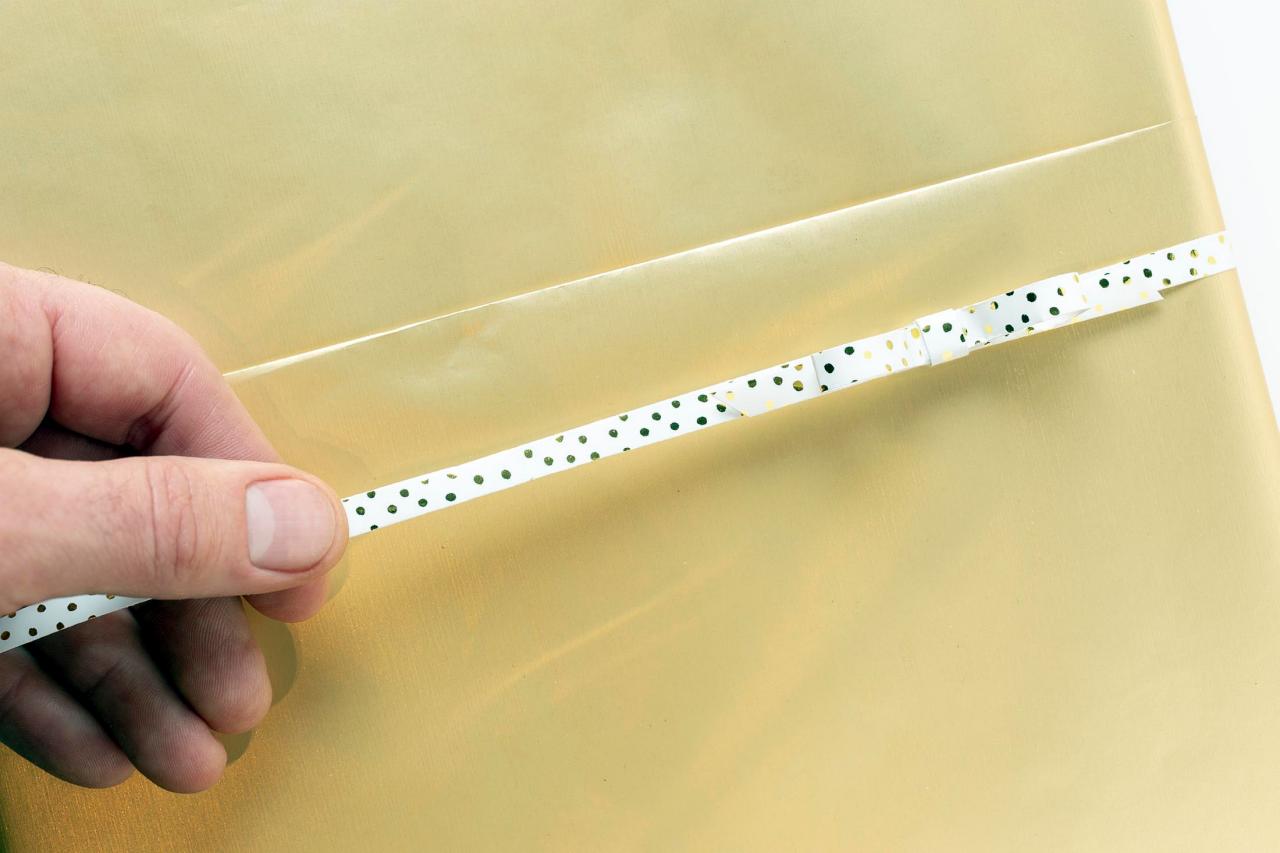
Folds: Pleated Package
Determine the width and height you'll need to wrap your package. Double the width and cut a piece of paper to those dimensions. Starting at one of the height ends, fold the paper over and make a crease. On the back of the paper, use a ruler to draw a line 1-1/2" from the crease (Image 1). Fold the paper at the line by pulling the far edge of the paper toward you. Turn the paper over with the good side facing up. Pull the fold to the first crease and press it in place. Turn the paper over again and use a ruler to draw a line 1-1/2" from the bottom of the previous fold. Fold it over as before, then turn the paper over and pull the fold to the bottom of the previous fold (Image 2). Continue in this manner until there is just enough paper left to cover the opposite end of the box. With the good side facing down, add tape to the folds to hold them in place while you wrap the package (Image 3). Wrap the package as usual and finish with a band of coordinating paper (Image 4).


