


How to Build a Loft Bed With a Built-In Table and Benches
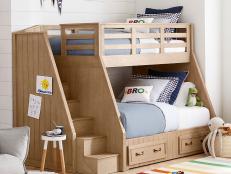
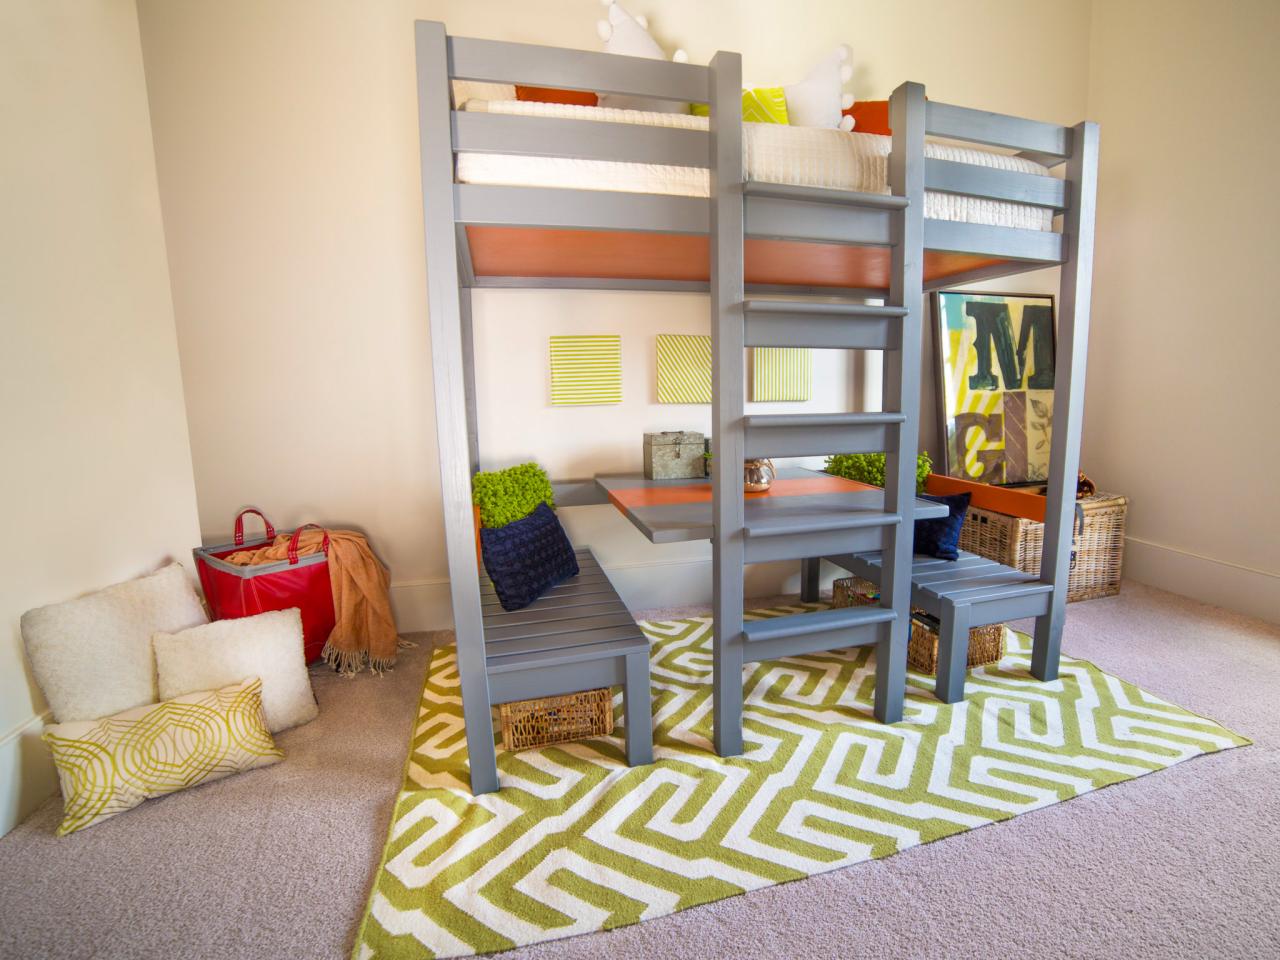
Increase the square footage in your child's bedroom by making a loft bed with a built-in desk/play station.


Your child will love the tree-fort feeling that a loft bed provides, and you'll love the extra storage space you'll gain. This intermediate woodworking project is for a standard twin mattress.
Tools and Materials
- (6) 4x4 x 8’ wood posts (paint grade)
- (16) 5/4” pine boards 3-1/2” x 8’
- (3) 5/4” pine boards 1-1/2” x 8’
- (6) 3/4” pine boards 3-1/2” x 8’
- (2) 3/4” paint-grade plywood
- (1) box of 1-1/2” long, heavy-duty cabinet screws
- (1) box of 1-1/4” pocket screws (coarse thread)
- (1) box of 2-1/2” pocket screws (coarse thread)
- (8) 2” pan-head screws (coarse thread)
- paint or stain
- (1) box of maple pocket-screw plugs
- chop saw
- circular saw or table saw
- trim nail gun
- drill
- sander
- router with a 1/8” round-over bit, a flush-cut bit, a chamfer bit and a 3/8" forstener bit
- pocket-hole jig
Cut List:
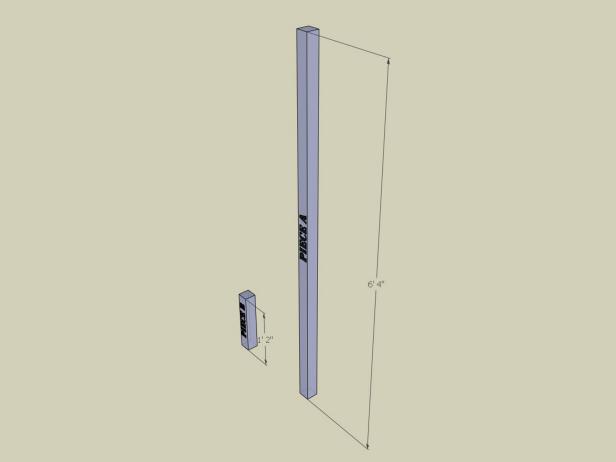
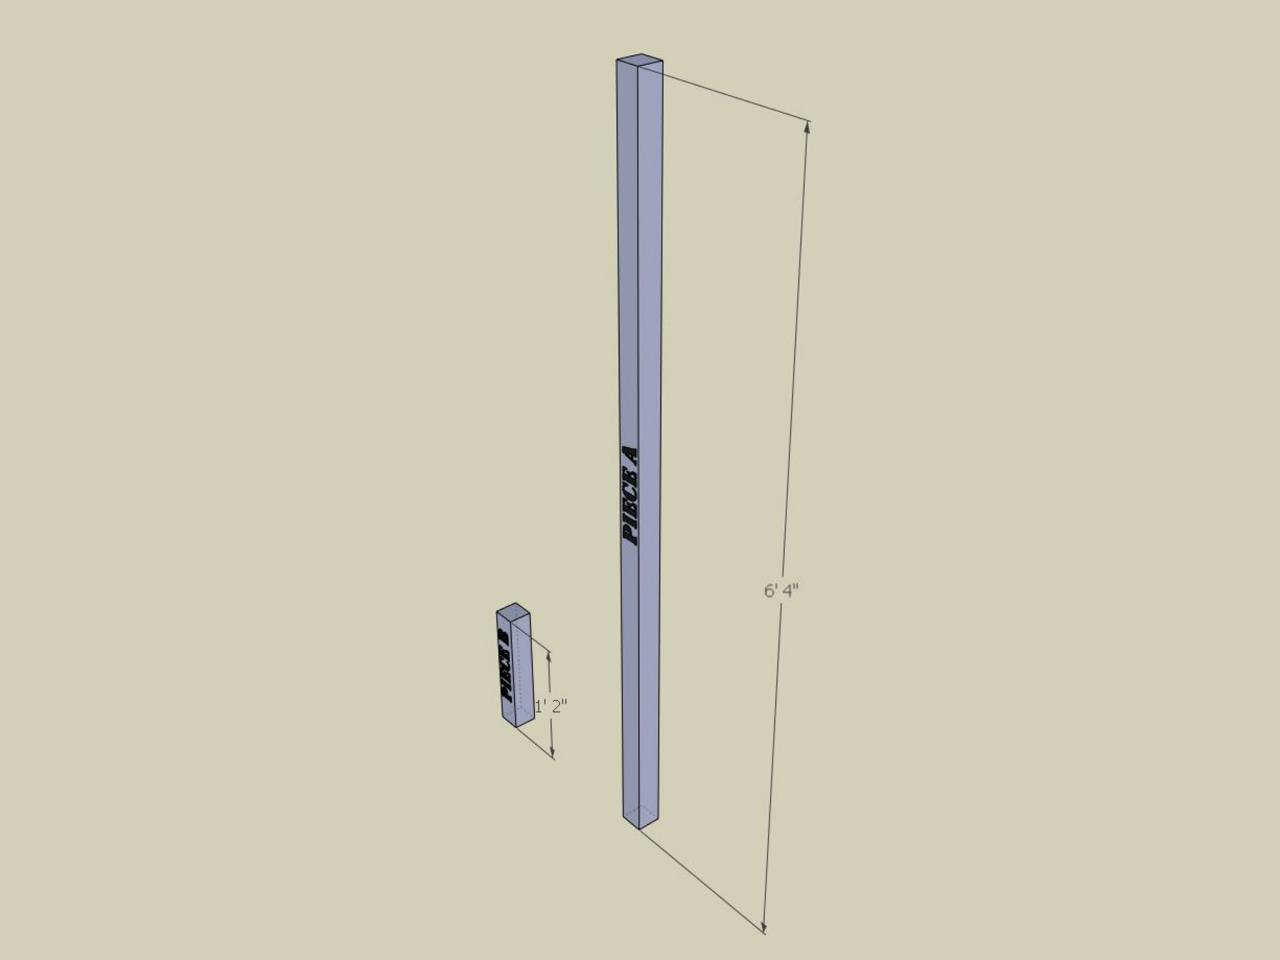
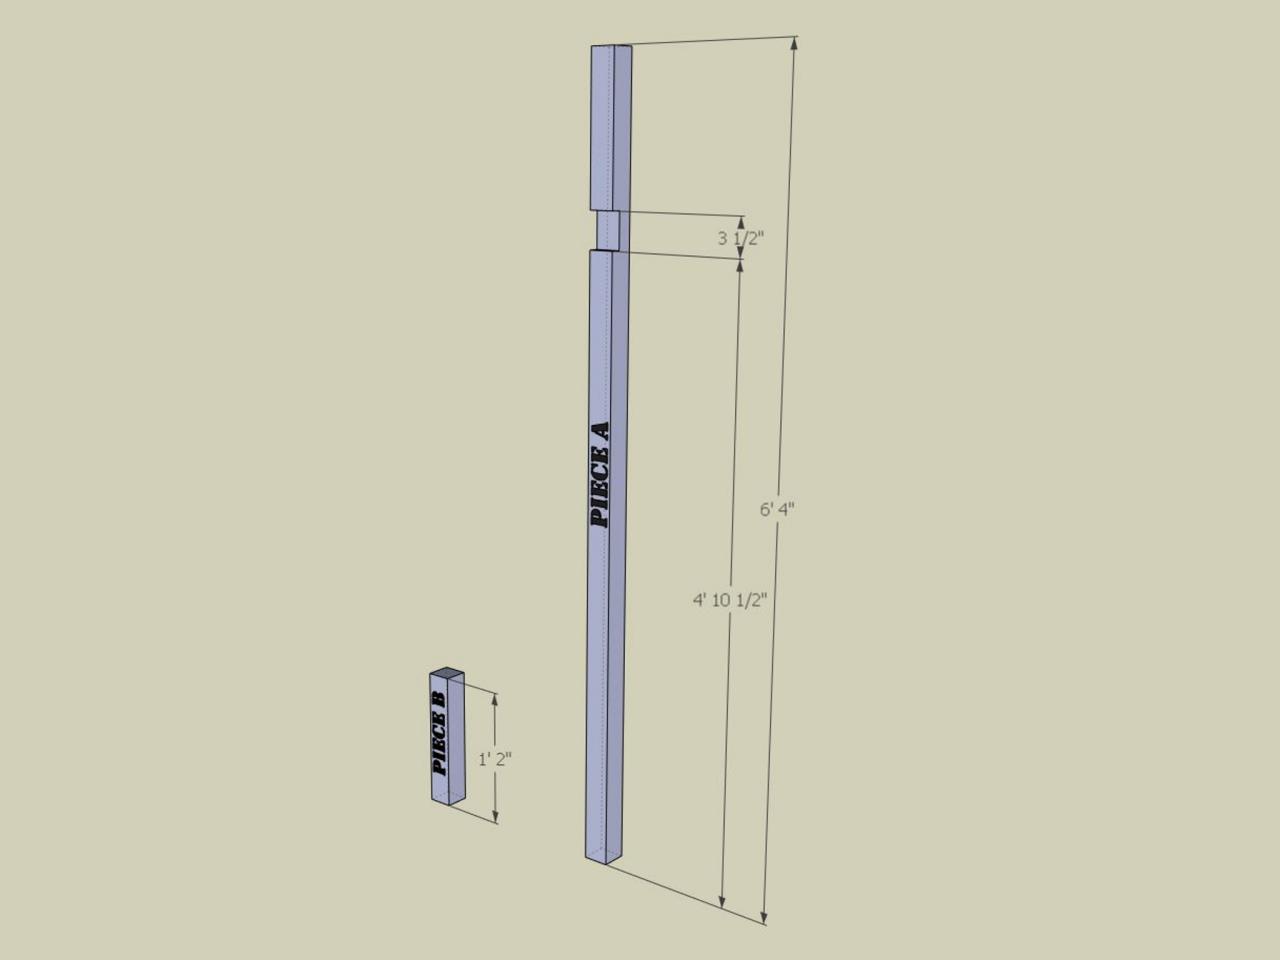
- Piece A - vertical support posts: (6) 4x4 x 6'4" (optional: If you have the proper tool (band saw/planer) to machine posts down to 2-1/2" square, it would be desirable for scale.)
- Piece B - vertical bench support posts: (4) 4x4 x 1'2" LONG (optional: If you have the proper tool (band saw/planer) to machine posts down to 2-1/2" square, it would be desirable for scale.)
- Piece C - side bench stringers: (4) 5/4" x 3-1/2" x 3' 2-1/4" pine
- Piece D - front and rear bench stringers: (4) 5/4" x 3-1/2" x 1' 2-1/2" pine
- Piece E - side support stringers: (8) 5/4" x 3-1/2" x 3 '2-1/4" pine
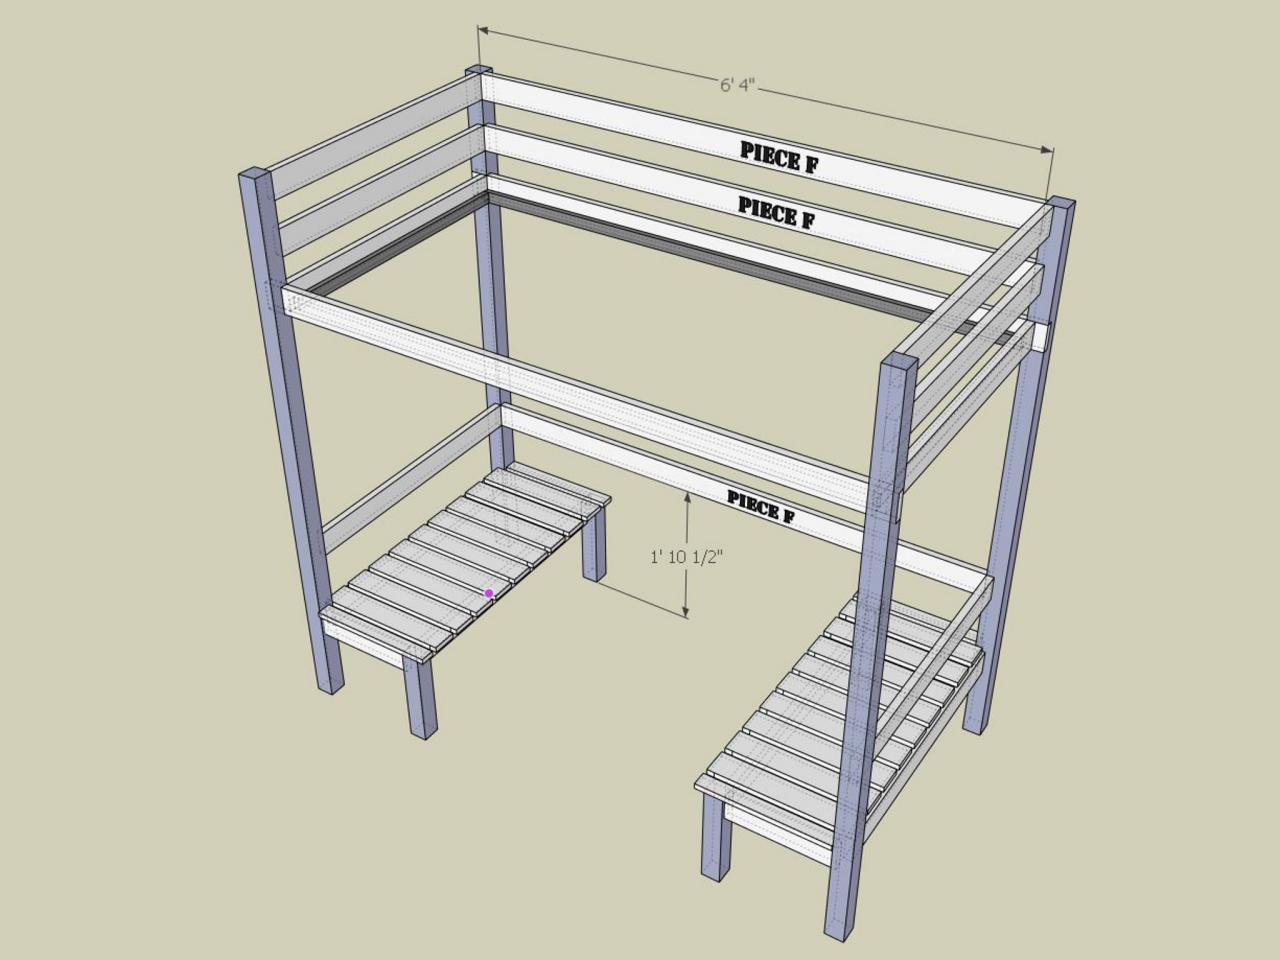
- Piece F - front full width support stringers: (3) 5/4" x 3-1/2" x 6'4" pine
- Piece F2 - front full width support stringers plus extensions (bed frame support): (2) 5/4" x 3-1/2" x 6'9" pine
- Piece G - front partial width support stringers: (4) 5/4" x 3-1/2" x 2'4" pine
- Piece H - front and back ledger for bed slats (twin size): (2) 5/4" x 1-1/2" x 6'4" pine
- Piece I - side ledgers for bed slats (twin size): (2) 5/4" x 1-1/2" x 3' 3/4" pine
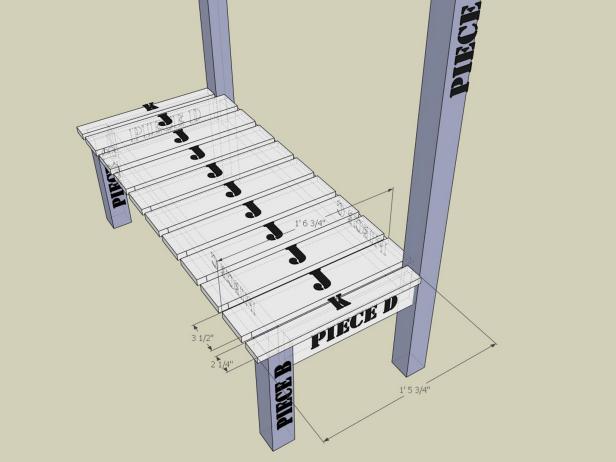
- Piece J - center seat slats: (18) 3/4" x 3-1/2" x 1' 6-3/4" pine
- Piece K - edge seat slats: (4) 3/4" x 2-1/4" x 1' 5-3/4" pine
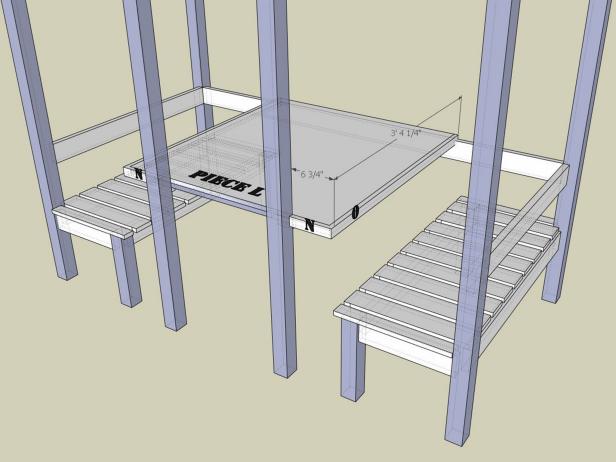
- Piece L - desk top: (1) 3/4" x 3' 1" x 3' 4-1/4" paint-grade plywood
- Piece M - desk top support ledge: (2) 5/4" x 1-1/2" x 2-1/2"
- Piece N - front desk top face frame: (2) 3/4" x 1-1/2" x 6-3/4" pine
- Piece O - side desk top face frame: (2) 3/4" x 1-1/2" x 3' 4-1/4" pine
- Piece P - ladder step support: (5) 3/4" x 3-1/2" x 1'8" pine
- Piece Q - ladder step treads: (5) 5/4" x 3-1/2" x 1'8" pine
- Piece R - mattress pan: (1) 3/4" x 6'4" x 3' 2-1/4" plywood
Step 1:

Chip
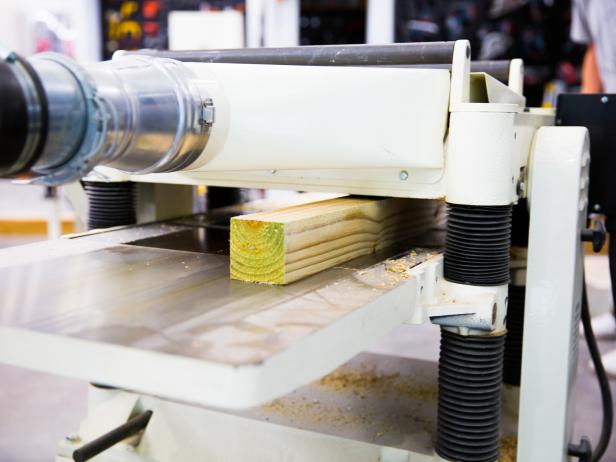
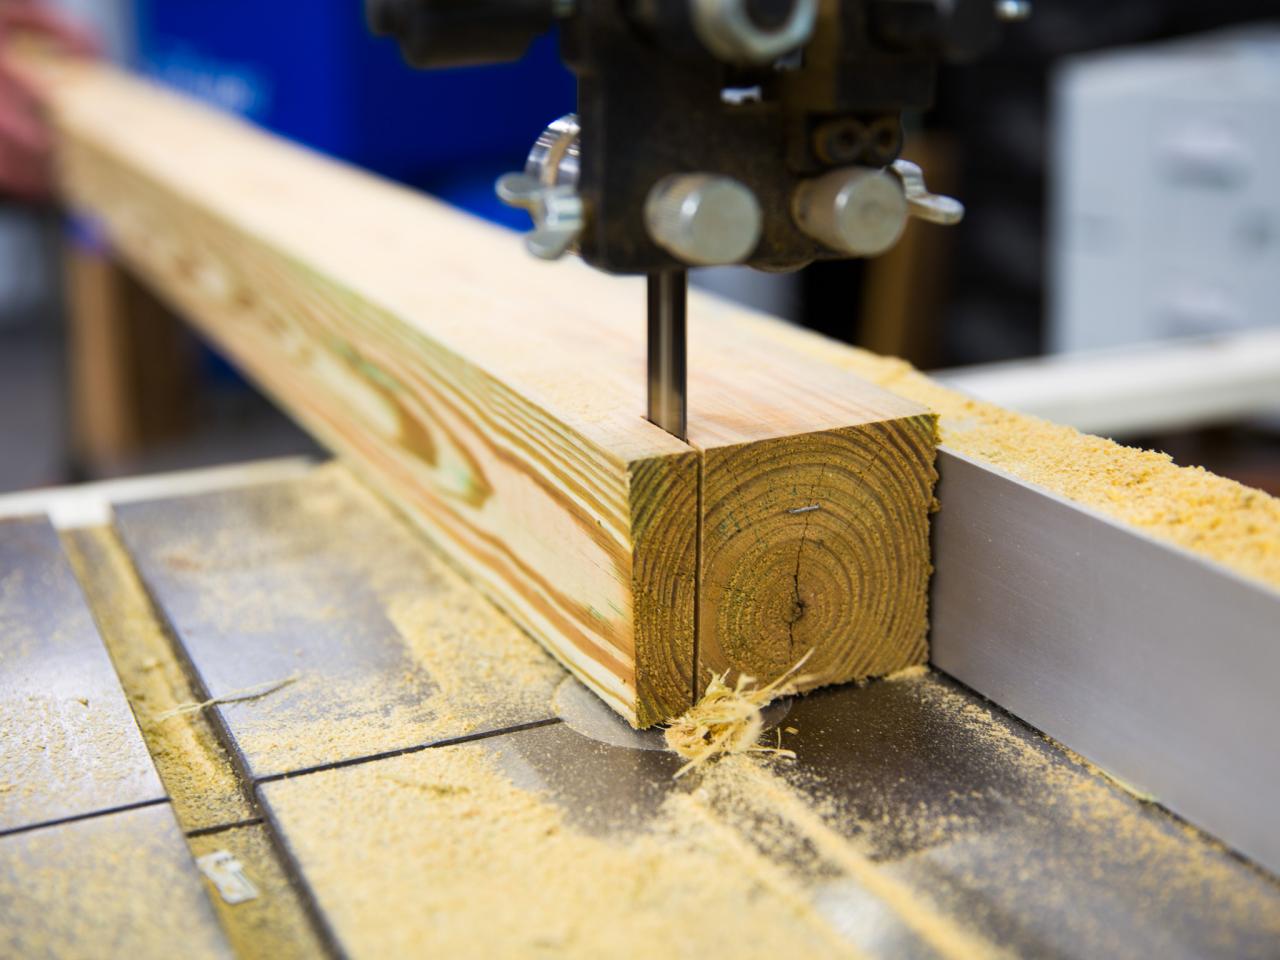
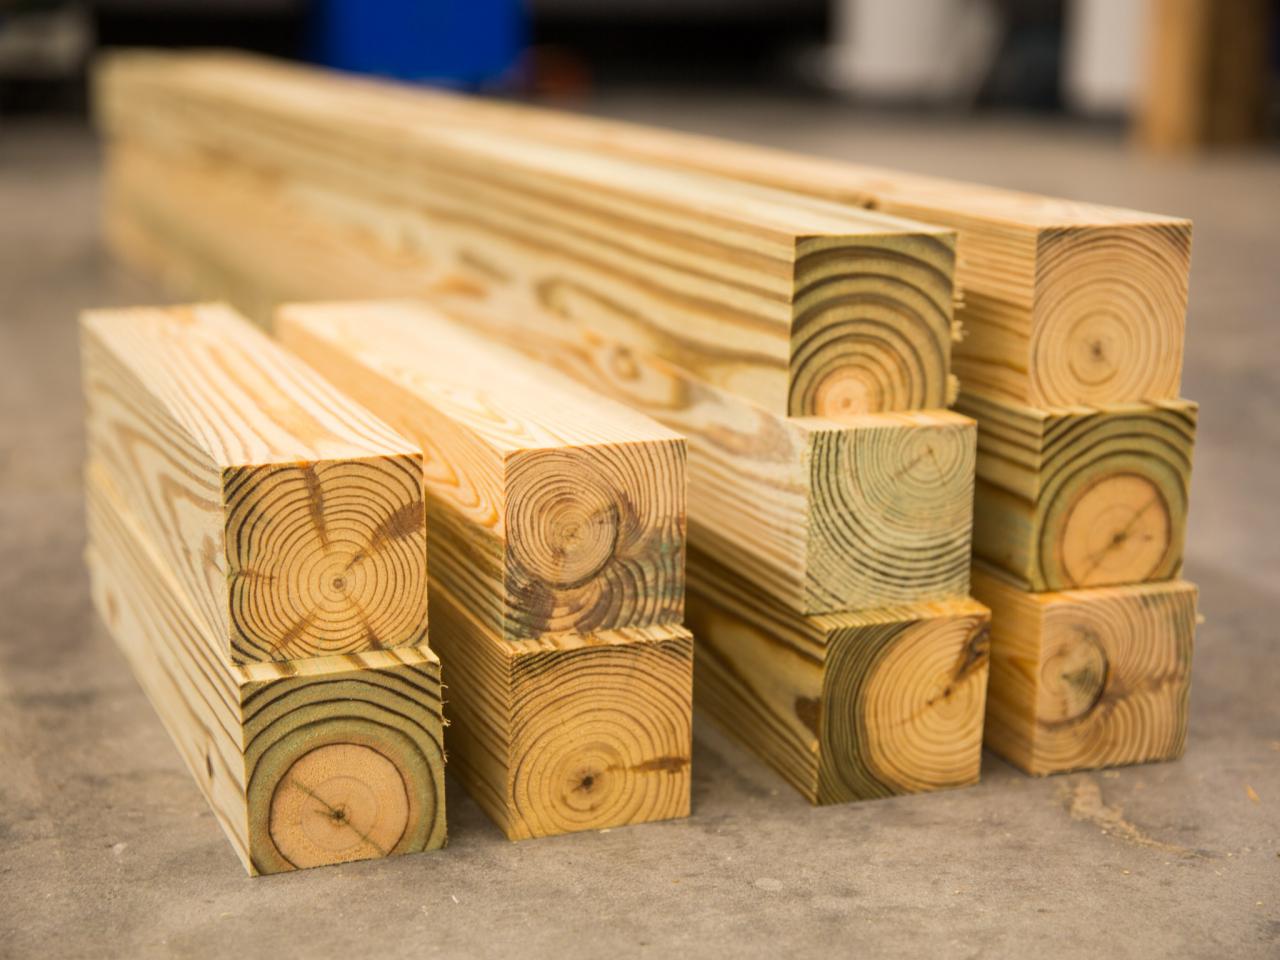
Cut Pieces A and B to length using a chop saw. If you choose to dimention the 4x4 posts down to 2-1/2" square, you can use a bandsaw and planer to get them to size.
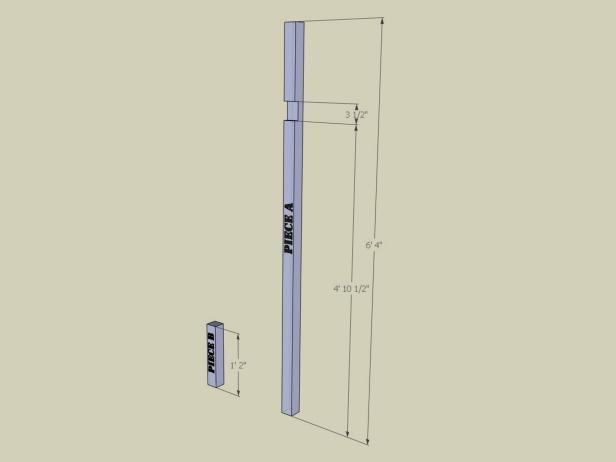
Step 2:
Chip


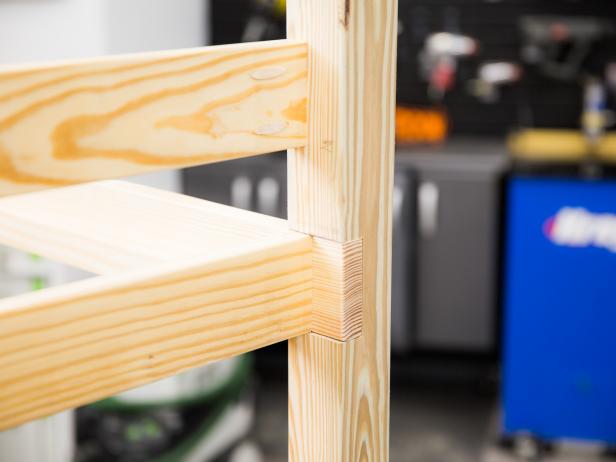
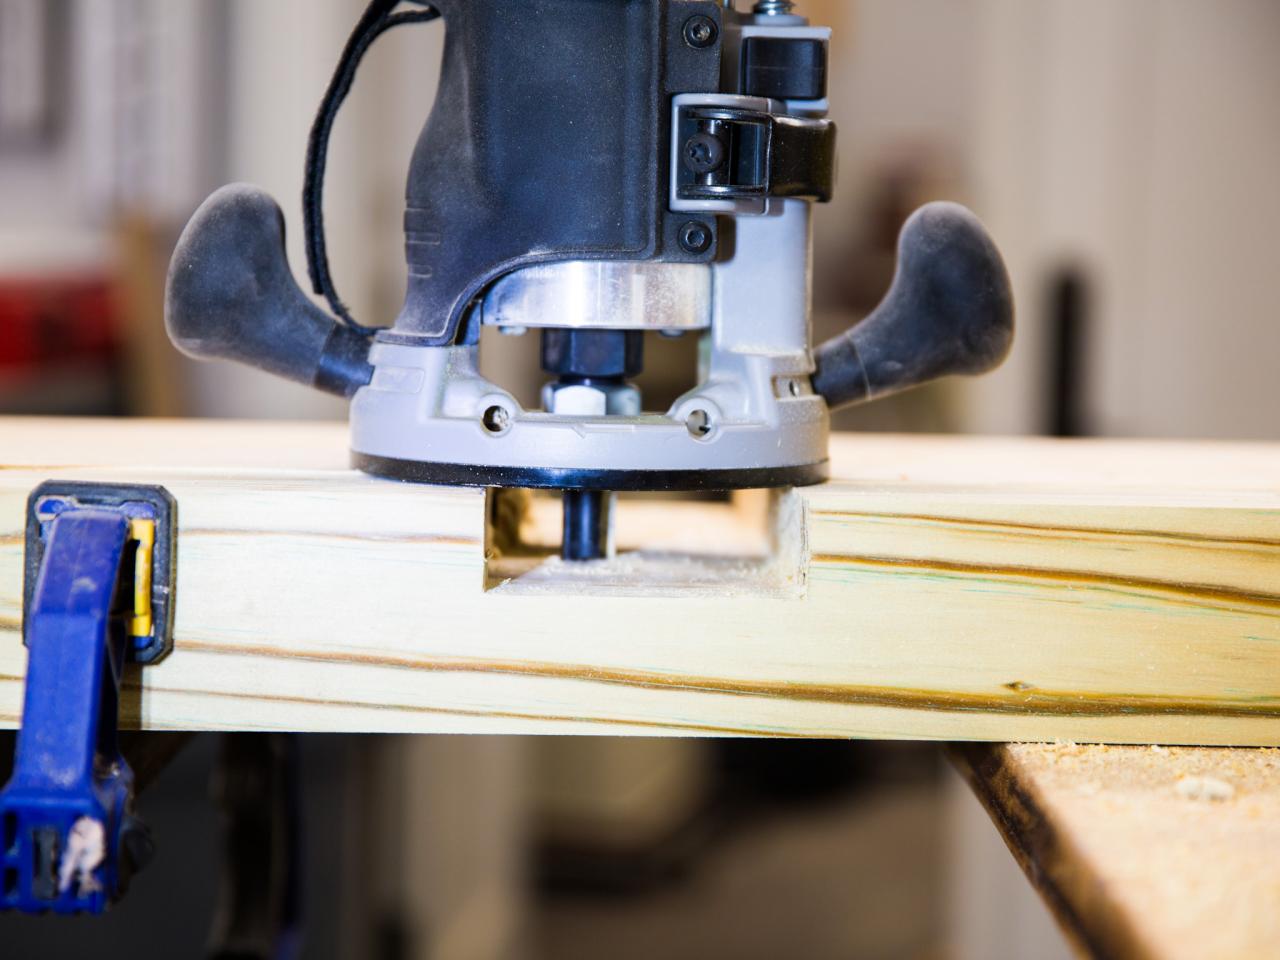
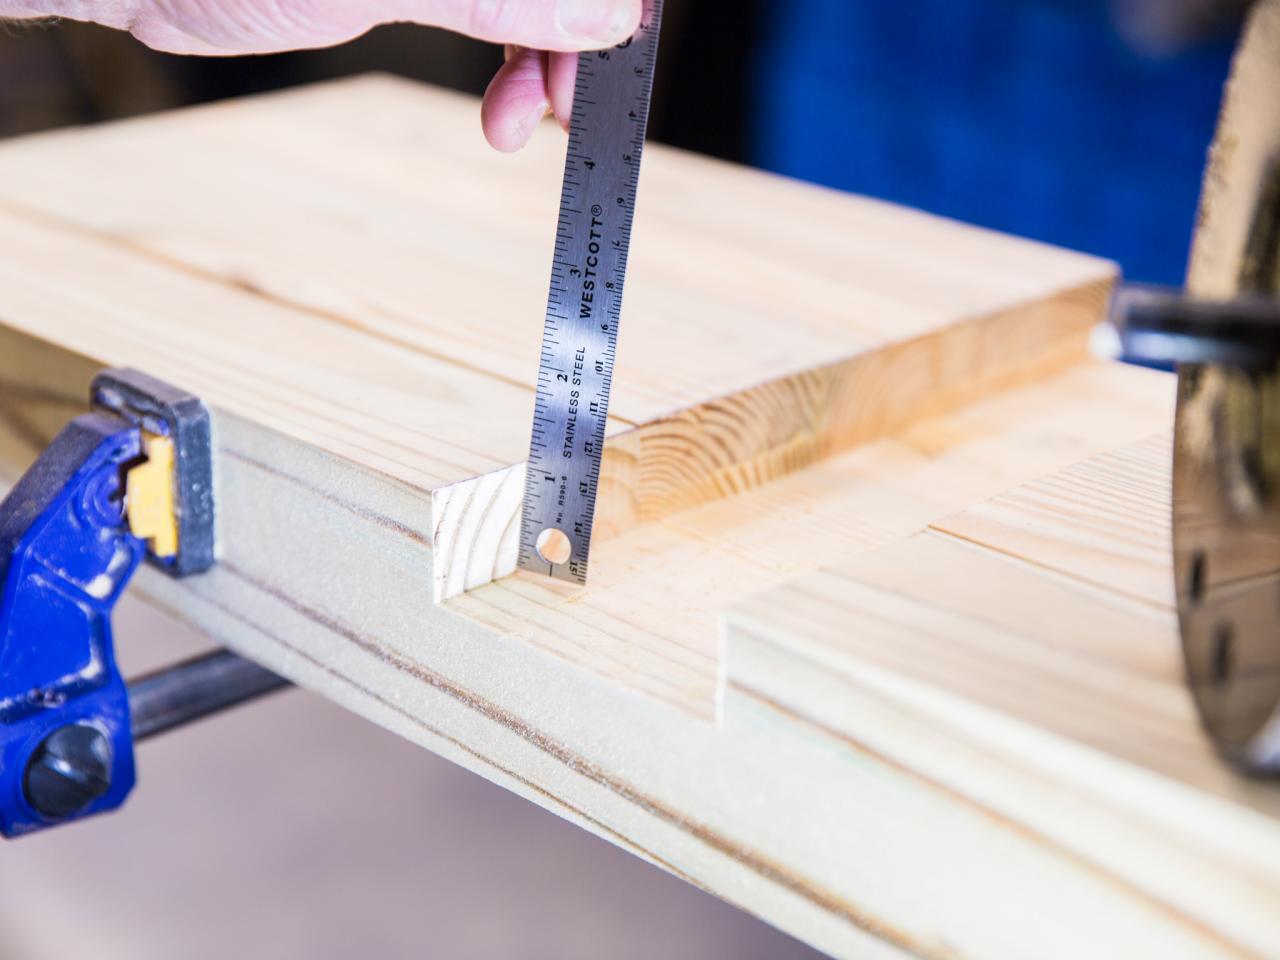
On four of the Piece A sections, cut a mortise (slot) 3-1/2" wide and 1" deep with a flush-cut router bit.
Step 3:
Chip


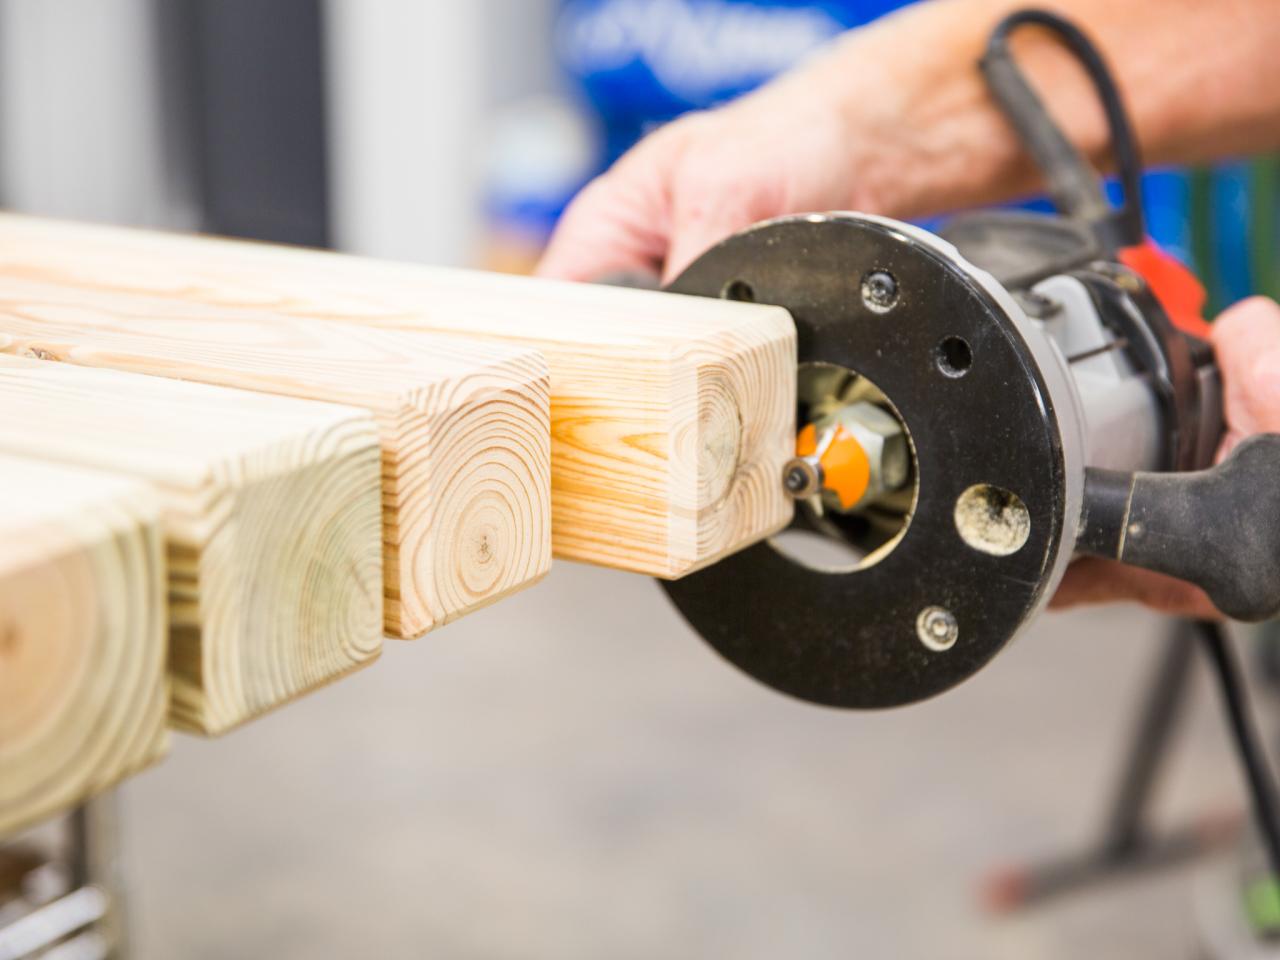
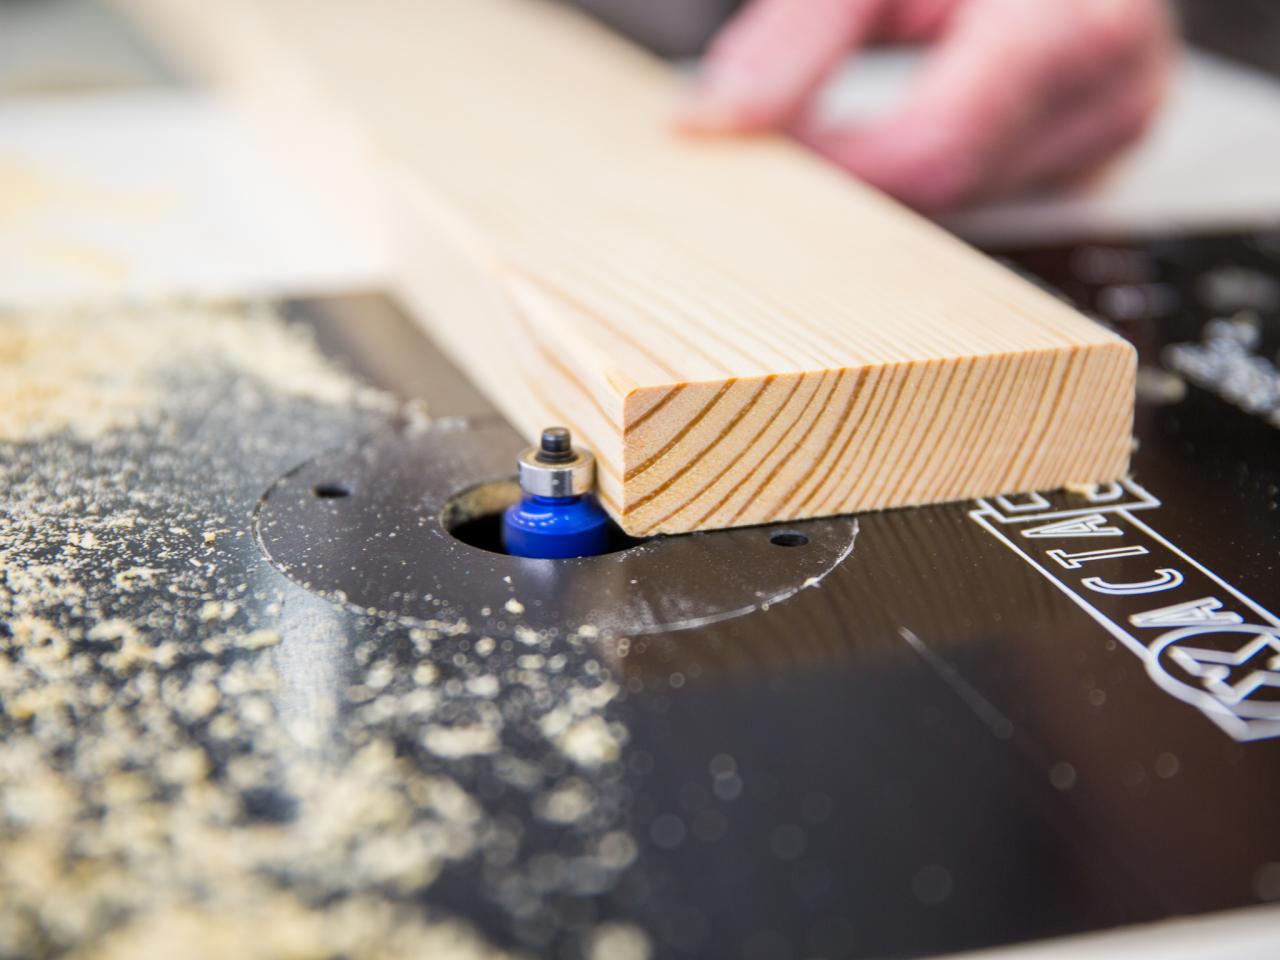
Using a chamfer bit, put a bevel edge on the top of all six of the Piece A's. Using the 1/8" round-over bit, ease all edges of Piece B sections.
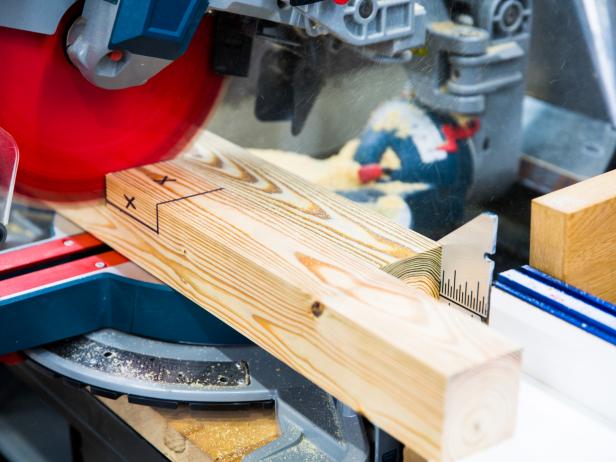
Step 4:

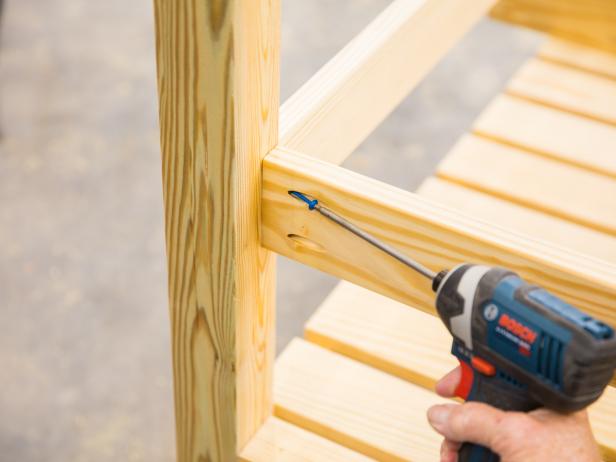
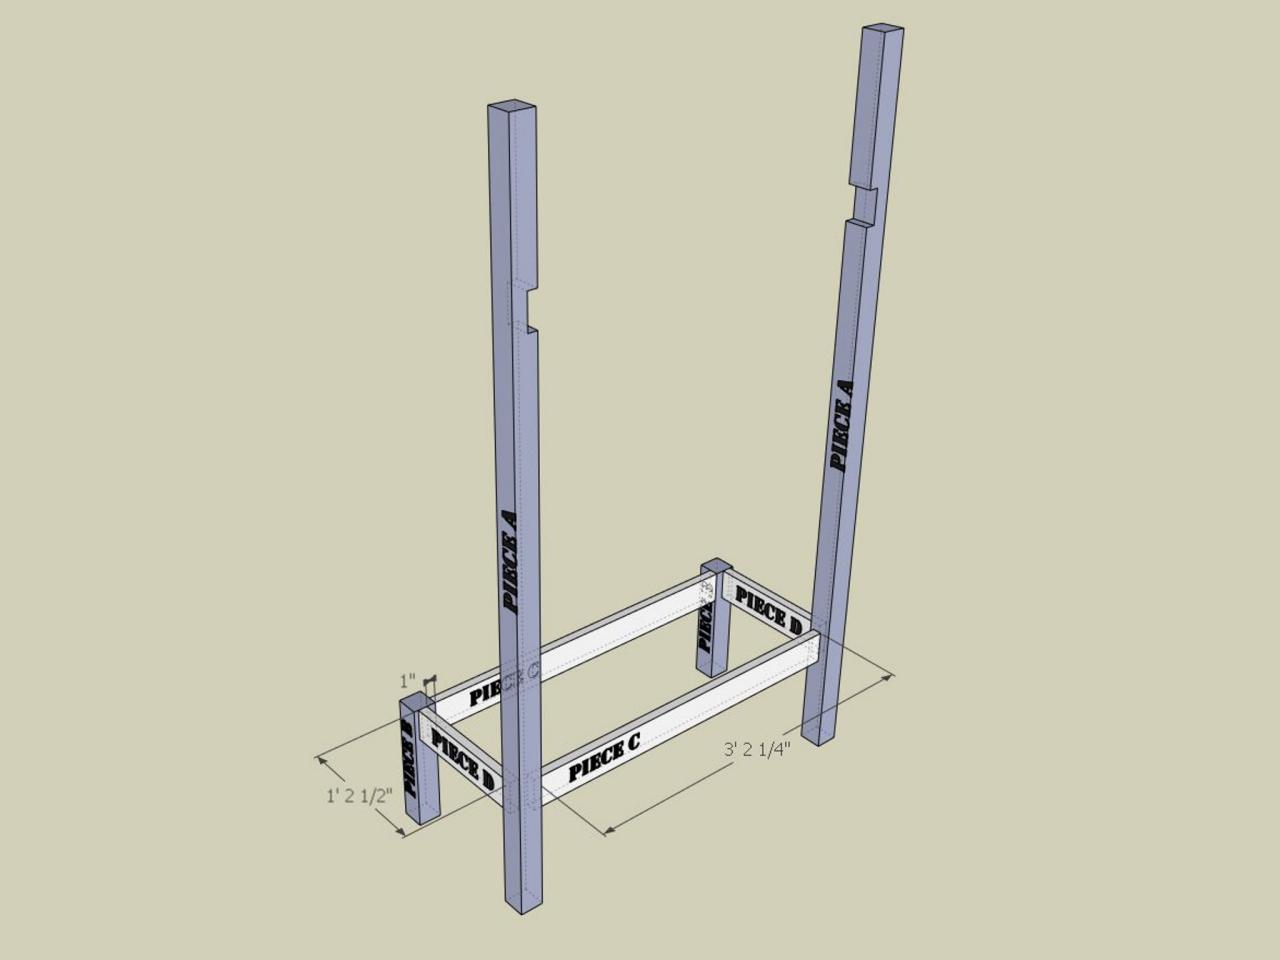
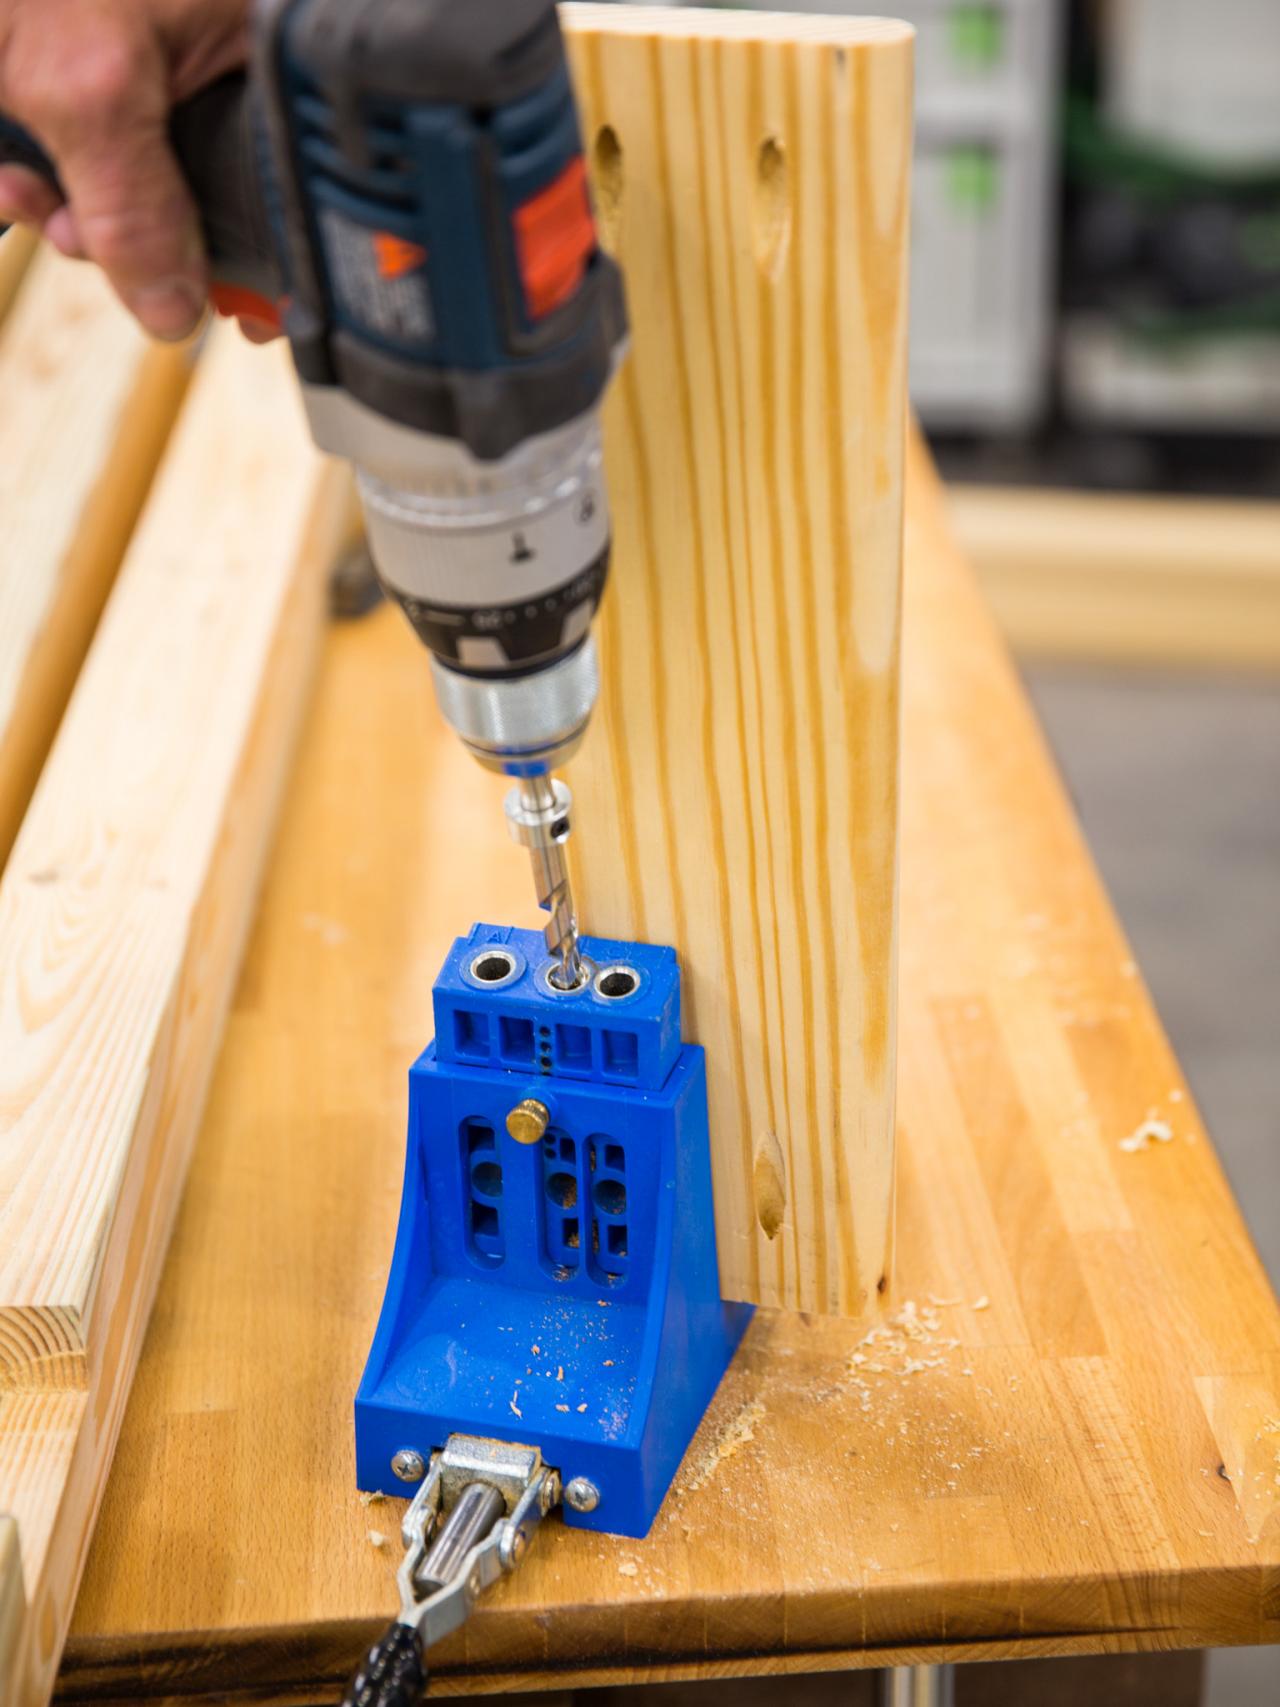
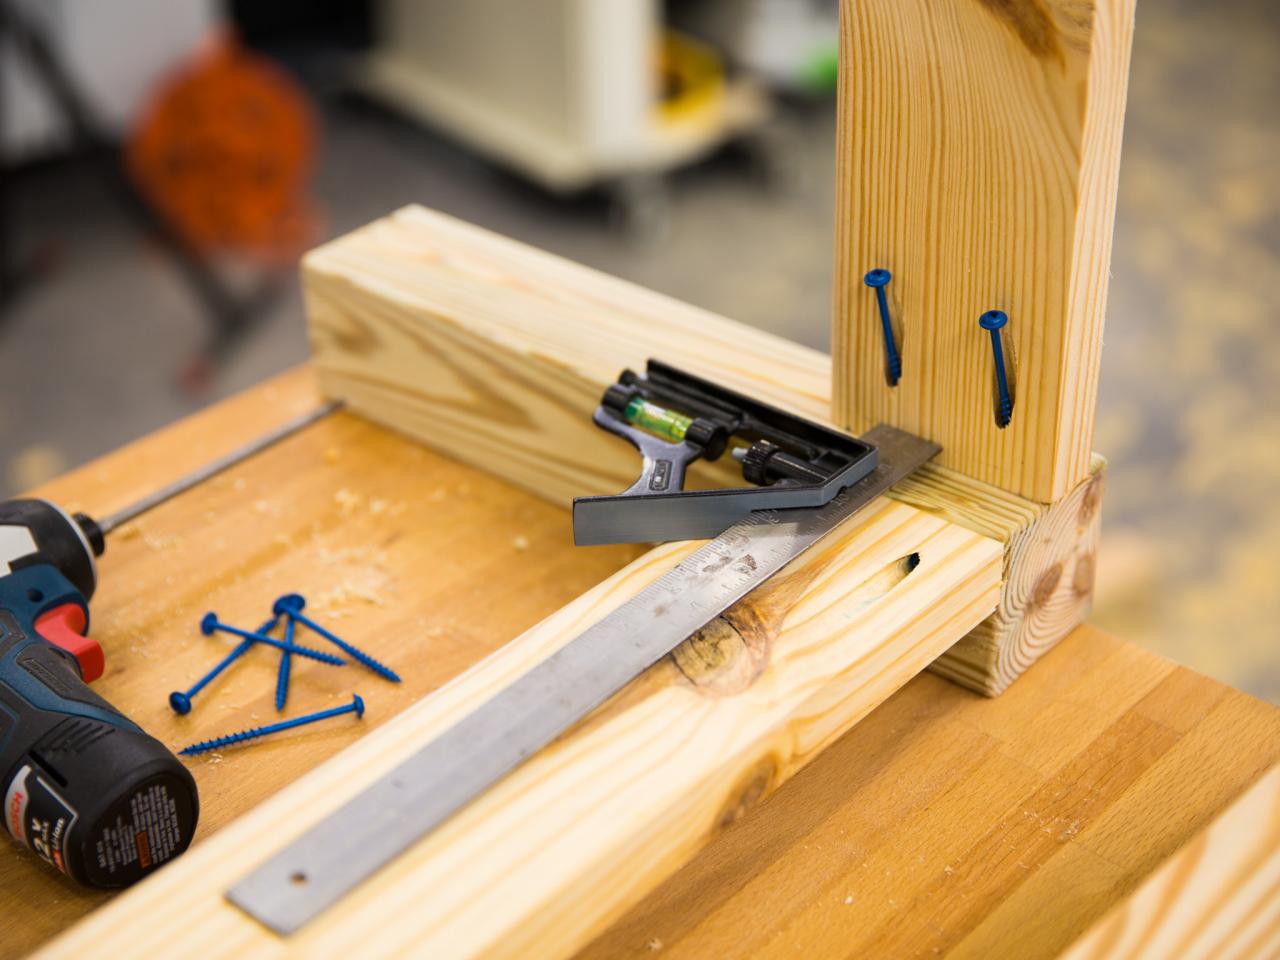
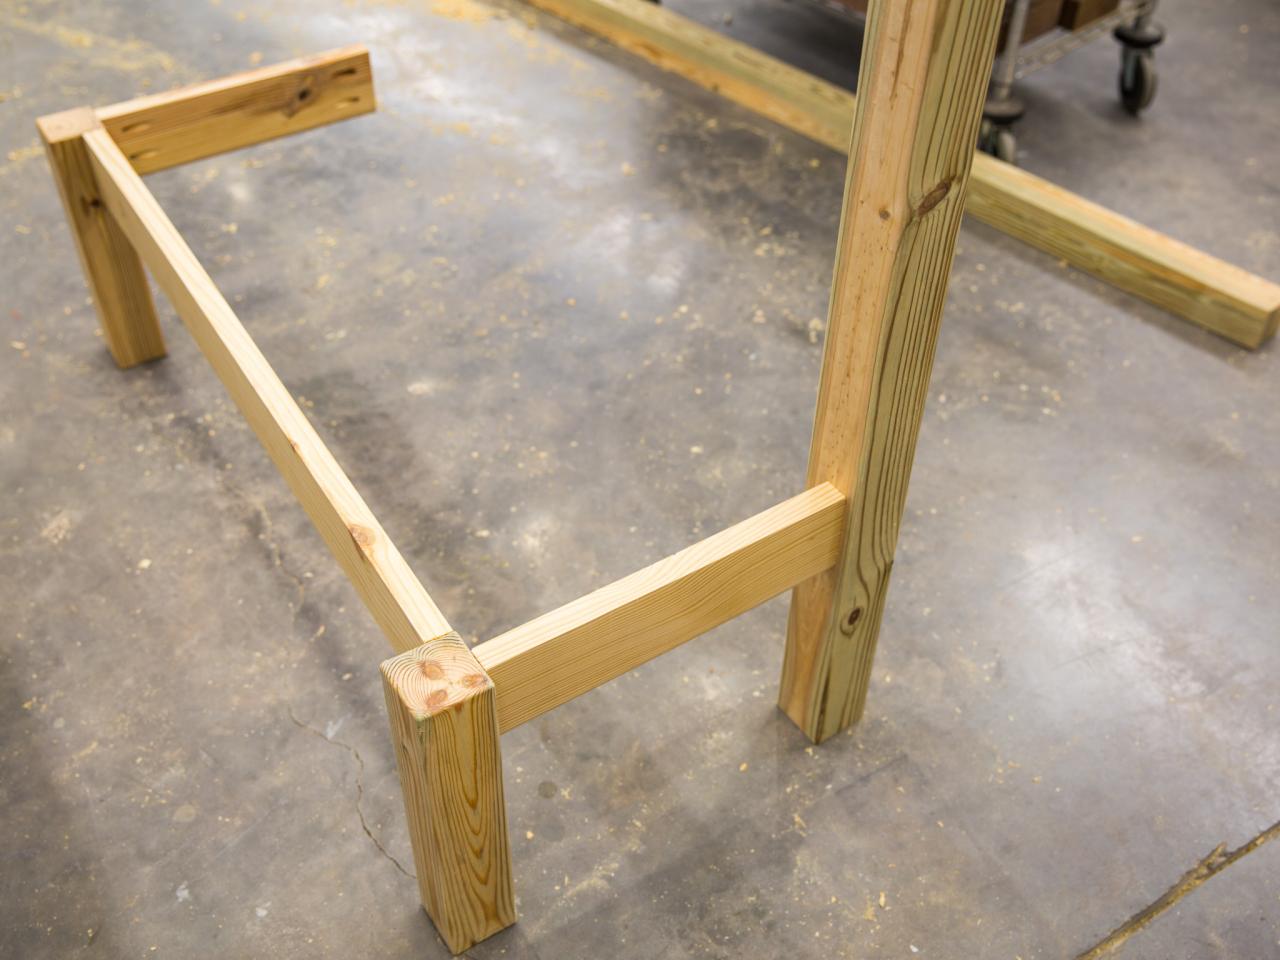
Cut four of the Piece C sections and four Piece D sections to length with a chop saw. Using a pocket-hole jig, place two holes on each end of the back of all Piece C's and Piece D's as shown, and attach to vertical support posts with 2-1/2" pocket screws. This makes both bench assemblies.
Step 5:

Chip


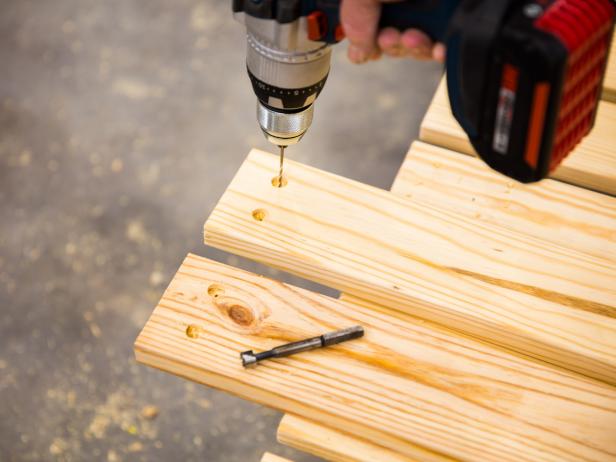
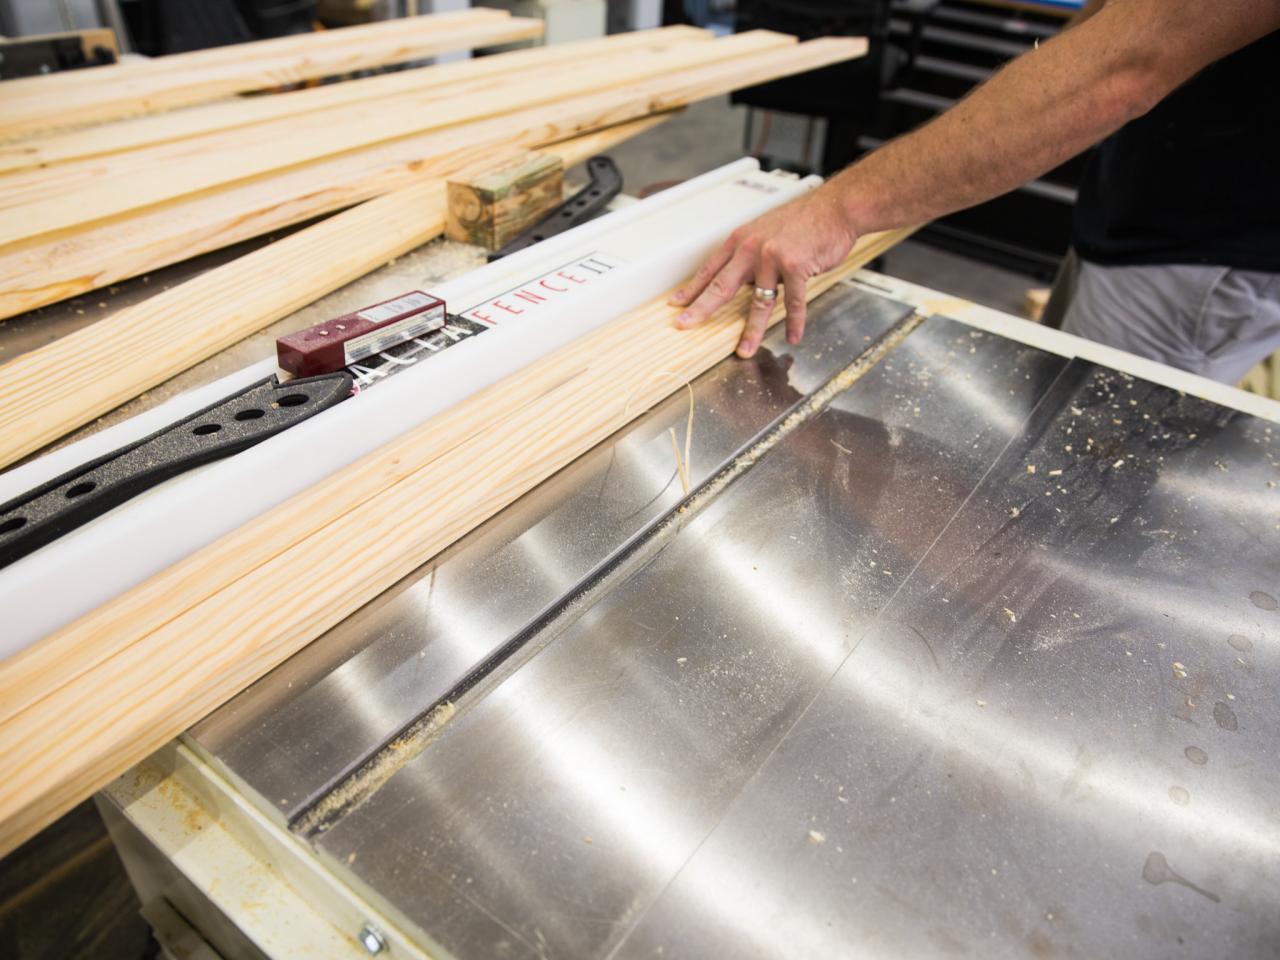
Cut (18) Piece J sections to length with a chop saw. Rip four Piece K sections to the correct width and length with a table saw and a chop saw. Round all the edges with a 1/8" router bit. These pieces will go on both both benches as shown. Glue and nail into the bench stringers from the top.
Step 6:
Chip

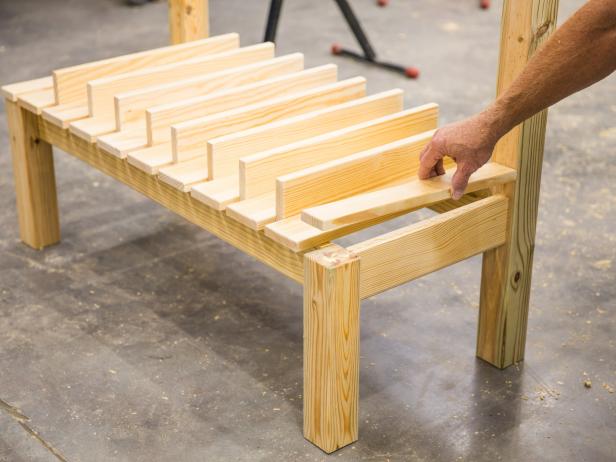
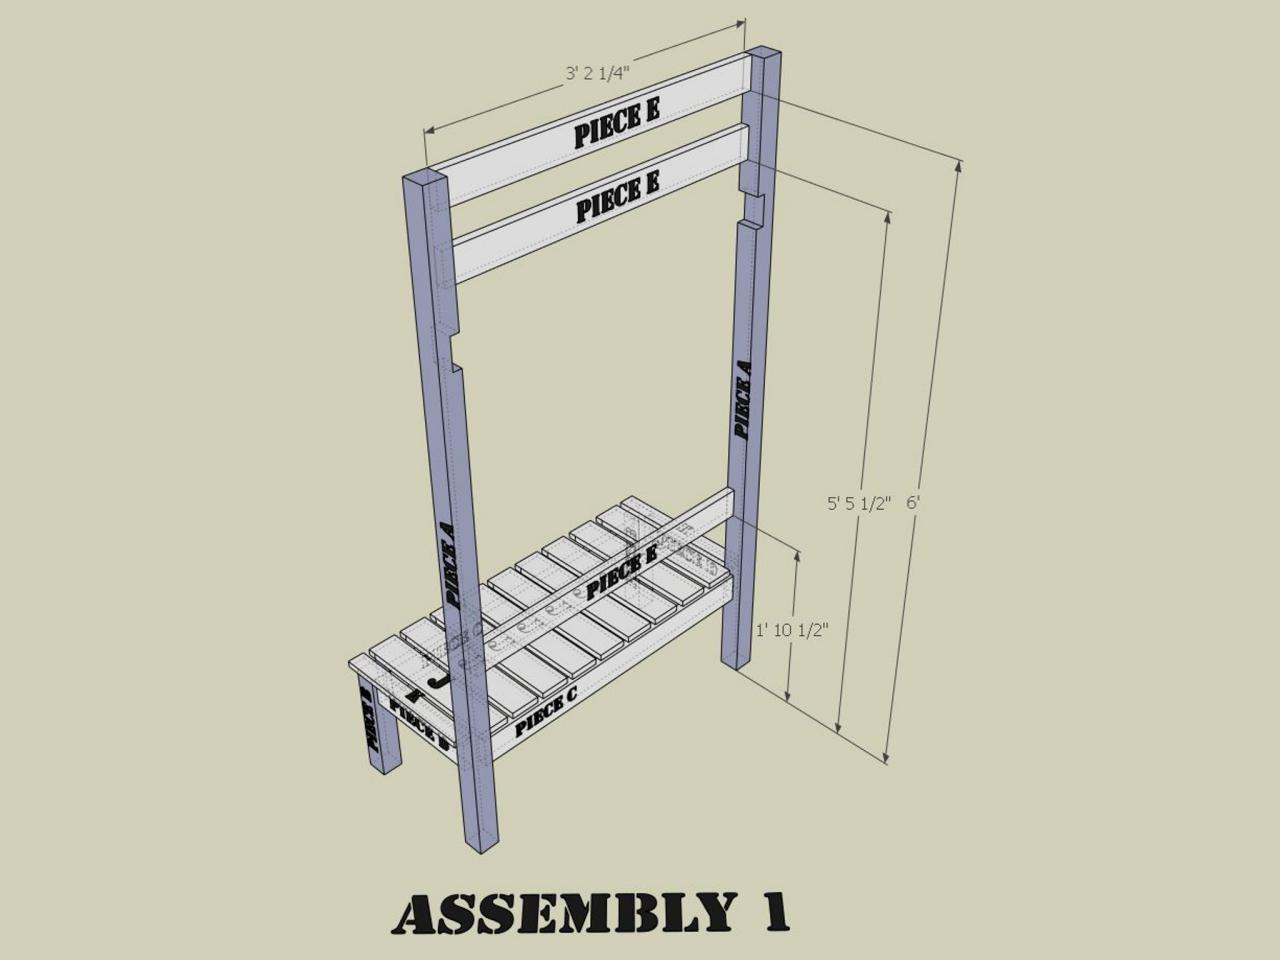
Cut six Piece E sections to length with a chop saw, ease just the long edges with a round-over bit and then put two pocket holes on either side of the back of the six pieces. Attach to the vertical Piece A sections for both benches as shown with 2-1/2" pocket screws. This finishes Assembly 1. Set the two benches aside.
Step 7:

Chip

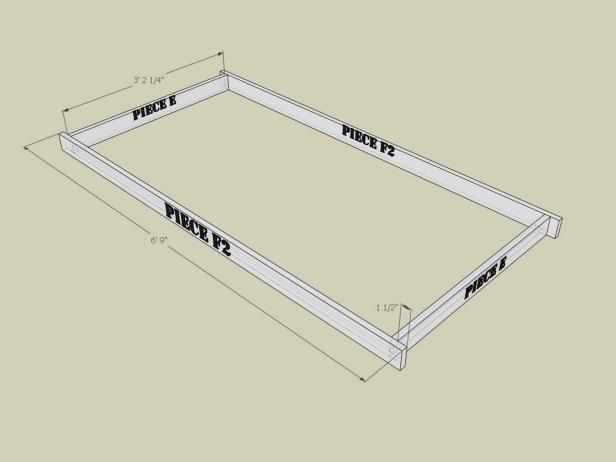
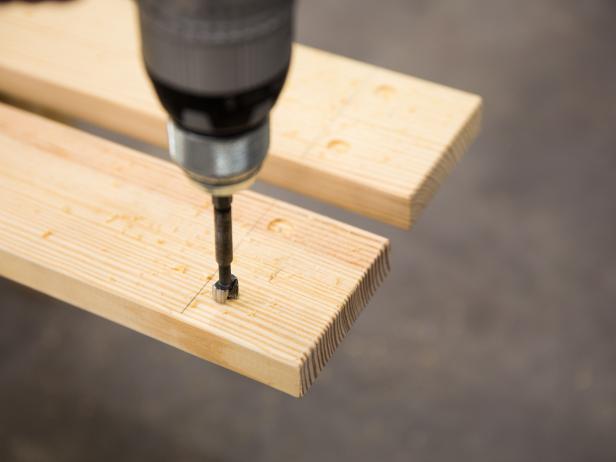
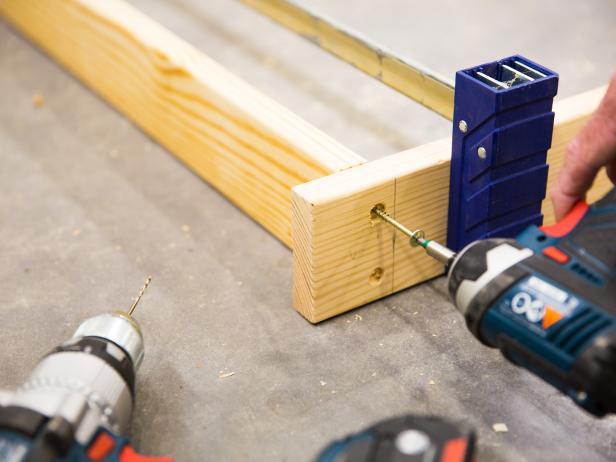
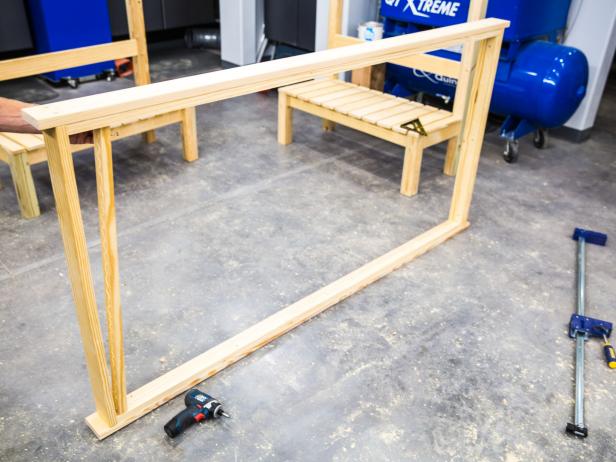
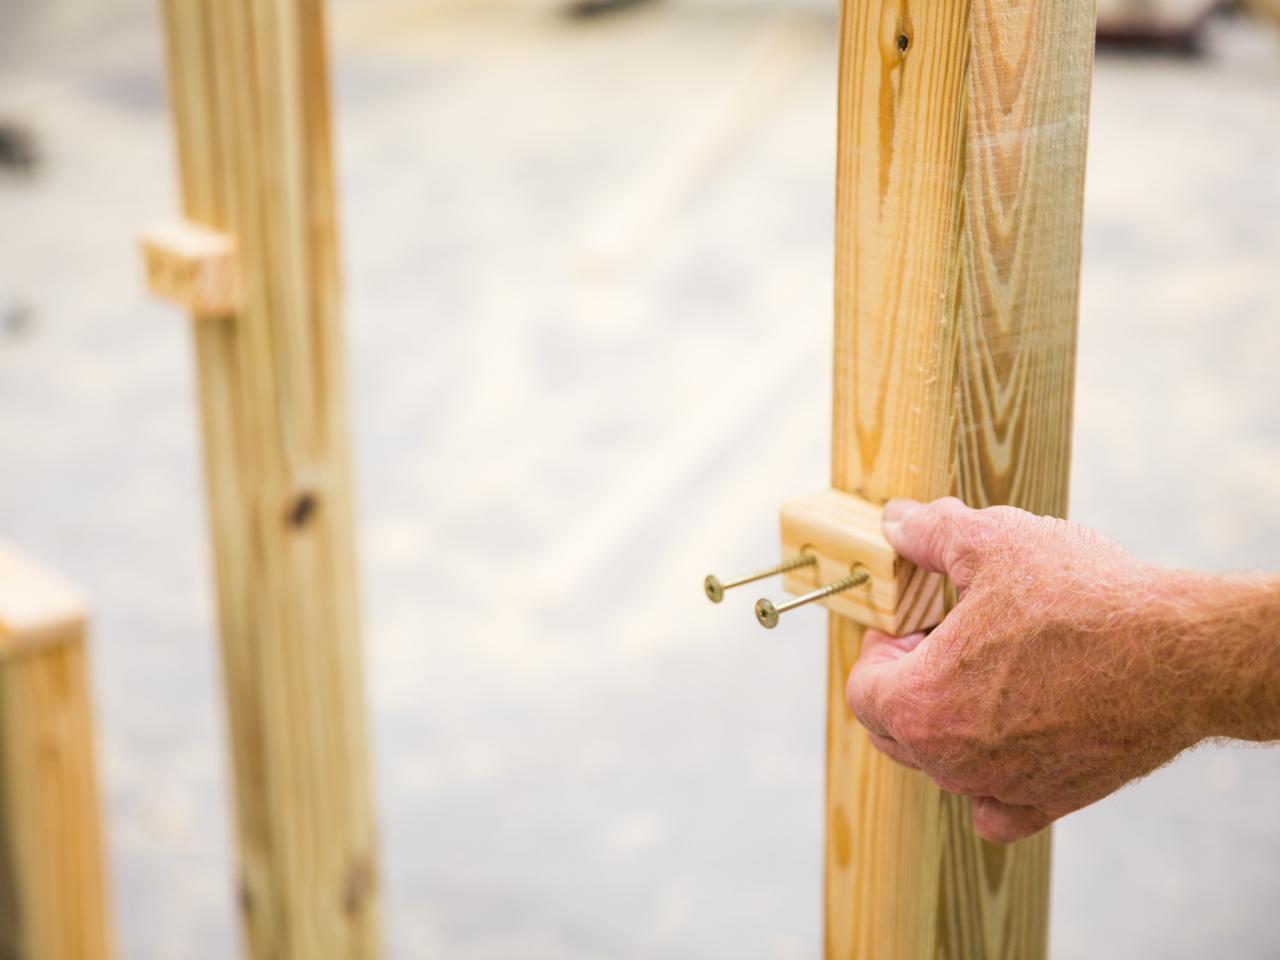
Cut the two remaining Piece E sections and two Piece F2 sections to length with a chop saw. Use a round-over bit on all the long edges. Using a 3/8" forstener bit, counterbore two holes as shown just deep enough for the 2-1/2" cabinet screw heads where the pieces connect. Glue and screw together as shown.
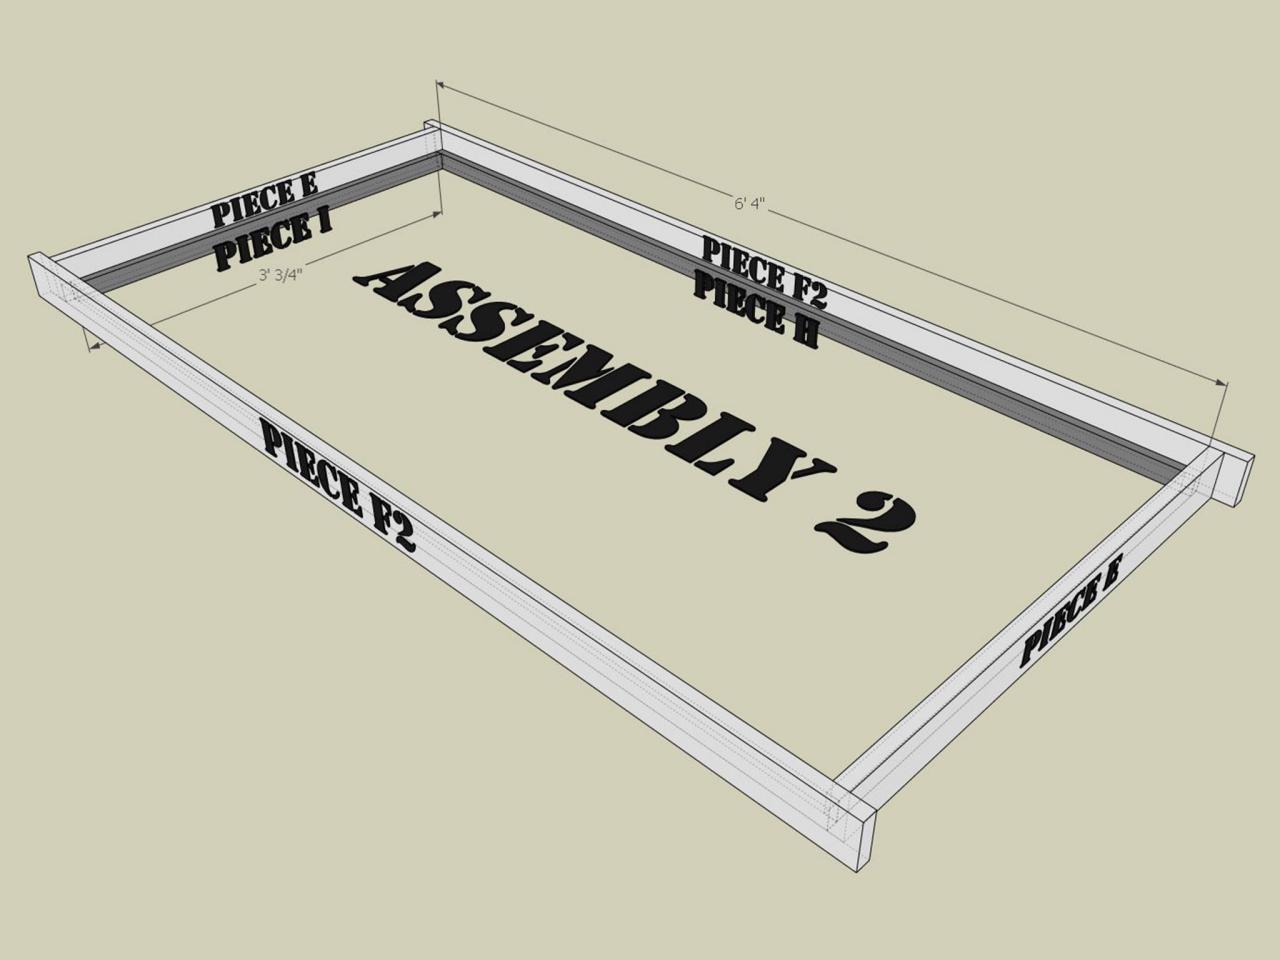
Step 8:
Chip
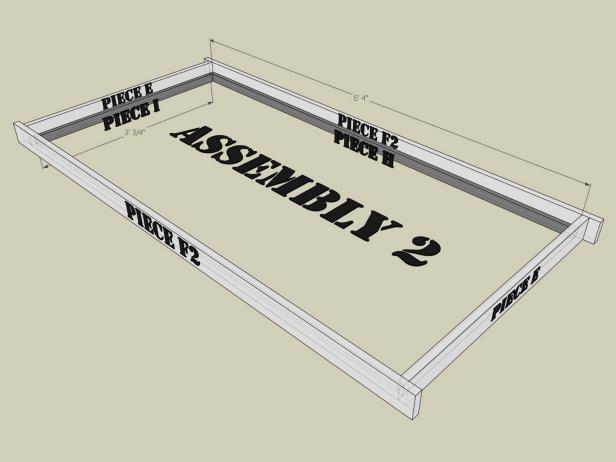
Rip two Piece H sections and two Piece I sections to length on a chop saw. Glue and screw in place with 1-1/2" cabinet screws every 24 inches as shown. This creates Assembly 2.
Step 9:
Chip

Connect both bench sections of Assembly 1 with Assembly 2 as shown with the Assembly 2 fitting flush into cut mortises on the Piece A section. Do not use glue on the joints, use only two 1-1/2" cabinet screws at each connection, as these assemblies be taken apart for transport.
Step 10:

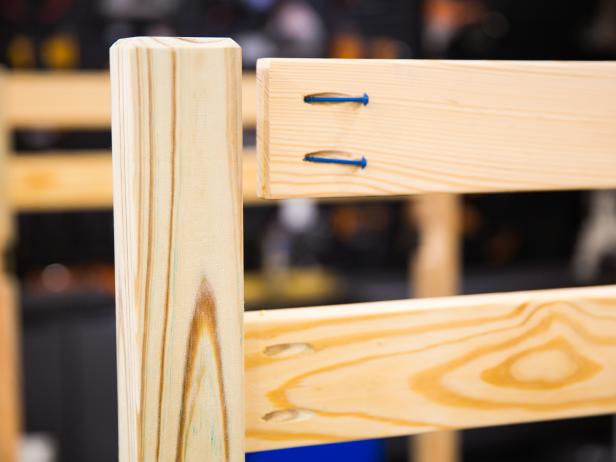
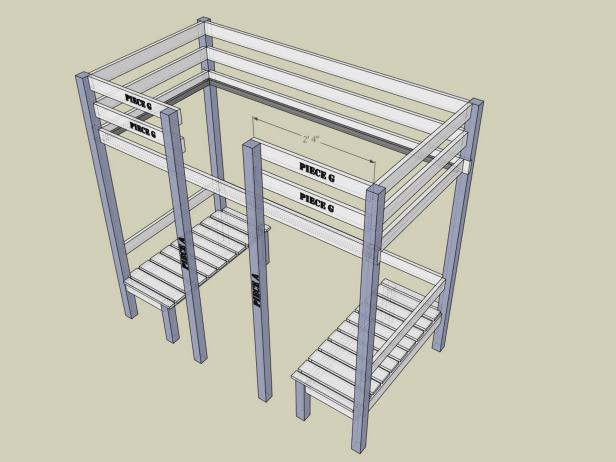
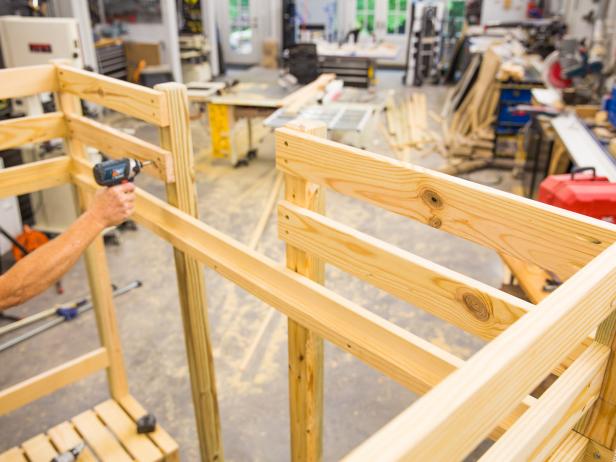
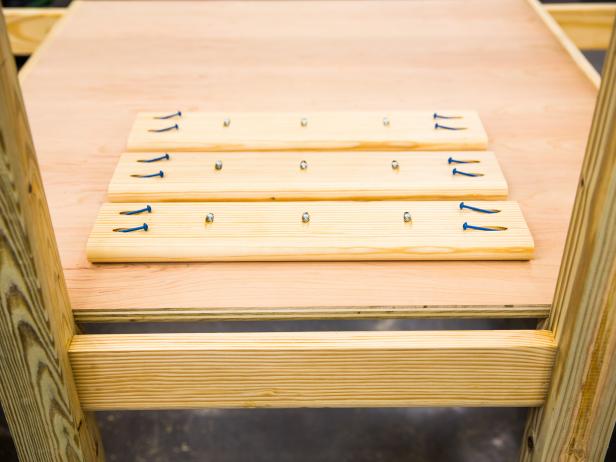
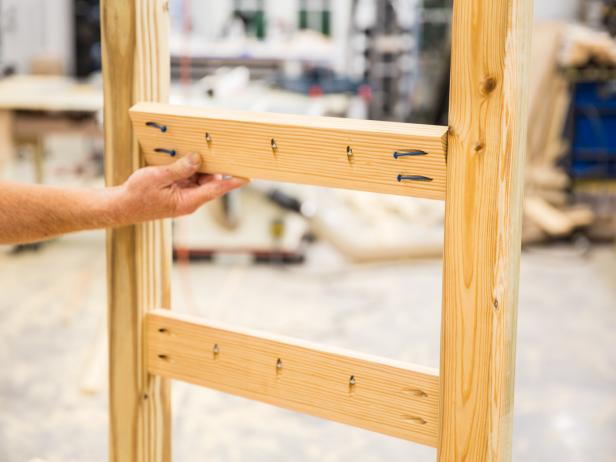
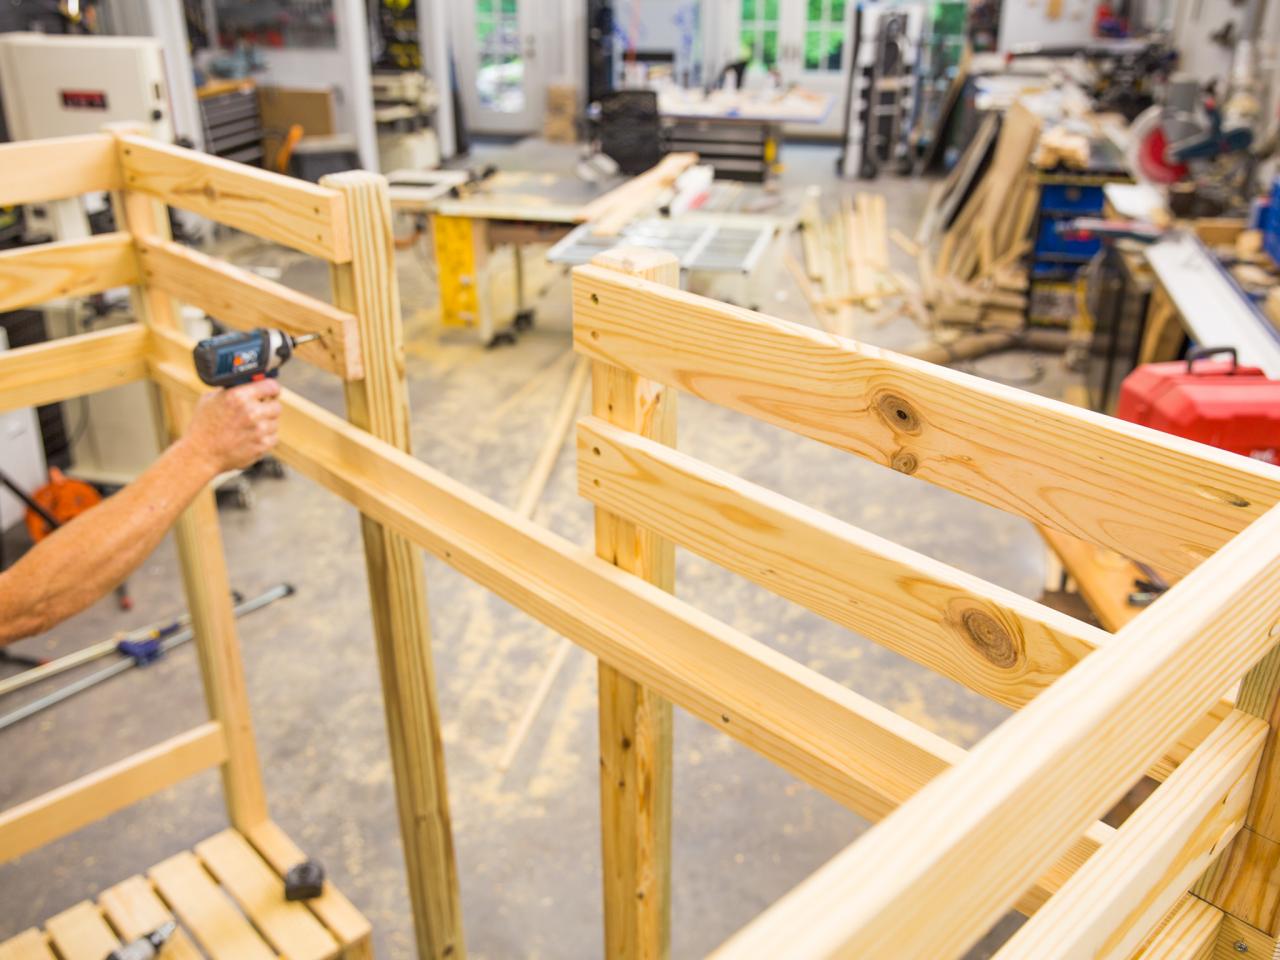
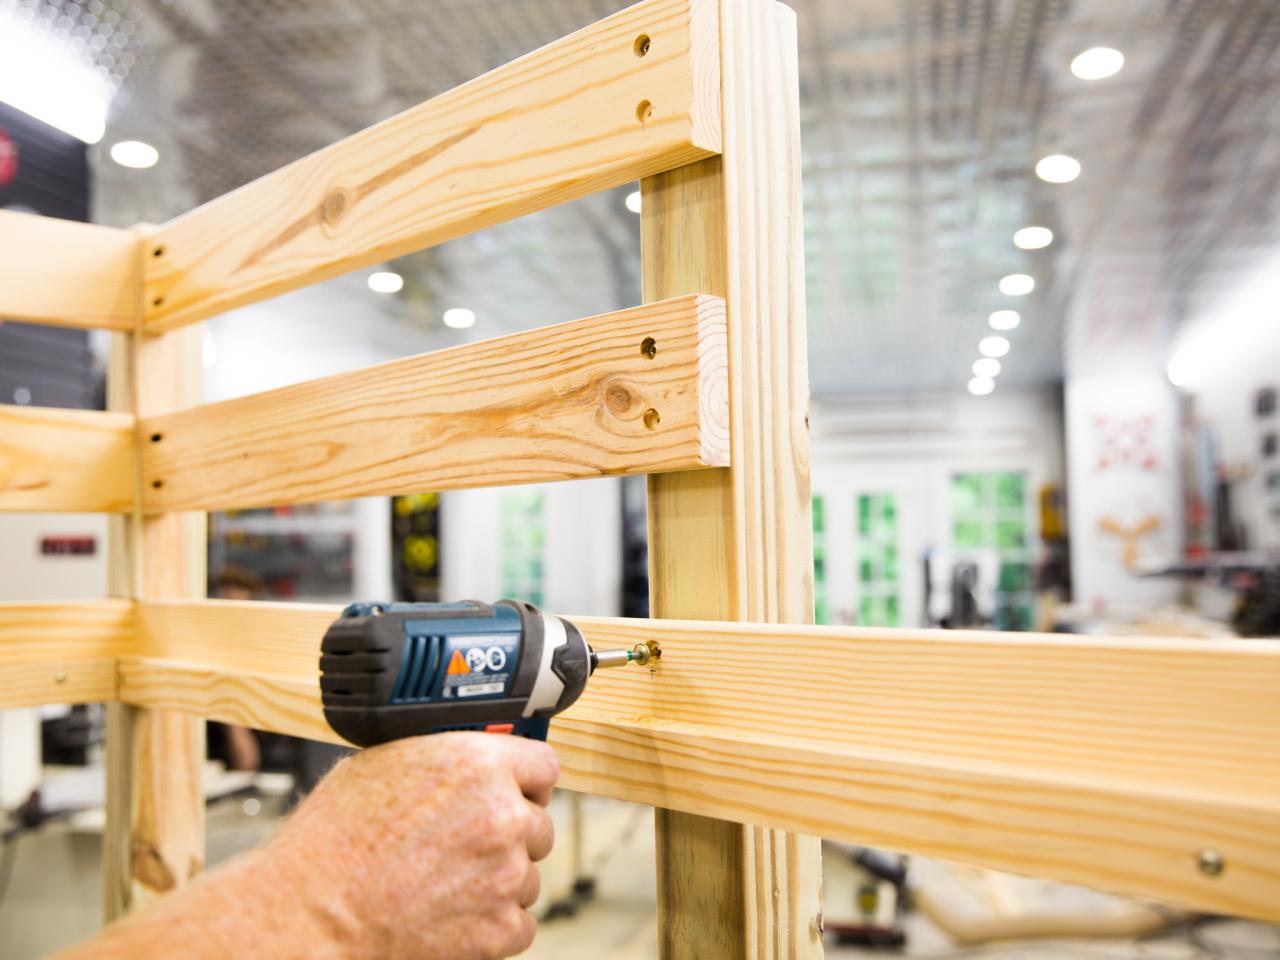
Cut three Piece F sections to length and ease only the long edges with a round-over bit. Using the pocket-hole jig, place two holes on each end of the back of the three Piece F sections. Screw in place using 2-1/2" pocket screws at the locations shown (do not glue). Align top boards with the Piece E sections from before.
Step 11:

Chip
Cut four Piece G sections to length and ease all the long edges and the end of one side of each board. Counterbore two holes on the eased edge end of all the boards using a 3/8" forstener bit. Set the remaining two Piece A's in place and screw (do not glue) as shown with 2-1/2" cabinet screws, aligning with the previously placed Piece E sections.
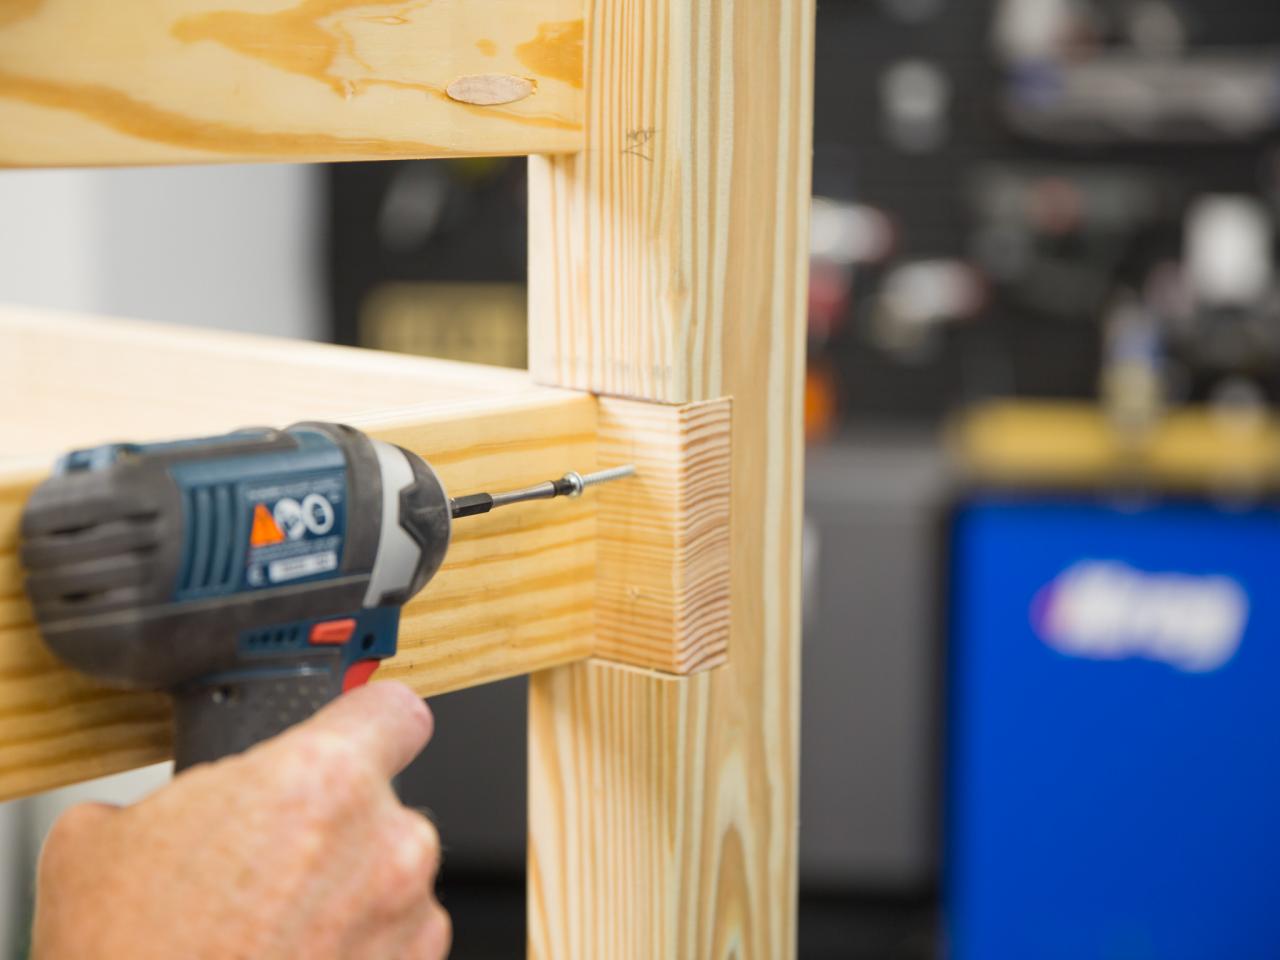
Step 12:
Chip
Counterbore and screw Assembly 2 to the two Piece A sections just placed (do not glue) as shown with 2-1/2" cabinet screws.
Step 13:

Cut two Piece M sections to size and ease the edges on one of the 1-1/2" faces. Attach to both recenly placed Piece A sections as shown with glue and 2-1/2" cabinet screws.
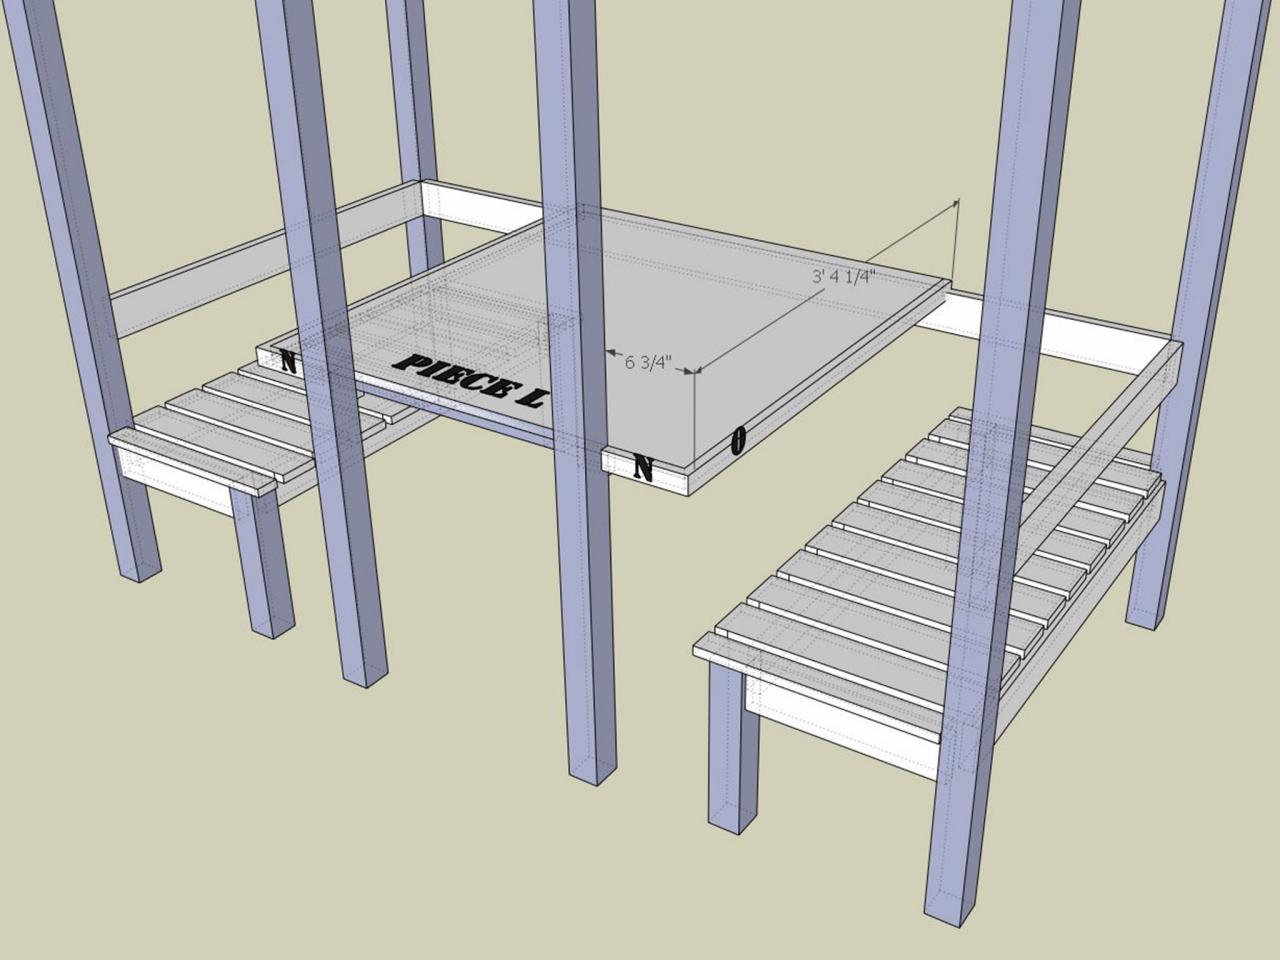
Step 14:

Chip

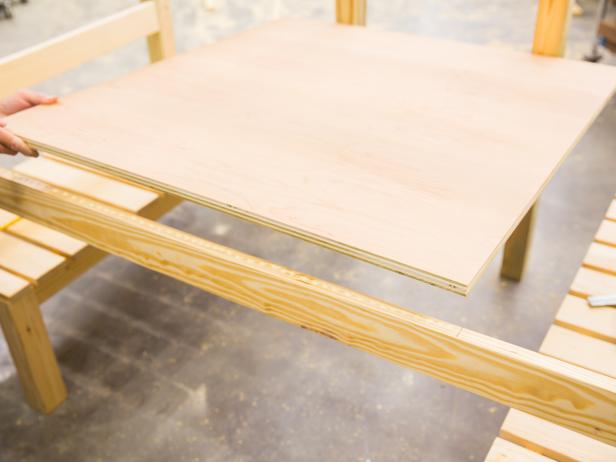
Cut Piece L, two Piece M's and two Piece O's. Glue and nail Piece L to lower Piece F, counterbore and screw (do not glue) Piece L to both Piece M' sections with 1-1/2" cabinet screws. Glue and nail the Piece M's and Piece O's as face frames to Piece L as shown.
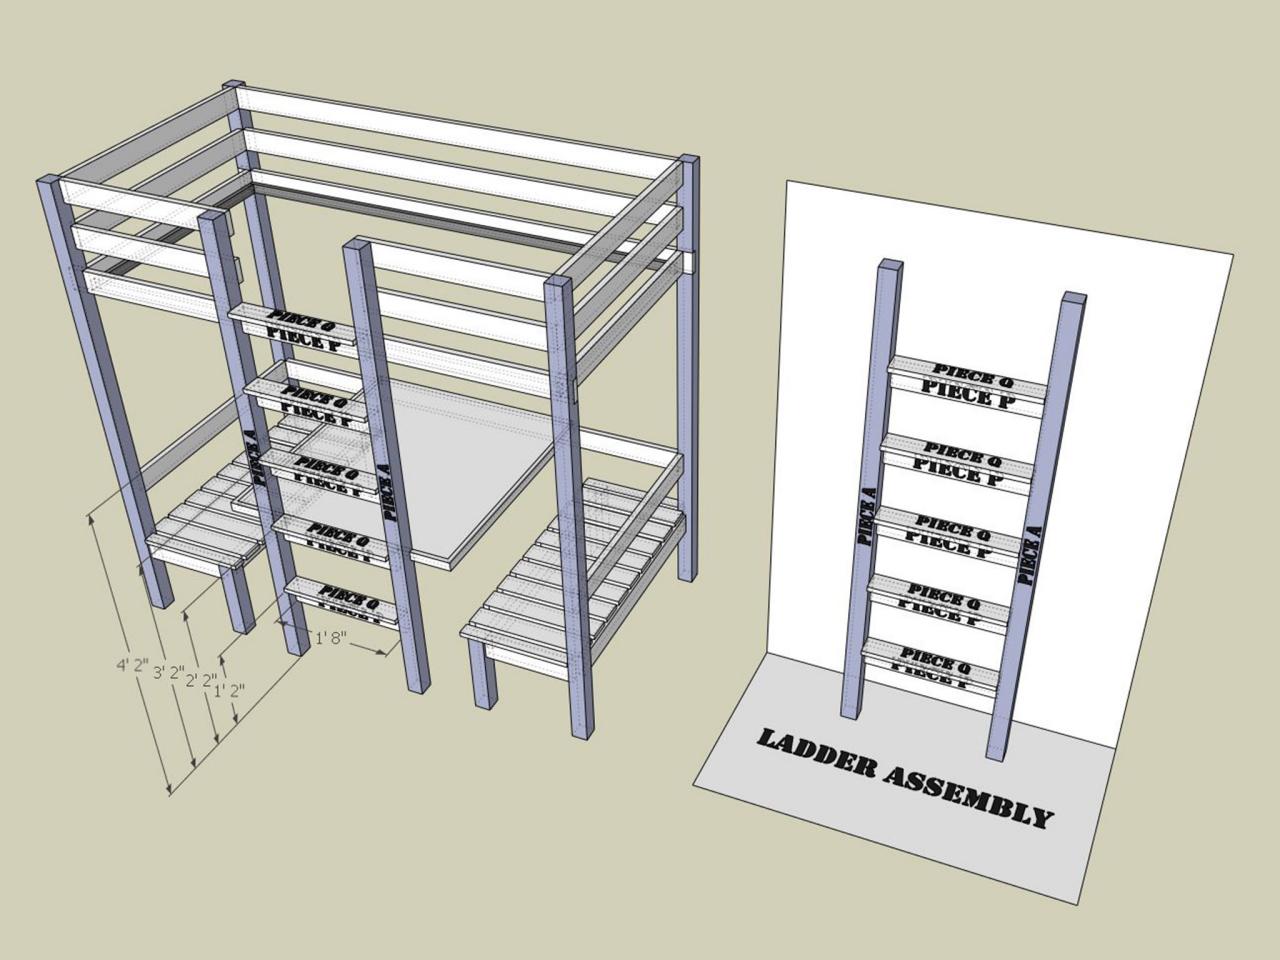
Step 15:

Chip
Chip

Cut five Piece P sections and five Piece Q sections. Using the pocket-hole jig, place seven pocket holes as shown on the back of all five Piece P sections, ease long edges and attach with glue and 2-1/2" pocket screws on the ends. Ease all long edges of Piece Q's and glue and screw to Piece P's with 1-1/2" pocket screws from the bottom.
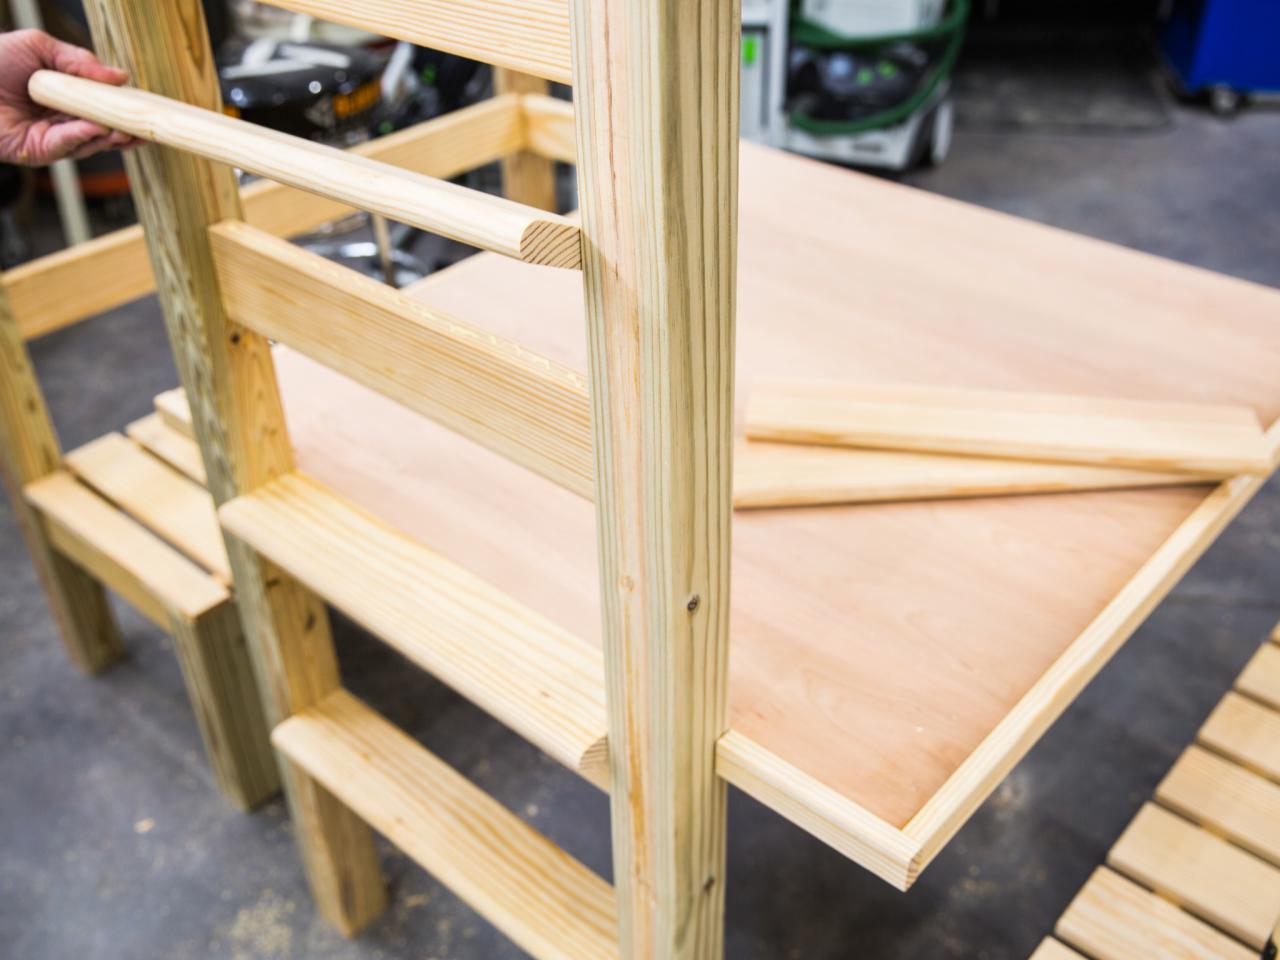
Step 16:

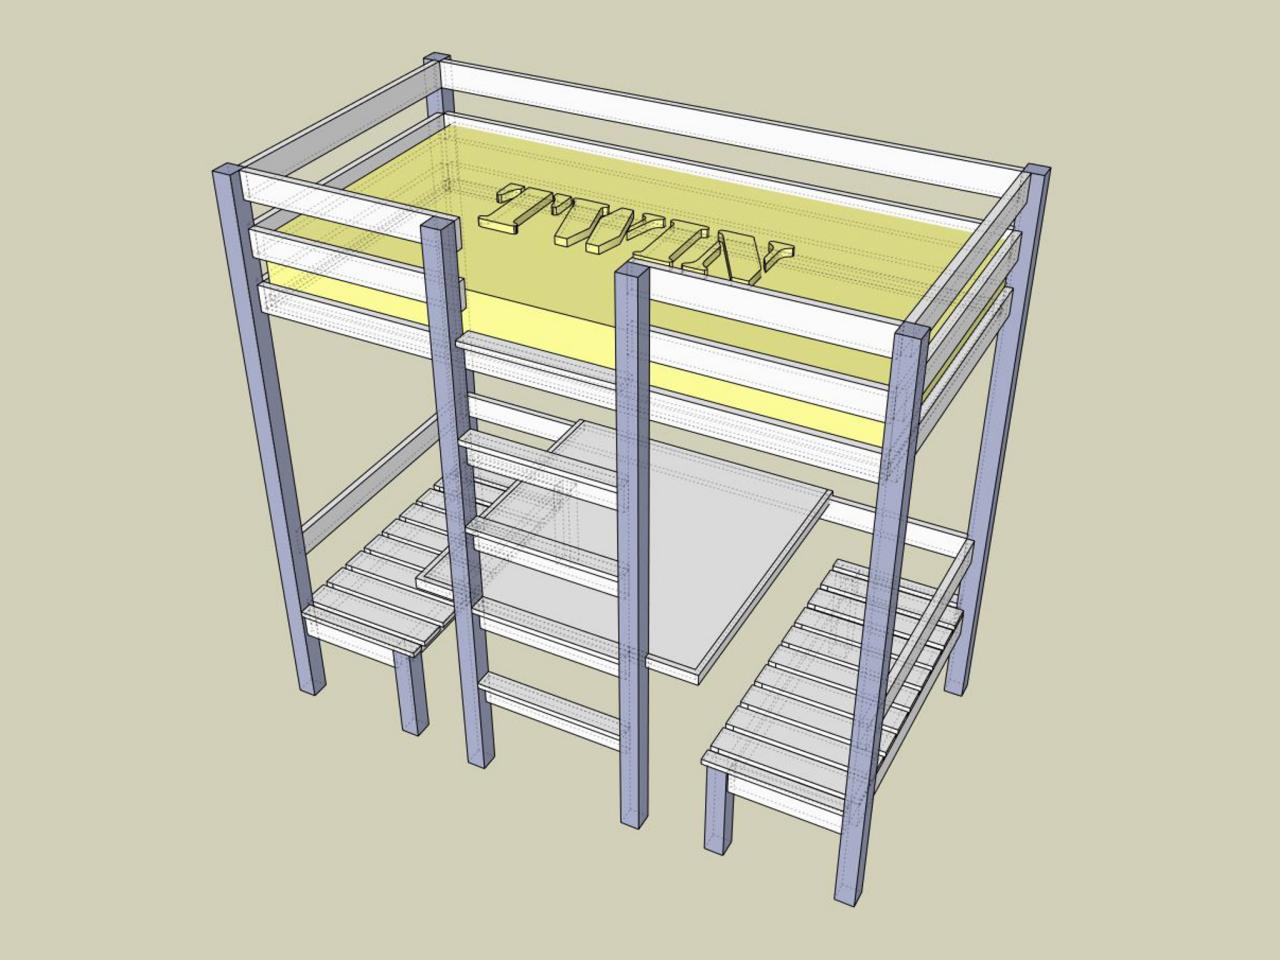
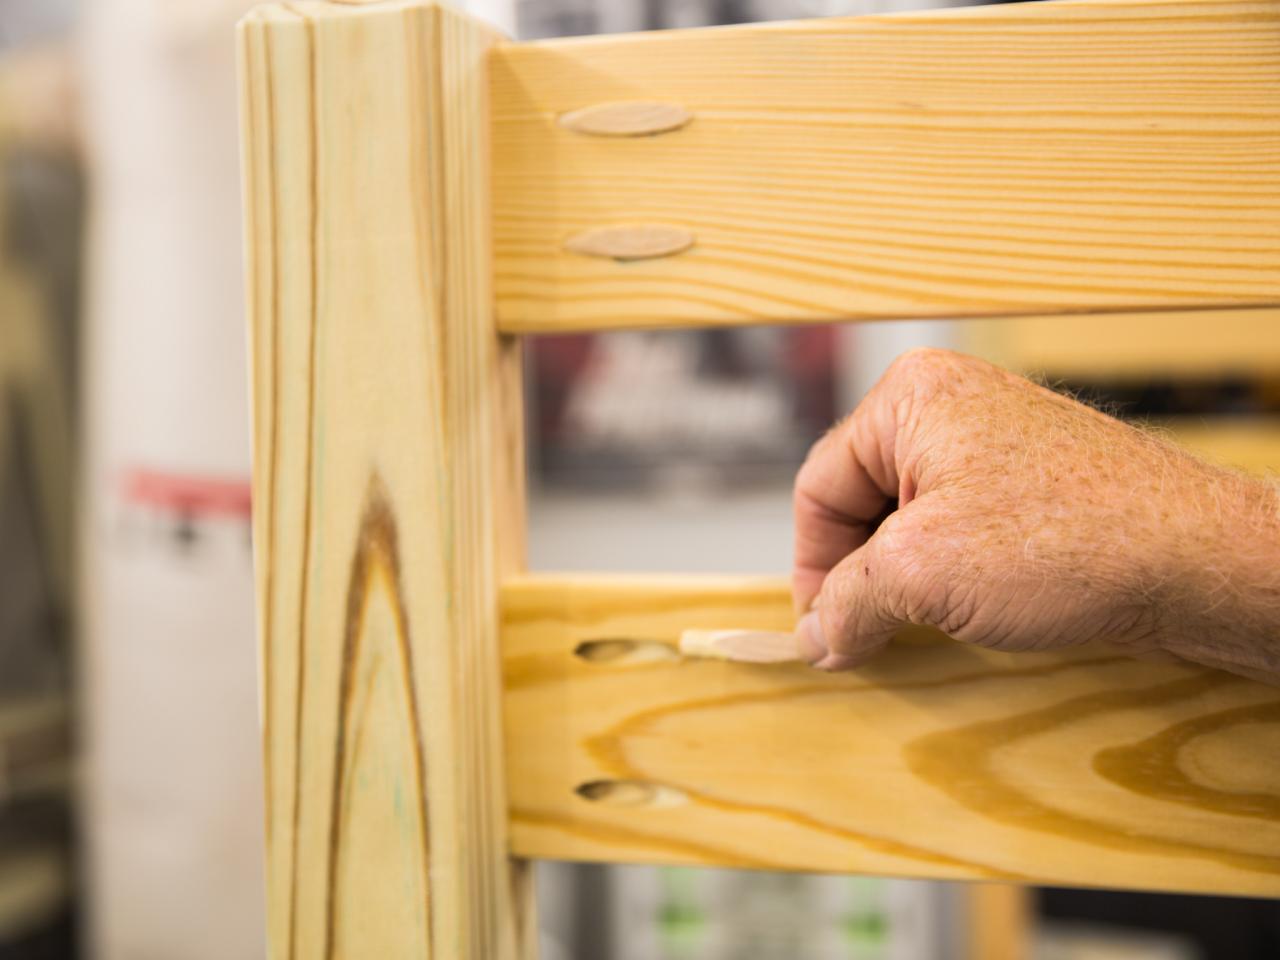
Chip

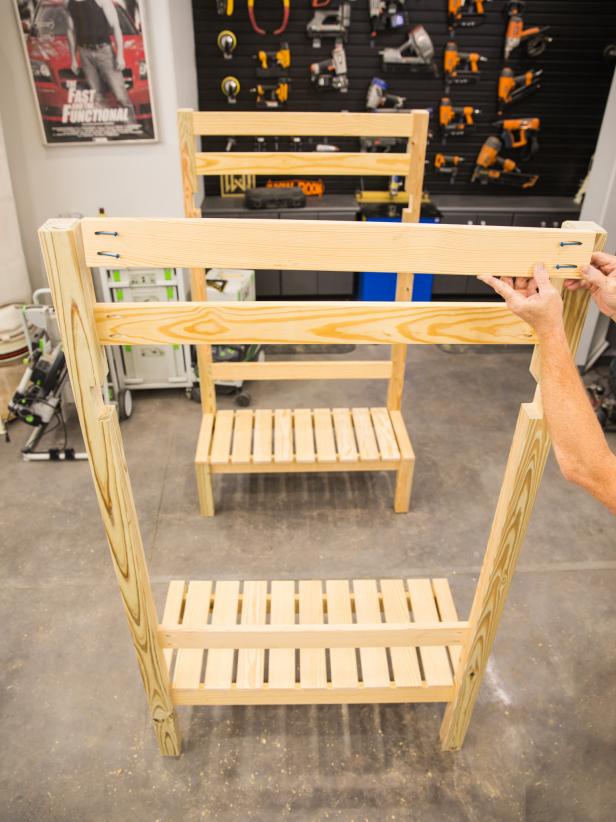
The bed should now look like this. Fill, plug all the pocket holes with plugs and sand to smooth.
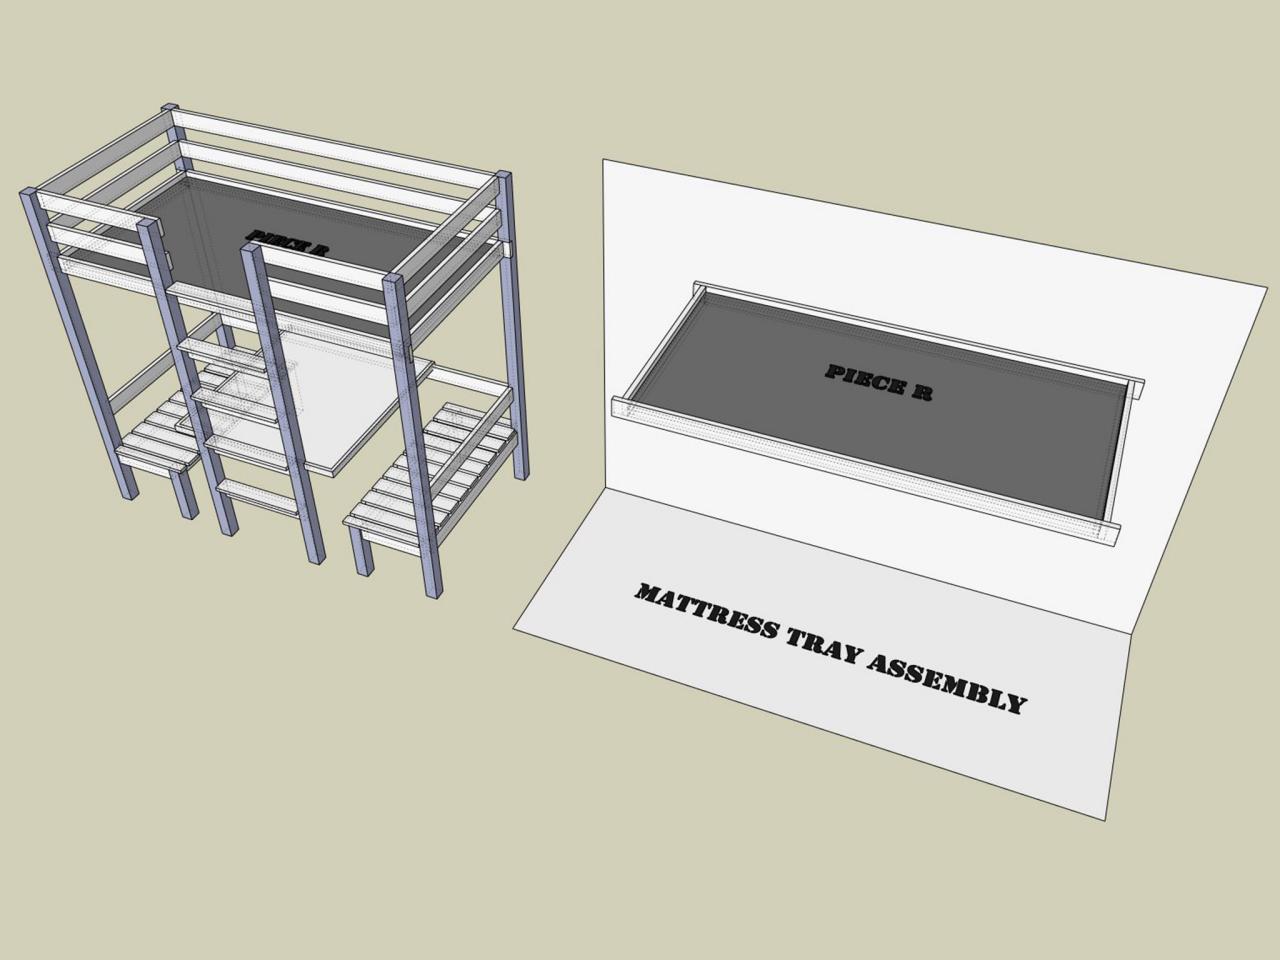
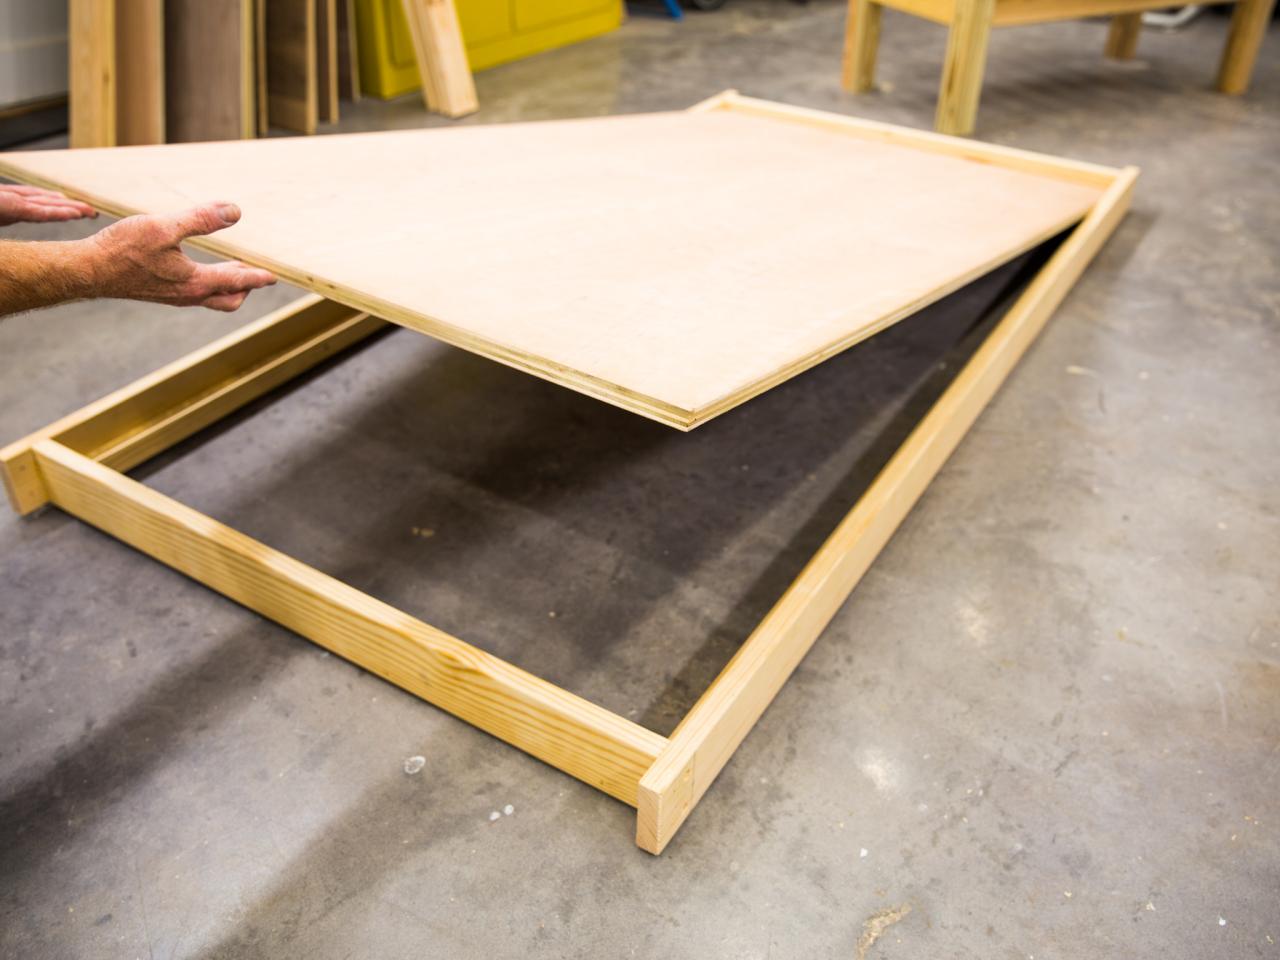
Step 17:

Cut Piece R and glue and nail into Assembly 2 as shown. This creates the mattress tray assembly.
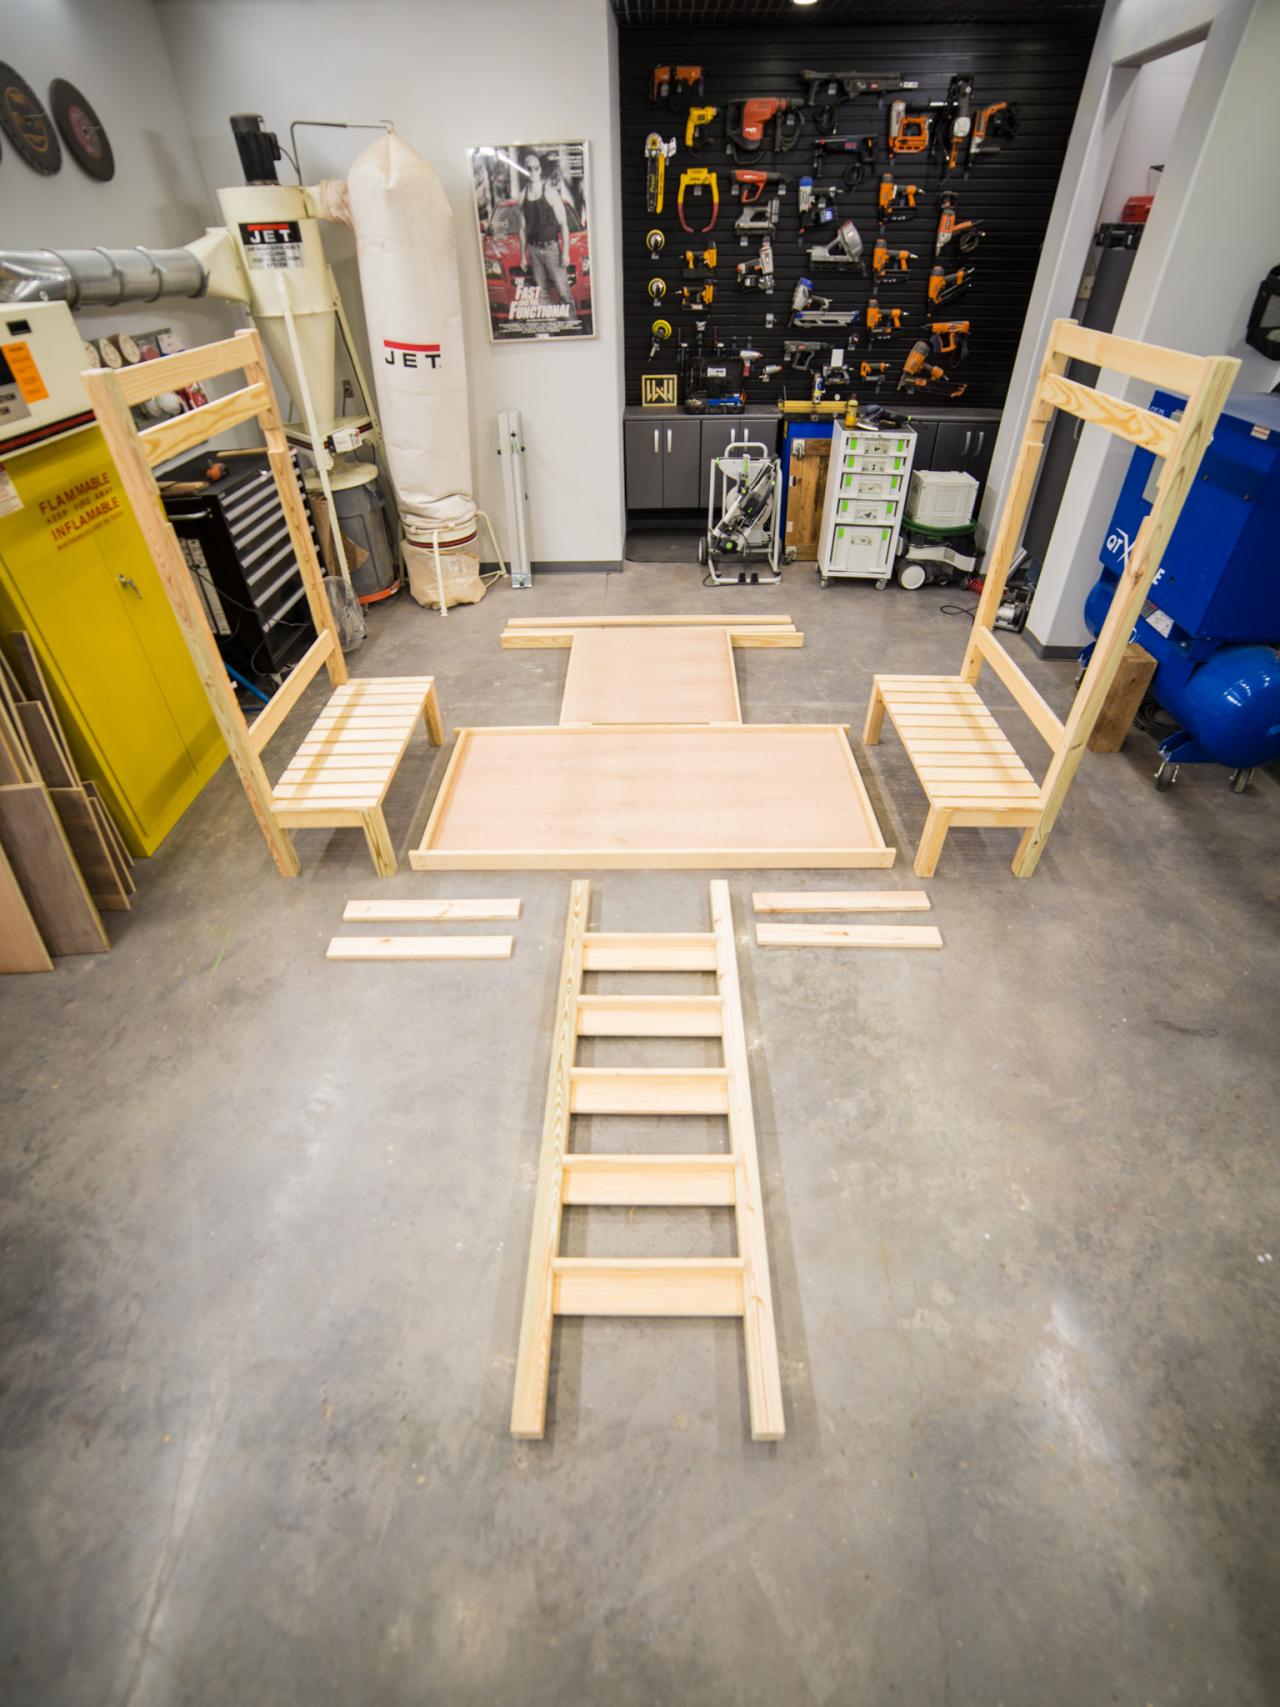
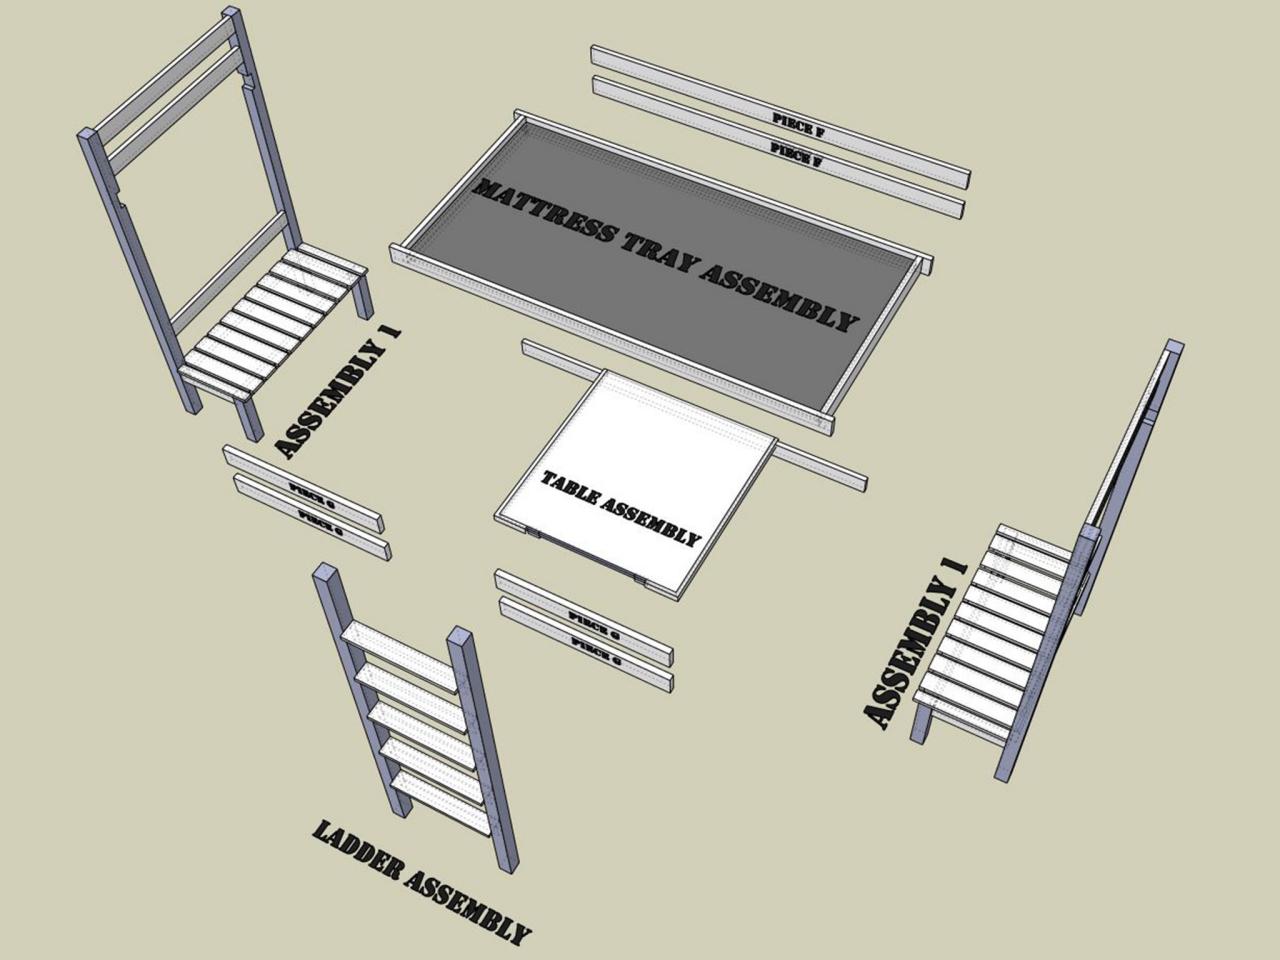
Step 18:

Chip

Dissasemble the bed into assemblies as shown. Place all the loose hardware in a bag. Coat or paint with the finish of your choice. A resilent paint with a semi-gloss luster over primer is reccomended (two coats).
Step 19:


Chip
Assemble in place.


