


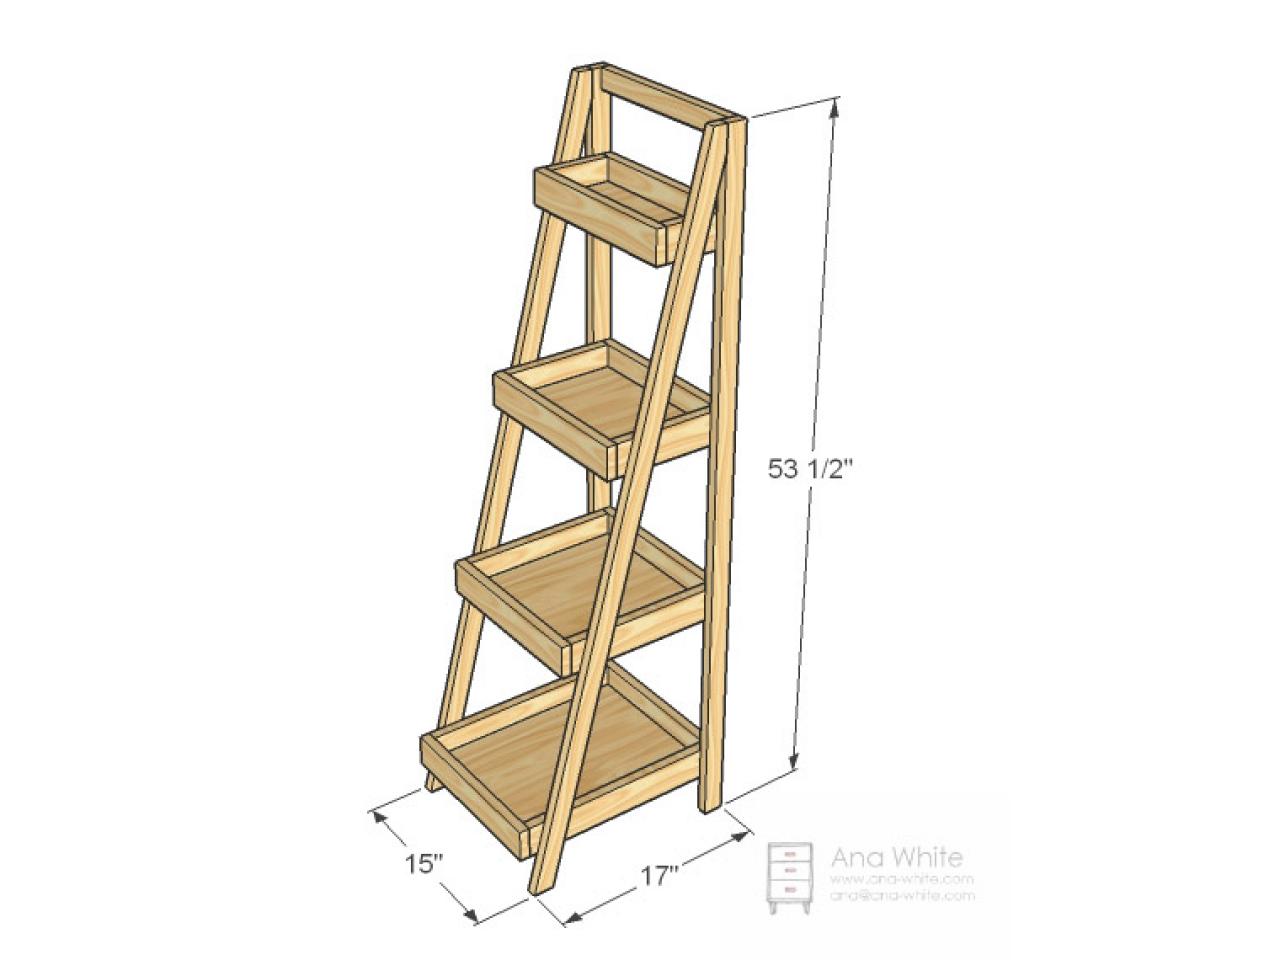
Build a Storage Ladder

Materials Needed:
- 4’ 12"-wide shelf
- 6' 1x2 pine board
- 8' 1x4 pine boards (2)
- 2 -1/2" wood screws (24)
- 1-1/4" wood screws (10)
- pilot hole bit to match wood screws and lag screws
- small tube wood filler
- 1 quart stain or 2 quarts flat paint
- spray can exterior clear coat
- sandpaper in medium and fine grits
- measuring tape
- carpenter's square
- protractor
- level
- drill
- circular saw or jigsaw Tip: Many hardware stores will make cuts complimentary with the purchase of lumber.
- vacuum with soft-bristled brush attachment
Cut List
1x2 boards cut 55 3/8" long (front legs, ends cut at 15 degrees off square) (2)
1x2 boards cut 531/2" long (back legs) (2)
1x3 boards cut 25- 1/2" long (fronts and backs of shelves) (8)
1x2 board cut 25 1/2" long (top trim)
12” wide shelf cut 12" x 4 3/4" (top shelf cut from 12" wide shelf)
1x3 boards cut 4 3/4" long (top shelf side trim) (2)
12" wide shelf cut 12" x 8 1/2" (second shelf)
1x3 boards cut 8 1/2" long (second shelf trim) (2)
1 12" wide shelf cut 12" x 12 1/4" (third shelf)
1x3 boards cut 12 1/4" long (third shelf trim) (2)
1 12" wide shelf cut 12" x 16" (bottom shelf)
1x3 boards cut at 16" long (bottom shelf trim) (2)
Getting Started
Select boards that are straight. Tip: Pretend the board is an arrow on a bow and look down the length of the board to see if it is straight. Tip: To save time, have hardware store cut boards as directed in cut list. Work on a clean level surface large enough for the project, and always wear safety glasses and ensure proper ventilation when painting.
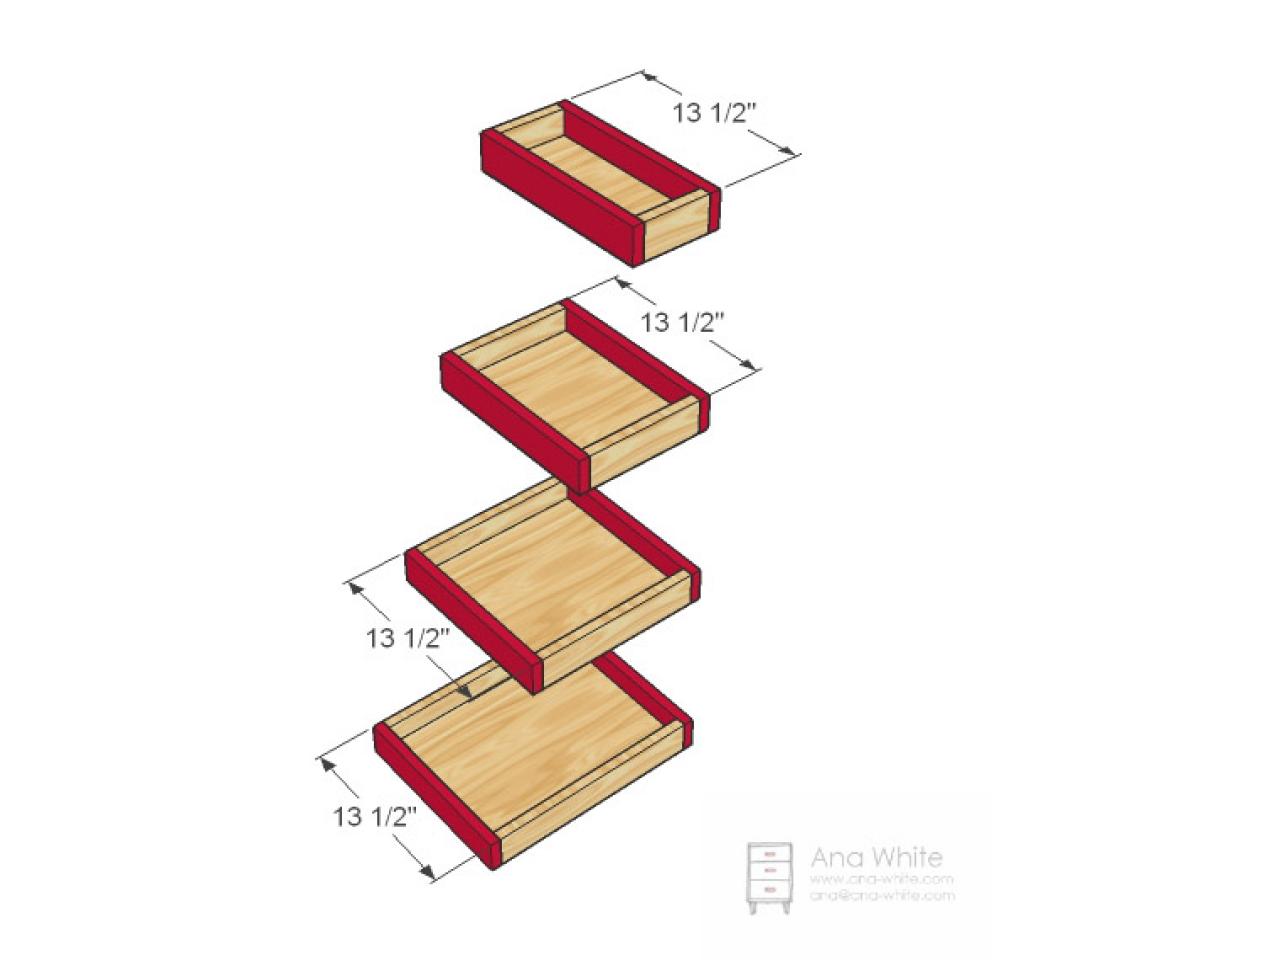
Trim Sides of Shelves
Pre-drill pilot holes with countersink bit on bottom edge of all trim boards. Use glue and 2-1/2" trim screws to attach side trim to shelves. Keep bottom edges flush.

Attach Front and Back Trim
Drill pilot holes on front and back trim along bottom edge and ends. Use 2-1/2" trim screws and wood glue to attach front and back trim to shelf and side trim. Set shelves aside.

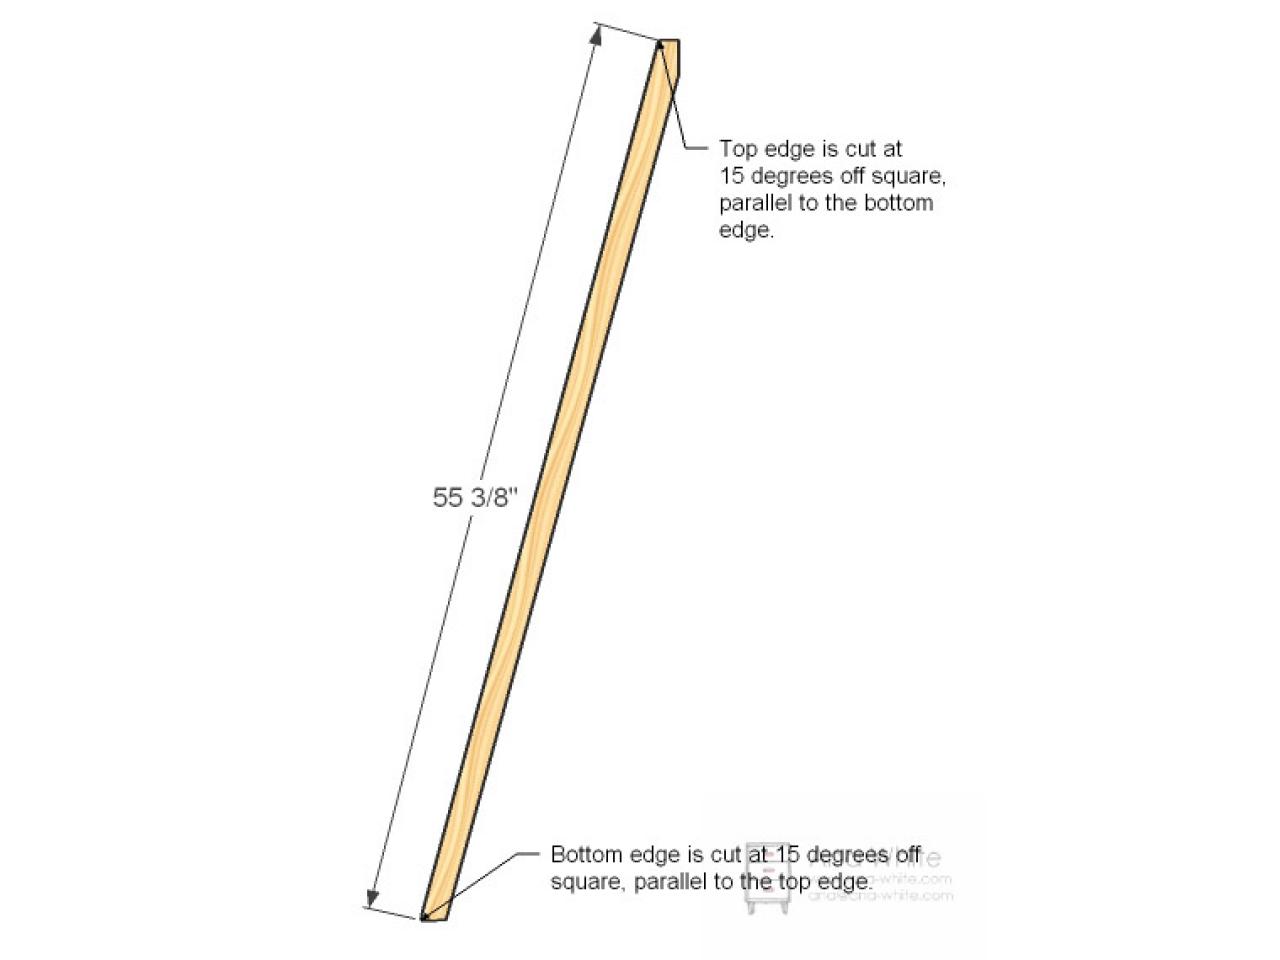
Cut Front Legs
Mark end of front leg with protractor at 15 degrees off square. Cut end of leg along mark with saw. Measure 55-3/8" to opposite end of leg. Mark top of leg with protractor making line parallel to bottom of leg. Cut.

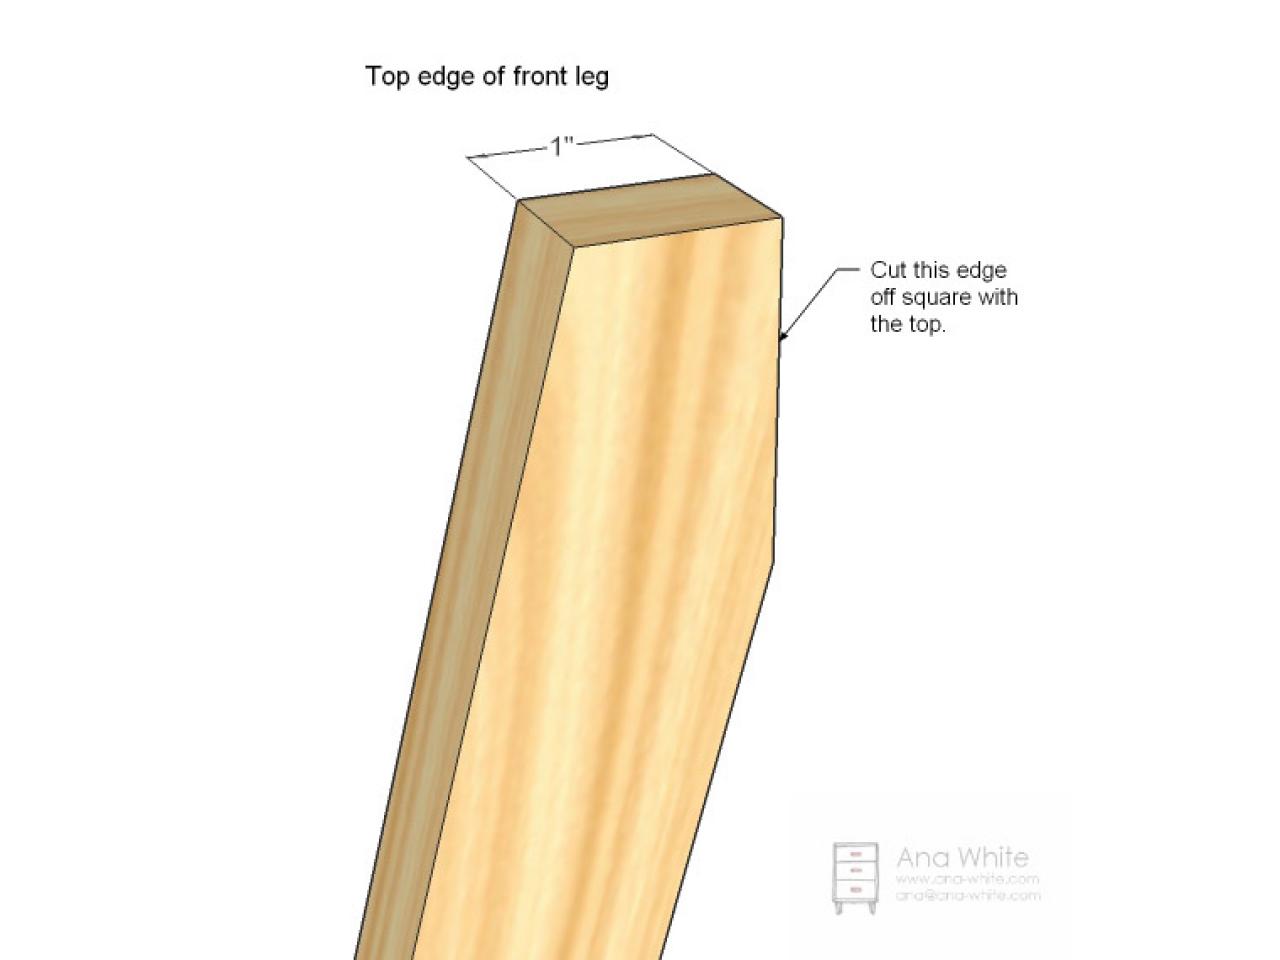
Cut Top of Front Leg
Measure one inch from top front of leg and mark. Using the square, draw a line perpendicular to the top of leg. Cut as shown in diagram.

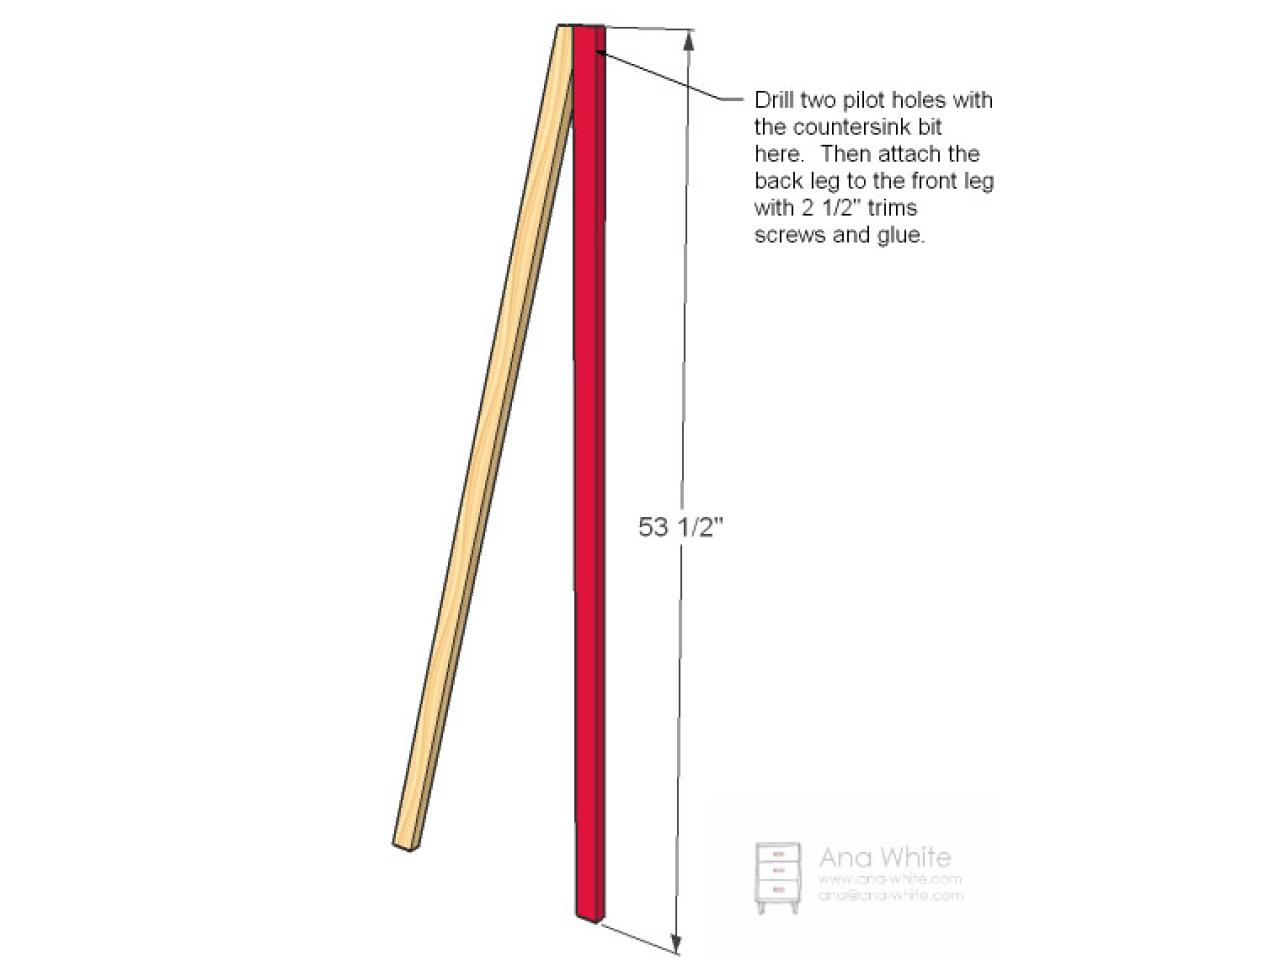
Assemble Legs
Drill pilot hole on top edge of back legs. Screw back legs to front legs as shown in diagram with 2-1/2" trim screws and glue.

Top Trim
Pre-drill holes as shown in diagram then glue and attach legs to top trim, using 2-1/2" trim screws.

Shelf Assembly
Mark legs as shown in the diagram. Also mark each shelf 2" from the top front corner; the top front edge of the shelves extends 2" beyond the front legs. Start by attaching bottom shelf to legs, using 1-1/4" screws. Then attach remaining shelves, checking for level and square on each shelf.

Finishing
Fill exposed screw holes with wood filler and let dry. Sand the entire shelf with medium sandpaper. Refill holes, as needed, with wood filler and let dry. Sand with medium-grit sandpaper. Then vacuum shelf with soft-bristled brush to remove sanding residue. Wipe clean with damp cloth. Apply wood conditioner, stain and clear coat for a beautiful wood finish. Apply primer and three coats of flat paint, followed with clear coat for a durable painted finish. Tip: Sand edges before applying clear coat to create a time-worn distressed finish.


