
.-Battle-on-the-Beach-courtesy-of-HGTV.-.jpg.rend.hgtvcom.196.196.suffix/1714761529029.jpeg)


How to Grow Mushrooms at Home
Learn about mushrooms and how to grow them at home three ways — in a box, in a bucket or on a log — plus find sources for mushroom growing kits and supplies.
Perhaps more than any other creature, mushrooms fascinate us humans. And with good reason. Not animals and not plants, fungus are a kingdom of life all their own. They’re the great recyclers of nature, responsible for decomposing matter and turning it into nutrients that can be reused by plants and animals, including us. They also take in carbon dioxide, a greenhouse gas, and convert it to carbon that’s largely stored underground and exchanged with plant roots through fungal networks called mycelium.
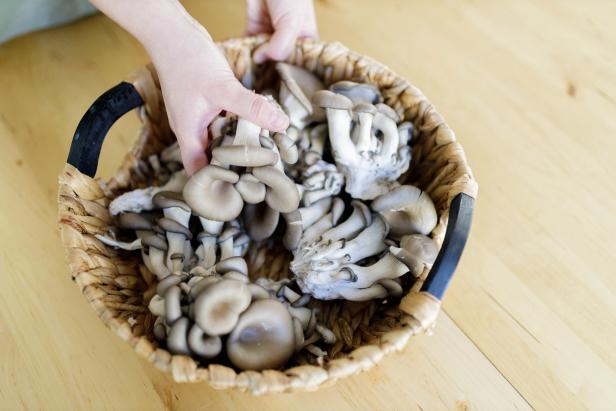
Tomas Espinoza
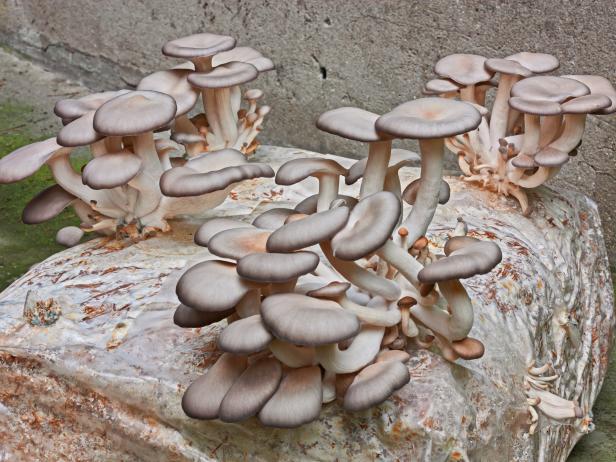
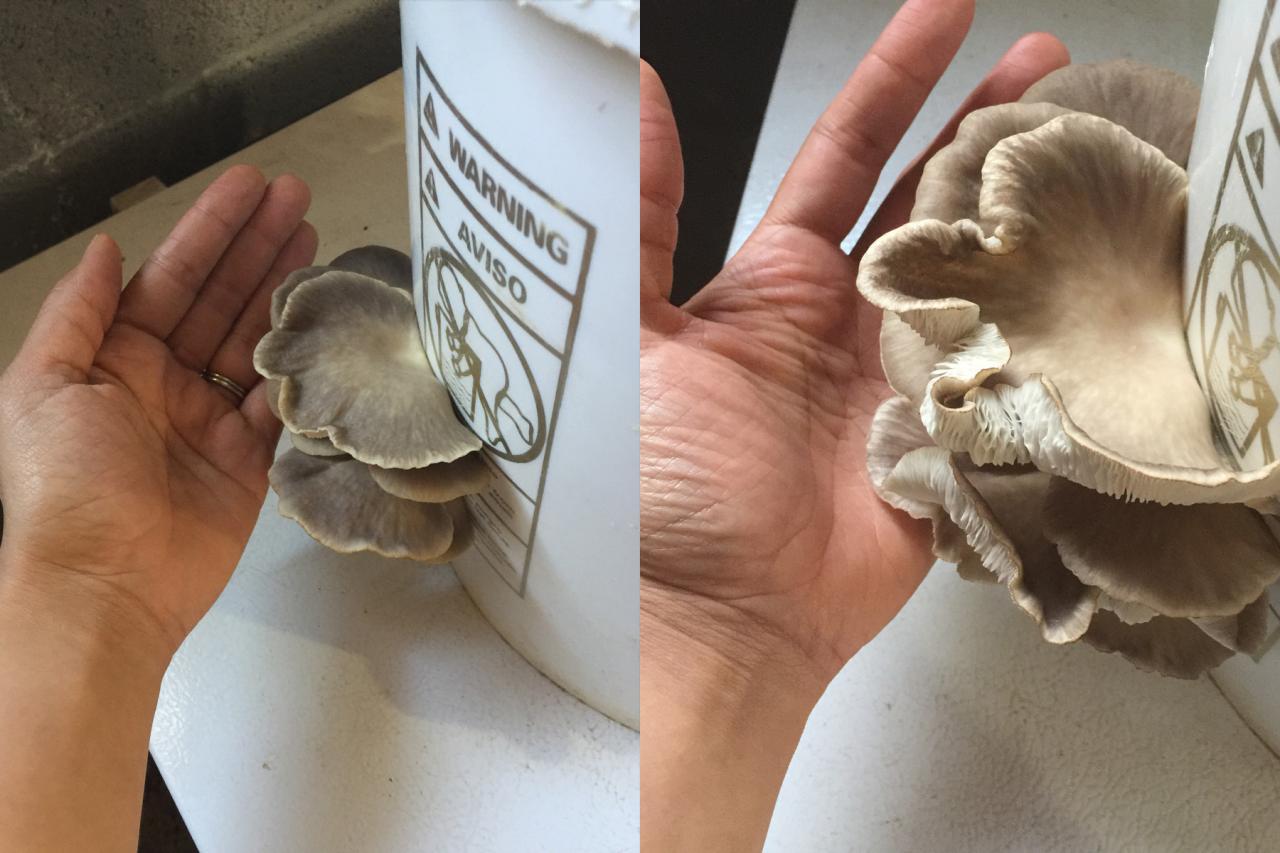
This oyster mushroom harvest was grown using the bucket method.
Of the more than one and a half million species of fungi, approximately 20,000 species make mushrooms: fruiting bodies that produce spores for reproduction. Though some are poisonous, many mushrooms are edible and have been used by humans for food and medicine for millennia. Besides tasting great — they have a meaty texture and flavor but are vegetarian-friendly — mushrooms also are a low-calorie, high-fiber source of immune-boosting vitamin D, zinc, potassium and micronutrients.
While foraging for wild mushrooms requires great care, attention and knowledge, growing mushrooms at home can be easy, and a natural extension of vegetable and fruit gardening. Just as it’s rewarding to learn how to grow tomatoes or garlic, it’s equally rewarding to discover how mushrooms grow and to serve homegrown mushrooms at your dinner table. There are three primary ways to grow mushrooms at home:
- Using a box kit inoculated with spores
- In a bucket using sawdust spawn and a substrate
- On logs using plugs inoculated with spores.
Read on for information about each mushroom growing method.
How to Grow Mushrooms From a Box Kit
You can order online mushroom growing kits to make growing mushrooms easy. You'll get a mushroom block filled with oat bran, sawdust or other substrate material that has been coated with mushroom spores. Directions may vary slightly from kit to kit, but these are general instructions for growing mushrooms using a kit.
Mushroom Box Kits


Step 1: Moisten the Block
Mist the block three or four times a day with spring or well water or collected rainwater. You can also use boiled tap water, but don't use water straight from the tap, because it contains chlorine that will kill the spores. Distilled water won't work either, because it lacks nutrients the mushrooms need.
Step 2: Cover the Block
Cover the block with plastic after each misting to hold in the humidity. Many kits come with a plastic humidity tent. Only white button mushrooms need to grow in the dark, so your block will be fine in indirect light.
Step 3: Harvest Mushrooms
In a few days, little blisters will develop and mushrooms will pop up. They'll be ready to harvest in a week or so.
Step 4: Repeat
To re-use the block, let it dry out for a week. Then soak it in water for 24 hours. Wait one more day, and it'll be ready to go back under the humidity tent to produce more mushrooms, although not as many as before. Repeat this process to get several harvests from the same kit.
How to Grow Mushrooms in a Bucket
You can grow mushrooms at home in a bucket using spawn, which is living fungal culture (also called mycelium) that can be grown on a substrate. It’s important to buy spawn from a reputable source, such as North Spore in Maine. Spawn can be grown on a variety of substrates, including creating a mushroom patch outdoors, but the most common, especially for beginners, is sawdust along with wood chips, as described below.
Tools + Materials
- medium capacity plastic storage tote
- 5-gallon bucket with lid
- power drill
- large drill bit
- aspen wood chips
- mushroom sawdust spawn
- spray bottle with water
- 1 large trash bag
- plenty of boiling water
- bleach

Mark Wolfe
Growing mushrooms at home in a bucket from spawn instead of spores is like growing from a cutting instead of from seeds.
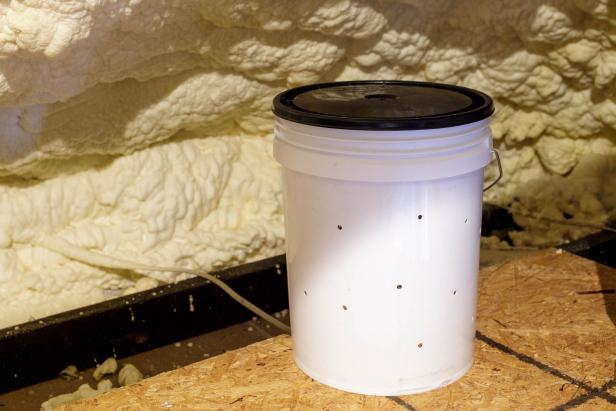
Step 1: Prepare the Bucket
For best results, start by sterilizing the bucket. You can either run it through the sterilization cycle of your dishwasher or add 1/4 cup of bleach and water and let it stand for two minutes, then rinse thoroughly. Drill lots of holes all over the bucket.

Tomas Espinoza

Tomas Espinoza

Tomas Espinoza
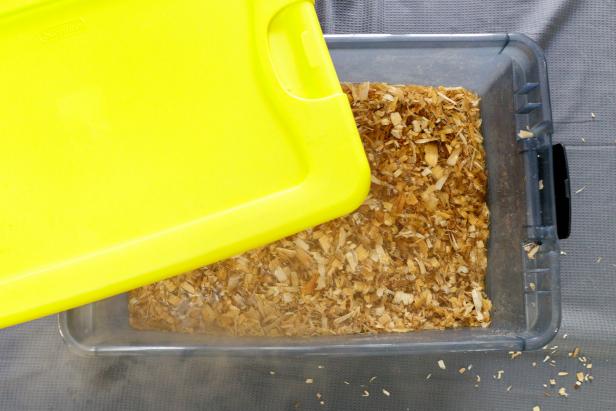
Step 2: Prepare the Substrate
Fill the tote with wood chips. Add enough boiling water to cover the wood chips. Put the lid on the tote and give the wet, woody mixture time to cool down. Once it’s cool to the touch, drain the water and squeeze the excess moisture from the chips using your clean hands.

Tomas Espinoza

Tomas Espinoza
Tomas Espinoza
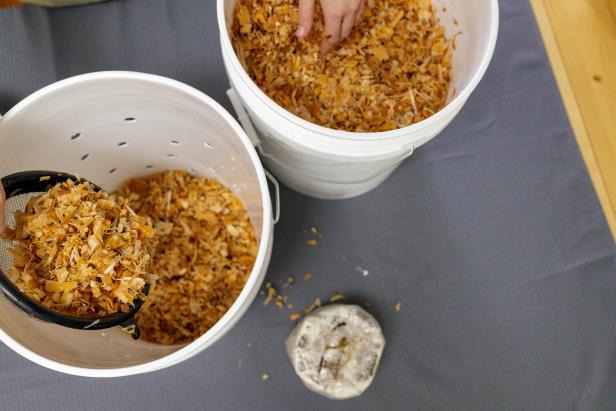
Step 3: Layer Substrate and Spawn
Now it’s time for spawning. Start by layering about 2 inches or so of the slightly damp wood chips into your hole-filled bucket. Add mushroom spawn according to package directions. Repeat the layering over and over until your bucket is full and has a final layer of spawn.
Tomas Espinoza

Tomas Espinoza

Tomas Espinoza
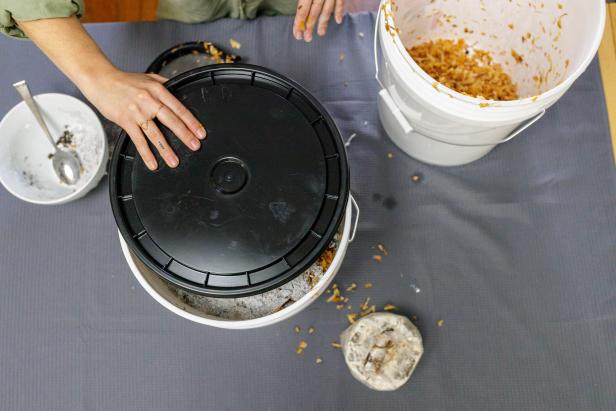
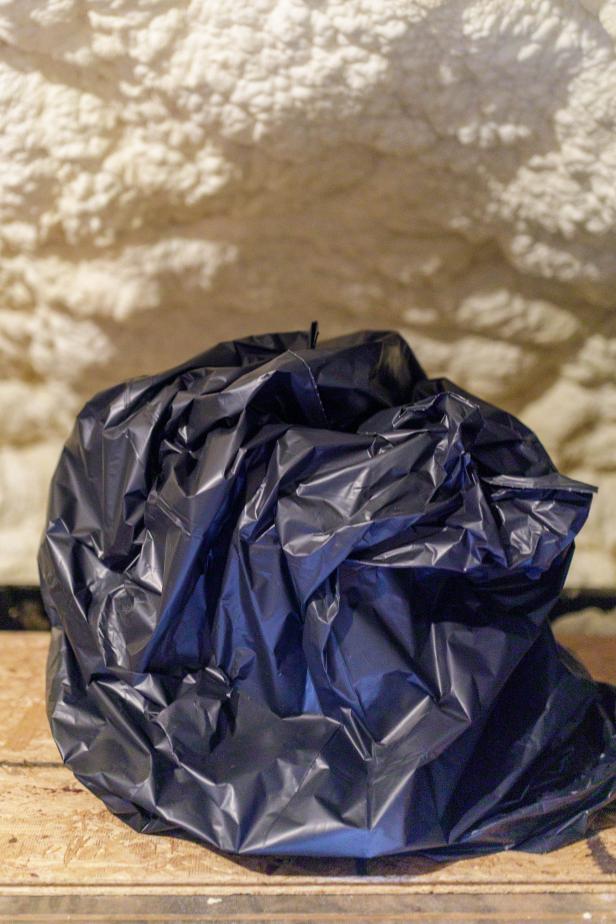
Step 4: Let It Spawn
Tightly place the lid on your bucket filled with layers of substrate and spawn. Move it to be stored in a cool and dry spot such as a closet, attic, or guest room. Wrap the bucket with a trash bag, but don’t tie it — airflow will support spawning and growth of mushrooms.
Depending on the mushroom strain and growing conditions, the substrate will be completely colonized by the mushroom mycelium in two to four weeks. When the colonization period is complete, tiny mushrooms will begin to grow through the holes in the bucket.
Tomas Espinoza
Tomas Espinoza
Tomas Espinoza
Step 5: Harvest Mushrooms
Maintain consistent humidity and temperature, and avoid drafts and sudden cooling or heating of the growing area. The mushrooms will double in size daily until they are mature. Harvest oyster mushrooms when the edges of the caps begin to turn up. Leaving them too long will affect texture and flavor.
After the first harvest, wait two to three weeks, and another harvest may be had. Typically, each subsequent harvest will yield about half the weight compared with the prior harvest. In perfect conditions, four or five harvests may be had before the substrate is exhausted, then it’s time to start over.

Mark Wolfe
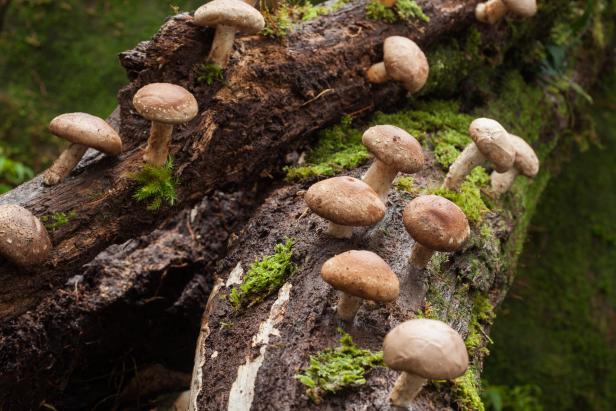
How to Grow Mushrooms on Logs
Unlike some mushroom varieties, shiitakes can grow on a hardwood log. You can buy a kit that comes with a pre-inoculated log that usually needs to soak for 24 hours; this is called "force fruiting." Or you can buy plugs that contain spores mixed with sawdust and nutrients and inoculate your own logs. Using a kit will shorten the time to harvest significantly and allow you to grow indoors. If inoculating your own logs, it can take several months to a year before you will get a first harvest. Below are general directions for understanding the log-growing method, but you will need to use more specific directions, depending on style of growing, from the source of your spores, whether a kit or plugs.

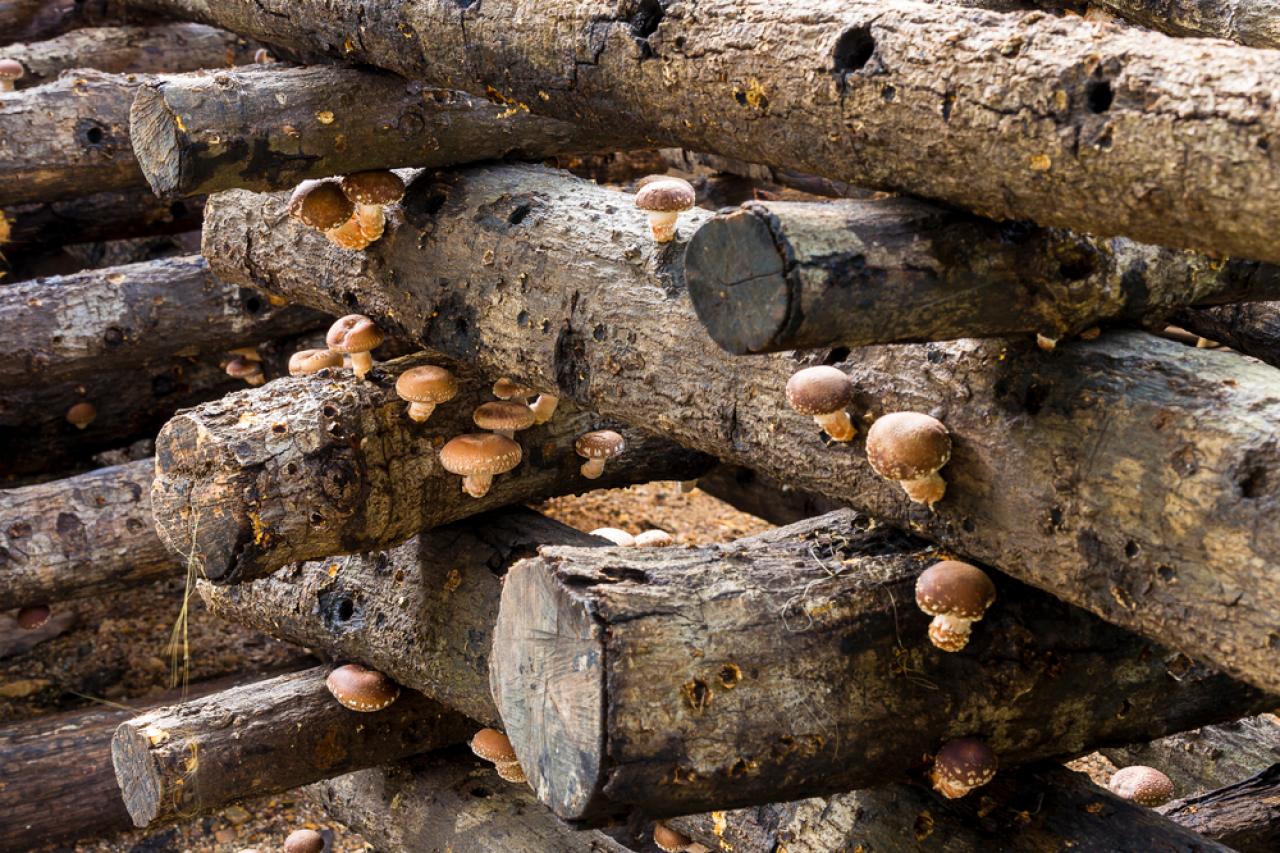
Shutterstock/Saravut Biacharas
Here, a large-scale shiitake growing operation shows how hardwood logs can be stacked to create mushroom "gardens" that can produce for several years.
Step 1: Prepare Logs
Drill holes in the log the same size as the plugs and about three inches apart. Place the plugs into the holes and use wax to cover the holes completely. Sealing the holes is important because it keeps the spawn from drying out or being contaminated.
If using a pre-inoculated log, you will skip this step.
Shiitake Log and Plug Kits


Step 2: Manage Moisture
Place the log in a shaded spot. In the absence of rain, water to keep it moist. Some log kits will fruit indoors. If growing outdoors, you may cover the log with clean burlap to maintain the moisture level. Little white bumps should show up in a few days (with a log kit) to several weeks; timing varies when growing on logs.
Step 3: Harvest Shiitakes
When gills (ribs that produce and release spores) form under the caps, and the edges of the caps start to curl under, the shiitakes are ready to harvest. Using a log kit, this will be in just 10 days; if making your own logs, it may be 10 months. Most logs will produce more than one harvest, and if you’re using a longer-term process outdoors on quality logs, they can produce for several years.
Tips for Growing Mushrooms at Home
- "Pins" are teeny-tiny baby mushrooms, and they form first. Moisten them with a spray bottle as needed to keep them from drying out.
- Once mushroom caps form, and the caps start to curl, it's time to harvest. Pick entire clusters as opposed to individual mushrooms.
- Use the mushrooms fresh. Or to preserve them, dry your mushrooms using a dehydrator at 110 to 125 degrees until fully dry. (They should break, not bend.) Store in an airtight jar or bag. When you're ready to cook with them, pre-soak the mushrooms to rehydrate.
- When you've harvested all of your mushrooms, compost the used substrate for a great soil amendment. This is actually what store-bought "mushroom compost" is: used substrate from commercial mushroom growing.
Popular Types of Mushrooms to Grow
Brown oyster mushrooms are popular for home growing, but there are many types worth trying. If your weather is very hot or cold, you may have to use a different kind of mushroom spawn recommended for your climate. Enokis, for example, need a temperature that stays around 40 to 50 degrees. On the other end of the spectrum, shiitakes like 72 to 78 degrees.
Oyster
Oyster types are the easiest for beginners to grow. They have a mild taste and can be cooked, which gives them a velvety or silky texture, or dried to enjoy later. Look for gray, white or tan varieties. Store fresh oyster mushrooms in the refrigerator in a paper bag, not plastic, so moisture won't accumulate on them.
Shiitake
Shiitakes are tan to dark brown in color. They're thought to boost the immune system and have a meaty texture, like portabellas. When cooked, they have a smoky flavor. When dried, the flavor becomes stronger. Remove their tough stems to use them in soups, stir-fries and other dishes.
Enoki
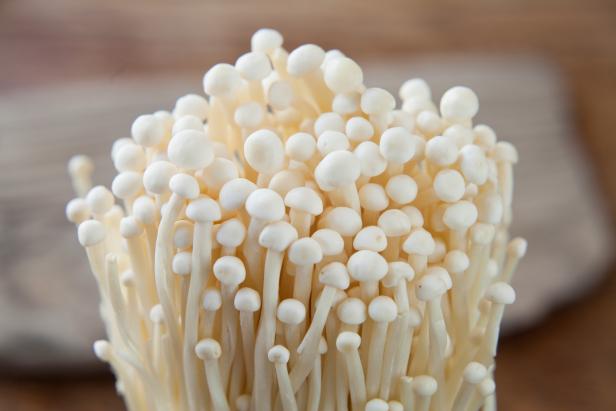
Enoki mushrooms, with their long, slender stems, have a mild, delicate flavor. They can be grown from kits that come with spawn and growing medium. You'll usually be instructed to put the medium in a sterile glass container in a room with high humidity and temperatures around 72 to 77 degrees. For white enokis, keep the container in the dark; the enokis will be brown if they're exposed to light. Once the mycelium appears, move the container into a cooler area so the caps will form.
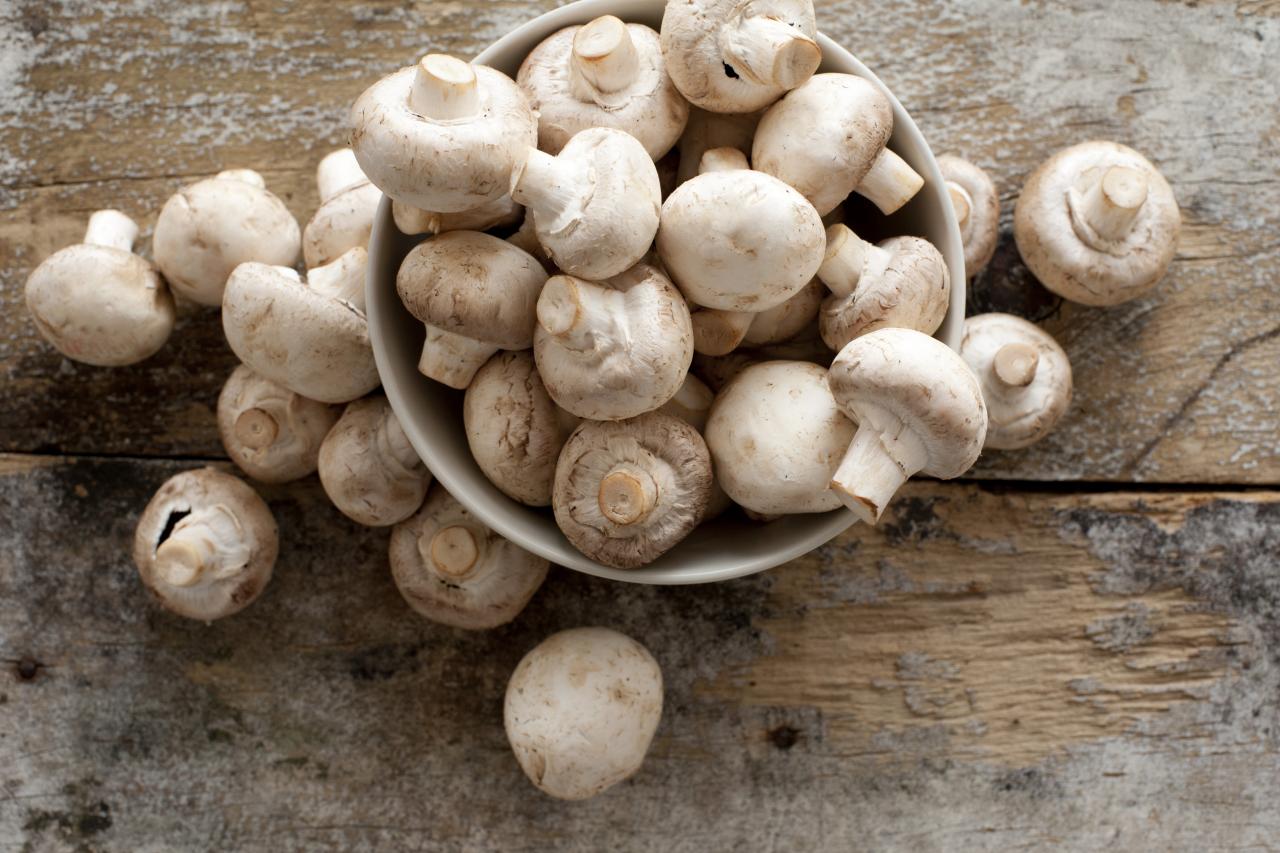
White Button

White button mushrooms are the ones often sold in grocery stores, and they're usually less expensive than other varieties. You can grow them from kits that contain organic matter inoculated with their spores. White buttons have a mild, slightly earthy taste.
Cremini or Portobello

2013, Image courtesy of Ben Rollins
Cremini mushrooms are round and light to dark brown. They have a firm texture and savory taste. They are actually the same type as button mushrooms, but more mature. The most mature stage is called a portobello, which is why cremini mushrooms are sometimes called "baby bella."


