


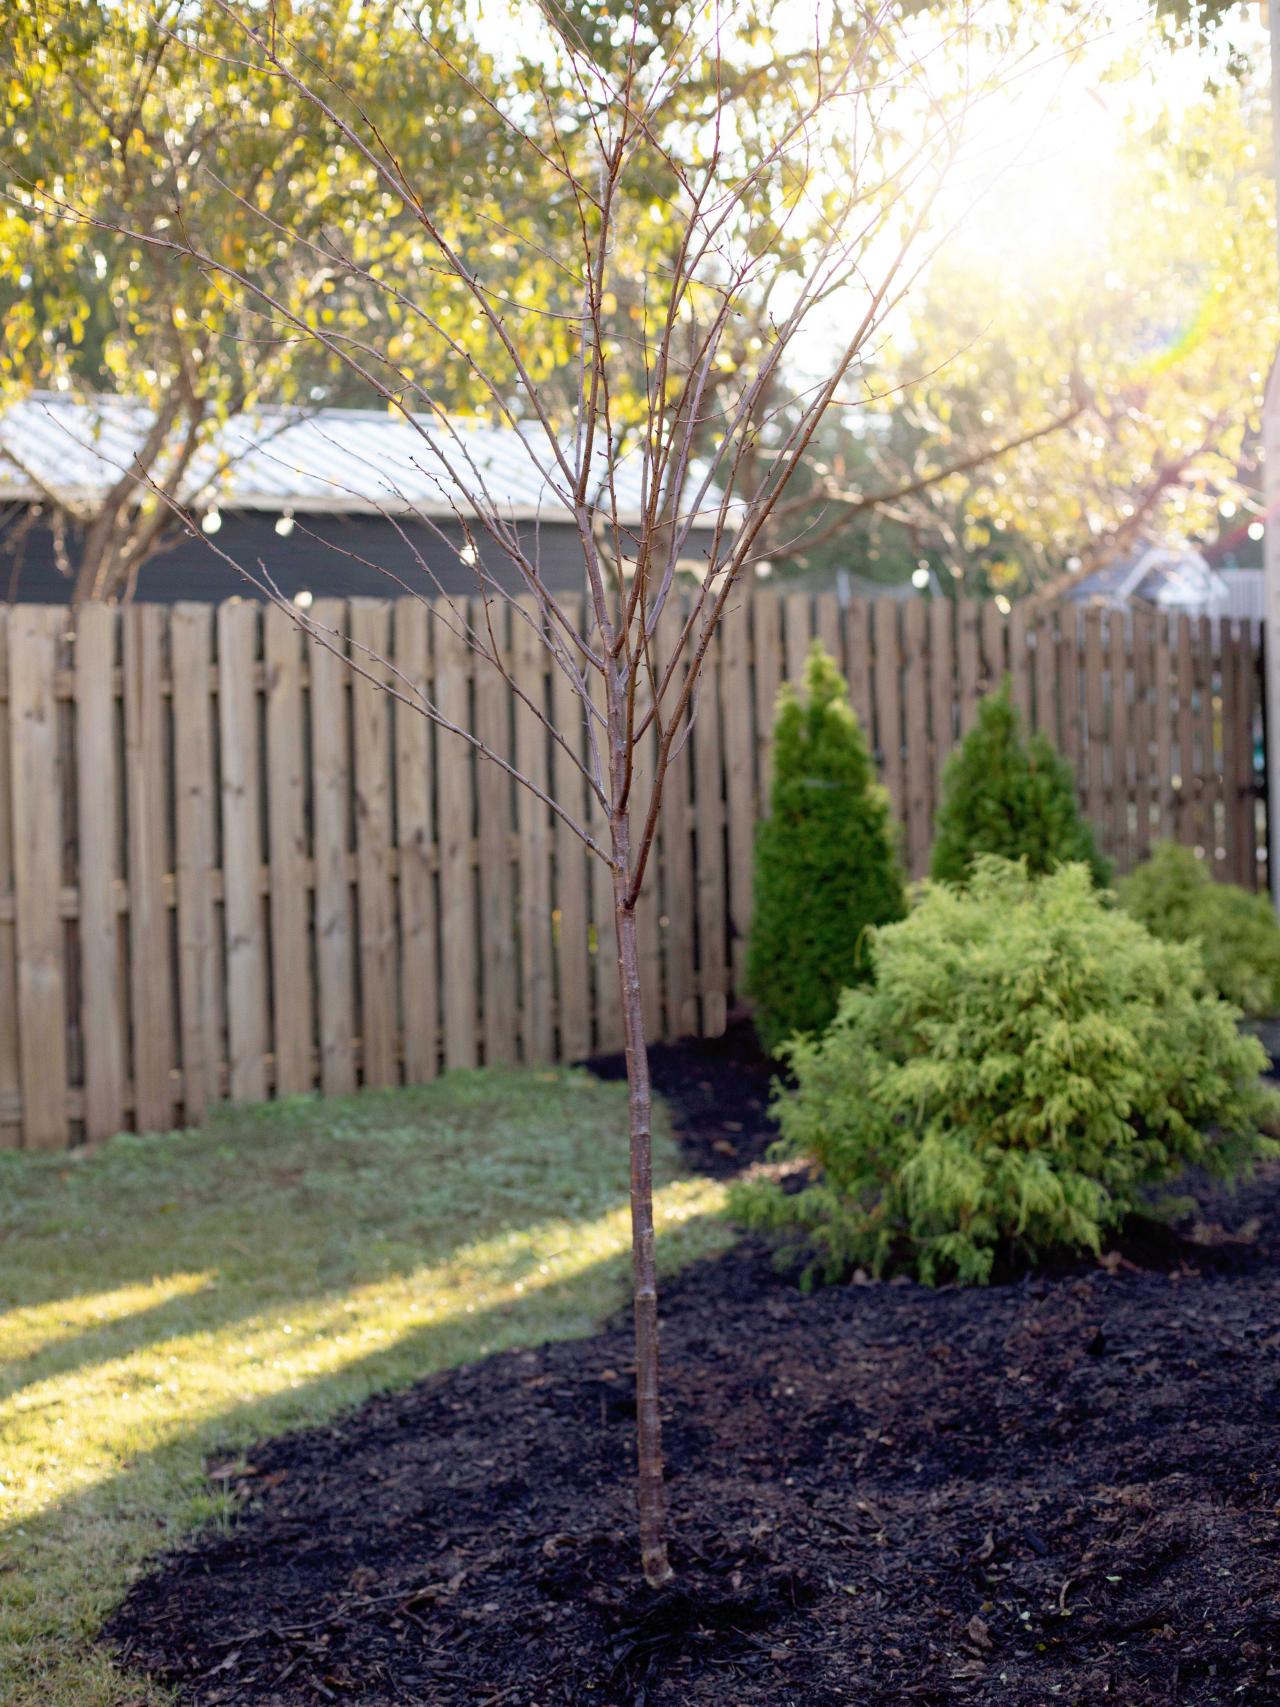
How to Plant a Tree
To give your new tree a good chance for success, follow these simple instructions on planting a tree.

Shain Rievley
Planting a tree correctly starts with choosing the right tree for your landscape and then digging a planting hole about 1.5 times the width of the container the tree comes in from the nursery.

Why do we plant trees? Trees provide shade, beauty and wildlife habitat as well as buffer noise and absorb pollution, among many other benefits. New research shows that what we do when we plant trees will have long-lasting health impacts on the trees.
Give your trees the best possible start by following these 10 best practices for planting a tree.
Tools + Supplies
- round shovel
- straight-backed shovel
- spade
- planting knife or hand saw
- water hose or buckets with water
- mulch
- hand pruners
- staking system (if needed)
1. Choose the Right Tree to Plant
There is a tree out there for every garden function, but it can be easy to misjudge exactly how a small tree from the nursery will look when it grows up. How much space will the tree ultimately have to grow, both in terms of height and spread? Are there any utility lines or other obstructions? Is there a foundation, road or sidewalk that could limit root growth? How well does the soil drain? How much light will the tree get during the day?
Think through these questions before you go to the nursery or garden center and check each plant label to see whether the species is a good fit for your landscape.
")
14 Front Yard Tree Favorites 14 Photos
Looking for a tree to provide some curb appeal? Get inspired with these choices.
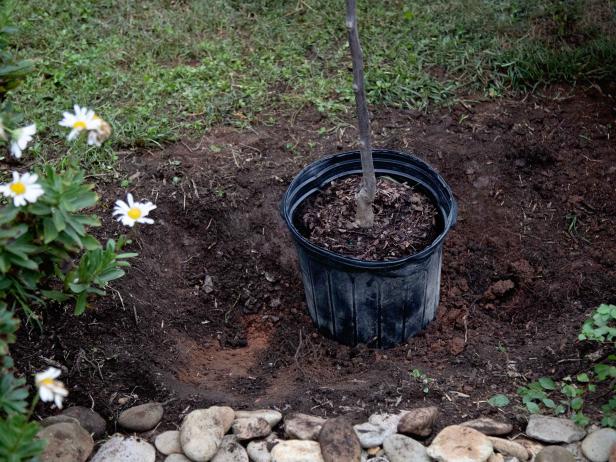
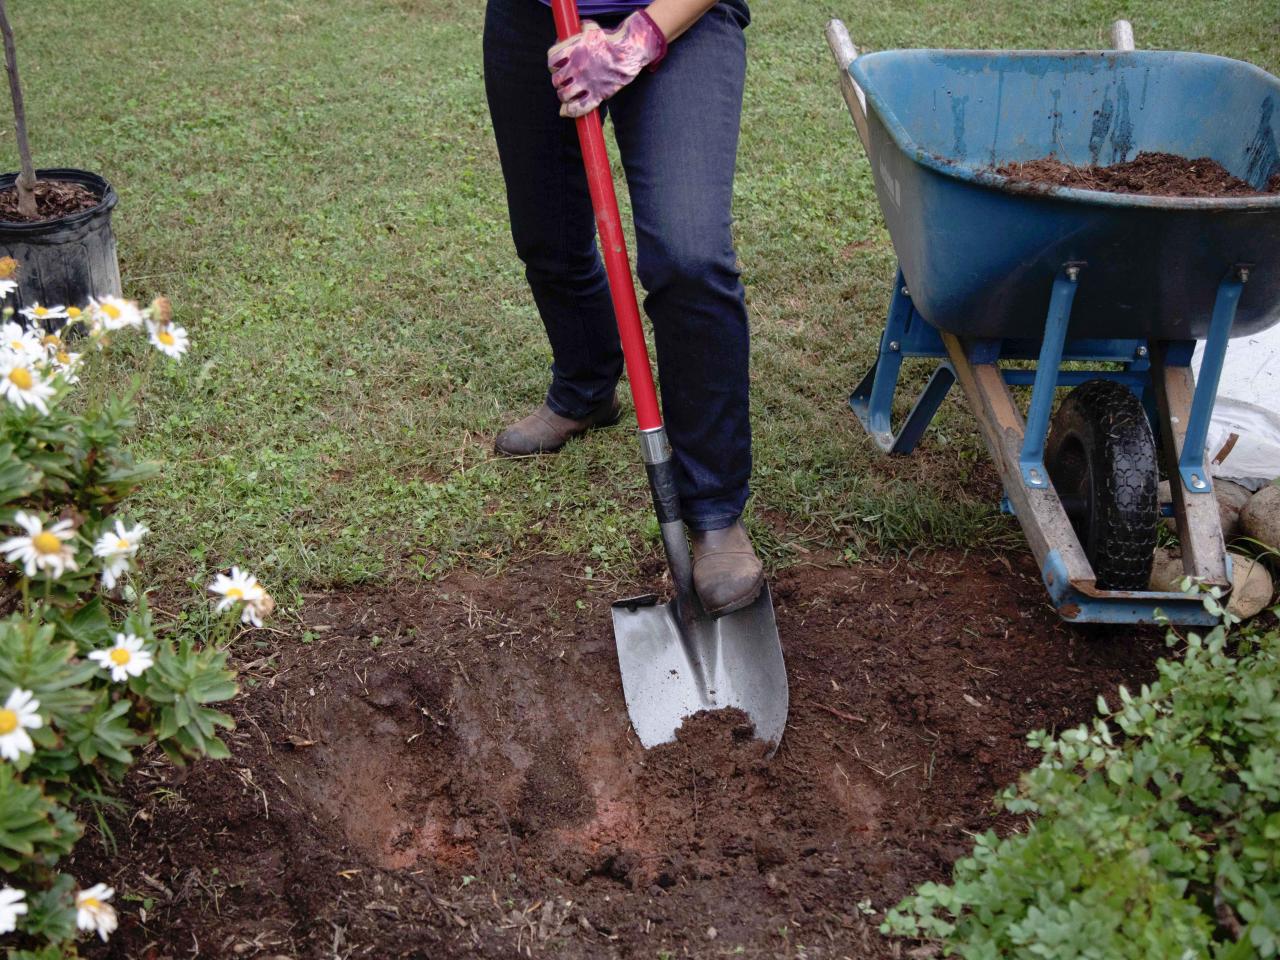
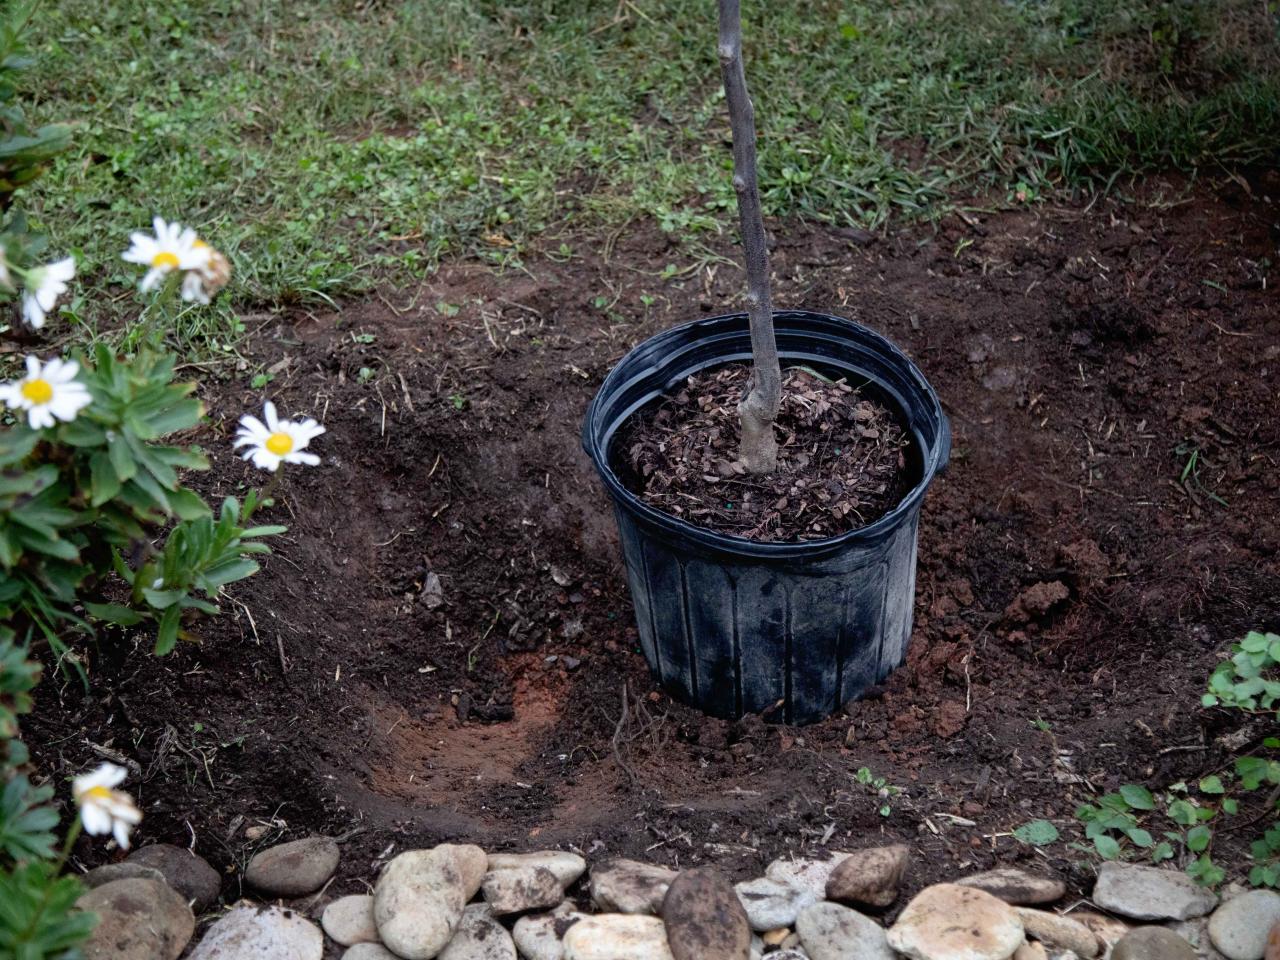
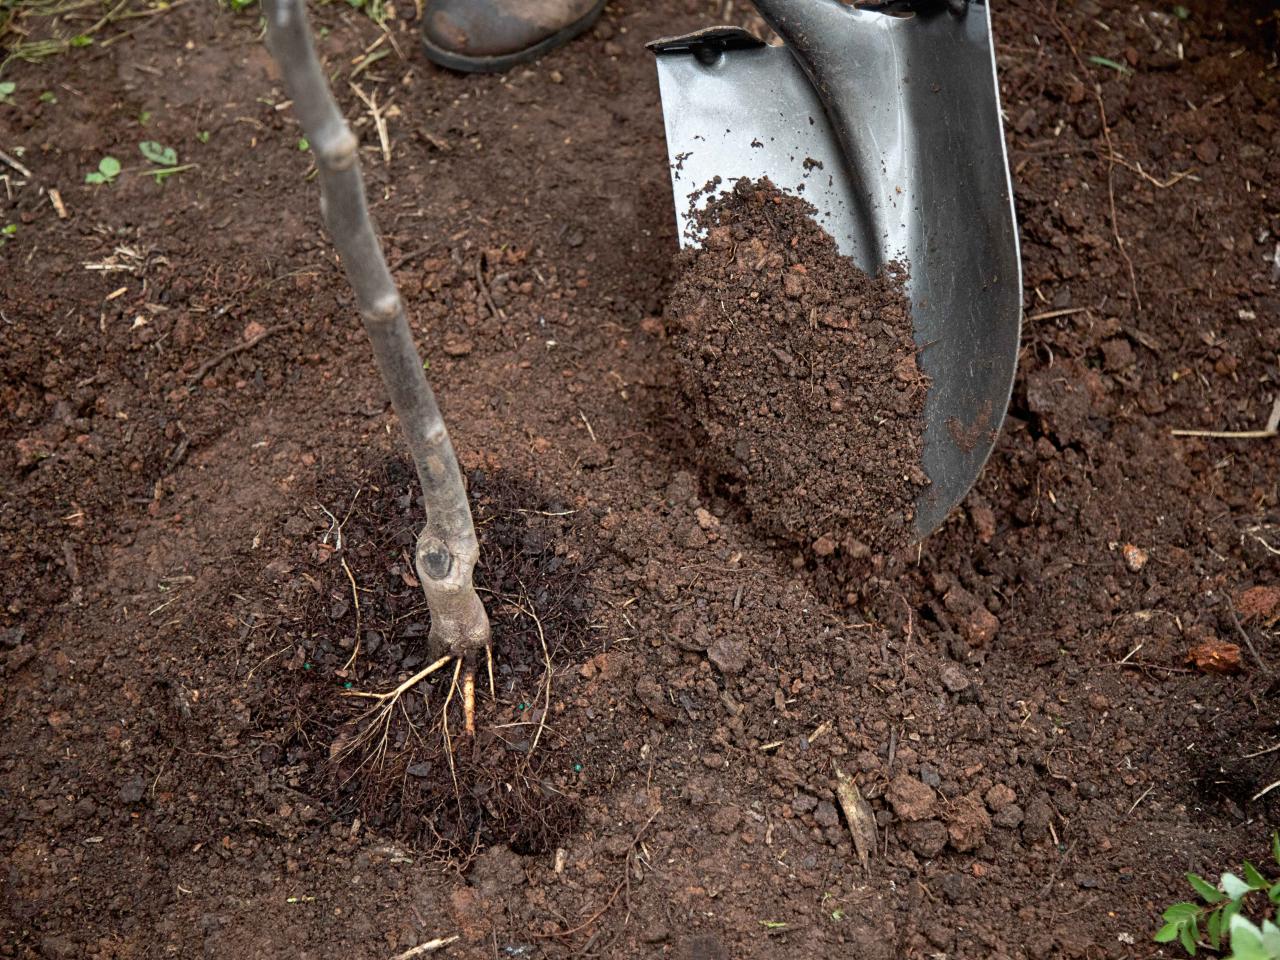
2. Dig a Tree-Planting Hole the Correct Size
The hole where you'll plant your tree should be about 1.5 times the width of the container the tree comes in from the nursery — just large enough to hold the root ball (Image 1). Tree roots may appear delicate and too soft to penetrate hard soil, but roots secrete fluids — known as "exudates" — that condition the soil with nutrients so the roots can take hold and extend beyond the planting hole.
In most situations, your tree should grow well even if you dig a hole slightly wider than recommended.
Try not to dig a hole any deeper than the root ball of the tree (Image 2). If you happen to dig the hole too deep initially, be sure to tamp down the soil you use to backfill the hole to the correct depth. Disturbed soil can sink over time, causing the tree to sink as well.

Shain Rievley
Shain Rievley
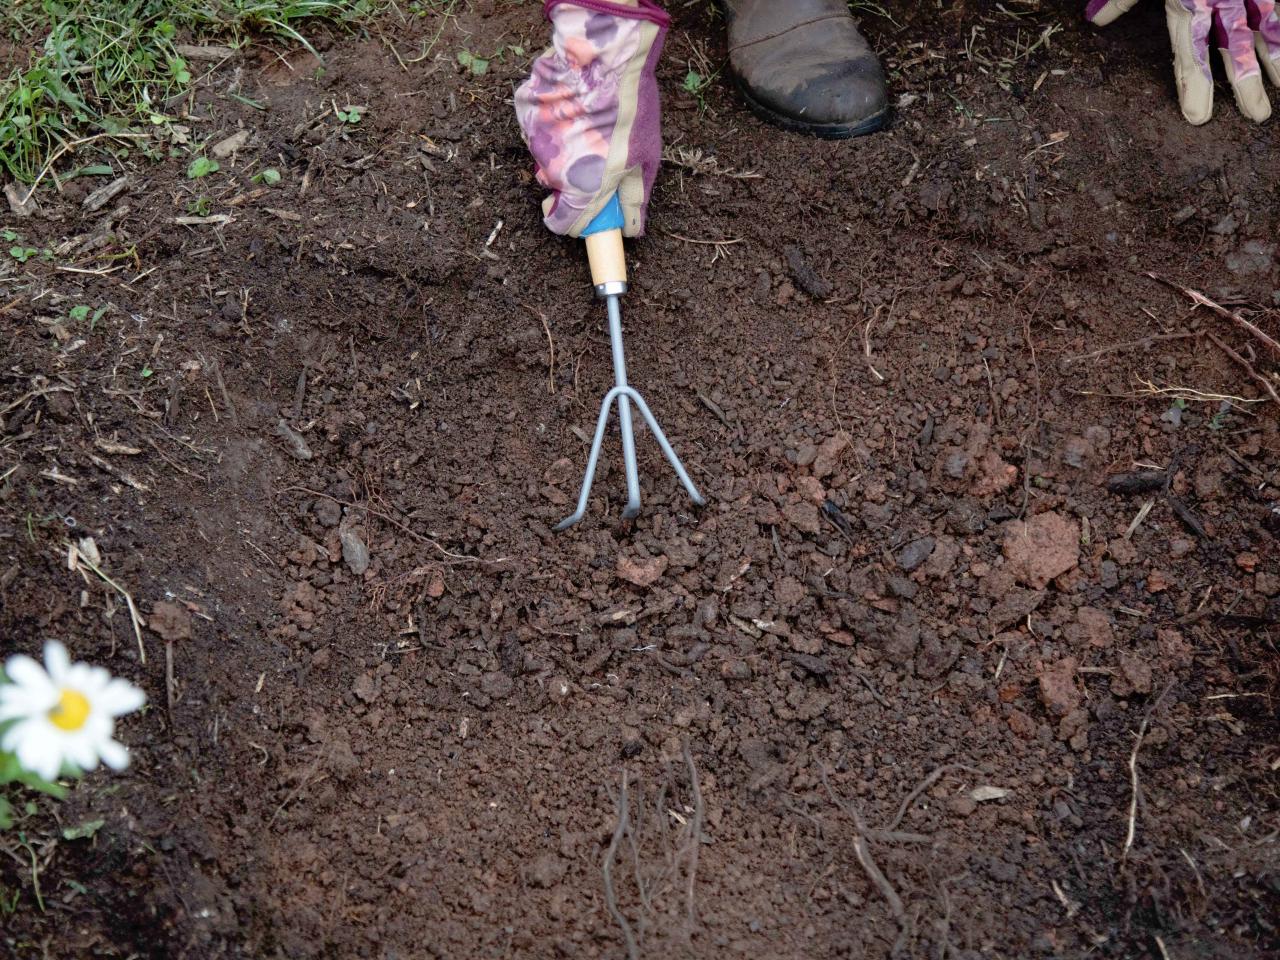
3. Loosen Soil In and Around Planting Hole
If your garden has heavy clay soil, the sides of the dug hole may look firm, slick and even a little shiny. This glazing effect can prevent tree roots from penetrating into the soil. Help your tree by extending the width of the hole to the spread of the tree's canopy and use your spade (a hand cultivator works, too, as shown below) to scratch the edges of the hole and break up the "glazing."

Shain Rievley
Dr. Edward Gilman, professor emeritus with the University of Florida's Institute of Food and Agricultural Sciences, has dedicated his career to learning how to improve the health and longevity of trees in the landscape. According to Dr. Gilman, the most common mistake folks make when planting trees is planting too deeply.
"There is still this huge feeling that isn't based on research that somehow putting that root ball in the earth and covering it up with soil helps it somehow," said Gilman. "We found that if you put soil or mulch on top of that root ball, it (soil) will capture the water that's put on top. It doesn't get to the root ball where the roots are."
Dr. Gilman recommends that you loosen the soil over a much larger area around the tree after the tree is planted. Use a straight-backed shovel to break up the soil over a space that is roughly three times the size of the root ball. If you plan to spread mulch to cover the area below the tree's canopy, use your spade to lift any turf or other existing vegetation growing around the hole. This will prevent weeds from popping through the mulch and spreading over the root ball.
")
27 Flowering Trees for Year-Round Color 27 Photos
Stage year-long color with flowering trees that bloom in different seasons. See some of our favorite examples plus learn how to use them in your yard.
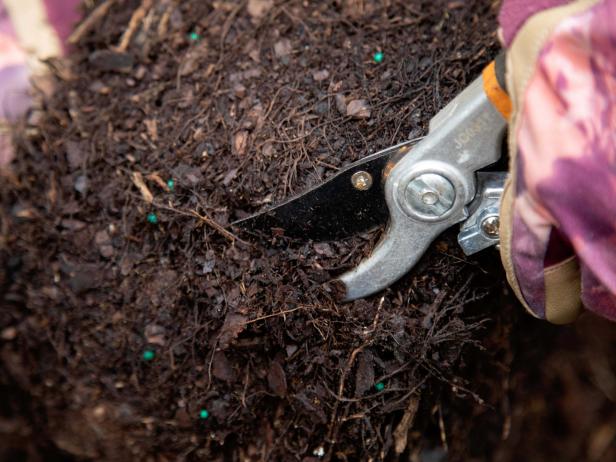
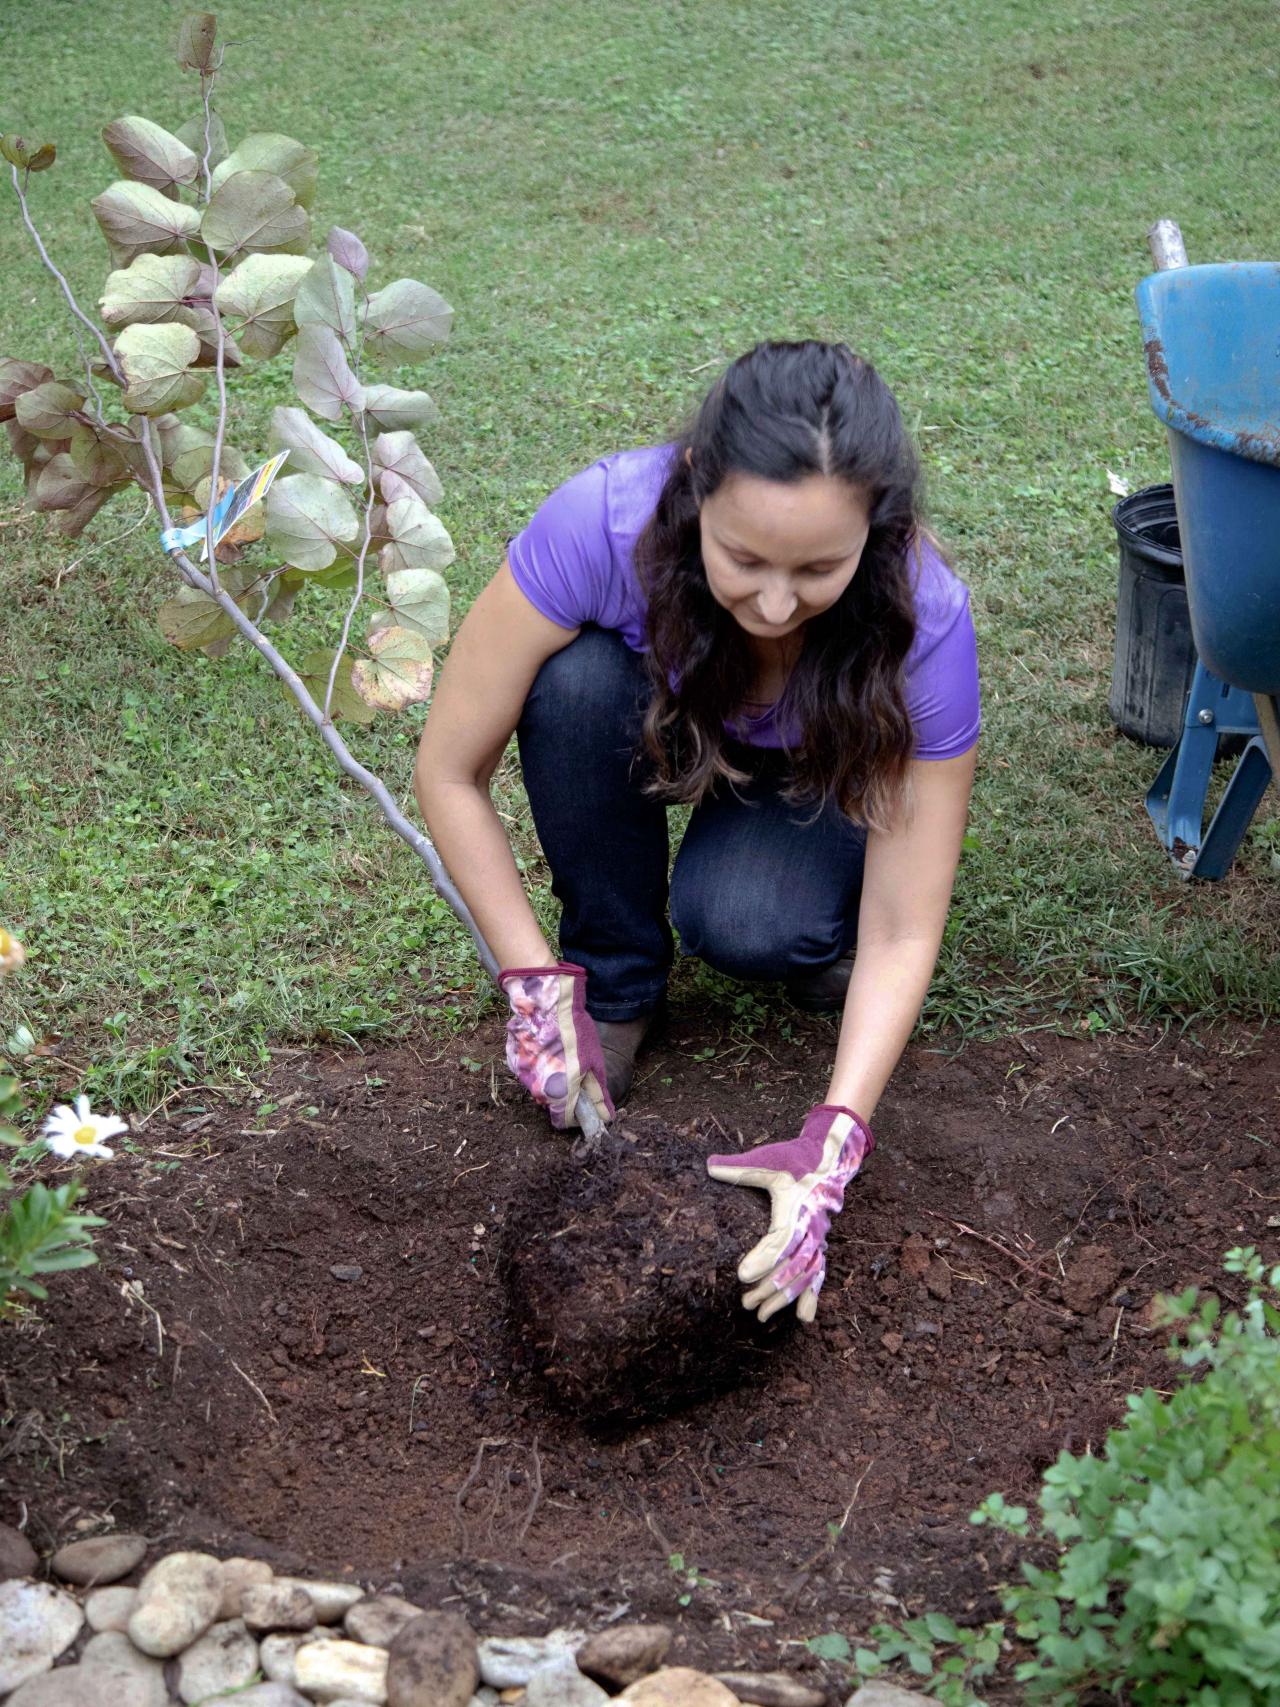
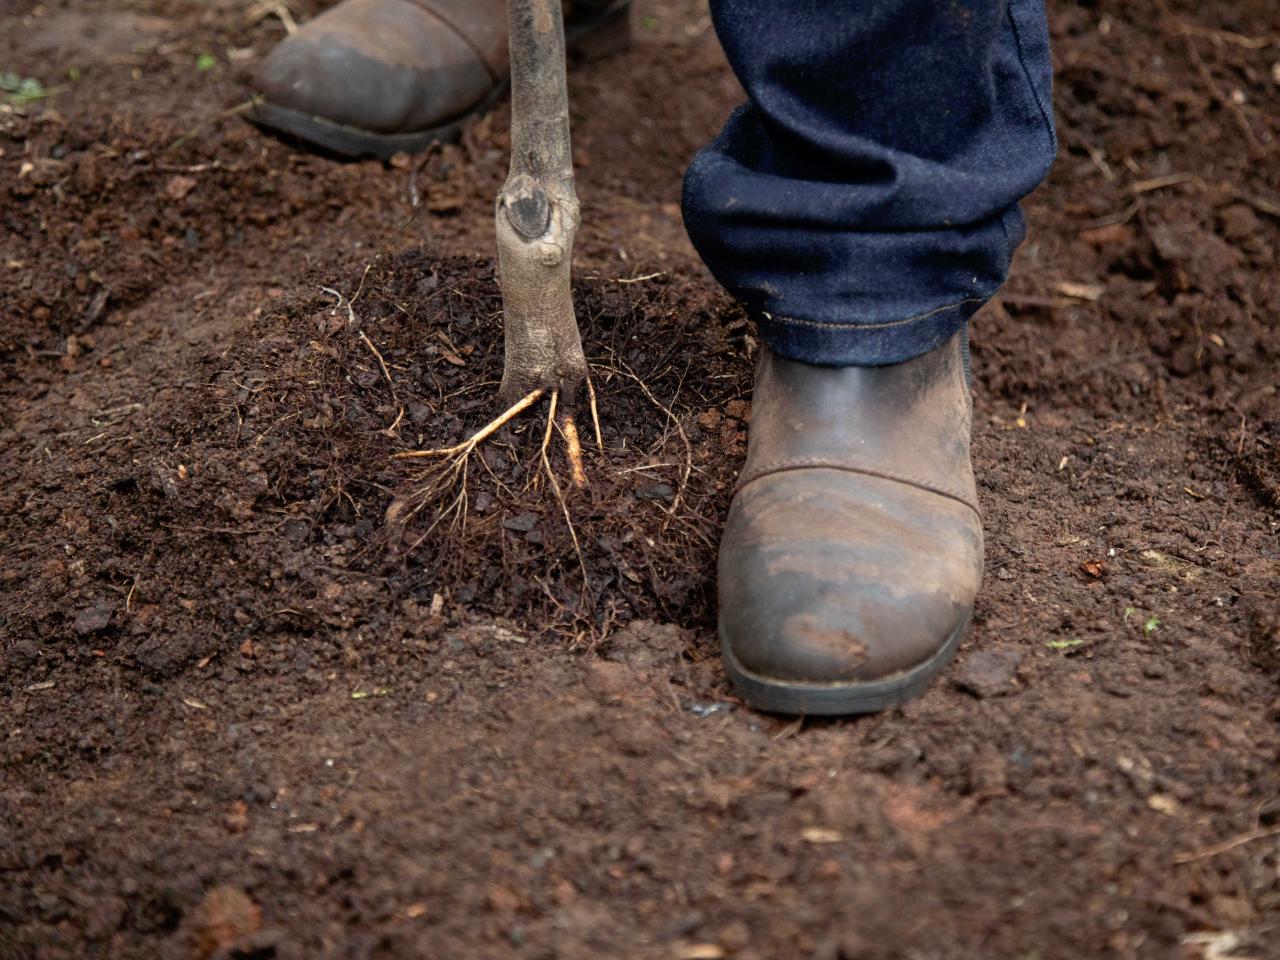
4. Remove Circling Roots
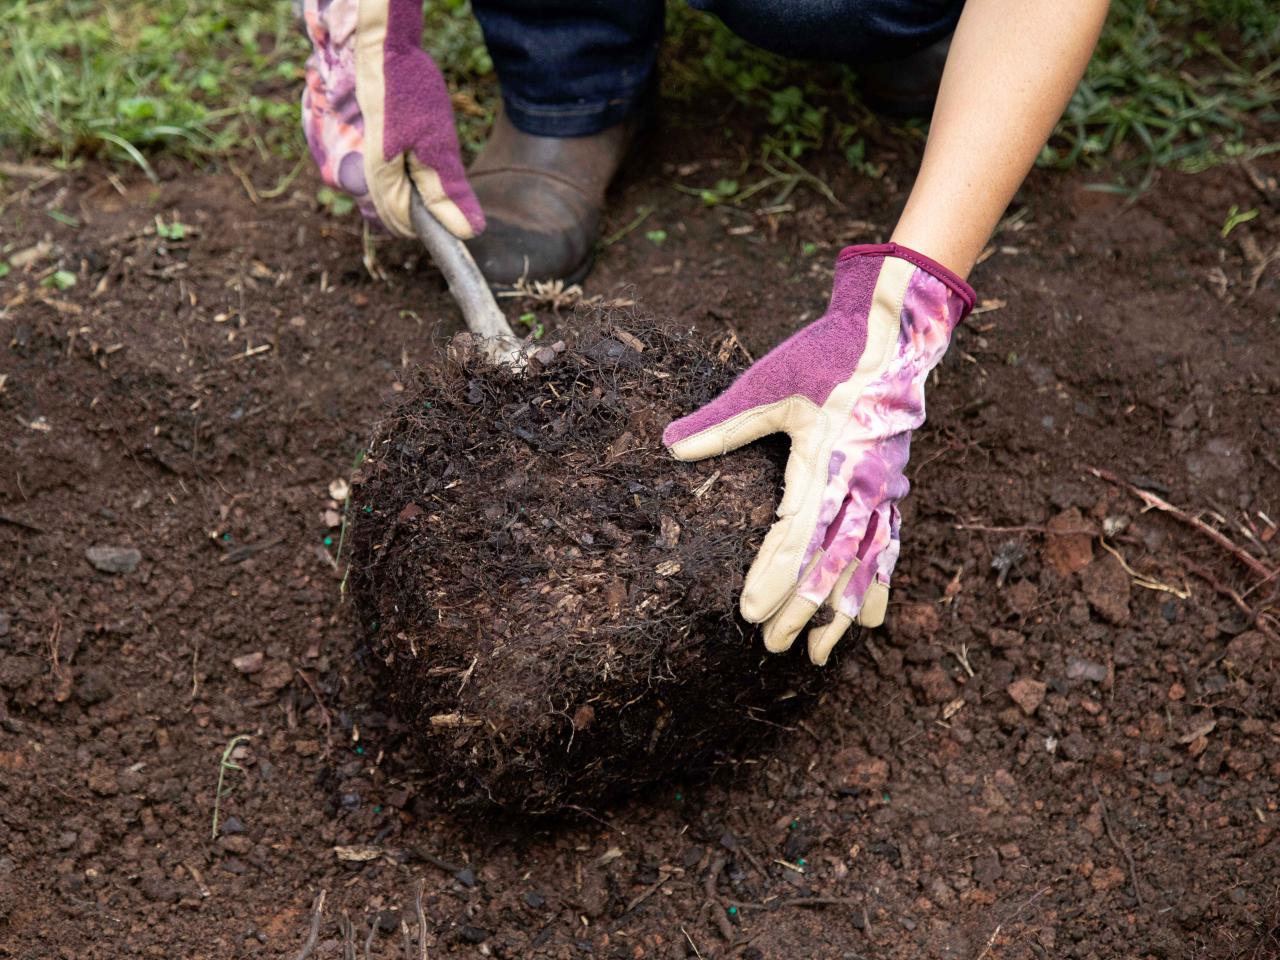
After you gently slide the tree out of the pot from the garden center, you will probably find a dense wall of circling roots along the side and bottom of the tree's root ball (Image 1). This is common on container-grown plants, although root circling is also possible with some larger ball-and-burlap trees and even bare-root trees, too.
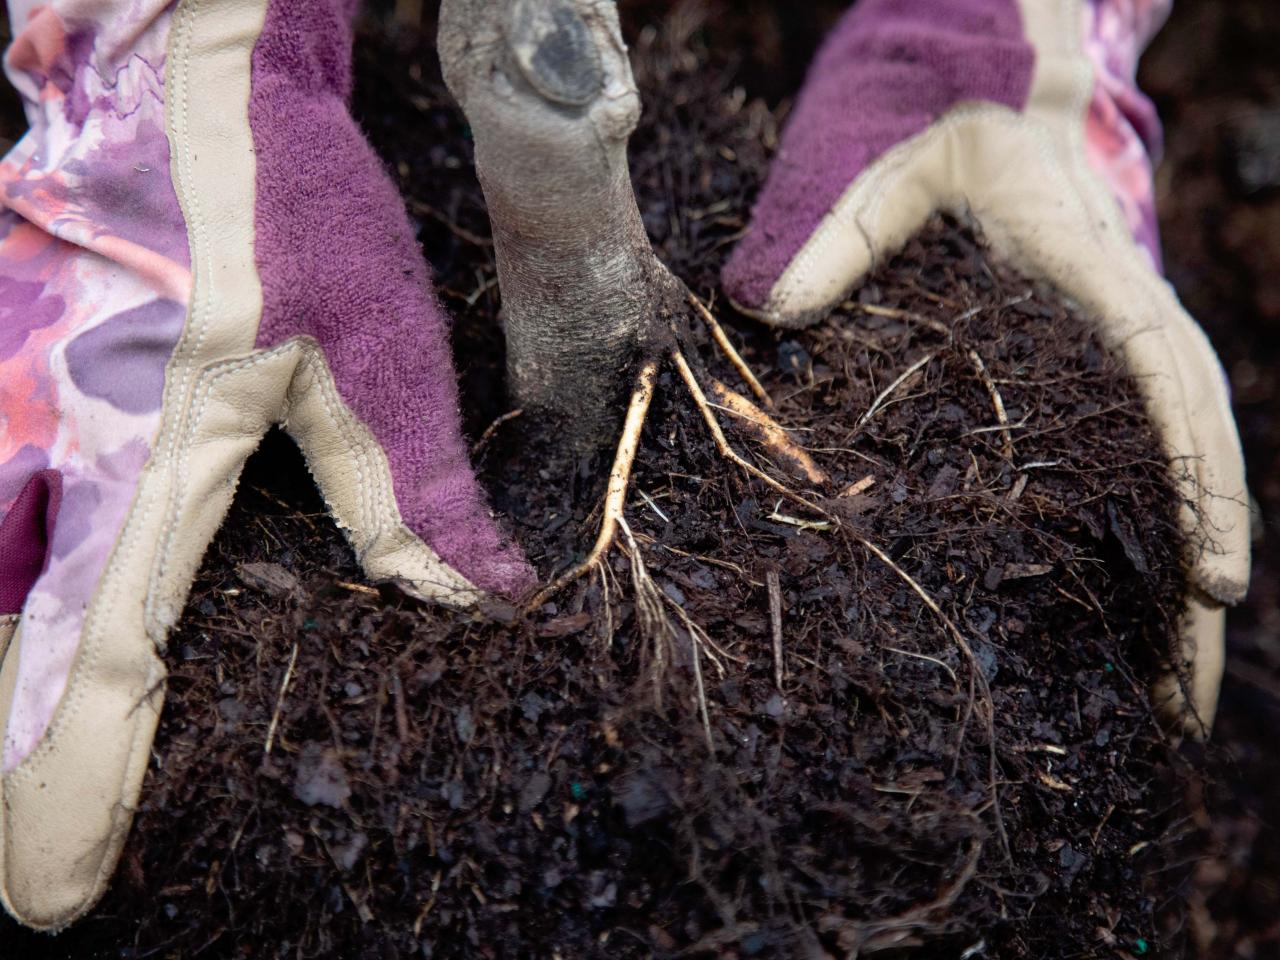
According to Dr. Gilman, once a tree's root begins growing in one direction, it will continue growing that way — even to the future detriment of the tree. Circling roots don't properly anchor trees into the soil, making them more susceptible to wind damage. Even worse, circling roots can go on to girdle the trunk, cutting off circulation and leading to the tree's eventual death. The best thing to do is use a sharp spade, planting knife, pruning shears or hand saw to completely sever the circling roots by removing the outer inch or so of the root ball (Image 2).
"I've seen it increase stability immediately," said Dr. Gilman. "When you cut roots that are circling or are descending (that is, growing down the side of the pot) the new roots come out horizontal to the surface of the soil, straight away from the trunk and you get an orientation like spokes of the wheel from the trunk."
As these new roots radiate out from the root ball (Image 3), they anchor the tree into the soil and allow the tree to become established more quickly.

Shain Rievley
Shain Rievley

Shain Rievley
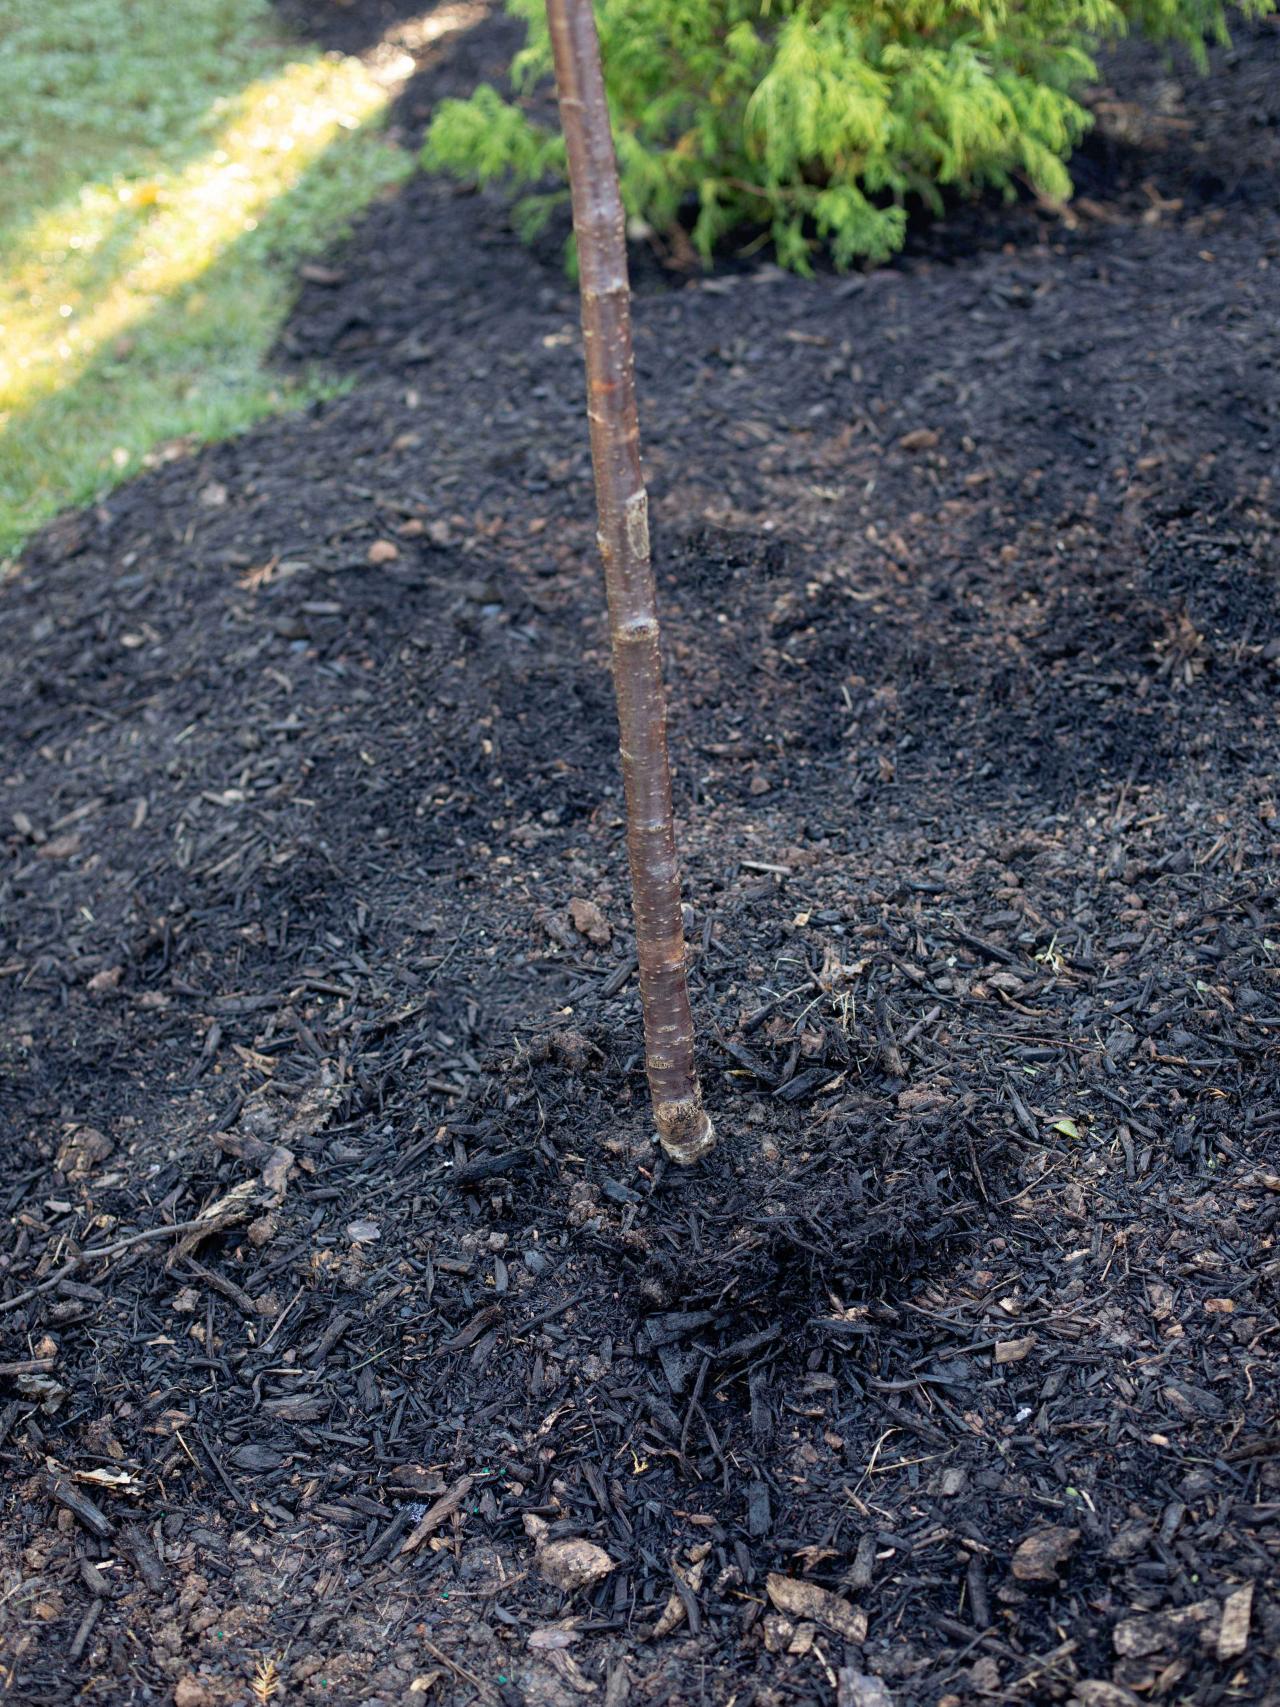
5. Make Sure Root Flare Is Not Buried
The root flare — also called the crown, root-shoot junction and trunk flare — is the point where the first woody roots emerge from the trunk. Although this area needs to be level with or even slightly above the soil surface when you plant the tree, it usually is a couple inches below the soil surface within the pot. Gently remove the soil from the top of the root ball until you find the first woody root jutting out from the trunk.

Shain Rievley
It's not uncommon for nurseries to bury trees a little deeply in the pot to limit how often trees will blow over in the wind. As long as you make sure you excavate the root flare before putting your tree in its forever home, this practice won't hurt your tree in the long run.

15 Fast-Growing Trees 15 Photos
Liven up your yard and add shade quickly with these fast-growing trees.
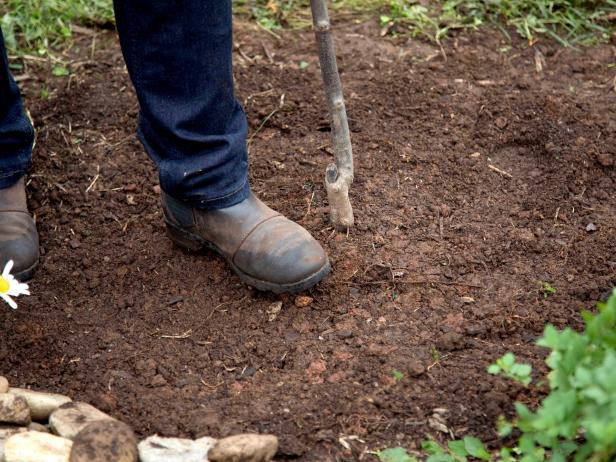
6. Backfill Hole With Loose, Native Soil
According to Dr. Gilman, breaking up soil clods before placing the soil back in the hole around the tree's root ball will promote root growth. In fact, this practice will improve the soil condition and is more important than adding compost, manure or other soil amendment. Some research even suggests that mixing the soil or replacing native soil with organic matter won't benefit the tree. If you have trouble breaking up the soil by hand, try using your spade or a hand tool (Image 1).
Use your foot to gently press the soil over the root ball into the soil (Image 2). This step is especially important if you aren't staking the tree as this could prevent the root ball from rotating out of the soil. Step gently to avoid compacting the soil around the tree's roots, especially if the soil is already wet (Image 3).

Shain Rievley

Shain Rievley
Shain Rievley
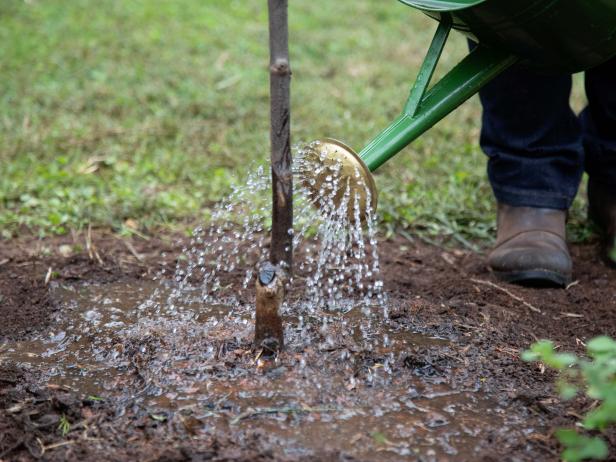
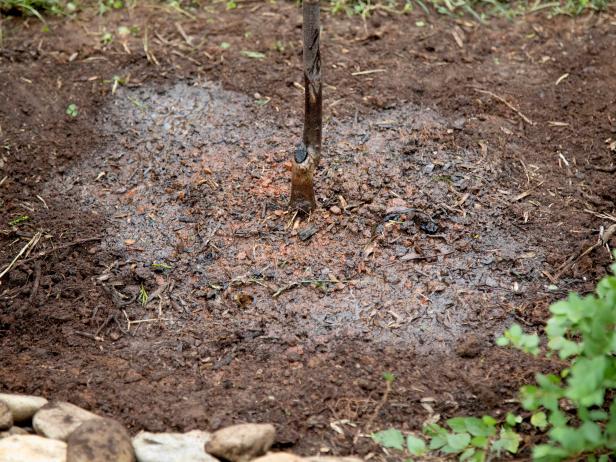
7. Water Well
Give the tree a good, deep drink of water. Slowly apply water from a hose, bucket or watering can until water begins to run off from the area around the hole (Image 1). Pause and allow the water to percolate into the soil, then slowly pour more water again. Repeat until you're sure that water has fully penetrated into the root ball and the soil in the hole (Image 2).
Some of the soil around the root ball may settle into the hole. If that happens, gently spread more soil into the hole and around the root ball.
Dr. Gilman says it's best to give your young tree 2-3 gallons per inch of trunk width two or three times per week. Be sure to water directly over the tree's root ball for best results. Continue watering this way for the first year or so.
Shain Rievley
Shain Rievley
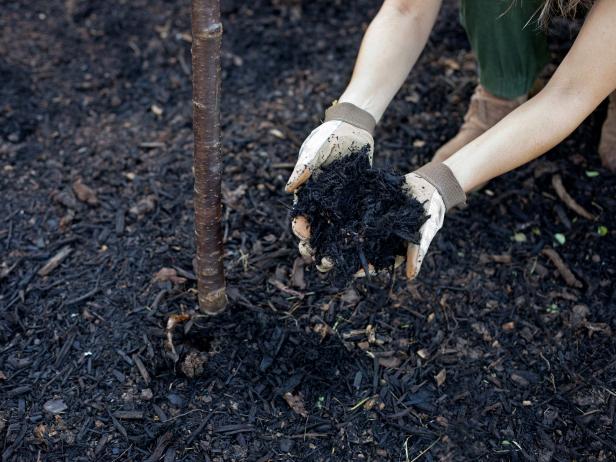
8. Spread Mulch
A healthy layer of mulch is a great way to suppress weeds, conserve moisture and provide a visual barrier for mowers and string trimmers (Image 1). When used as mulch, organic materials like wood chips, pine straw and compost will also feed members of the soil ecosystem and improve the soil as they decompose.
Spread mulch 1 inch thick or less over the root ball of the tree and pull the mulch at least 2 inches away from the tree trunk. This thin layer will provide the benefits described above without robbing the tree's roots of water or rotting the tree's bark.
Apply a thick 3- or 4-inch-deep layer of mulch below the tree's canopy beyond the root ball (Image 2). You can also use mulch to build a low berm around the perimeter of the mulch ring. This low barrier will hold water in the area around the tree's roots and limit runoff. Dr. Gilman recommends folks who live in drier climates west of the Mississippi River expand these tree berms annually for the first three years after planting in order to hold more water over the growing root ball.
Shain Rievley

Shain Rievley
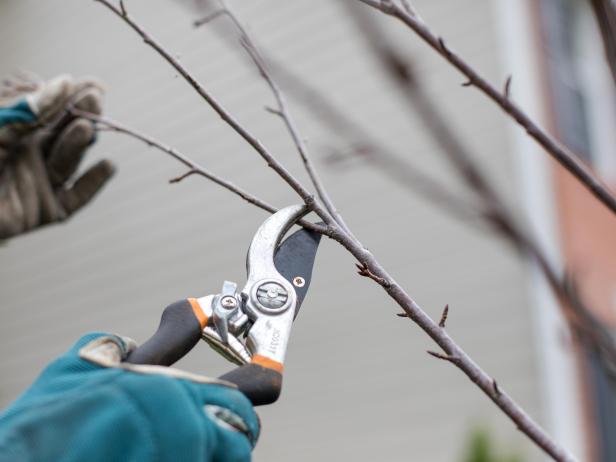
9. Prune the Tree
Planting is a great time to do some light pruning that will benefit the tree's health long term. First, use clean and sharp hand pruners to remove any dead, diseased or damaged branches.
Next, stand back and look at the tree. Are there any "competing leaders" or multiple branches that are starkly upright? If you are growing a species that will become a large shade tree, this is the time to eliminate competing leaders to promote a healthy branching structure that will be less likely to split. You don't need to completely remove competing branches. Simply follow the tip of the branch back to a bud or side branch. Then, use your hand pruners to snip the branch just above the bud. This will curb its growth, promote lateral shoots and eliminate the branch as a competing leader.
Not all trees need a strong central leader. If you are planting a small accent tree, spreading espalier, tightly clipped topiary, vase-shaped fruit tree or a tree with a weeping habit, simply focus on removing dead, diseased and damaged branches and — if necessary — clip to maintain the tree's form.
Shain Rievley
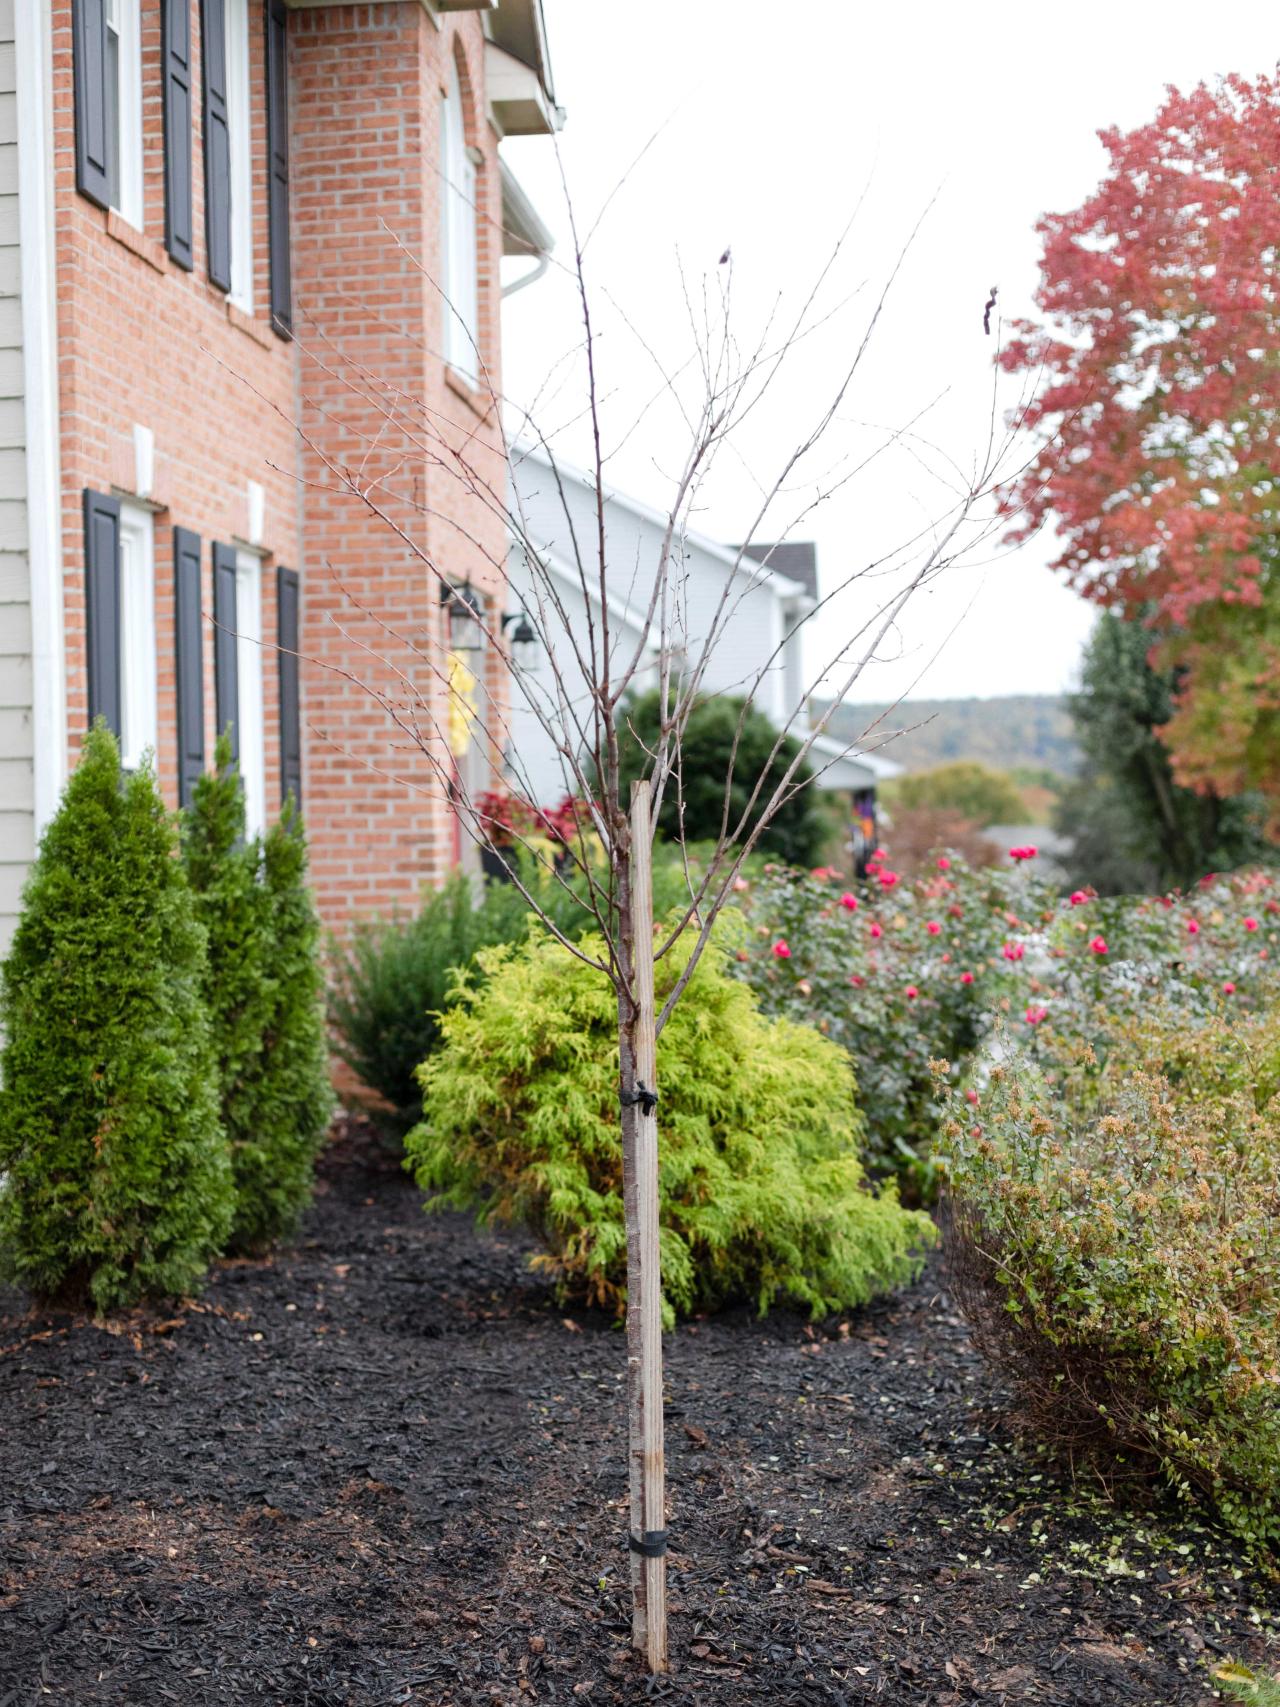
10. Stake If Needed
If wind damage is a concern in your area, you may need to temporarily stake your tree to stop it from blowing over before it is able to anchor roots into the soil (Image 1). There are many different staking systems out there, but regardless of how you plan to stake your tree, there are a few considerations to keep in mind.
First, the further down the trunk that the tree is secured, the better. Try to tie your tree no higher than 1/3 of the way up the trunk. This will allow the top of the tree to move more freely and provide plenty of opportunity for healthy growth.
A newer technique anchors the root ball rather than connecting stakes to the trunk. Create a wooden "staple" by screwing an untreated 2" x 2" board, cut 3 inches longer than the root ball is wide, to two vertical 4-foot-long, untreated 2" x 2" boards, then drive this "staple" completely into the ground and against the side of the root ball. Place a second staple on the other side of the trunk if needed for larger trees. Use drywall screws as they decay quickly. This system, which you can learn more about here, allows plenty of movement along the trunk and branches while securing the roots in the soil.
Second, avoid securing the tree so tightly that it is not able to move. Although we don't want the tree to be blown over, it is important for the tree to have some movement so that it can develop a healthy taper. Dr. Gilman says evidence suggests trees staked so they can't move likely will grow taller but develop narrower, weaker trunks.
Stake the tree using a wide rubber or other flexible tie that can grow along with the tree and will allow the tree to have some movement in response to wind (Image 2). Wire and tight rope are not good choices as they could cut off the tree's circulation and won't allow for any movement.
Finally, remember to remove the stakes and ties within one year of planting the tree. Some trees may only need to be staked for a few months before their roots have anchored into the soil. The longer that stakes are left up, the easier it becomes to forget to remove them. Even wide, flexible ties can eventually girdle the trunk, cutting off circulation and eventually killing the tree. If you opt for the 2"x2" wooden staples, you don't need to worry about removing the system or girdling the tree. These wooden staples will eventually decay without damaging the tree.

Shain Rievley

Shain Rievley


