


Make an Indigo-Dyed Market Tote

Materials Needed:
- plain canvas tote bags
- indigo dye kit
- aluminum foil
- 5-gallon bucket
- stirring stick
- waterproof drop cloth
Prep the Materials
Spread a dropcloth over your work area (cutting open a plastic trash bag works perfectly.) Fill the bucket with about 4 gallons of warm water. Put on rubber gloves (your kit should include them.)
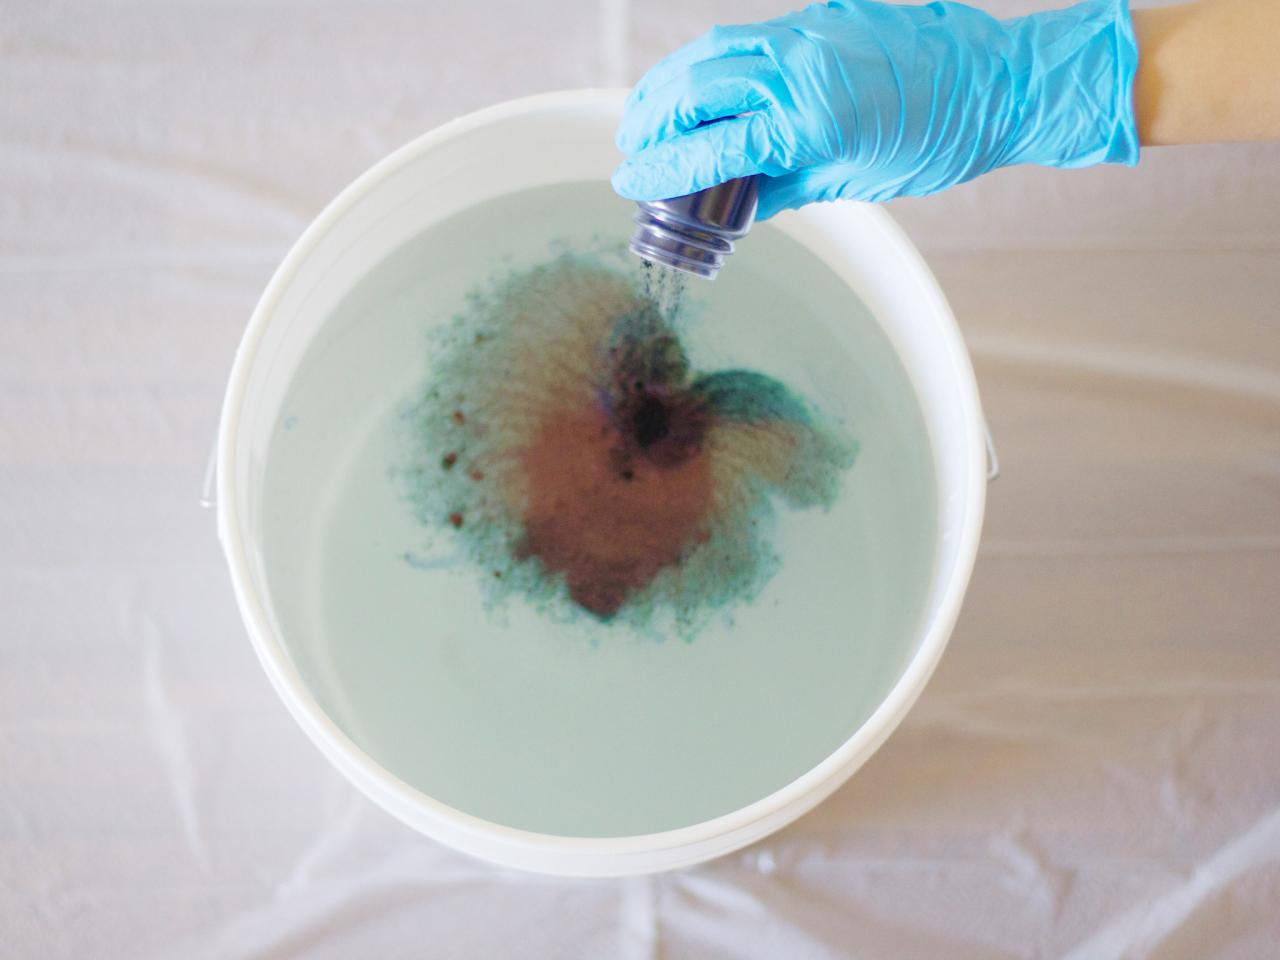
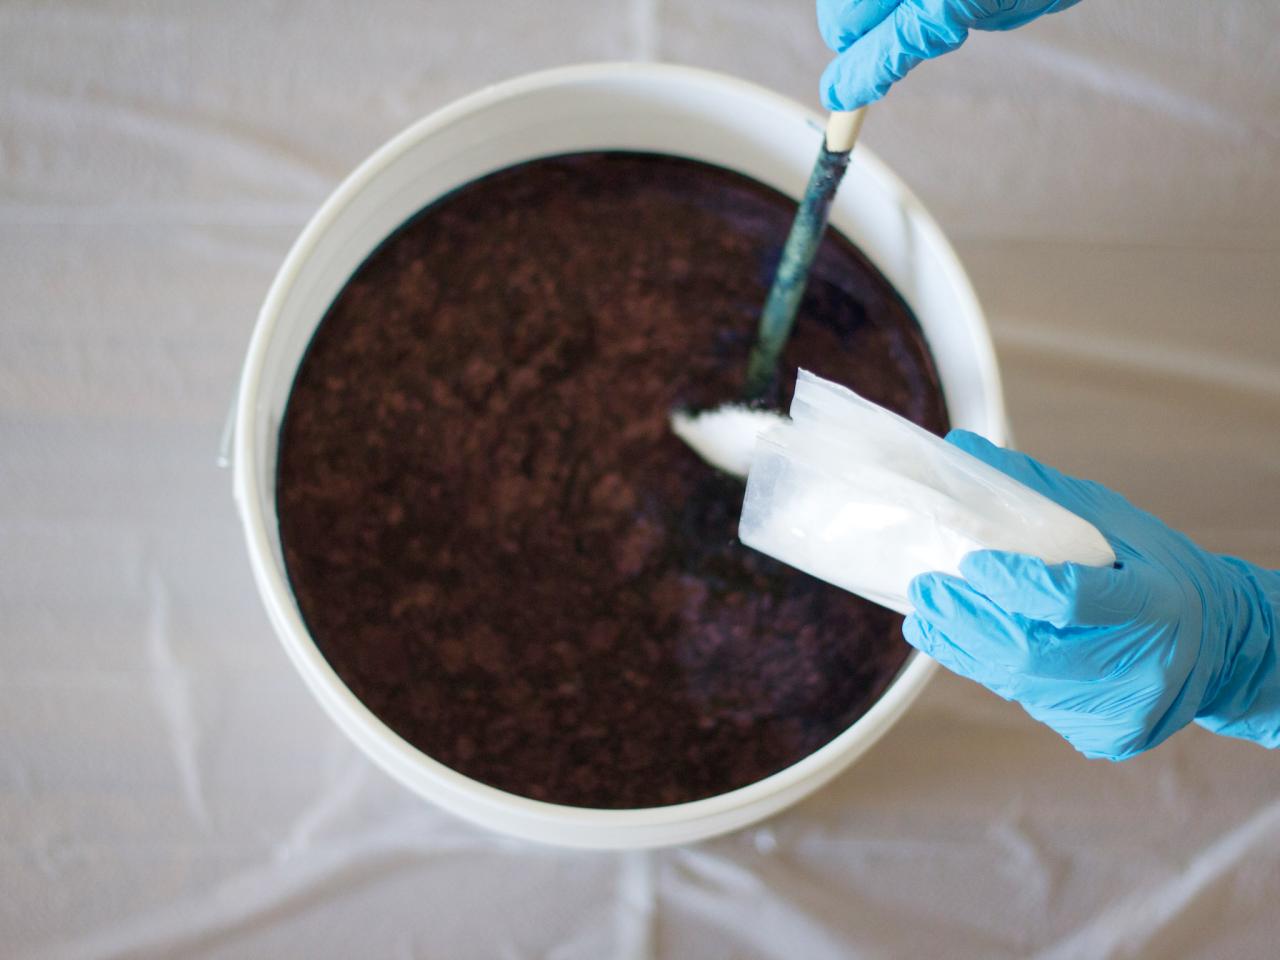
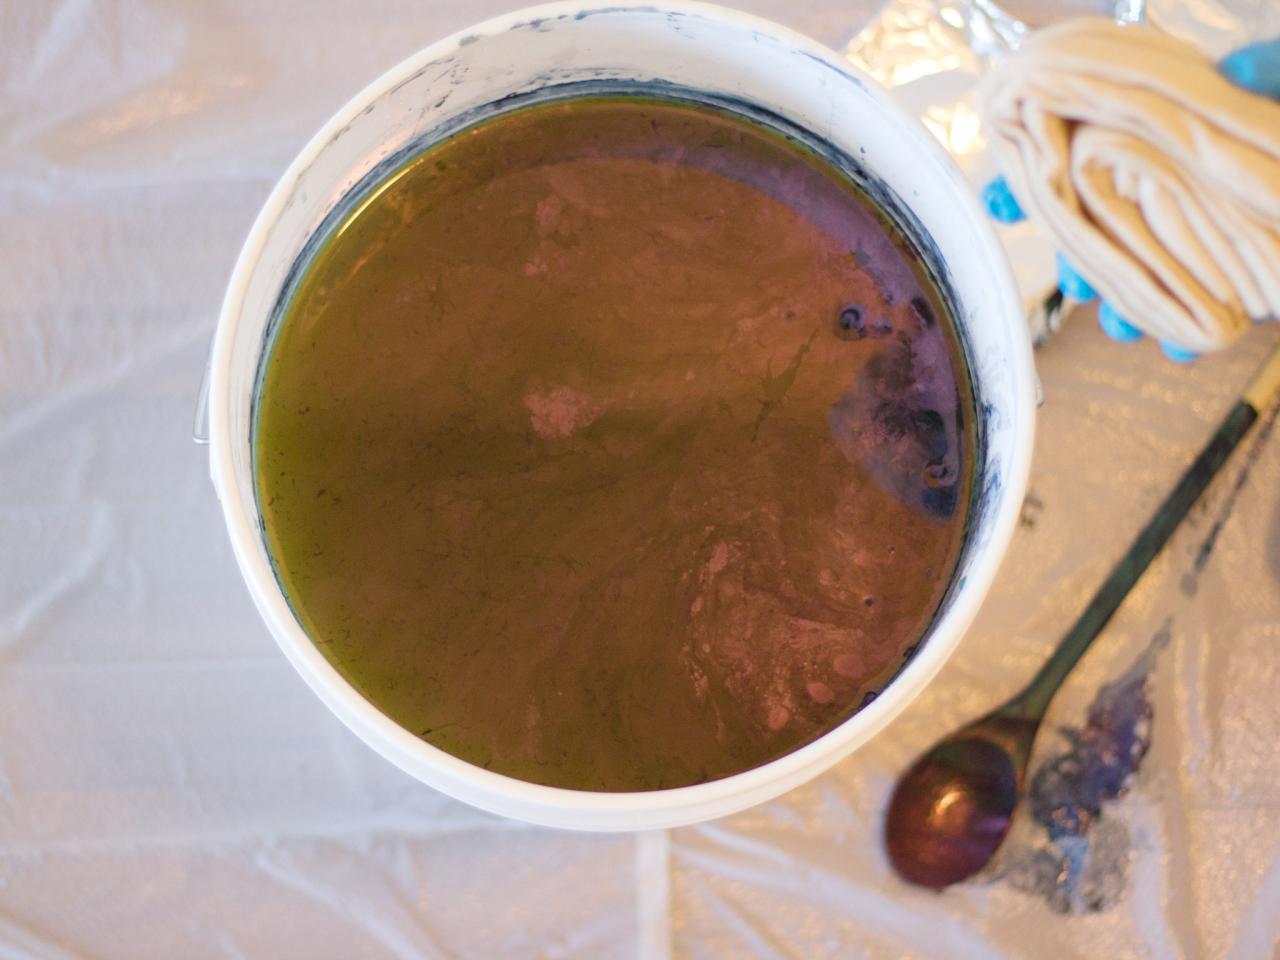
Mix the Dye
Begin by slowly emptying the contents of the dye packet into the water and stirring gently. Once thoroughly mixed, empty the accompanying packets of reducing agent while continuing to stir. (Note: each dye kit may have slightly differing instructions. Be sure to read your kit’s instructions thoroughly.) Stir slowly and gently in one direction until fully dissolved.

Image 1

Image 2
Let It Sit
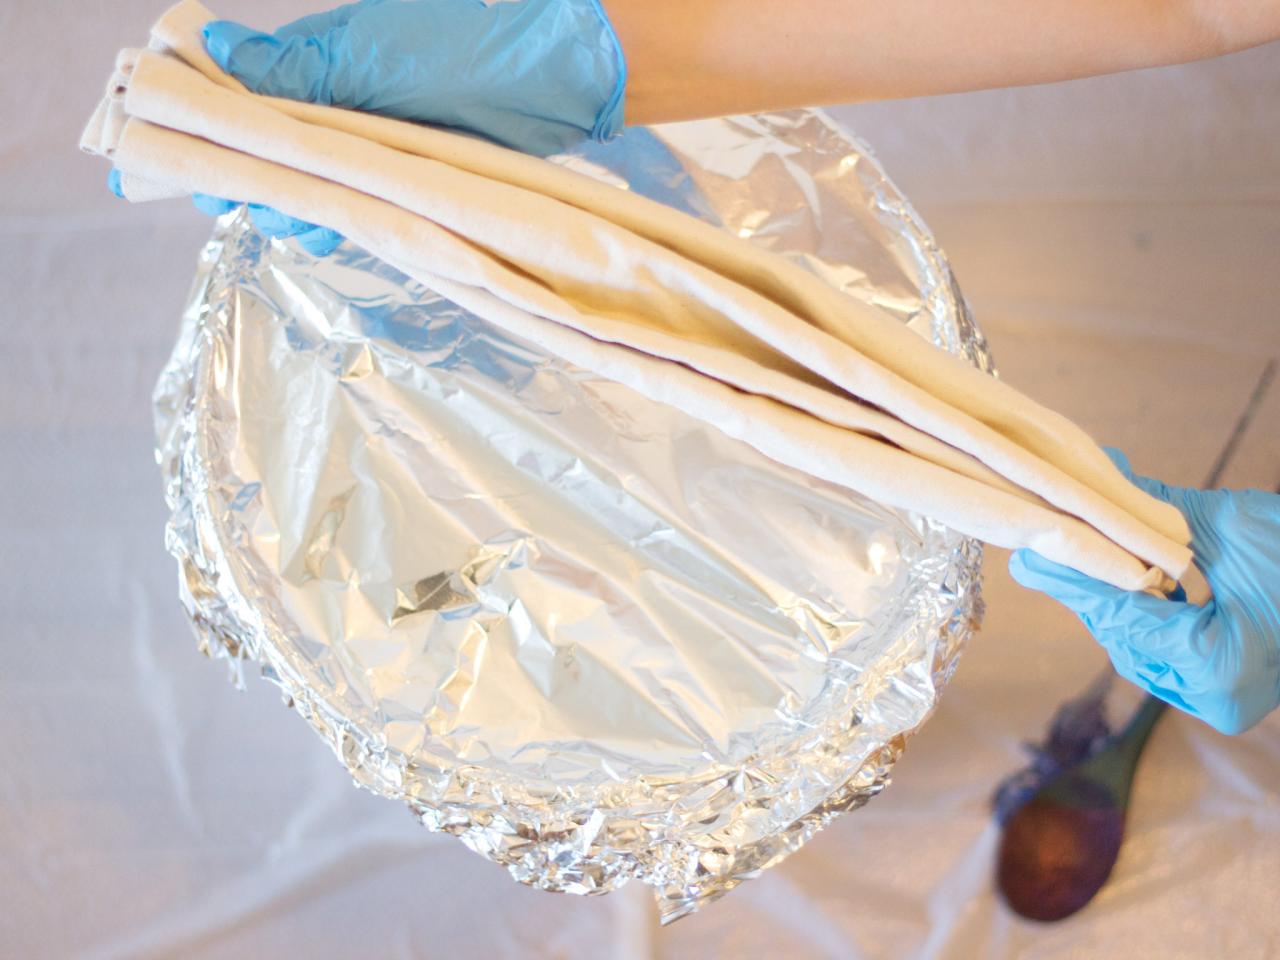
Over the bucket with foil and let the dye sit for approximately an hour. Covering is important to avoid oxidization.

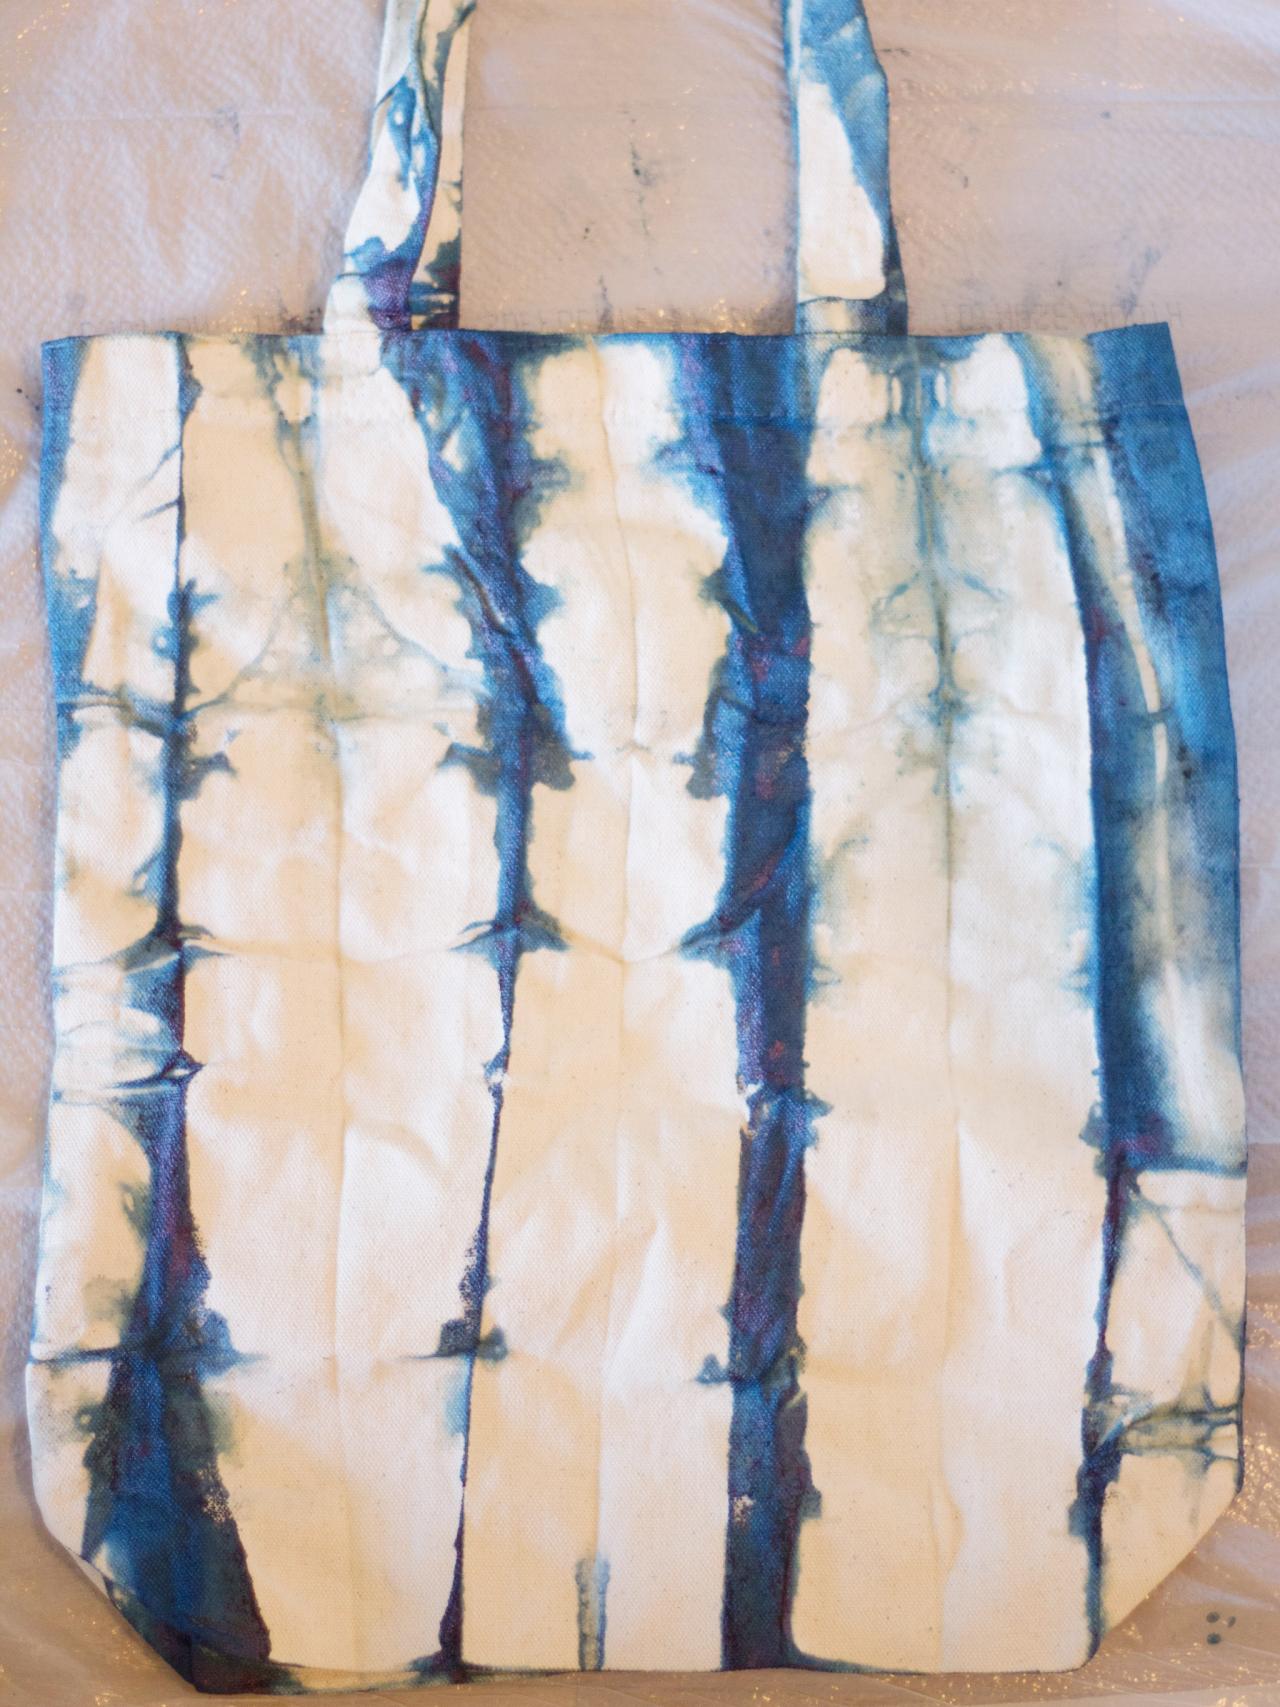
Pick a Pattern: Stripes
This is the fun part! Decide on a pattern and start folding your tote bag. For a more striped look (as shown below), first tuck the handles inside the tote bag. Fold the bag accordion-style. Fold the accordion in half, then half again and put a rubber band (included in your kit) around the center to hold it together.

Image 1

Image 2
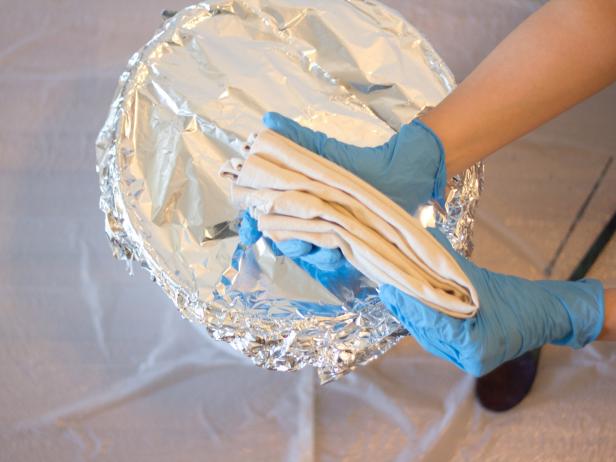
Image 3

Image 4
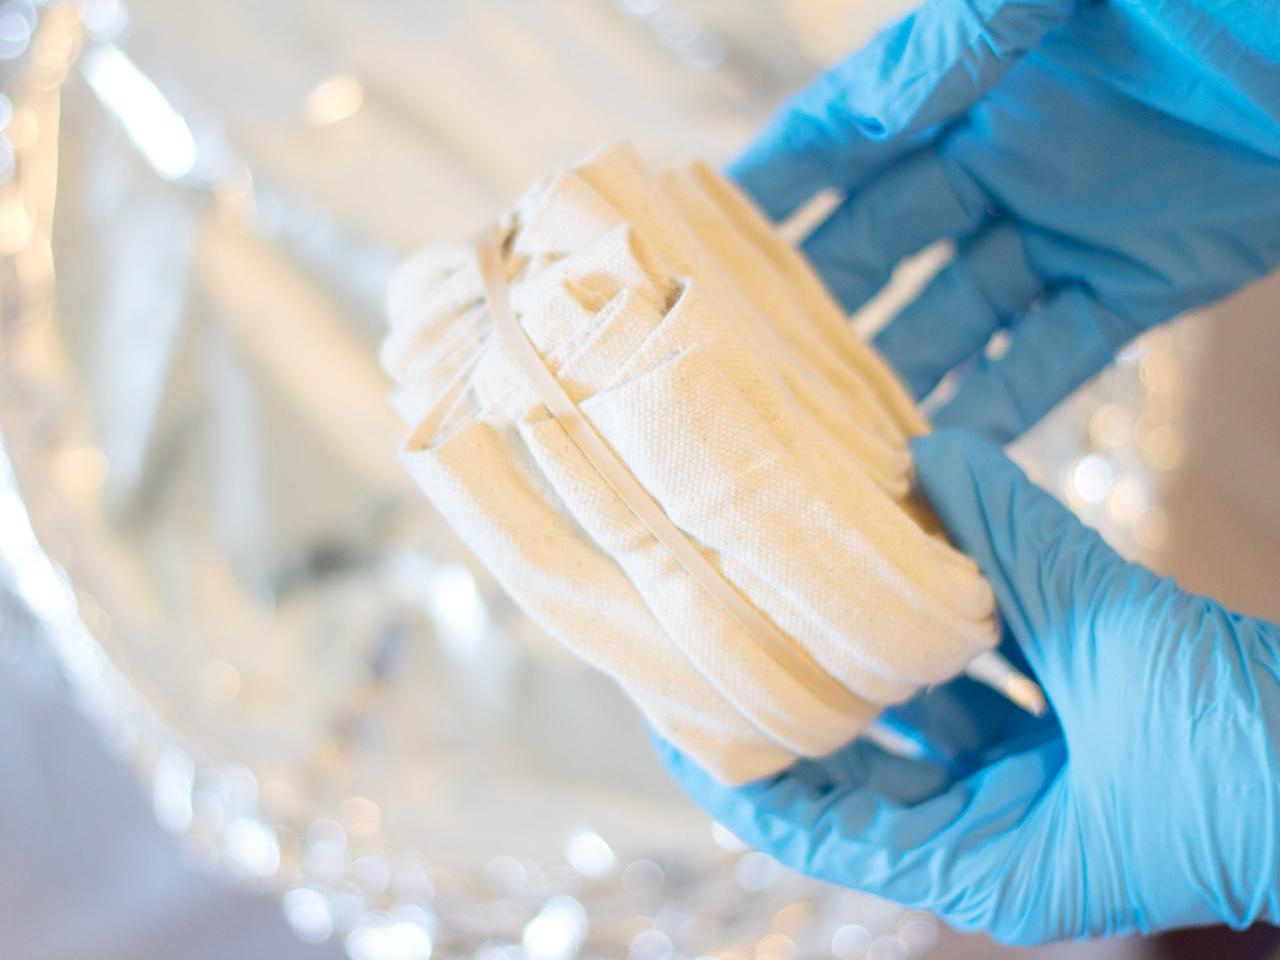
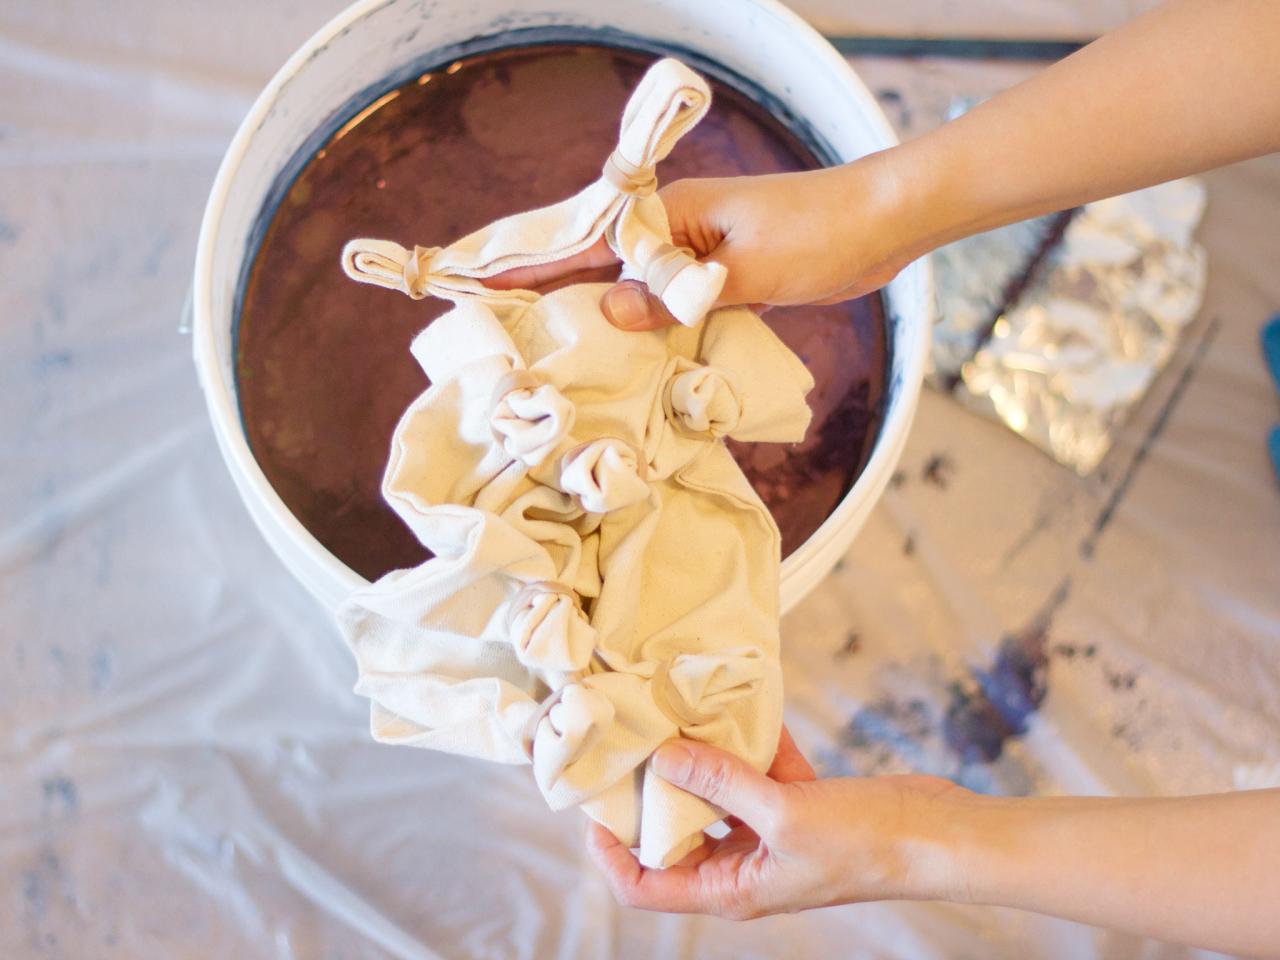
Pick a Pattern: Tie-Dye Bursts
For a traditional tye-dye “burst” look (as shown below), gather small bunches of the canvas tote together and wrap a rubber band around each gathered bunch. We used 9 rubber bands for 9 small gathered sections of the tote (including on the handle.)
Image 1
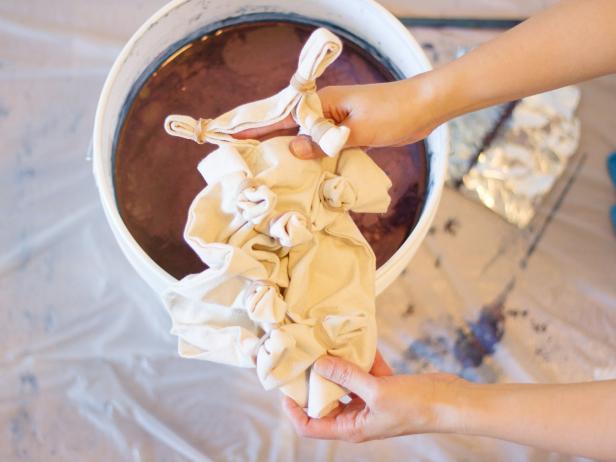
Image 2
Dip and Dye: Stripe Pattern
Remove the foil from the bucket. There will be some debris floating on the top of the dye vat; move it to the side or gently scoop it out. If you’re making stripes, gently dip one side of the tote into the bucket, so that the folded accordions are touching the top of the dye. Hold it in the dye for 1-4 minutes, depending on darkness desired. Remove, flip over, and dip the other side, leaving a bit of the center un-dyed.

Image 1

Image 2
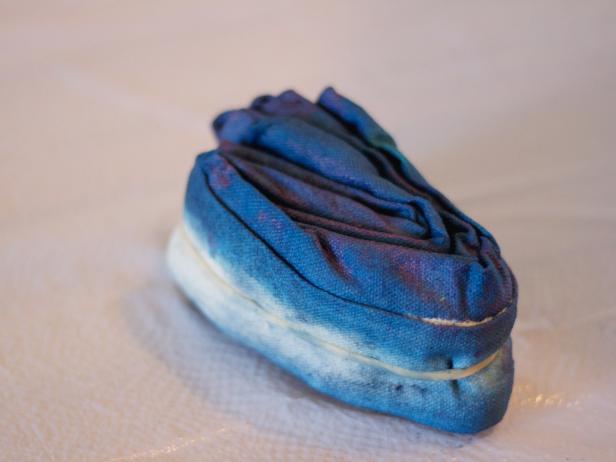
Image 3
Dip and Dye: Tie-Dye Burst Pattern
If you’re making the tie-dye burst pattern, submerge the entire tote under the surface for 1-4 minutes.

Image 1

Image 2
Remove and Cover
As you are pulling the tote out of the dye, gently squeeze to wring out extra dye liquid. Cover the dye vat again to avoid oxidization.
Oxidize and Rinse
Set the dyed pieces out for approximately 20 minutes to fully oxidize (you’ll see them going from a greenish color to dark blue.) If you’d like the pieces darker, repeat the dipping process. If not, rinse the pieces under cool water to remove excess dye. Squeeze them out, remove rubber bands, and unfold to see your design.
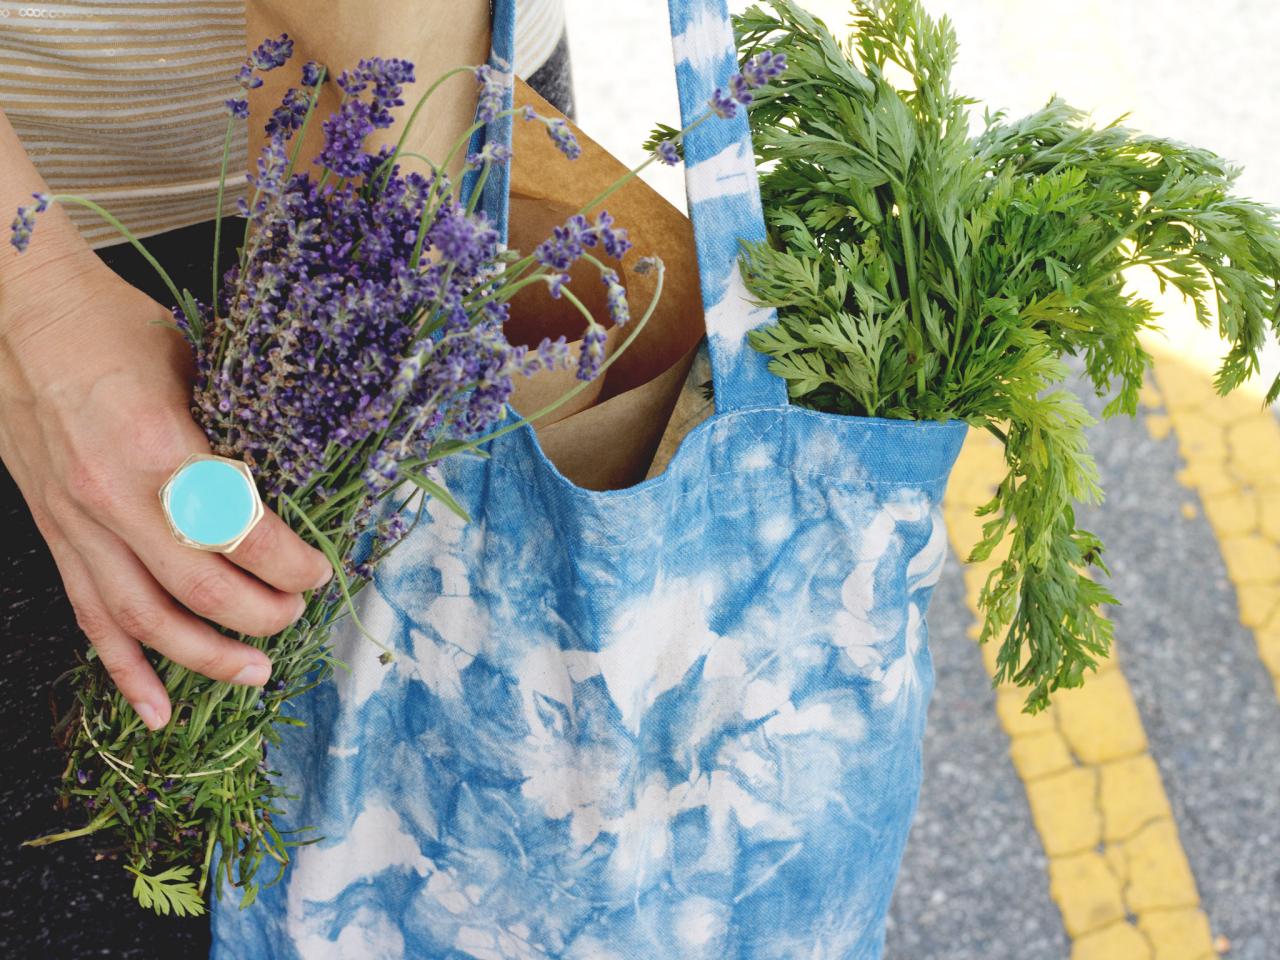
Wash and Wear
Put your dyed objects through a cool cycle in the washing machine to rinse out the remaining dye. Allow the totes to dry thoroughly, then take them to the market and fill them up!
Note: To dispose of the indigo dye, carefully pour down drain and rinse tools with a mild cleanser.


