


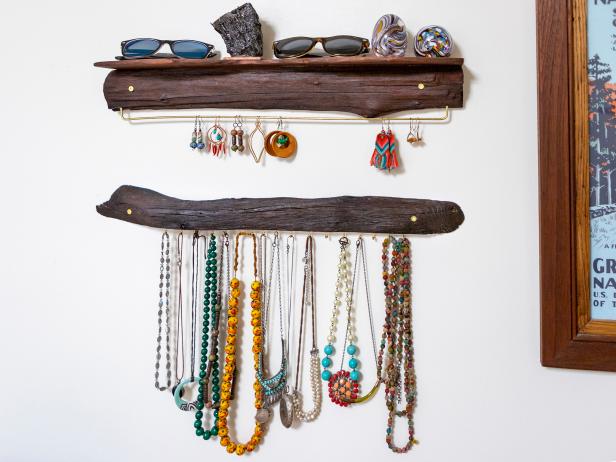
Build a Jewelry Organizer From Driftwood
You know that really cool piece of driftwood you picked up at the beach? Here’s a great way to get it out of the woodpile and give it a new life.

Tools and Materials
- bandsaw, jigsaw or scroll-saw
- jointer or stationary sander
- cordless drill and bits
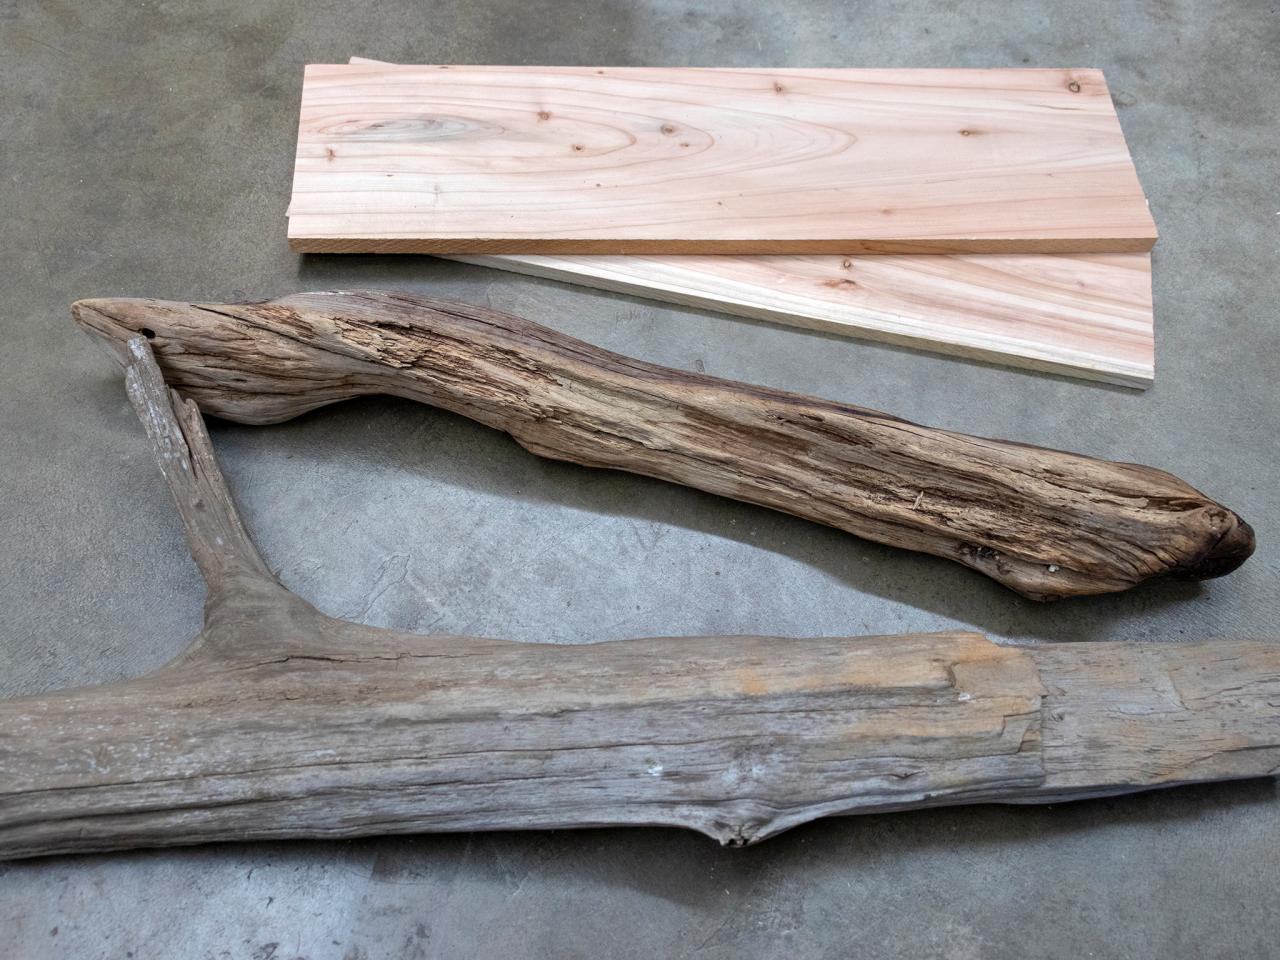
- (2) pieces of driftwood
- (1) piece of scrap wood roughly 1x6
- (1) 3/8" brass rod
- (4) drywall anchors
- bottle of wood glue
- bottle of super glue or similar
- (4pks) small brass screw hooks
You Only Need a Few Scraps
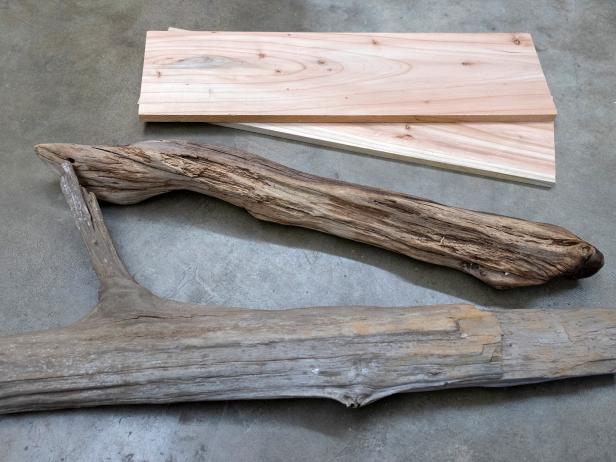
We’re using two pieces of driftwood to make two wall cleats, one of which will have a small shelf on top. Find or cut a piece of scrap wood the same length as the piece you want to use for the shelf. Try to use a lighter colored piece of scrap wood because it will be easier to stain it to match the driftwood. If you know the species of your driftwood that helps, but after years in the ocean, it can be difficult to identify.
Rip a Straight Edge Into Your Driftwood
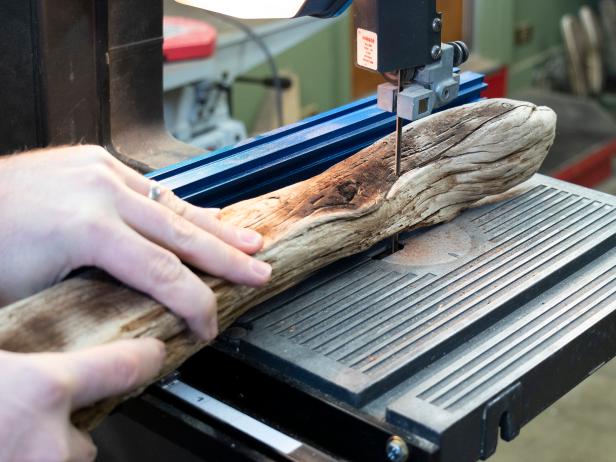
The first order of business is to give your driftwood pieces an edge that’s a little easier to work with. A bandsaw makes this quick and easy, but you can use a coping saw if you’ve got some patience and a strong sawing arm. Carefully run the driftwood through the bandsaw so that you make one clean, relatively flat face. While you’re at it, trim off any protruding branches that you don’t want.
Make Some 90 Degree Corners
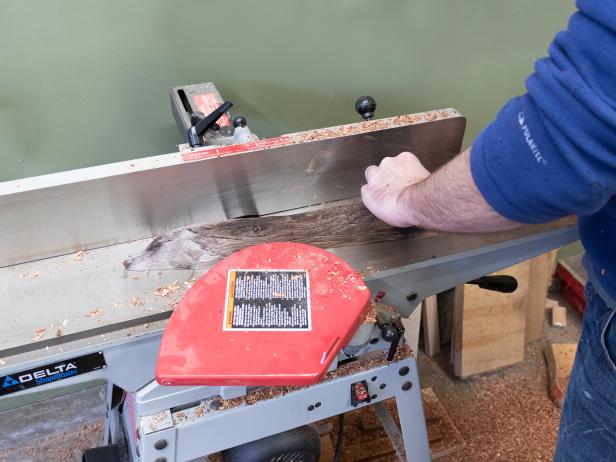
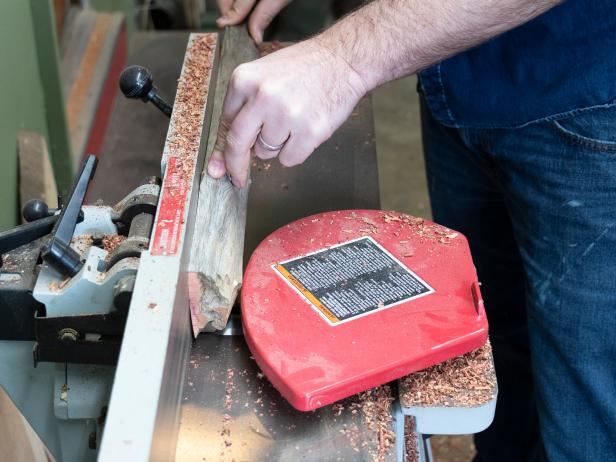
Next, get the ripped edges reasonably flat. The easiest way to accomplish this is with the use of a jointer. If you don’t have access to one of those, don’t worry. You can use a belt sander or even a hand plane to get two flat edges that are 90 degrees to each other. Take your time and don’t worry, it doesn’t have to be flawless, it just needs to be pretty close.
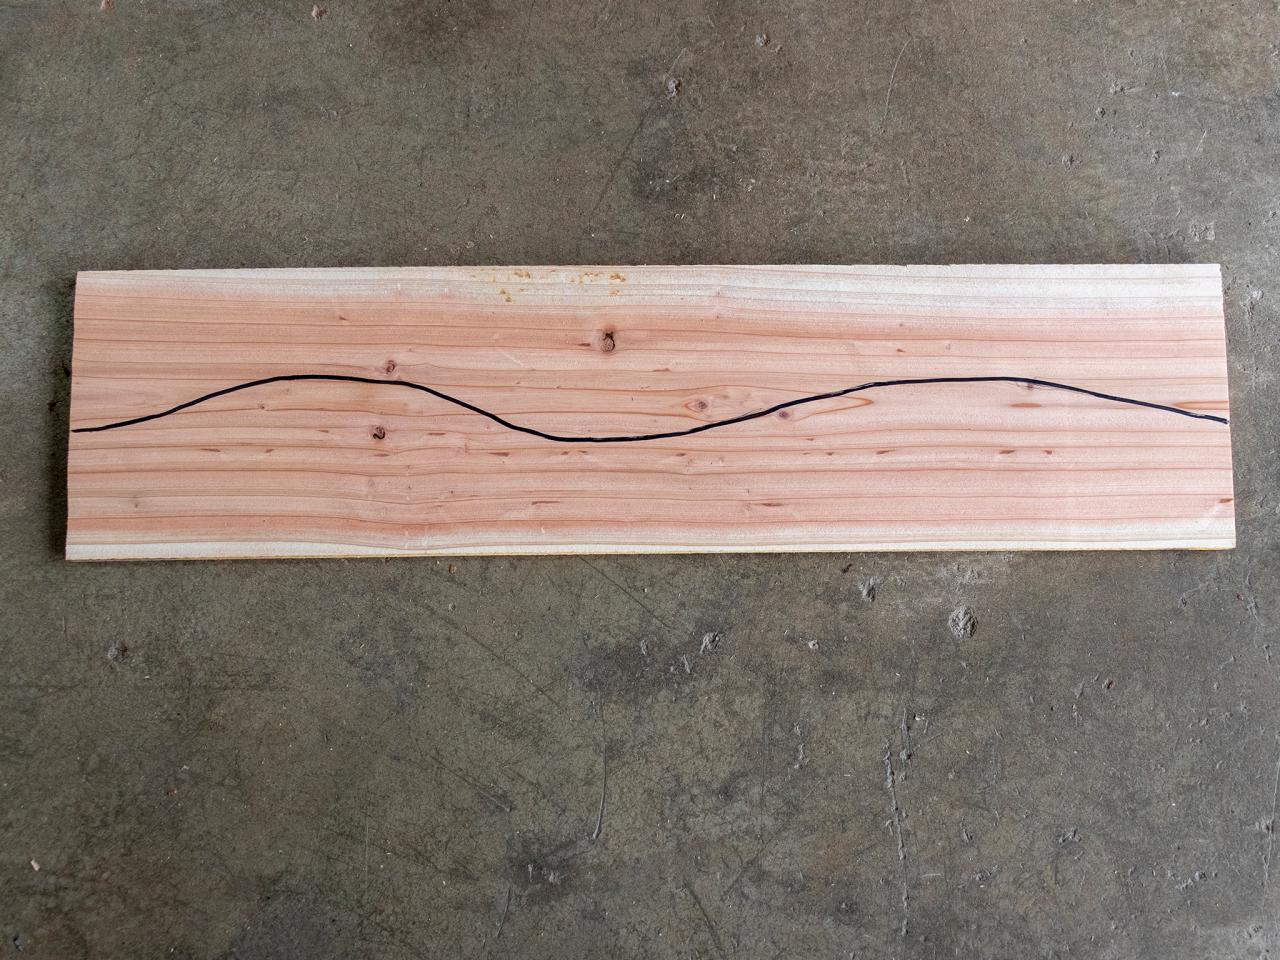
Cut Out the Top Shelf (2)
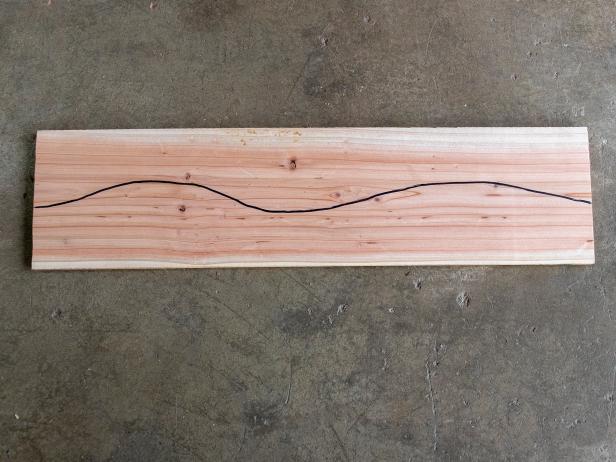
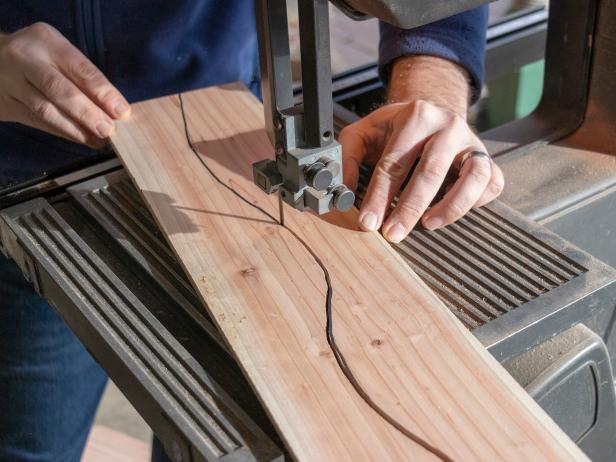
For the small ledge that rests on the top cleat, draw a curved pattern on the piece of scrap and trim it out with your saw of choice. Again, a bandsaw makes this easy but any other saw that can cut a curve will do.
Sand Everything Smooth (2)
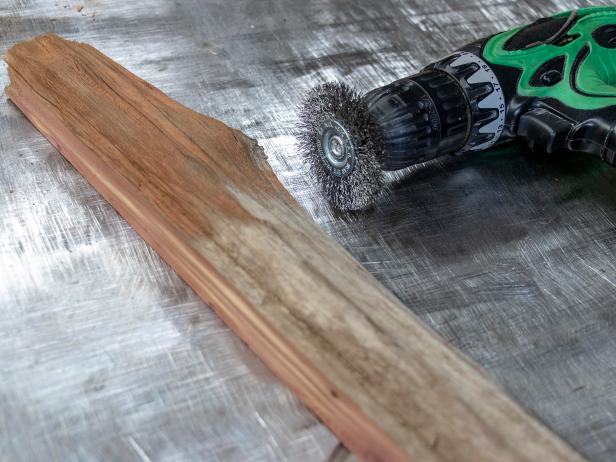
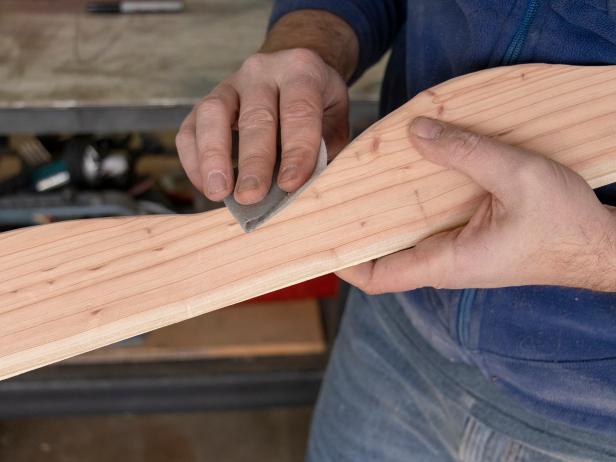
For your driftwood, the easiest way to sand it without losing all of the character of the wood is with a drill-mounted wire brush. This will rough sand your piece while kicking out all of the dirt and grime. Once you’ve got the driftwood cleaned up, give all of your pieces a light hand sanding to your desired finish. Make sure to wear a respirator while you work!
Drill Mounting Holes

Before you start gluing and finishing your project, you’ll want to drill the mounting holes. Use your best judgment on where to safely drill the holes on either end of your driftwood cleats. Try to keep the screw holes aligned so that when you hang your shelf it’s not visually distracting.
Glue Shelf Together and Stain

Use wood glue and a pair of clamps to attach the upper cleat to the shelf piece. Place the cleat on the flat backside and glue the shelf at a right angle to the top. Let the glue cure, scrape off any excess and leave it in the clamps until totally dry. Once everything is dry, you can apply the finish. If you’ve got a couple of different species of wood, choose a dark stain and apply it in thin coats until all of the parts match closely. Follow that up with a brush or spray-on polyurethane or acrylic clear coat to protect the finish.
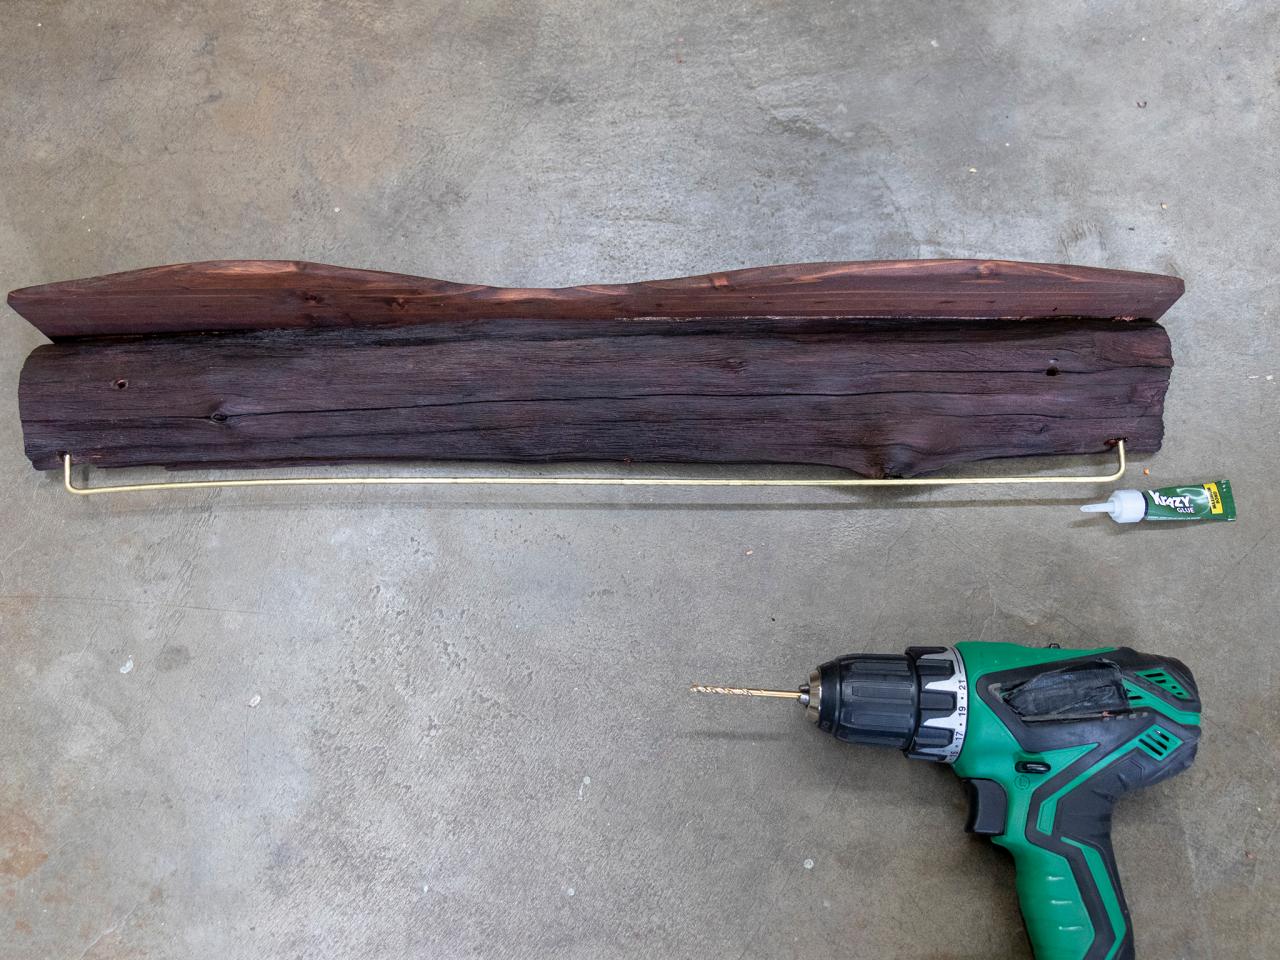
Bend Brass Rod

Brass is super soft and easy to bend and cut, just use a good pair of pliers that have cutters in the jaws. Cut the rod to the desired length and bend both ends upwards to 90 degrees. If you’re unsure of how long to make the ends, just make them a little longer than you think you’ll need. You can always trim them down as you test fit.
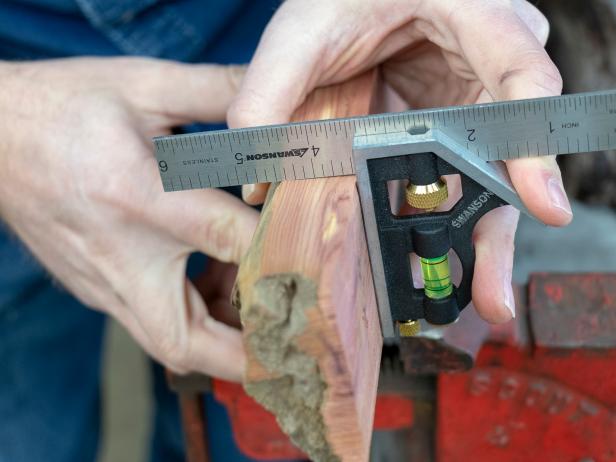
Insert Brass Hanging Rod

Using a 1/8” drill bit, place two holes into the underside of your top shelf. Start with a fairly shallow set of holes and test fit the brass rod. Make any adjustments to the hole depth or length of the rod ends until you achieve a level hanging rod as shown above. Once you’re satisfied with the placement, add a few drops of super glue and let it cure.
Place Necklace Hooks
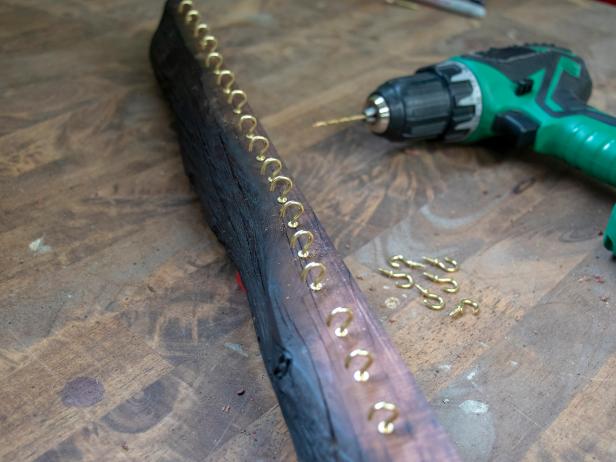
On the bottom edge of the lower cleat, drill a small series of pilot holes for the screw hooks. Usually, a 1/16” drill bit works best. Space the holes anywhere from 1/4 to 1/2” apart and then screw each of the hooks into the pilot holes until you’ve run the length of the cleat.
Mounting The Organizer

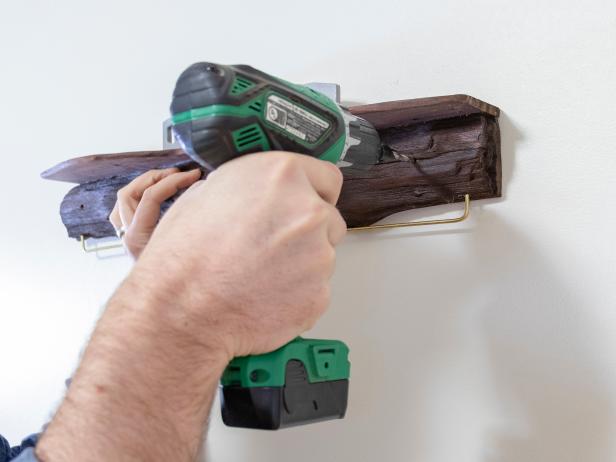

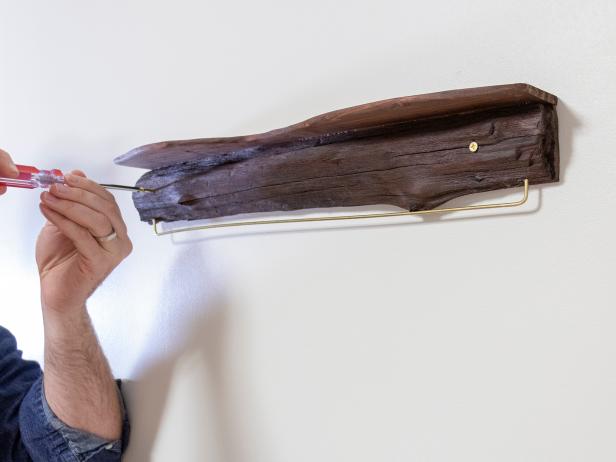

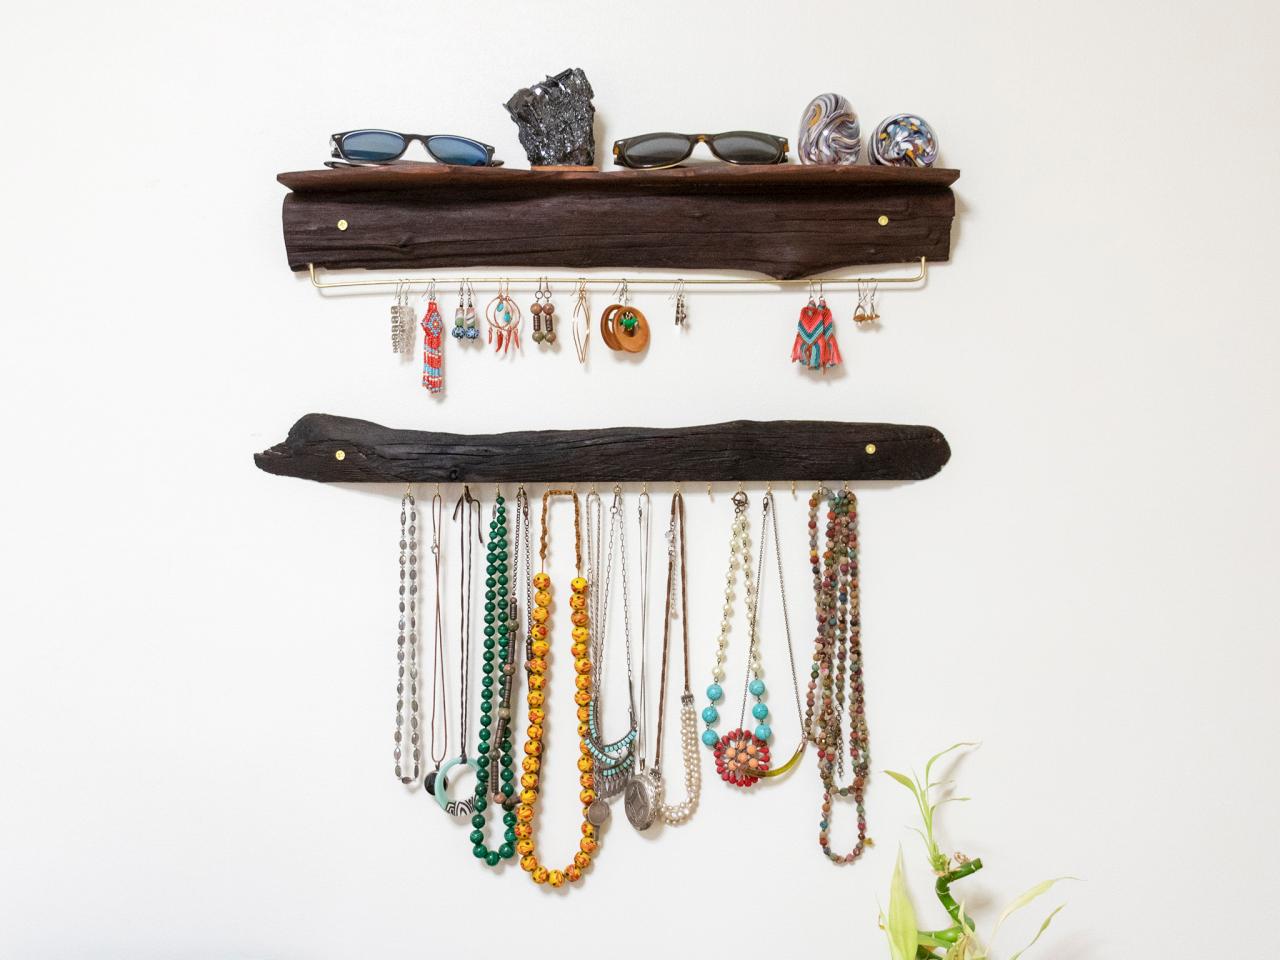
Starting with the top, place the shelf in the desired location with a small bubble level on top. Once the shelf is level, use your drill to place a shallow pilot hole through each mounting hole. Take the shelf down, drill holes for your wall anchors into the pilot holes and drive in your plastic anchors. Use brass screws and a hand screwdriver to affix the shelf to the wall. Place the lower shelf about 10"-12” beneath that in the same manner. Now you can hang your accessories and style your shelves!


