


Glass Tile Backsplash Ideas

If you're thinking of installing a new kitchen backsplash or updating an old one, you'll want to browse the full range of glass tile backsplash ideas.
Types of Kitchen Backsplash Tile
Kitchen backsplash materials run the gamut from traditional ceramic tile to high-end granite, but glass tile can be an attractive, inexpensive and easy-to-clean alternative.

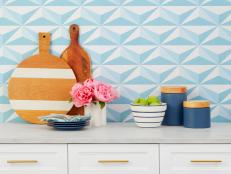
Gorgeous Kitchen Backsplash Options and Ideas 102 Photos
Explore dozens of beautiful kitchen backsplash ideas comprising all different materials, colors and designs.
If you've decided on glass tile for your kitchen backsplash, you're ahead of the game, as you've already done some important planning for your kitchen update. Next, you'll want to decide on the scope of your project — how much glass tile will you need—as well as the style, pattern and color of the tile.
Determine How Much Tile You Will Need
In terms of the amount of glass tile you'll need, this will be determined by the surface area your backsplash will cover. You may choose to cover the entire wall above the kitchen counters with backsplash, or you may decide on a reduced scope that covers only a portion of the wall. Either way, marking off the surface area you'll cover and then measuring the square footage will show you the amount of tile you'll need.
Decide on Tile Texture and Style

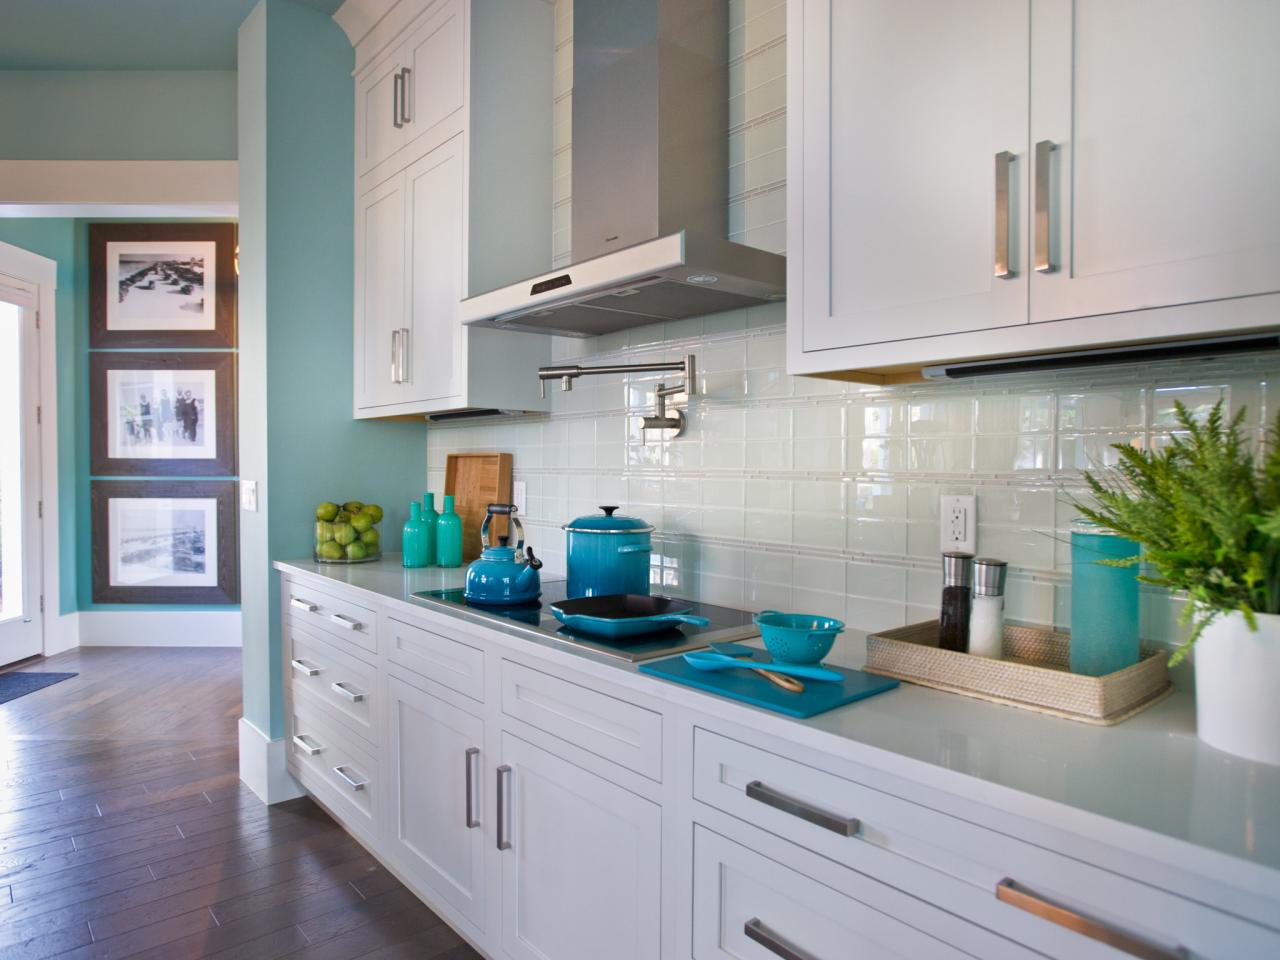
Adding a high-end glass tile backsplash is a lot easier than you may think, and it makes a tremendous difference in your kitchen's style. The opaque tile backsplash behind this sink gives the room an iridescent glow against the colors of the cabinets and countertop.
Once you've got the square footage figured out, it's time to think about the style of glass tile you'll feature. The possibilities are just about endless, from sparkling, clear styles to frosted, colored or textured glass. One consideration that may help you decide on a style is whether or not you plan to match the existing design of your kitchen with the new glass tile backsplash or if you'll use the backsplash to add a new, unique visual aesthetic to the space.
Materials Needed:
- opaque glass tile
- non-sanded grout
- thinset adhesive
- V-notched trowel
- level
- sandpaper
- glass tile cutter
- tile spacers (optional)
- wax pencil
- bucket
- sponge
- rubber grout float
A glass tile backsplash is a great way to add color and visual interest to your kitchen, and you'll also find that the tiles can be arranged in an endless array of patterns, adding even more distinct style and design flair. Glass tile is available for backsplashes in just about any style, from rectangular subway tiles to mosaic and penny styles, so the arrangement you decide on will be entirely up to you in the end.
How to Install Glass Tile
Once you've settled on a style, color and pattern for your glass tile backsplash, it's time for the installation. There are two routes you can choose here—professional installation or the do-it-yourself road. Hiring a contractor to install your backsplash will be more expensive, but it'll save you time, sweat and frustration—especially if this is your first time at the tile rodeo. Some tile styles are easier to install than others—for example, mosaic tile often comes with a mesh backing that allows you to simply stick large sections of tile to the sticky backing, making it a particularly popular choice for first time DIY-ers.
Read on for an easy tutorial on installing glass tile.
How to Add a Glass Tile Kitchen Backsplash
Step 1. Eliminate Power
Turn off power to all walls where you'll be working and remove outlet covers on the area to be tiled.
Step 2. Prep the Wall
Using 80- or 90-grit sandpaper, thoroughly sand the backsplash area to be tiled. Wipe walls with a damp rag to remove any loose debris. Find the visual center of the wall. This is where you will begin tiling. Use a level to draw a centerline through the visual center.
Step 3. Dry Fit Tiles
Make sure you understand how your tile will lay out, and that you will be happy with the fit by doing a dry layout on the floor before adhering tile to wall.
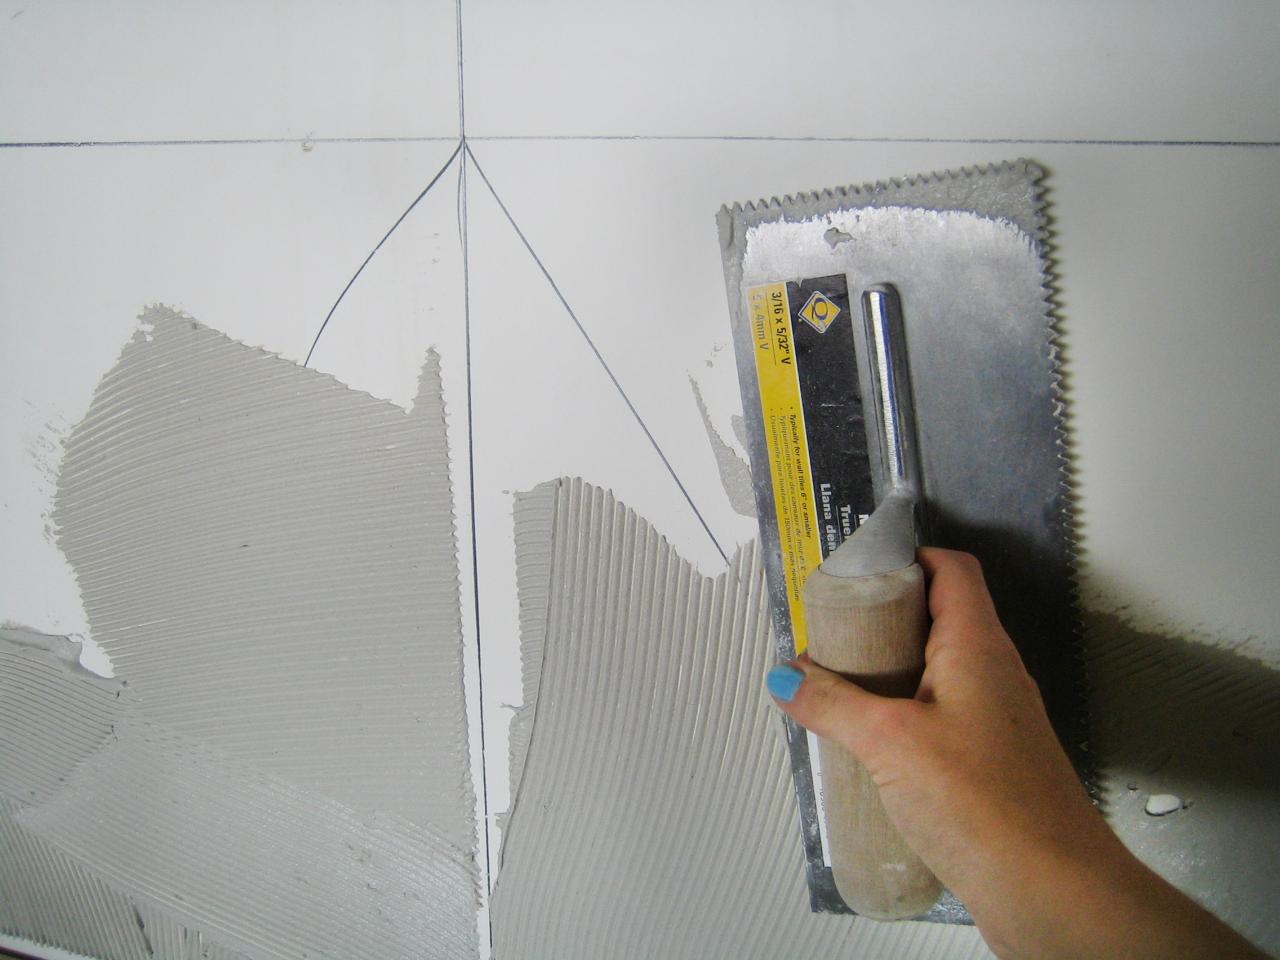
Step 4. Apply Thinset Adhesive

Apply thinset to a small area of the wall at the centerline. Start at the bottom of the wall, holding your trowel at an angle so the V-grooves cut into the thinset giving it a grooved texture which will help to grip the tiles. Wipe thinset onto the wall in sweeping motion, being careful to only apply enough adhesive that can be covered by a few tiles at a time.
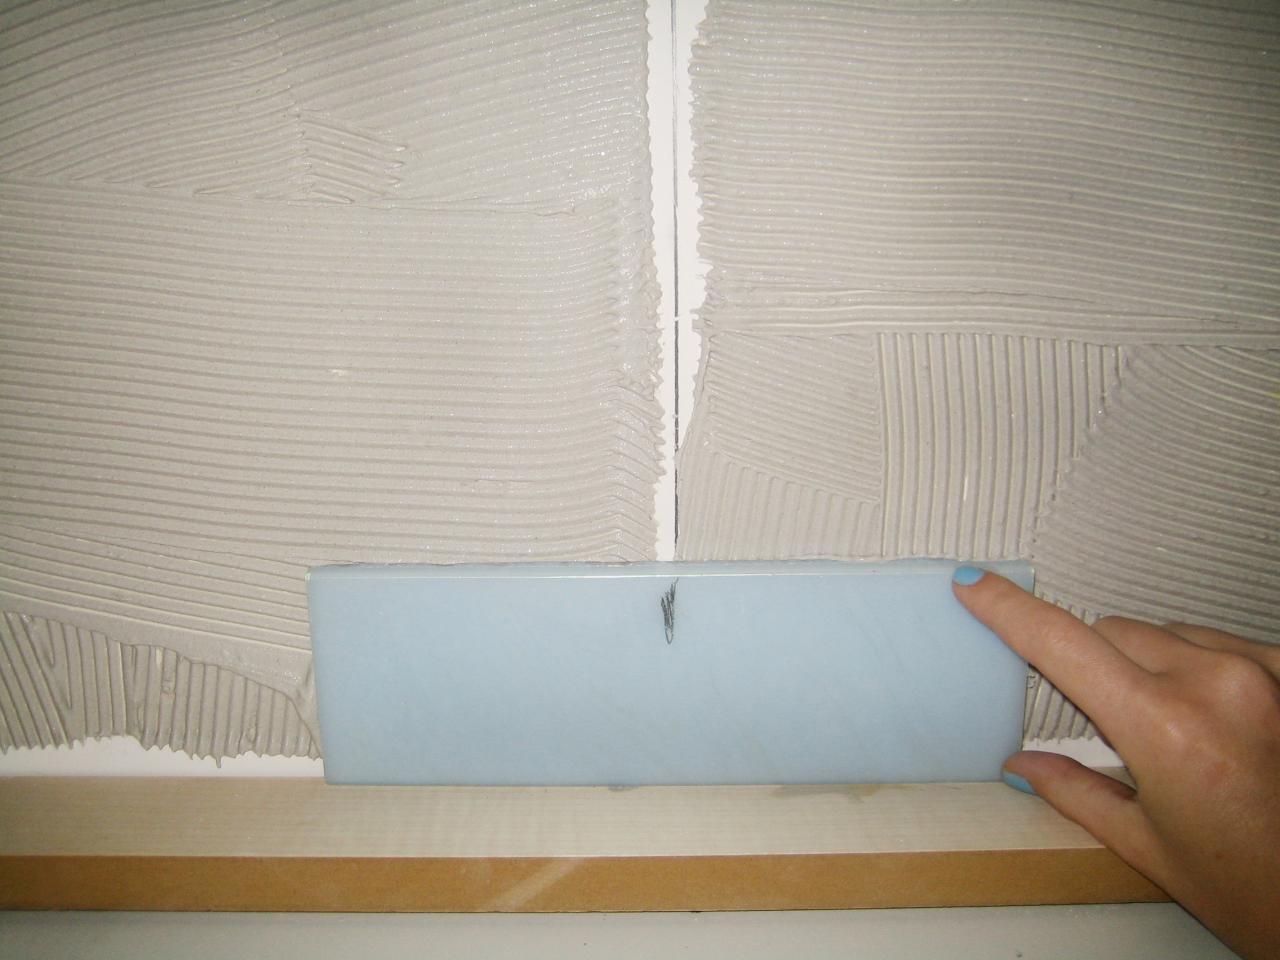
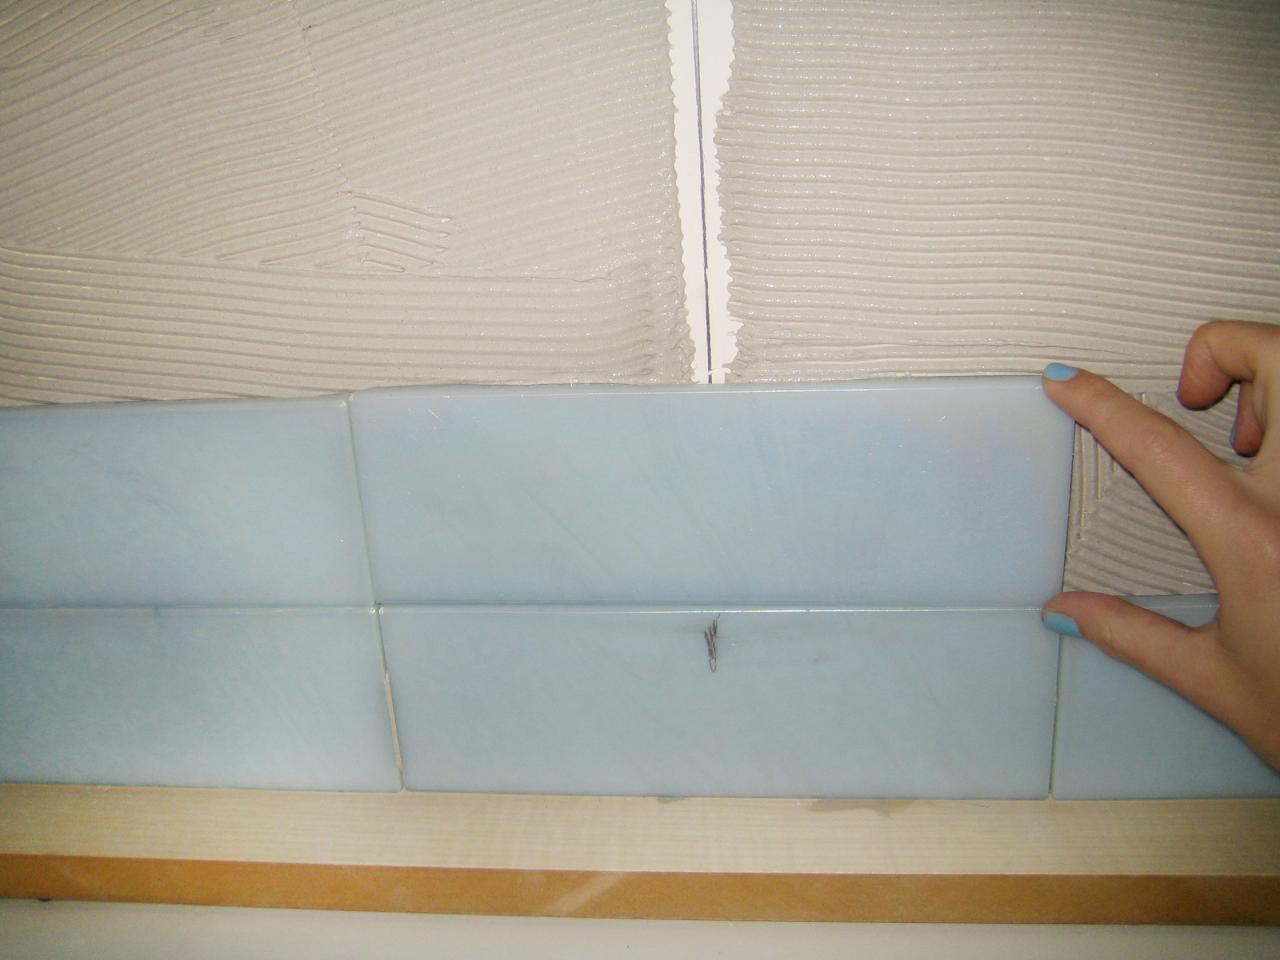
Step 5. Add Glass Tiles
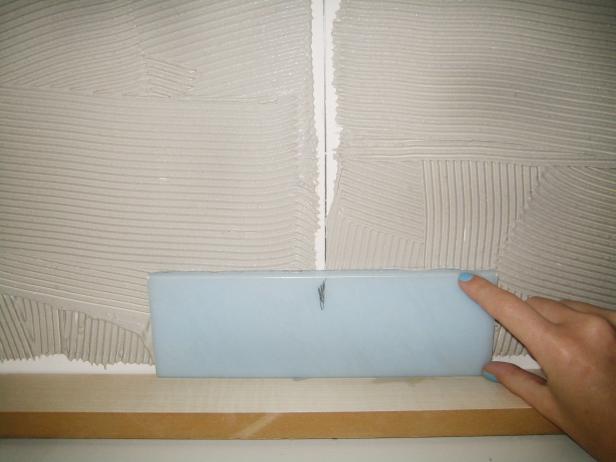
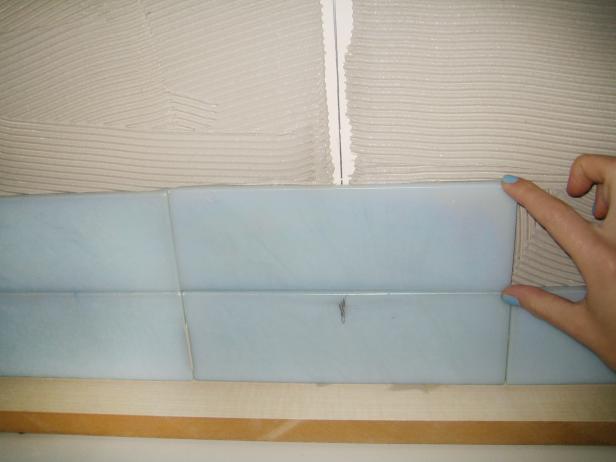
Place tiles over thinset, pressing them evenly into the adhesive. Use the centerline as visual reference to keep your tile application level as you continue to apply tiles. Work in a small area at a time, adding adhesive and tile until you reach the top of the area to be tiled. If the thinset begins to set before you apply tiles, just scrape it off and re-apply. Optional: To assist in placing the tiles evenly with consistent grout lines, use tile spacers to separate them.
Step 6. Cut Remaining Tiles to Fit
Mark the last row of tile with a wax pencil to the appropriate size and cut the tile with a glass tile cutter.
Step 7. Apply Grout

Wait 24 hours for adhesive to cure before applying grout. Mix grout in a bucket according to the manufacturer's directions. Apply grout along tile seams so it fills them in completely. Do not grout the bottom seam, this will be filled with caulk in a later step.
Step 8. Clean Surface of Tile

Using a soft, wet sponge, remove excess grout from the tile's surface. Use a gentle approach so you don't wipe grout out of the seams. After an hour, buff glass tiles to remove the hazy film left by grout and water.
Step 9. Apply Caulk
Apply a thin bead of caulk on the bottom seam where tile meets the countertop. Wet your finger and smooth the caulk seam in a single, continuous motion.


