


How to Build a Little Free Library for Your Neighborhood
One of the best ways to encourage reading is to share a favorite book with someone. Spread the love in your entire neighborhood with this adorable library everyone can enjoy.

Jalynn Baker

Tools and Materials
- (4) small hand clamps
- (4) small bar clamps 12"-18"
- (4) large bar clamps 24" or larger
- staple gun with staples
- hammer and small finish nails
- waterproof wood glue
- masking tape
- clear epoxy
- construction adhesive
- decorative cedar shingles
- 4x4 post bracket with screws
- door latch
- (1) 1/2" sheet outdoor-grade plywood
- (1) 12"x16" piece of plexiglass
- (2) 1/4" hinges with screws
- paint + roller
Cut List for 1/2" Sheet of Plywood
- (1) bottom panel - 14" x 14"
- (1) back panel - 14" x 18"
- (1) roof panel - 12" x 17"
- (1) roof panel - 11.5" x 17"
- (2) sides - 14.5" x 18"
- (2) gable ends - 10.25" x 10.25 " cut in two equal triangles
- (2) facade trim - 14.5" x 2"
- (2) facade trim - 10" x 2.25"
- (2) trim supports - 13.75" x 2"
- (2) door frame - 13.25" x 1.5"
- (2) door frame - 14" x 1.5"
- (4) small scraps roughly 4" x 4"
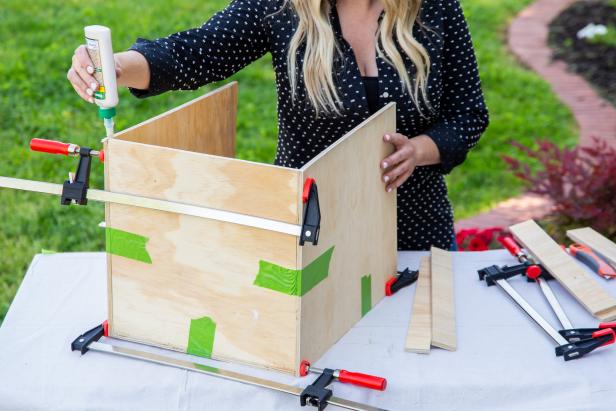
Assemble the Main Cabinet

Jalynn Baker

Jalynn Baker

Jalynn Baker

Jalynn Baker
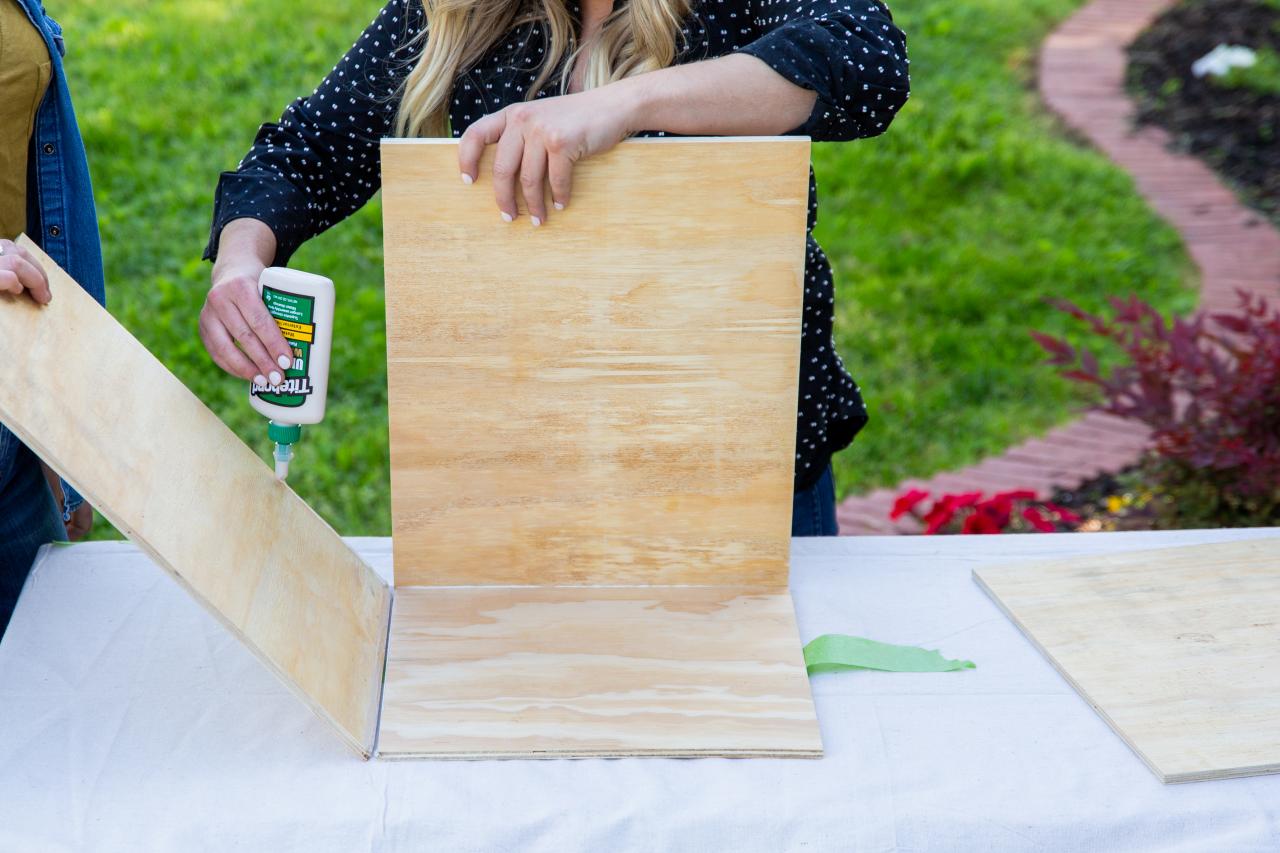
Start by attaching a small strip of painter’s tape on each side of the bottom piece so that about four inches hang off on each side. These will help hold your parts together as you glue up your box. Next run a line of glue around each side of the back panel, then tilt it upwards into place. Place one of the sides into position, tilt it upward into position with the back panel, and secure the corner with some masking tape. Repeat that process for the other side until you have a three-sided box. Fastening your painters’ tape to each side as shown while you work will help you hold all your glue joints together until you’ve got a reasonably sturdy cabinet. Using your large bar clamps, press everything into place using enough pressure so that all your corners are sealed. It’s super helpful to have a friend along for this step, but it can be done alone. Just take your time and use plenty of tape to act as a third hand. Pro tip: Wood glue has a very forgiving working time, so you don’t have to rush.
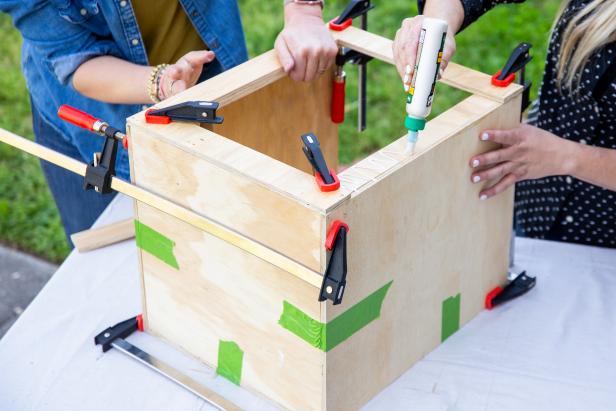
Attach the Front
Jalynn Baker

Jalynn Baker
Jalynn Baker

Jalynn Baker
Give the glue on your main cabinet about 30-45 minutes to set up, then position it on its back panel. Using more glue and a couple of finishing nails, attach the 14.5” x 2” pieces of trim horizontally across the front. Next, glue the two 13.75” x 2” front supports underneath those trim pieces. Using your small hand clamps, secure these pieces in place until they dry. Once that’s done, you can attach the 10” x 2.25” trim panels to the left and the right side of the door opening.
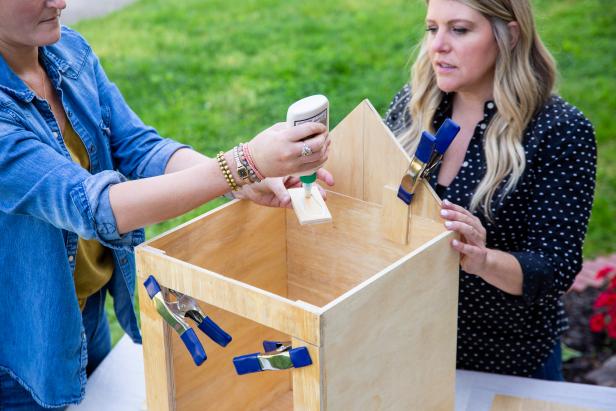
Attach the Gable Ends
Jalynn Baker

Jalynn Baker
Glue a few small scraps, roughly 4” x 4” to the inside of the front and rear of the case. These are going to hold your gable ends to the front and back of the box. You’ll want to make sure you position them so they will not be seen through the door and so they won’t interfere with the installation of the roof panels. Once you’ve glued them in place, use your hand clamps to hold them in place until they’re totally dry. At this point, it’s a good idea to let the entire cabinet dry for an hour or two, but there’s still some work you can do in the meantime.
Assemble the Door

Jalynn Baker
While you’re waiting for the glue to dry on the main cabinet, you can shift your attention to building your door frame. The door is constructed using glue and bar clamps in a similar fashion. Lay the two 13.25” x 1.5” pieces on your workbench, and glue your two 14” x 1.5” pieces to the outside of them. Apply glue liberally at all four points of contact and clamp everything together firmly. Do not over tighten your clamps! Ideally, you’ll apply the same amount of pressure at each corner to prevent your door from buckling, but when in doubt, it’s better to use a softer touch. Leave the door frame in the clamps until it's completely dry.
Raise the Roof

Jalynn Baker

Jalynn Baker
Now that your main cabinet is completely dry, you can finally attach the roof. Remove all of your clamps and make sure that you’ve got nice tight joints all the way around. If you ended up with some gaps, now is the time to fill them in with some exterior-grade caulking. Once you’re sure your box is water-tight, run a bead of glue around all of the top edges of your box. Start at the top of the gable ends, run all the way down and then across the sides. Starting with your short roof panel (11.5” x 17”) lay it gently into the adhesive and tape it in place. Next, lay down your larger roof panel (12" x17") and align both so that they’re centered neatly, then clamp into place as shown. It really helps to have a friend for this step, but you can always use masking tape to hold things in place while you work on the opposing side. Once you’ve got everything taped in place, crank it all down firmly with your bar clamps.
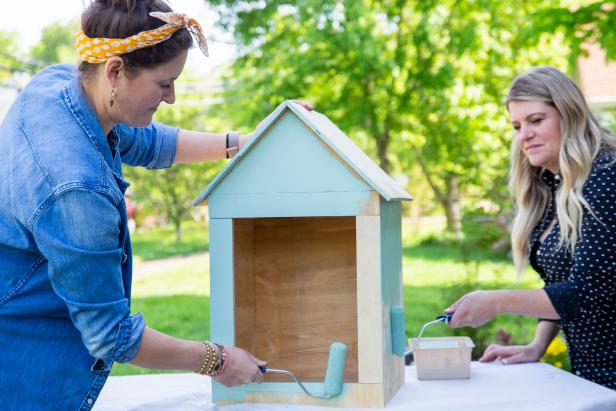
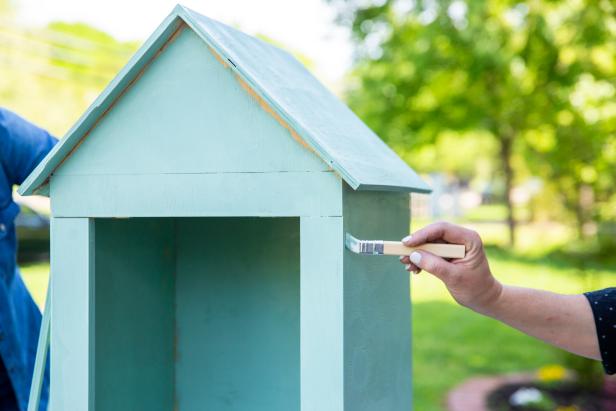
Pick a Friendly Color and Paint It
Jalynn Baker

Jalynn Baker
Jalynn Baker
Your little free library should be easy to see and instantly approachable, so pick a lively color that’s inviting to everyone. Give the entire box a liberal paint job using exterior-grade latex paint. For an extra dose of whimsy, pick a fun wallpaper or contact paper to apply on the inside. Don’t forget to paint the door frame, and be sure to give everything a chance to dry before moving on to the next steps.
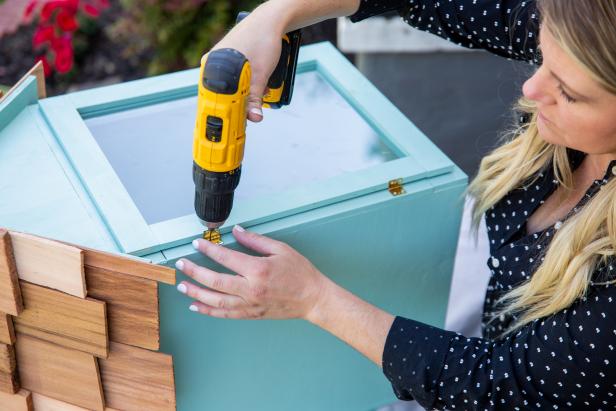
Attach Cedar Shake Shingles

Jalynn Baker

Jalynn Baker

Jalynn Baker
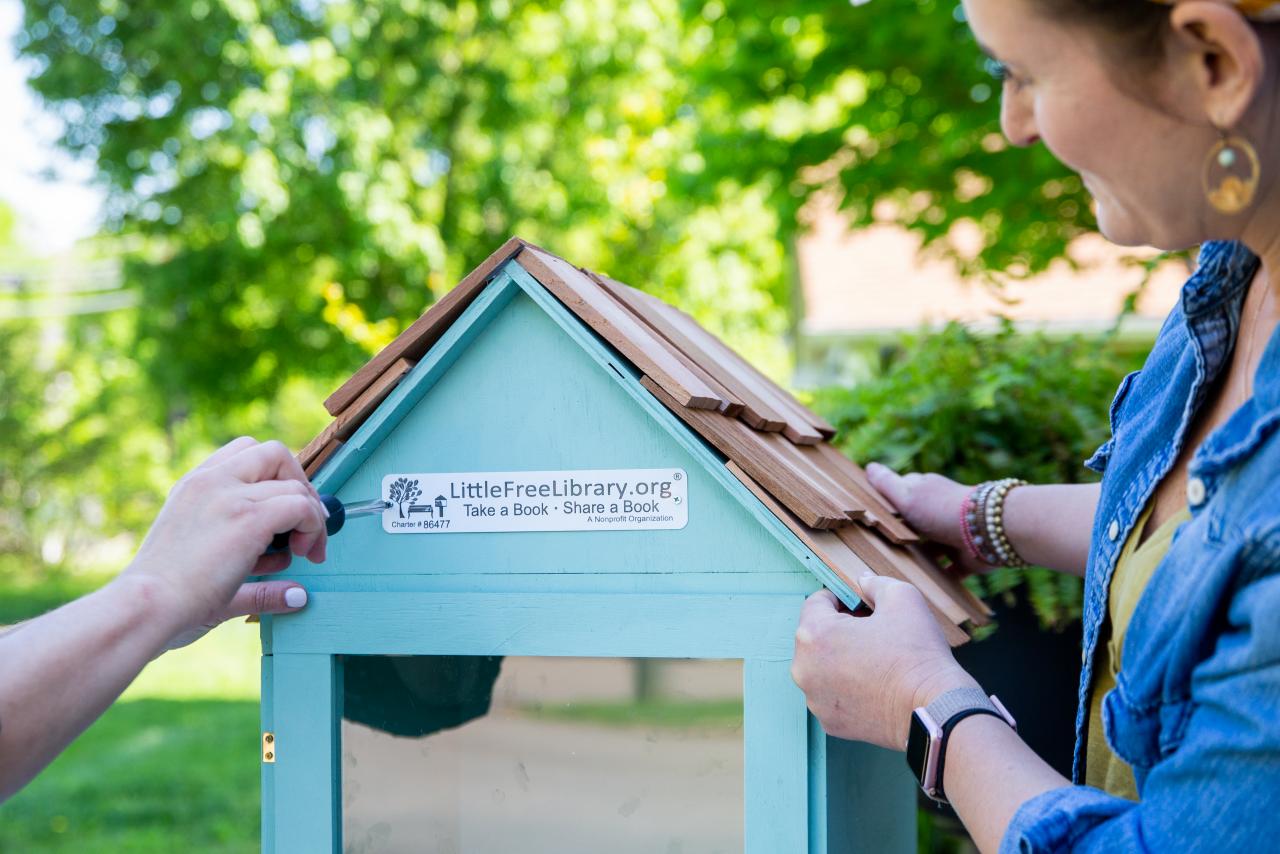
Now that everything is painted and dry, it’s time to add some charm to the roof. Run a bead of construction adhesive across one side of the roof and affix a row of cedar shake shingles across the width of the roof. Hold each shingle in place with a staple driven at the top edge. Do the same thing for each row, while overlapping the previous row as you work your way up the roof. Repeat the process for the other side of the roof once you’re done.
Attach the Plexiglass and Install the Door

Jalynn Baker

Jalynn Baker
Jalynn Baker

Jalynn Baker
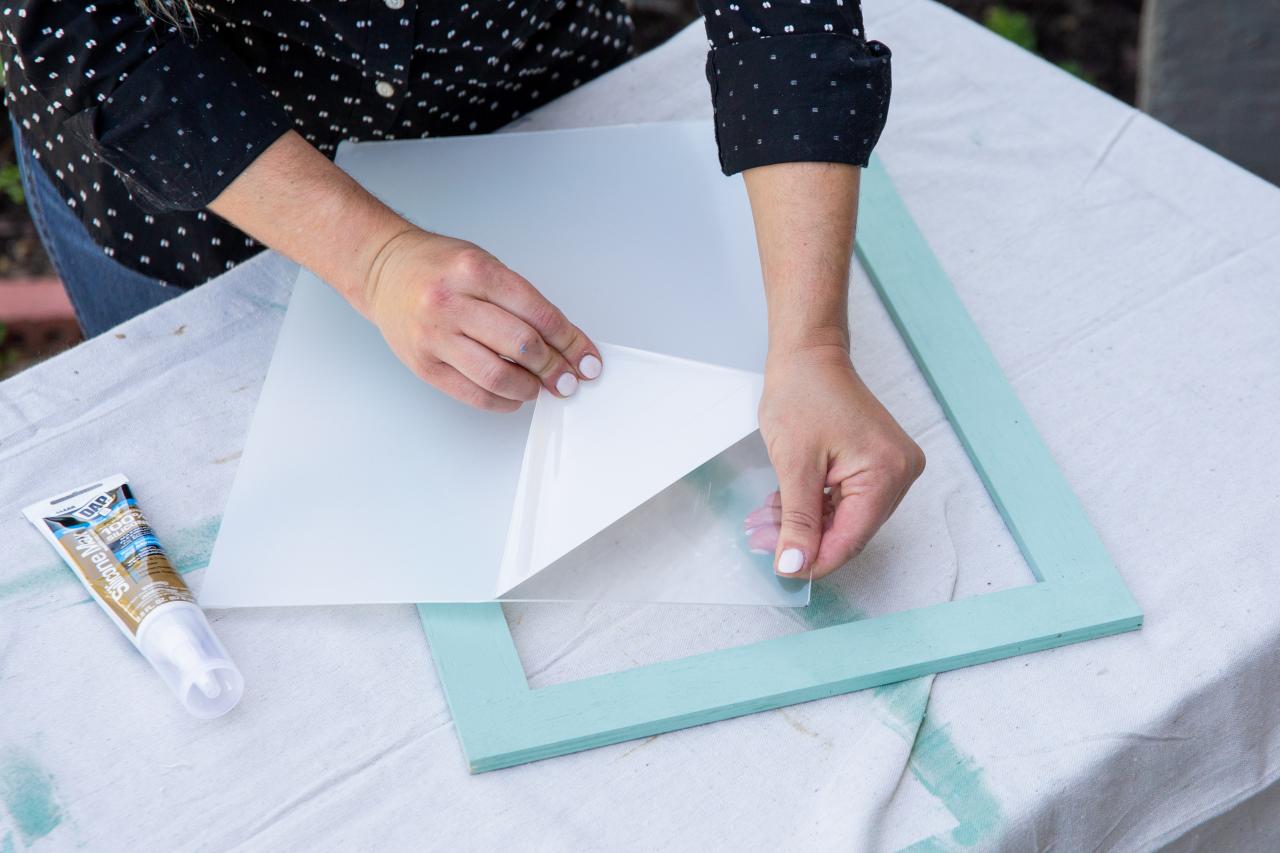
Once the door is dry and has a healthy coat of paint, it’s time to attach the plexiglass. Run a bead of clear epoxy around the outside about 1/4” from the edge of the glass. Press the plexiglass firnly against the frame, then place a few heavy books on top to keep everything in place while the epoxy sets.
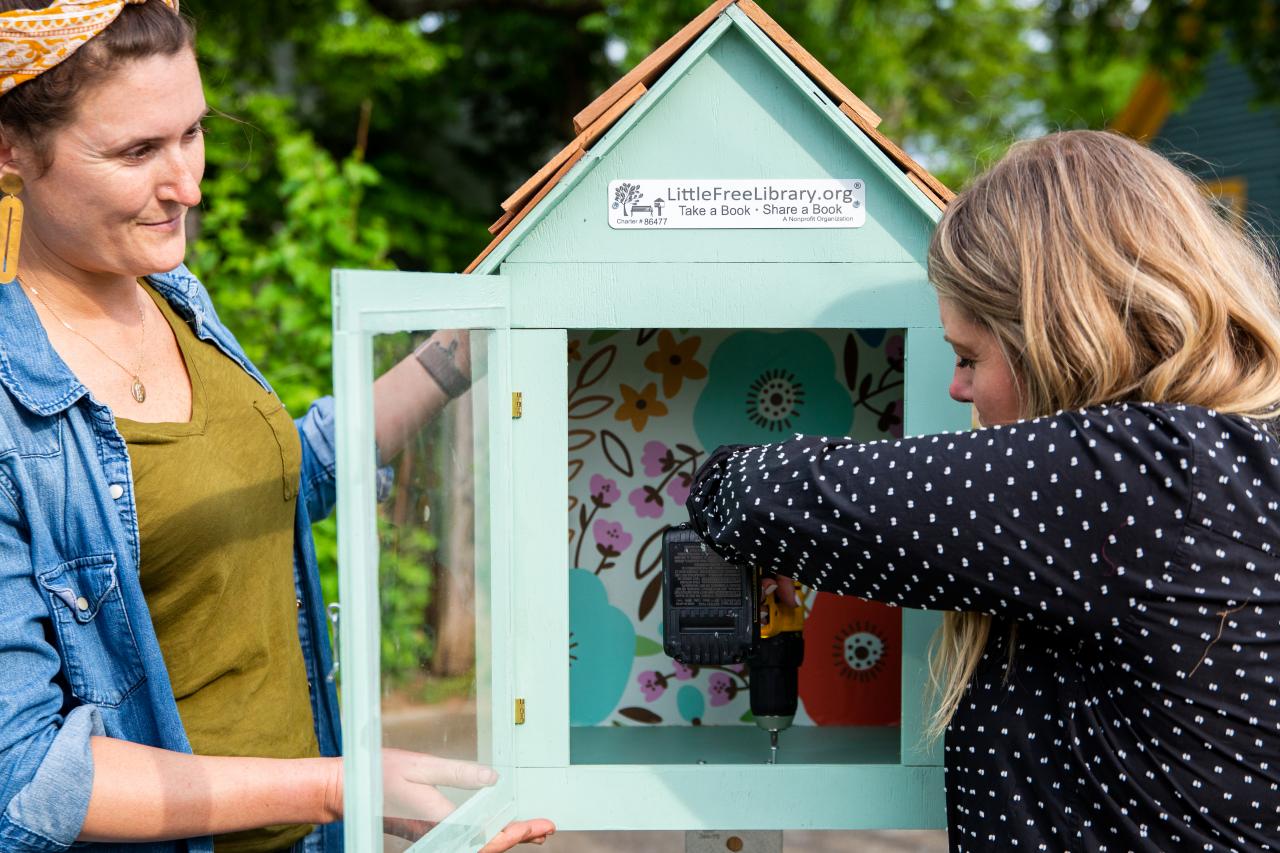
After the epoxy sets, you can safely attach the front door and the latch. Flip your box on its back and align the door with the opening. It often helps to tape the door in place before marking out the location of your hinges. Pre-drill and screw your hinges into place starting with the cabinet side before finally attaching the door side. Now that the hinges are secured you can position the door latch on the opposite side of the door.
Attach Your Post Bracket

Jalynn Baker

Jalynn Baker
Position your post bracket in the center of your library’s base. Mark the holes, including the center hole and pre-drill all of them using a 1/4” drill bit. It’s easier to attach the post bracket to the bottom of the library first, then install it on to your post. Make sure to drive a screw through the center hole into the post to keep everything tied together tightly.
Make Sure to Register Your Little Free Library!

Jalynn Baker

Jalynn Baker
Visit littlefreelibrary.org to register your library so that everyone will know where to find it ,and so it can be added to the worldwide map of little free libraries!


