


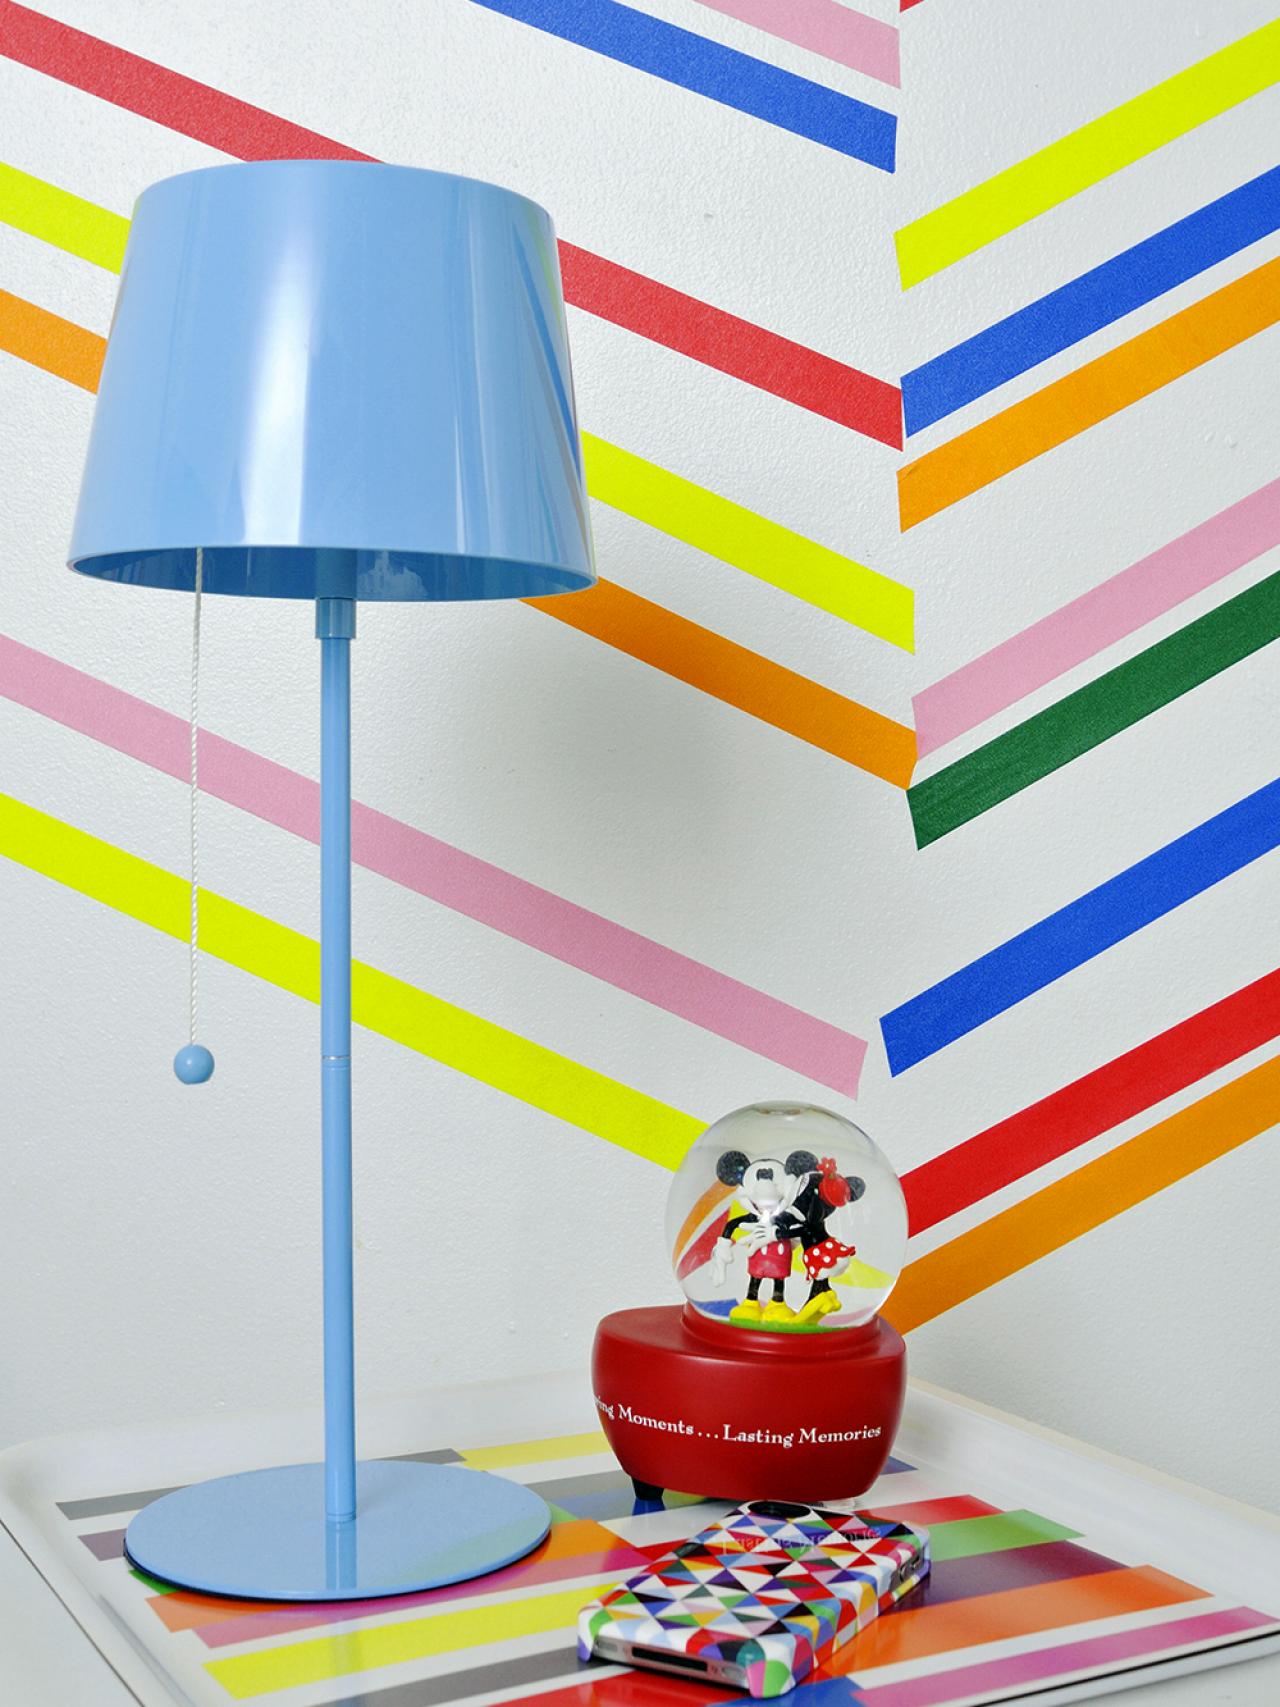
Create Herringbone Wall Decor With Washi Tape

Original_Michelle-Edgemont-Washi-Tape-Wall-Beauty-Wide_h

Materials Needed:
- colorful paper tape (also called masking tape or washi tape)
- pencil
- tape measure
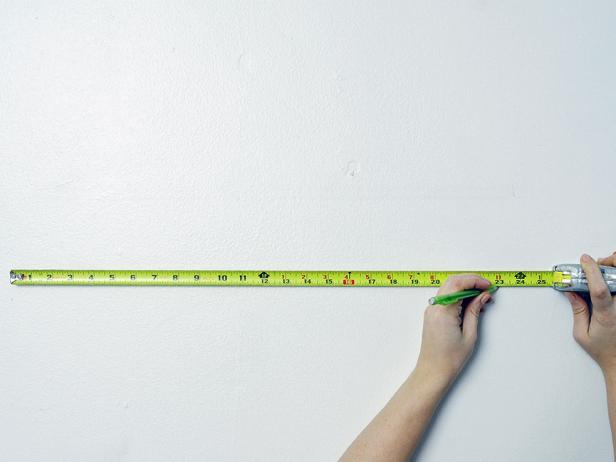
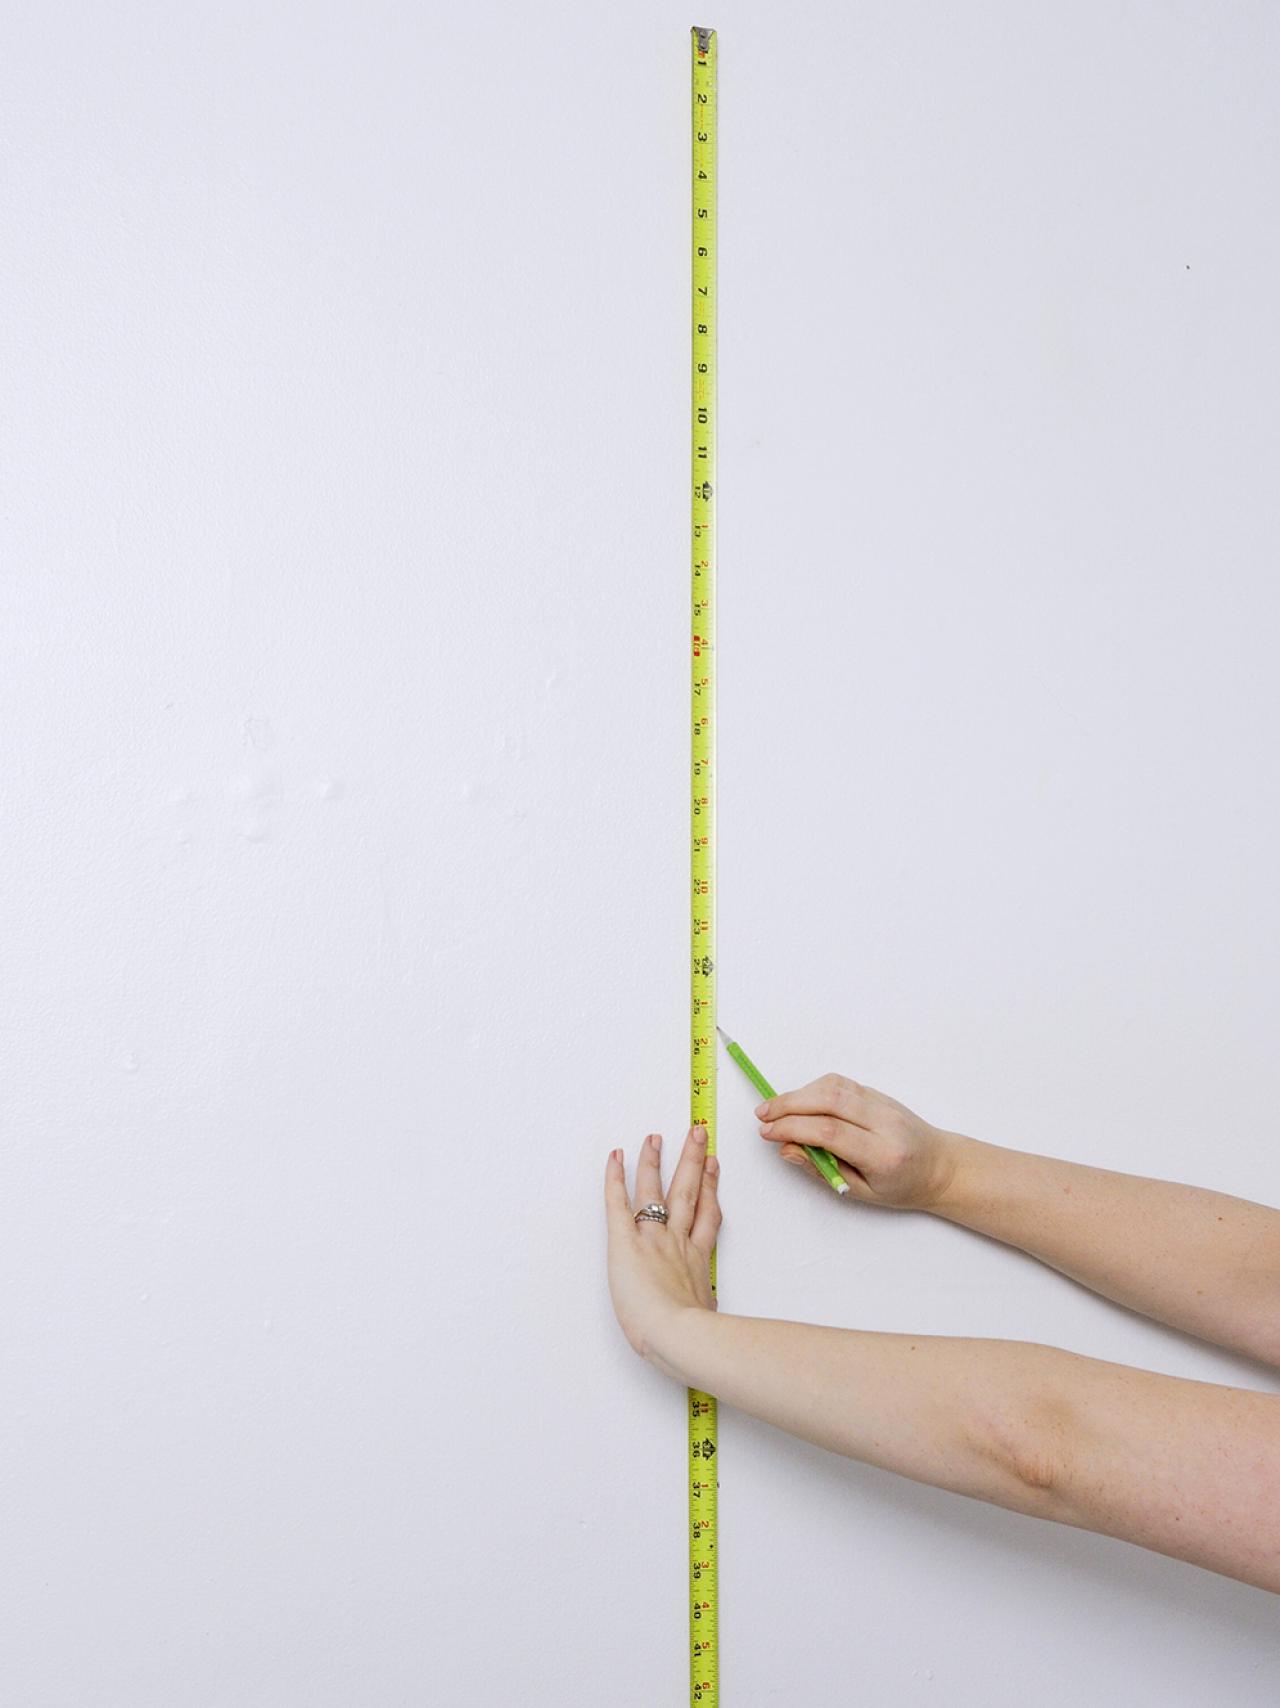
Measure and Mark Wall
Pick the blank wall you are using. Measure across the whole wall and divide by an odd number. For small walls, divide by 3, for larger walls, divide by 5 or 7. My wall is small, so I divided by 7 and got 23. Starting at the edge of the wall, mark every 23" (or whatever your equation equaled). This technique guarantees that each section of the herringbone pattern will be equal.
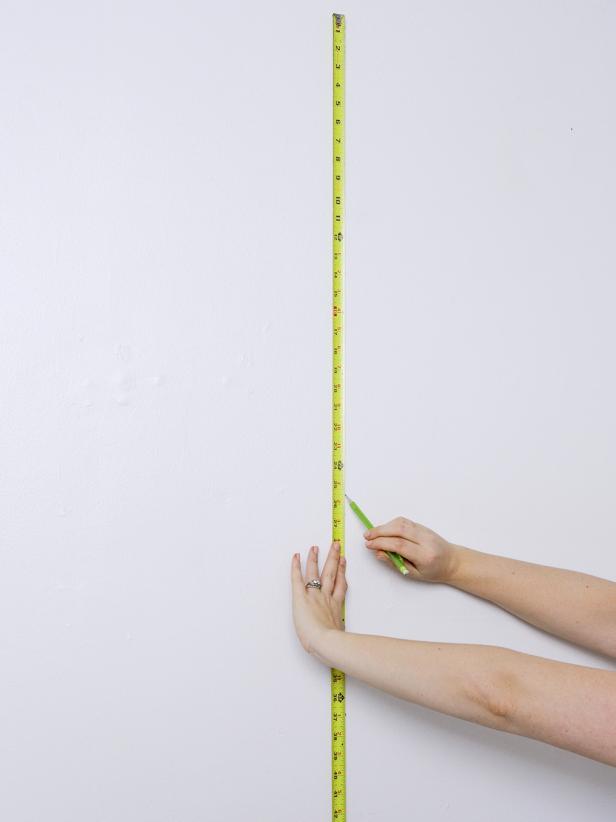
Hold the measuring tape vertically on each of the marks you just made and draw a straight vertical line. Each section of your wall should now be marked with a vertical pencil line.
Original_Michelle-Edgemont-Washi-Tape-Wall-Step-1-Measure-Wall_h
Original_Michelle-Edgemont-Washi-Tape-Wall-Step-1b-Measure-Wall_h
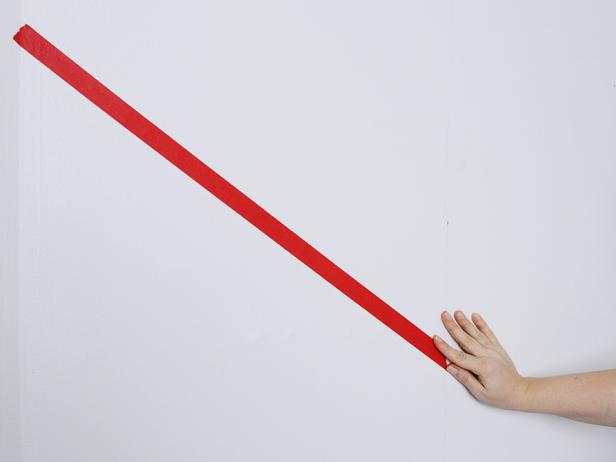
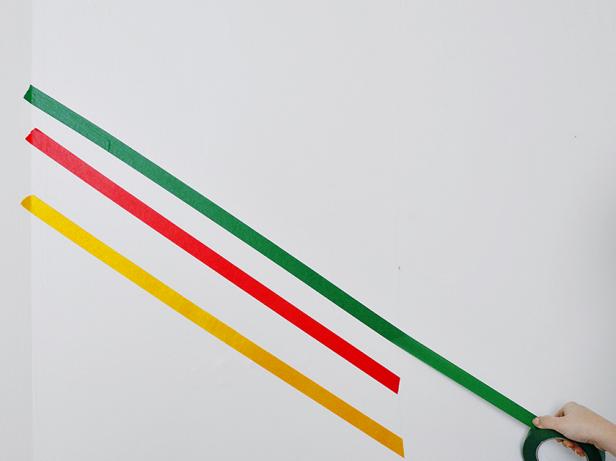
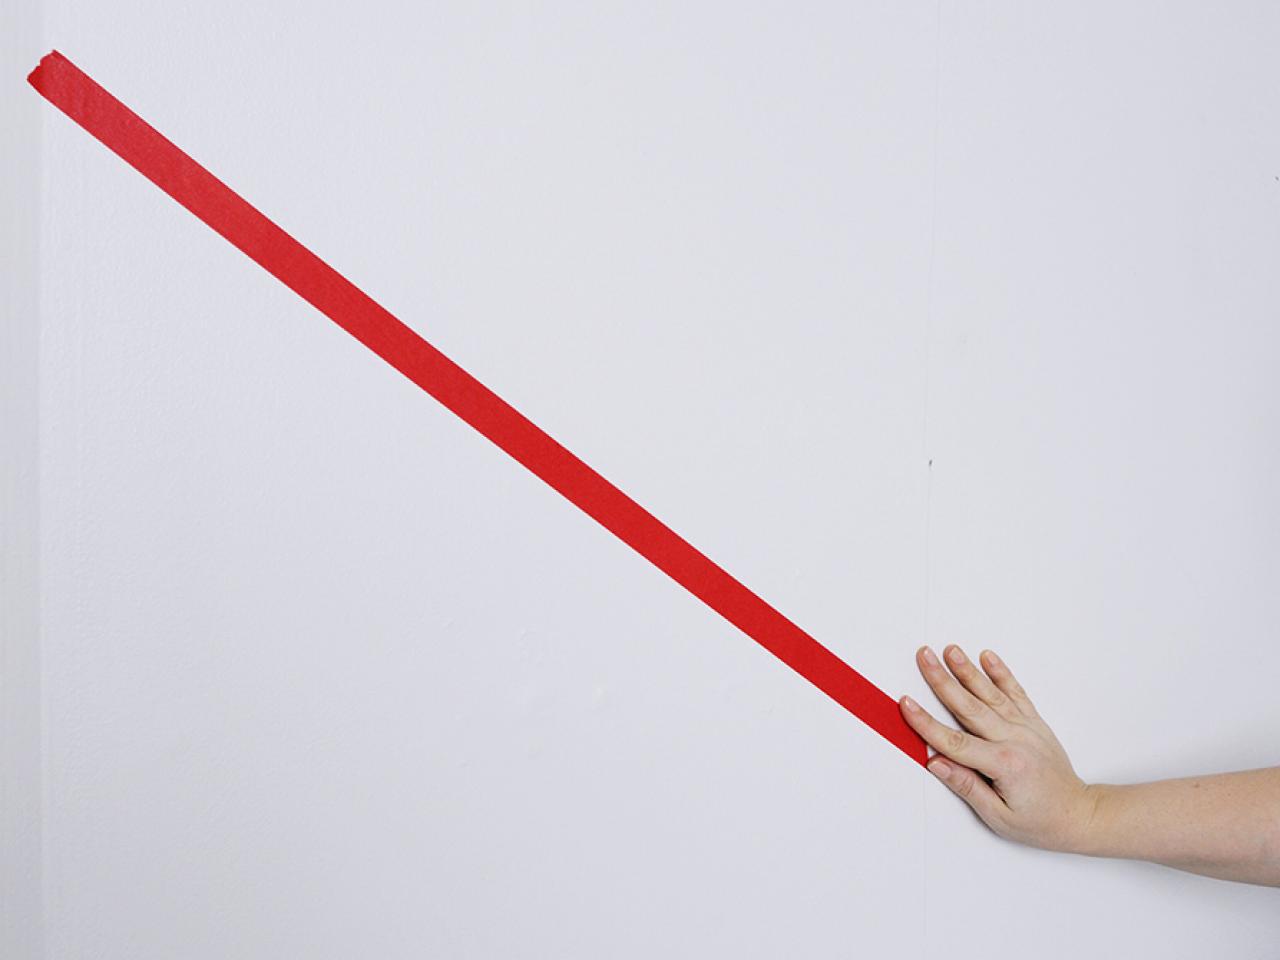
Add the First Piece of Tape
Starting at the edge of the wall, stick a piece of tape on a downwards diagonal from the edge to the first vertical line.
Cut the tape to be vertical at the pencil line.

Original_Michelle-Edgemont-Washi-Tape-Wall-Step-2-Add-Tape_h
Original_Michelle-Edgemont-Washi-Tape-Wall-Step-2b-Add-Tape_h
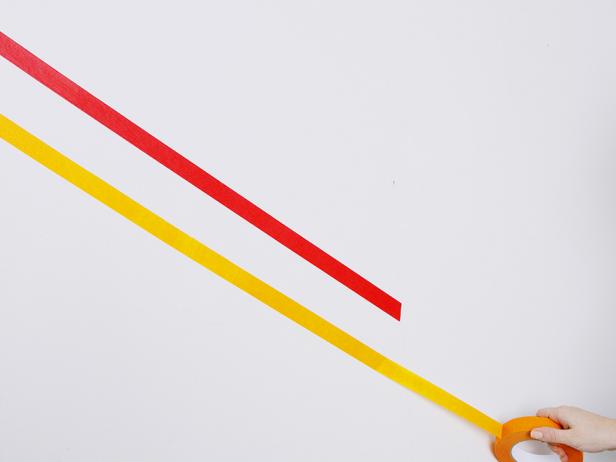
Fill the First Section With Vertical Tape Strips
Fill in the whole first section of your wall, alternating colors of tape. Use the first tape stripe you placed as a guide for the rest. Follow that same angle as you fill in the entire first section.
Original_Michelle-Edgemont-Washi-Tape-Wall-Step-3-Create-Design_h
Original_Michelle-Edgemont-Washi-Tape-Wall-Step-3b-Create-Design_h
Fill in Second Wall Section
For the second wall section, the tape will be place in an upwards diagonal. Start the stripes in between the ends of the stripes in the first section. Starting slightly over the first pencil line, stick a tape stripe on the wall. Rip the tape off at the second vertical pencil line — these tape edges will be cleaned up later.
Continue with remaining wall sections, alternating upwards and downwards diagonal tape stripes.

Original_Michelle-Edgemont-Washi-Tape-Wall-Step-3c-Create-Design_h
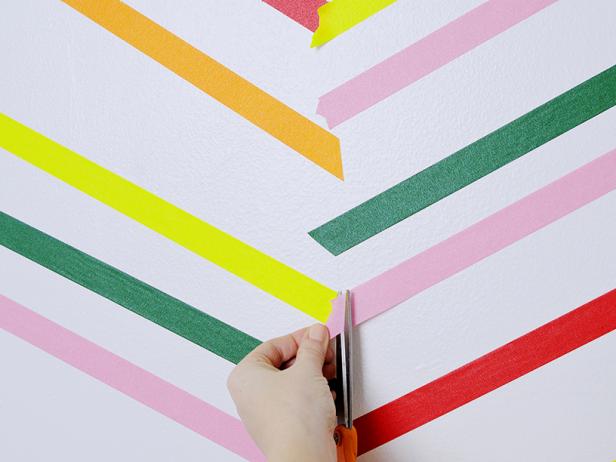
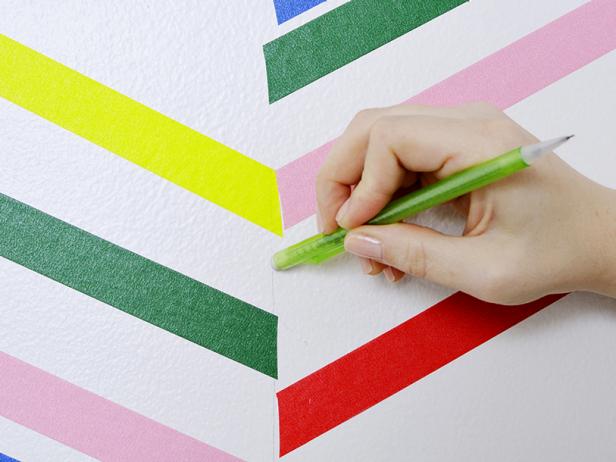
Clean Up Edges and Enjoy
Clean up the edges of the tape along the pencil lines by cutting the tape vertically along the pencil line. Erase visible pencil lines.
Then, sit back and enjoy your new wall art!

Original_Michelle-Edgemont-Washi-Tape-Wall-Step-4-Trim-Edges_h
Original_Michelle-Edgemont-Washi-Tape-Wall-Step-4c-Trim-Edges_h
Original_Michelle-Edgemont-Washi-Tape-Wall-Beauty-Close_v


