


Wood + Resin: A Showstopping Serving Tray
Amp up your hosting game with a DIY wood-and-resin serving tray.


The combination of wood and resin is taking the design world by storm. DIY your own “slice” of the action and have all your guests in awe of your crafting skills.
Materials Needed
- wood slice
- pencil
- jigsaw
- polymer clay
- parchment paper
- floor tile or flat and thin heavy object
- scrap wood pieces (to protect wood slice from clamps)
- drop cloth
- 2-part epoxy
- powdered pigment in desired color
- safety gear
- scrap leather pieces
- (6) weather-stripping nails
- hammer
- wood stain
- clean rag
- self-adhesive feet
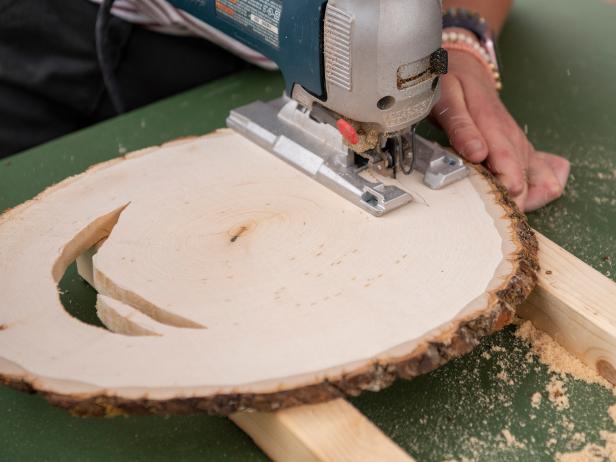
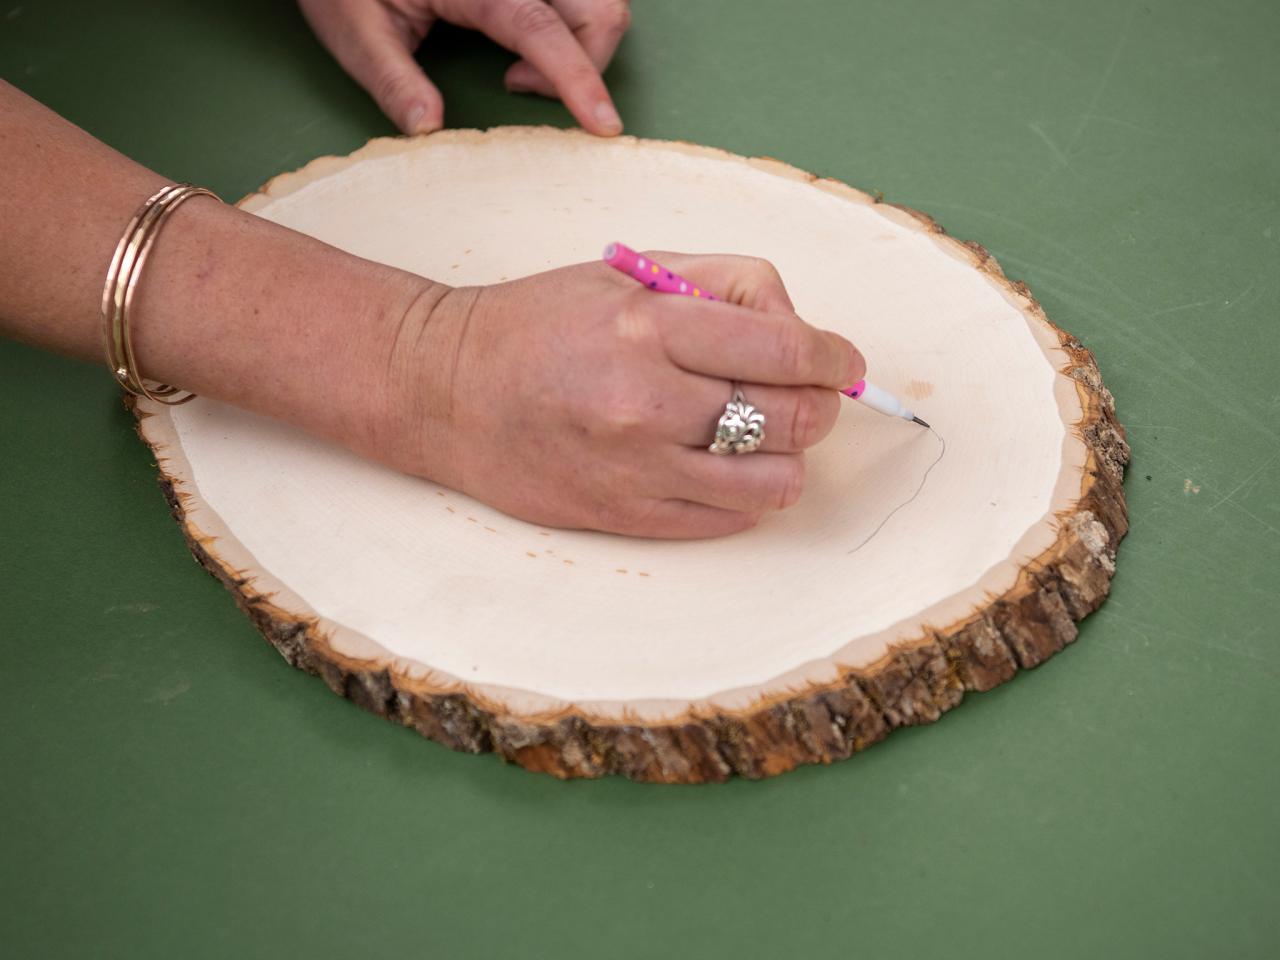
Cut Holes

Sarah Busby
Sarah Busby
Begin by drawing patterns to cut out and fill with resin, following along with the natural grains of the wood. Use a jigsaw to cut out the shapes. Next, sand the edges to knock down any splintering.
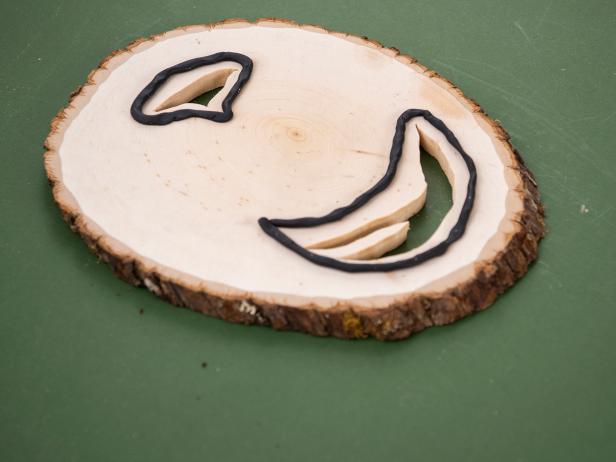
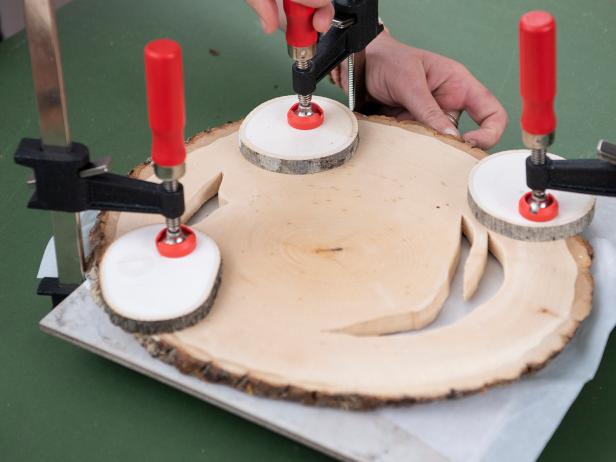
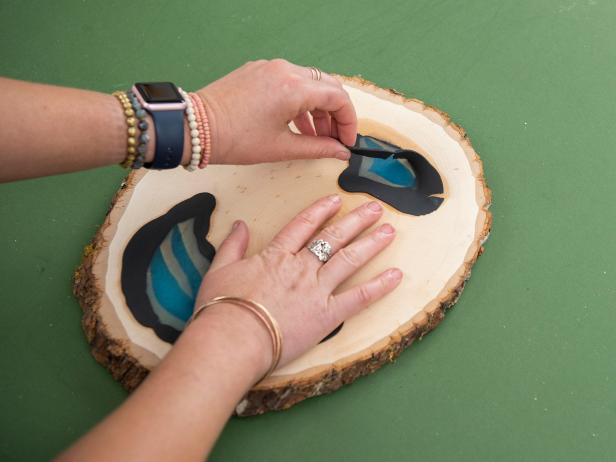
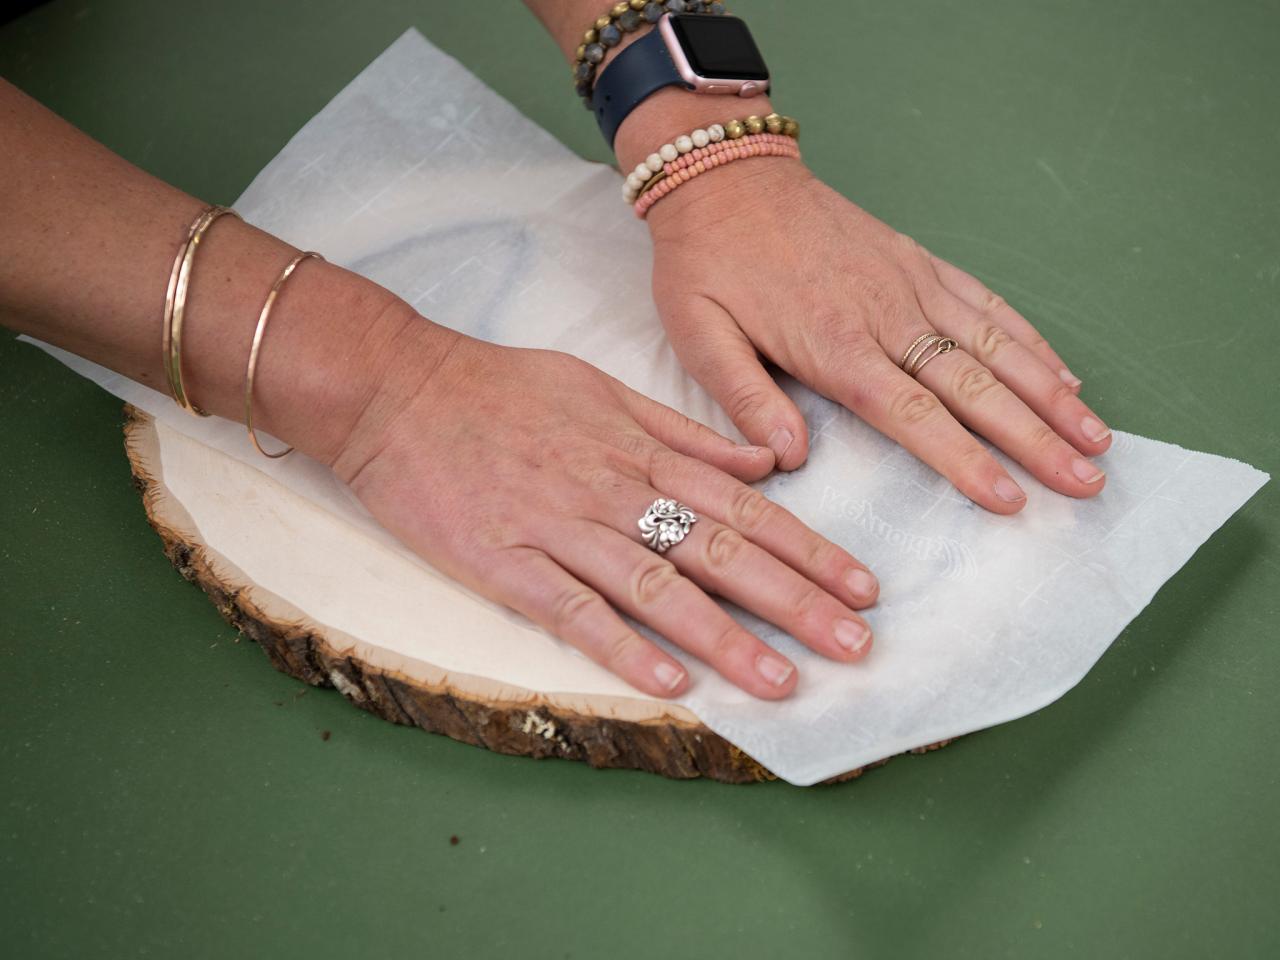
Prep for Resin
Sarah Busby

Sarah Busby

Sarah Busby
Sarah Busby
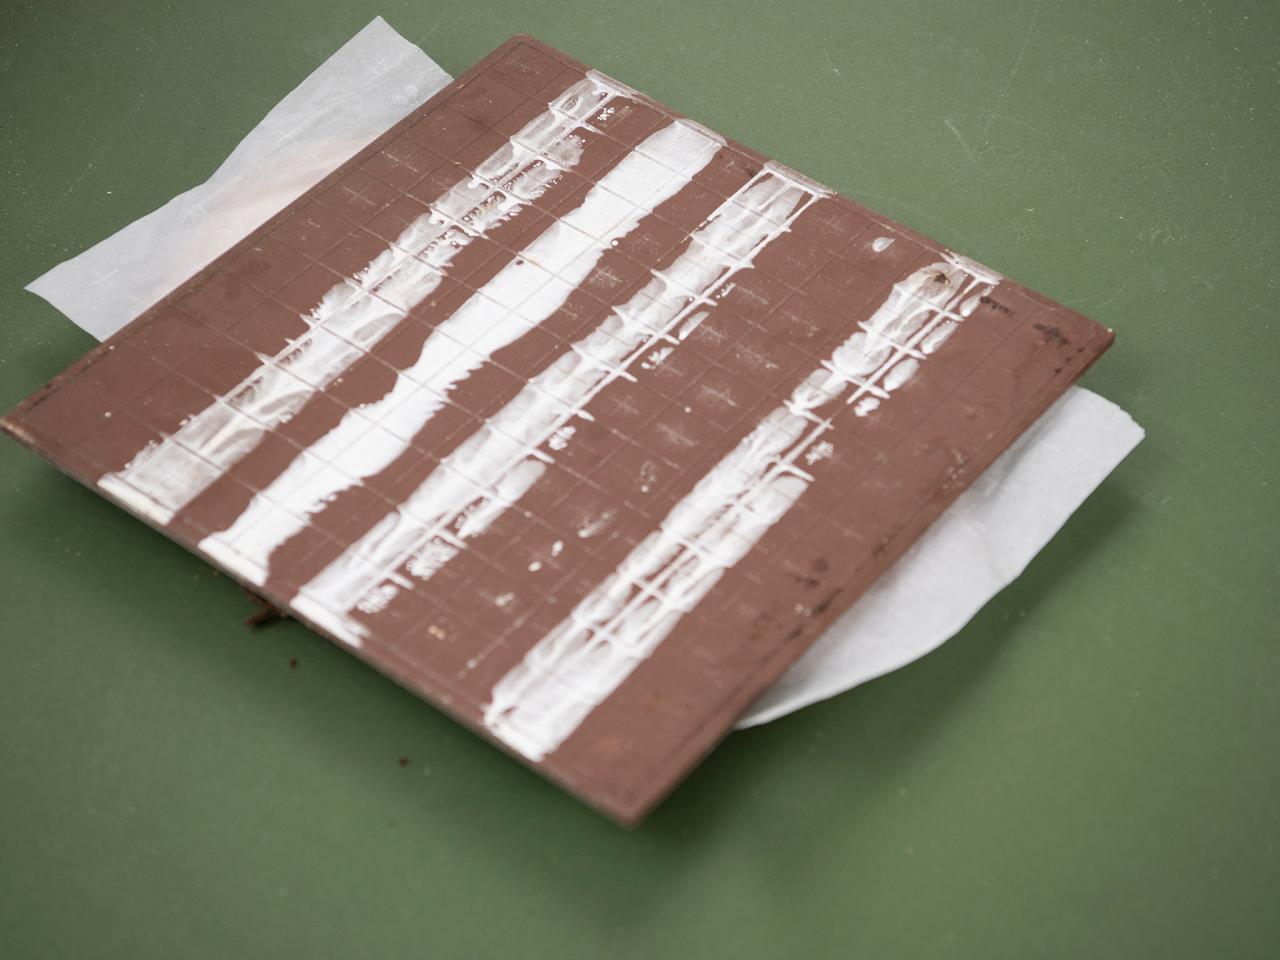
Flip the wood slice over and line the holes with thin strips of polymer clay. Once fully surrounded, cover with parchment paper and place a flat heavy object like tile on top. Press down firmly and flip back over. Use four clamps to hold the tile firmly against the wood slice, and use small pieces of wood to protect the slice’s surface from the clamps.
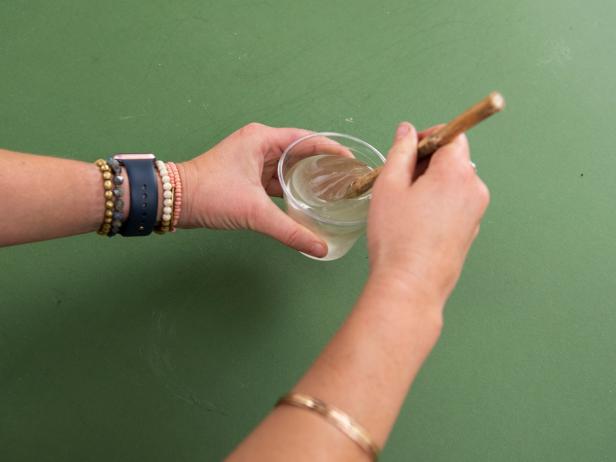
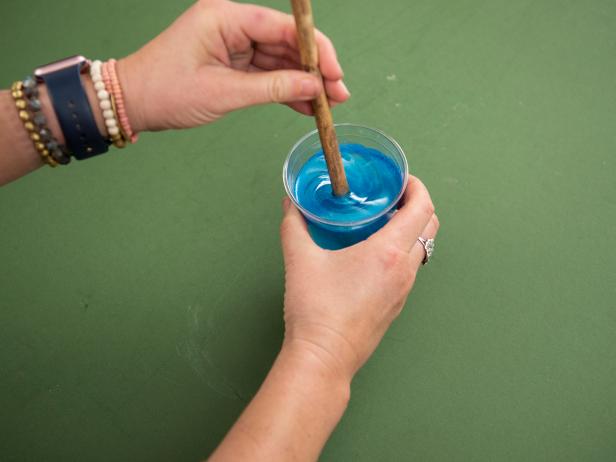
Mix and Pour Epoxy
Crystal Martin
Crystal Martin

Sarah Busby
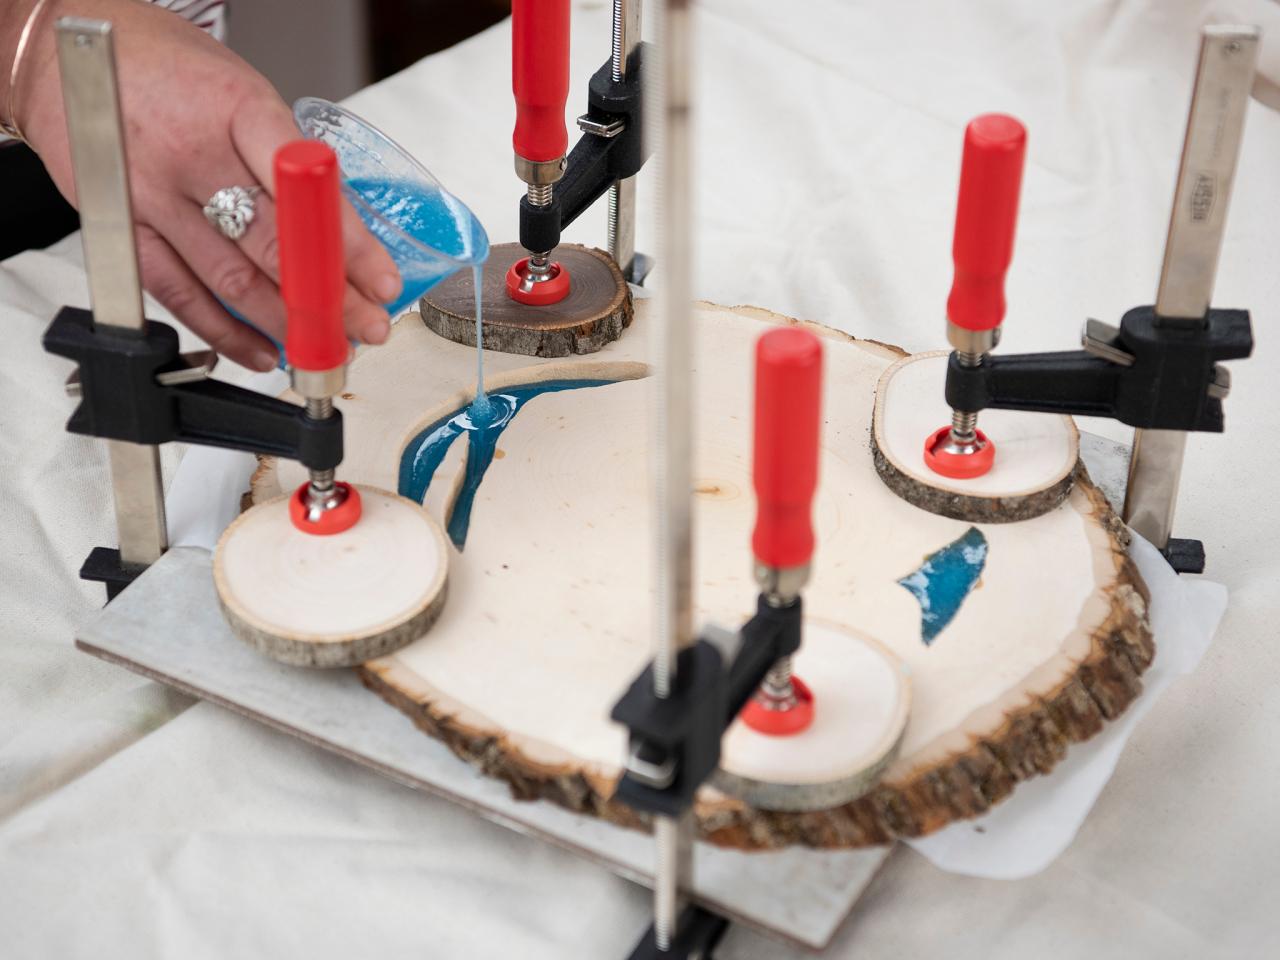
Mix 2-part epoxy according to manufacturer’s instructions and add powdered pigment color of your choice. Place the wood slice on a drop cloth or tarp and ensure the surface is level before pouring. Carefully fill each hole with epoxy and use a straw to blow out any air bubbles on the surface. Note: Epoxy dries quickly so work fast.
Stain and Attach Handles
Crystal Martin

Crystal Martin

Crystal Martin
After 72 hours (or the time the instructions specify), remove the clamps, polymer and parchment, and apply the wood stain of your choice. Finish by attaching strips of leather with weather-stripping nails.


