


DIY Elevated Dog Feeding Station With Built-In Storage
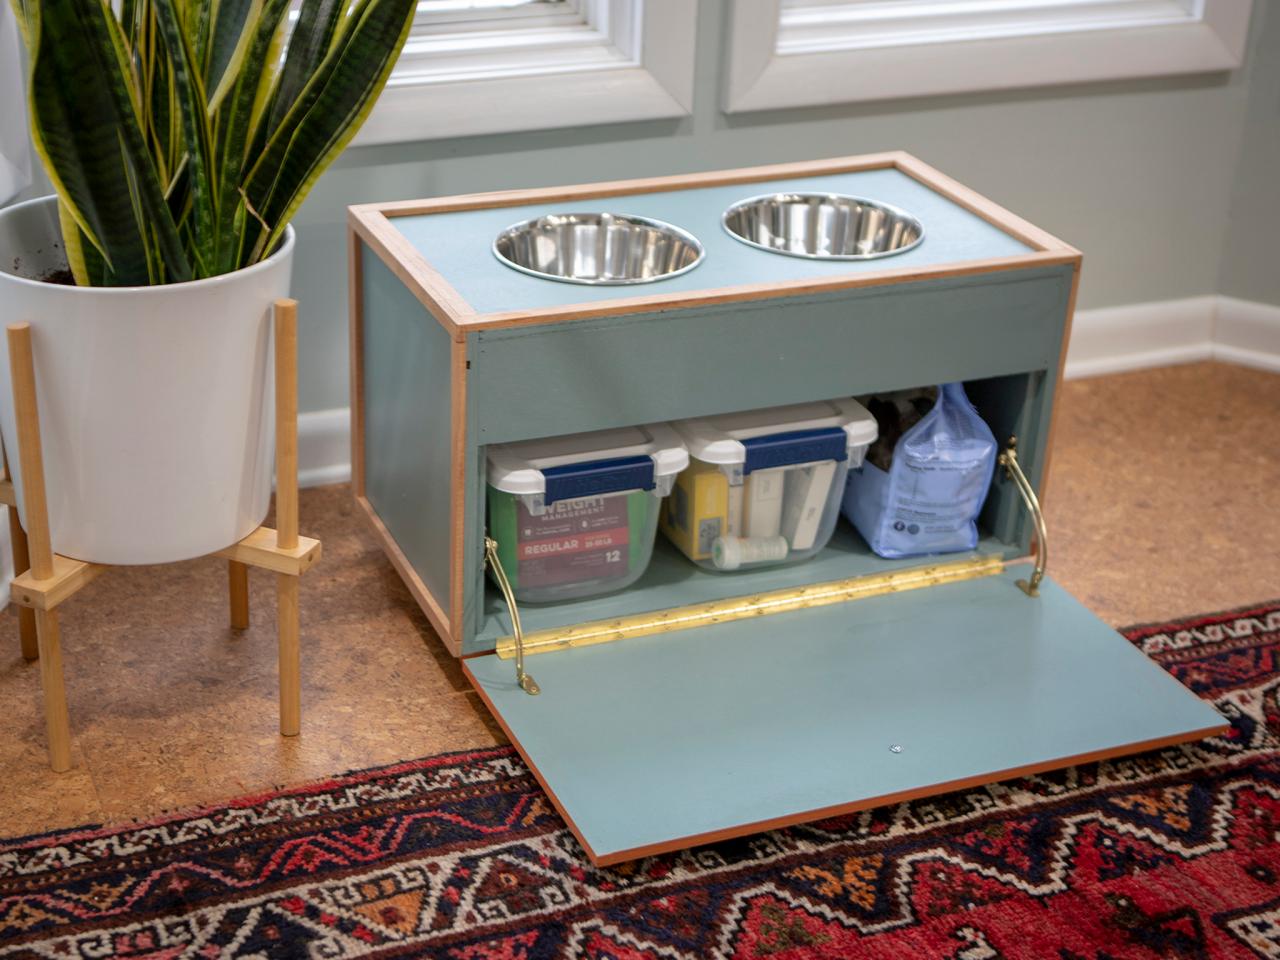
It’s time to tame the mess that the dog bowl makes on your kitchen floor. For the cost of just one sheet of plywood, build this raised dog food and water bowl with handy, hidden storage.
Note: Some veterinarians warn that raised feeders may cause bloat in large- and giant-breed dogs by allowing them to eat and drink too quickly causing their stomach to fill with air. So this project is not advised for dogs who are at risk for bloat — however, it could really help an aging or arthritic dog who's having trouble bending over. If in doubt, first check with your vet.

If your dog is a messy eater, like Rufus here, or is having a hard time bending over to eat, raising the bowls off the floor will help. Bonus: The feeder's hidden storage is perfect for keeping your pup's food handy for dinnertime. All you need are basic tools and a few hours in the garage to make a big improvement in your pet’s life.

Derek Trimble
Tools and Materials
- circular saw
- jigsaw
- drill with bits and drivers
- (3) bar clamps 3’ in length
- hammer or finish nailer
- tape measure
- compass with pencil
- straight edge
- materials
- (1) 4x8x1/2 sheet of sanded plywood
- (4) 2” bun feet with mounting hardware
- wooden pull knob
- 18" piano hinge
- (2) hinge supports
- wood glue
- finish nails
- masking tape
- paint and painting supplies
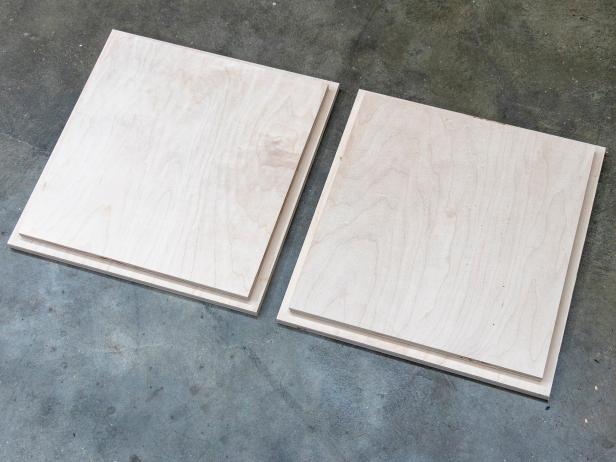
Start With a Sheet of Plywood
With a circular saw and the sheet of plywood supported on sawhorses, make the cuts for the core parts using the dimensions shown below. If you’re short on workshop space or just want to speed things up, ask your local hardware store to make the cuts for you.

Glue the Sides Together
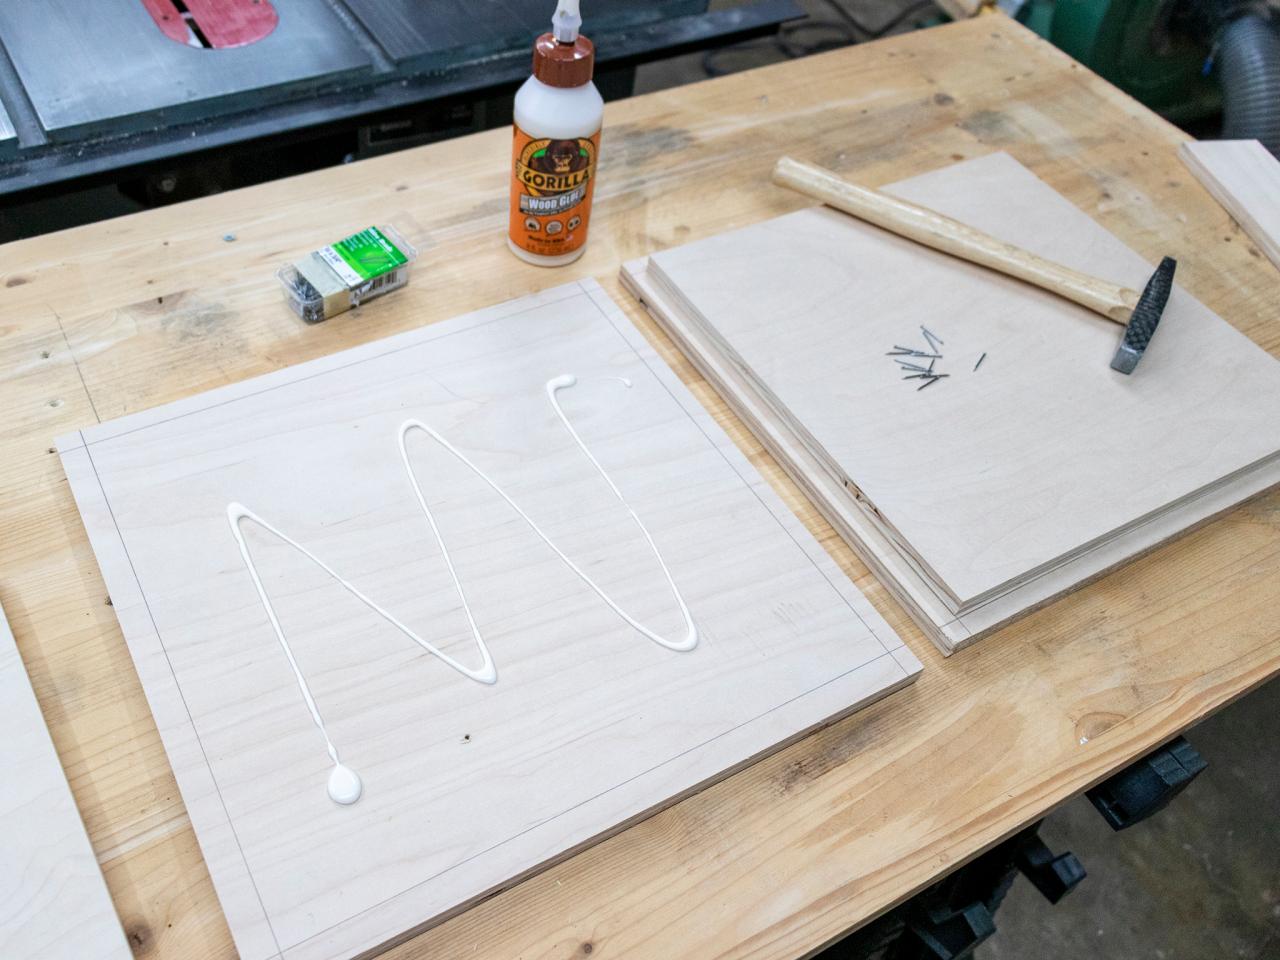
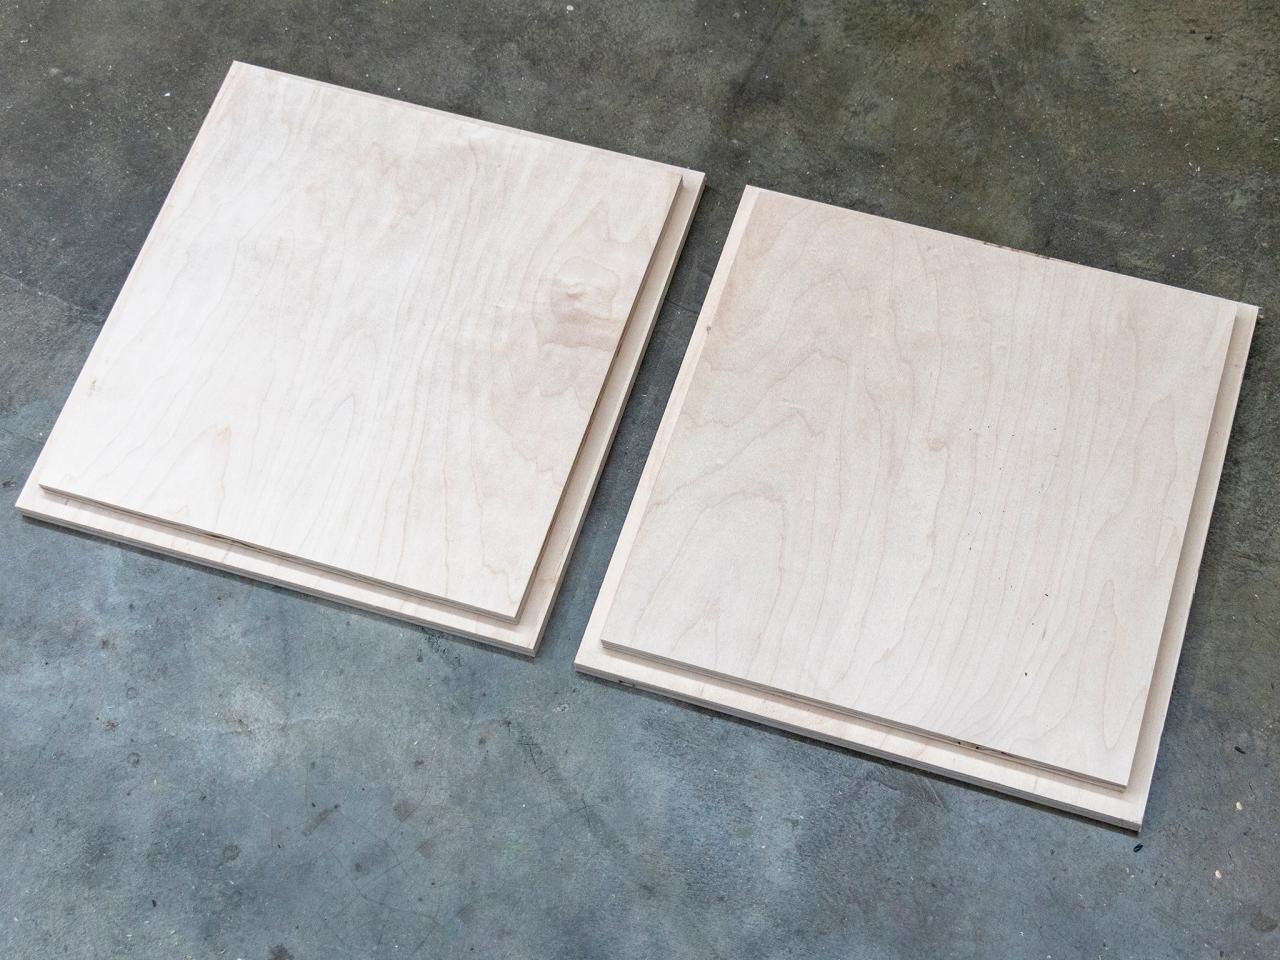
Using a generous amount of wood glue, adhere the inner sides to the outer sides (Image 1). Drive a few finish nails into the corners and the middle just to hold everything in place as it dries (Images 2 and 3). Wait an hour or so for the glue to set before you move on to any further assembly.

Derek Trimble

Derek Trimble
Derek Trimble
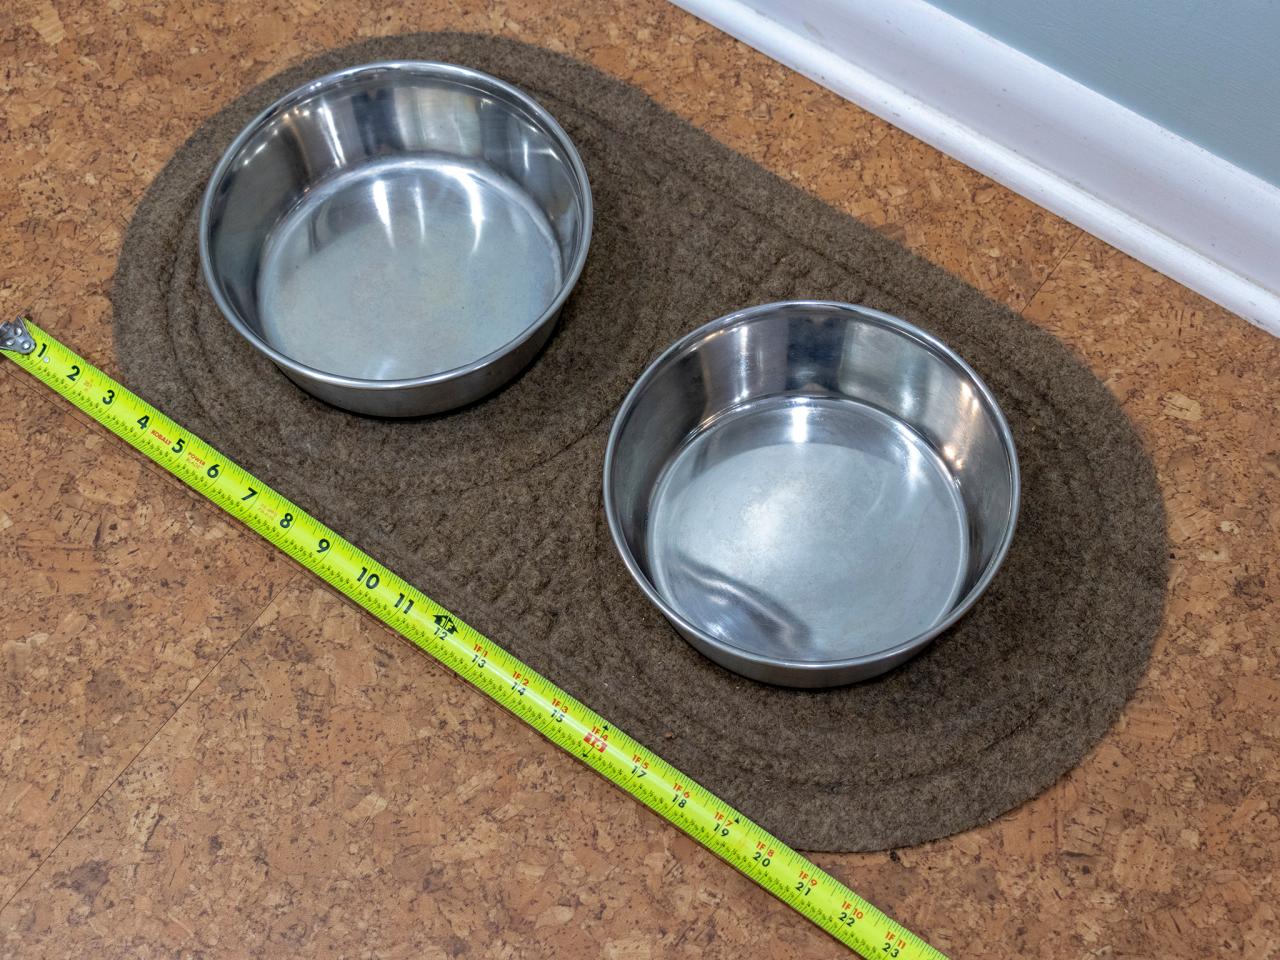
Measure and Mark Bowl Holes
If it’s not stamped on the bottom of the bowl, you’ll need to measure the diameter of your dog’s food bowl and decide how much space you’d like between the bowls and around top the edges (Images 1 and 2). Mark the center lines as shown using those measurements (Image 3). Using a compass, scribe the circles making sure to create a nice dark line that's easy to see (Images 4 and 5). Tip: In our case, the bowls are 8” at the lip, so our holes are 7-7/8” so the bowl will sit flush without falling through. Set the compass to half the diameter of the circle you’d like to cut, so in this case we’re using 3-15/16."

Derek Trimble

Derek Trimble

Derek Trimble

Derek Trimble

Derek Trimble
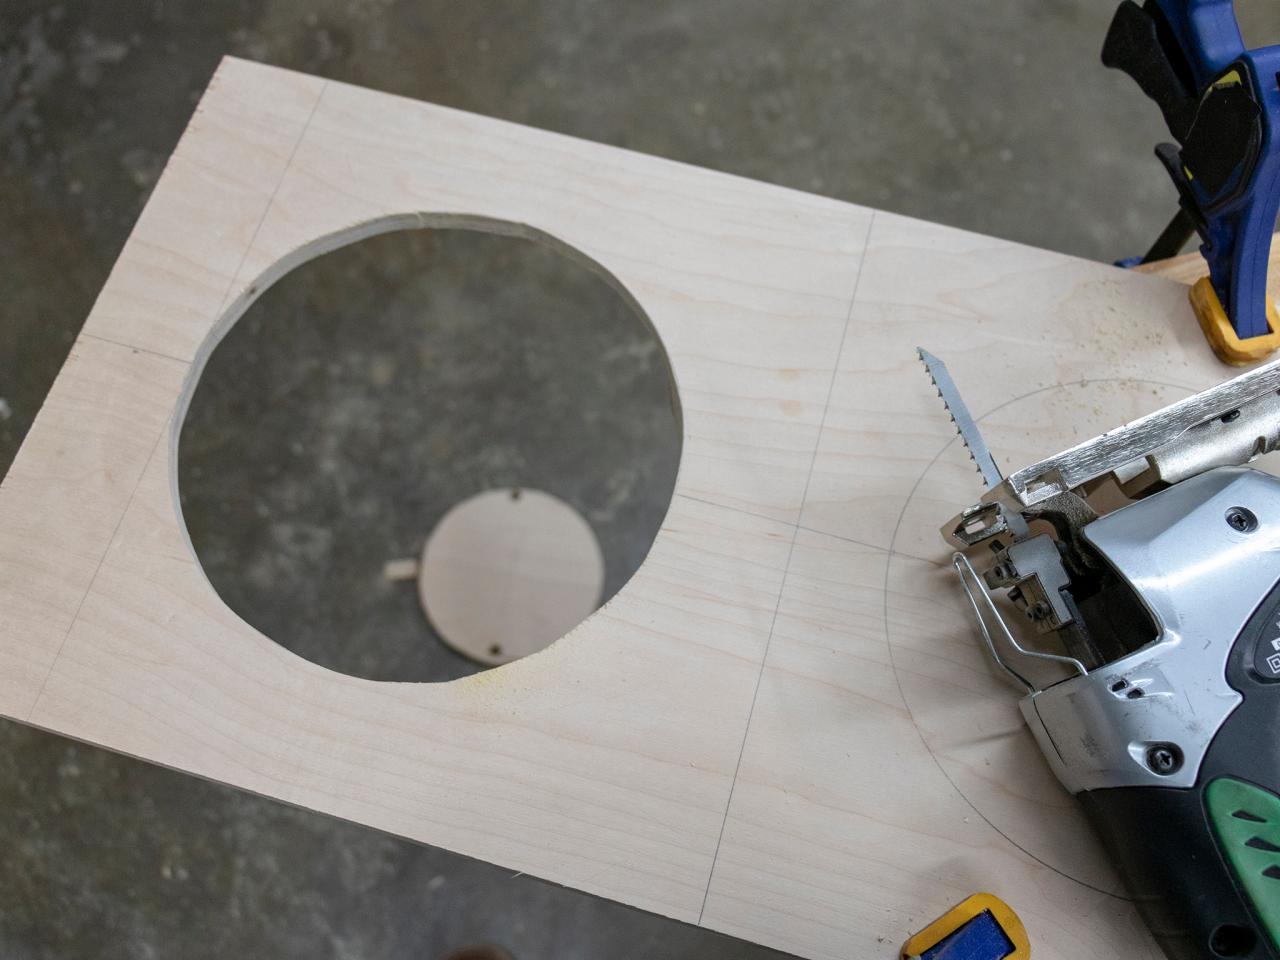
Cut the Holes
Now that you’ve got everything laid out, it’s time to make the cuts. Drill a hole big enough for your jigsaw blade at the top and bottom of each circle (Image 1). Note: Place your board over the edge of a sawhorse or workbench so the blade won't hit anything as you cut. Insert the jigsaw blade and follow the INSIDE of the line until you’ve cut a complete circle (Image 2). Repeat this process on the opposite side taking care to support your work safely and securely.

Derek Trimble

Derek Trimble
Assemble and Clamp the Case Together
Run a bead of glue around the inner edge of each side and begin to assemble the case as shown. Tip: It helps to use masking tape to hold the corners together as you assemble the parts, this keeps pieces from falling over while you’re working alone. Once everything is in place, use the bar clamps to apply pressure and leave the clamps in place while everything dries. After the glue has dried, drive a few nails into each edge for added strength.

Derek Trimble
Add a Simple Crossmember in Front
Your case at this point is going to be pretty strong but if you want to add a little extra support and hide the bottoms of the food bowls, add a small crossmember across the top front. Using one of your scraps (you’re going to have a few) glue and nail a roughly 4x24” piece across the front.

Derek Trimble
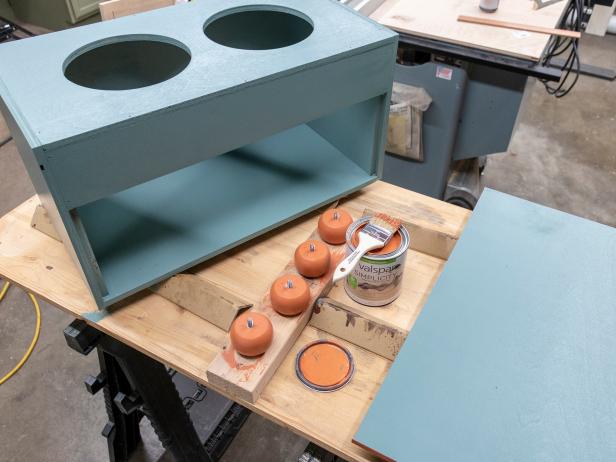
Lightly Sand and Add Finish
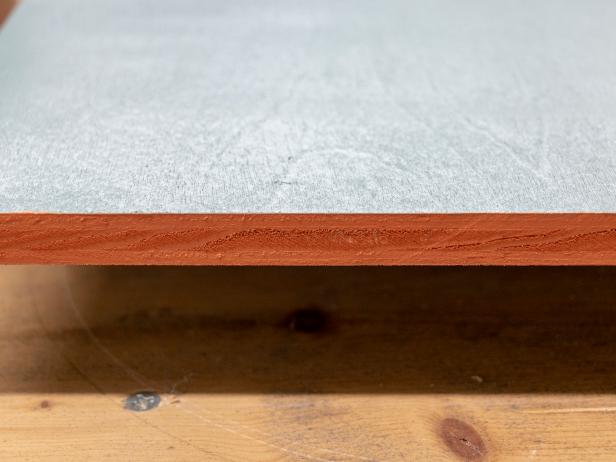
Now that everything is nice and strong, give your project a light sanding. Make sure to wipe any excess sawdust off with a damp towel before applying the finish. Note: Use a low VOC non-toxic finish if your pet has a habit of chewing things (Image 1). You can also tape off the edges of your front piece and paint them a contrasting shade for a nice pop of color around the edge or to hide any of the plywood edges if you're not going to add trim (Image 2).
Derek Trimble
Derek Trimble
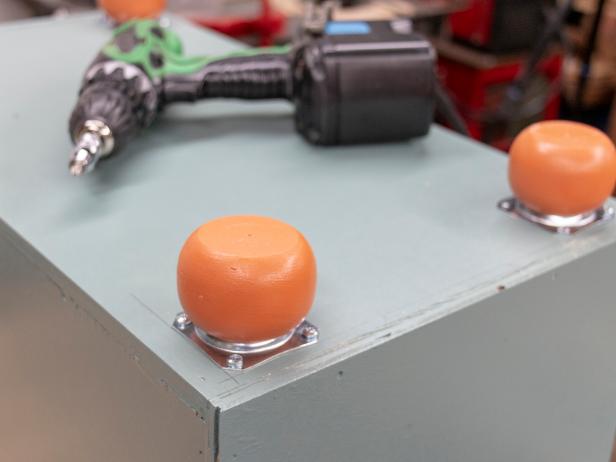
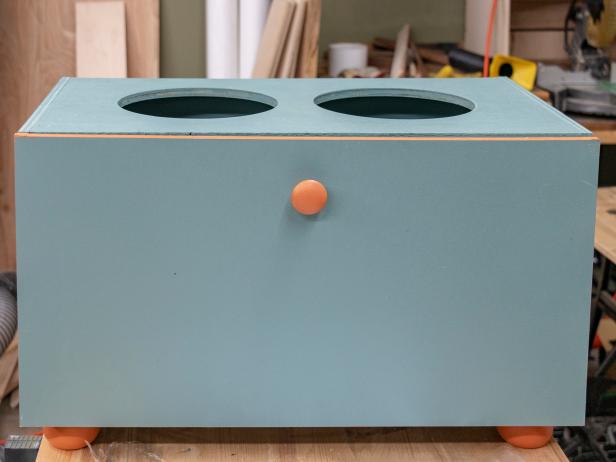
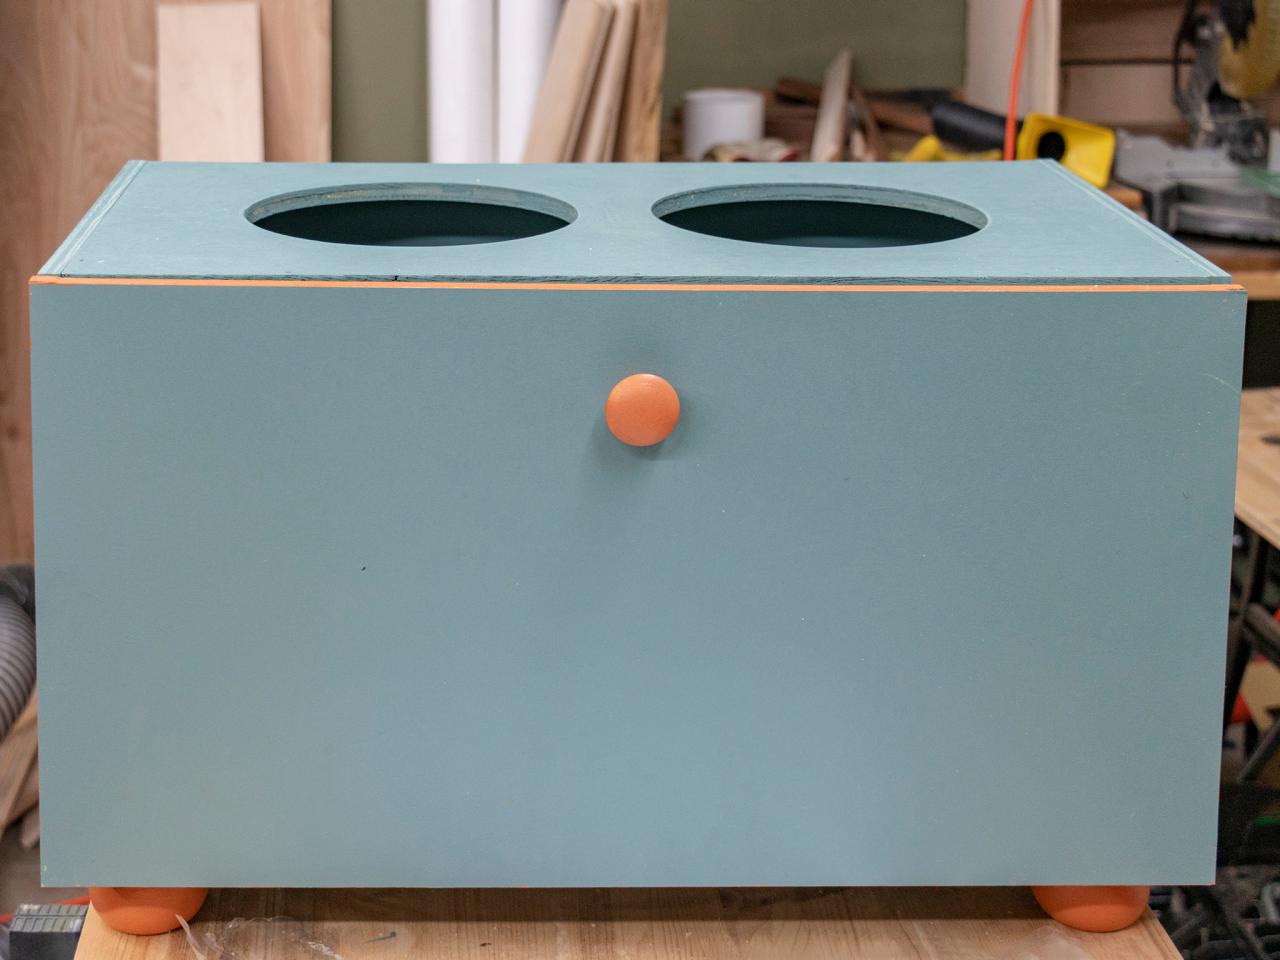
Flip Over and Add the Bun Feet
Once everything is painted and dried, you can roll the case over and add the bun feet. Make sure to spread them out as far as you can for stability but not so far that you can see the mounting hardware when it’s upright. If you’ve got easily scratched floors, add some thin rubber pads to the bottom of the feet.
Derek Trimble
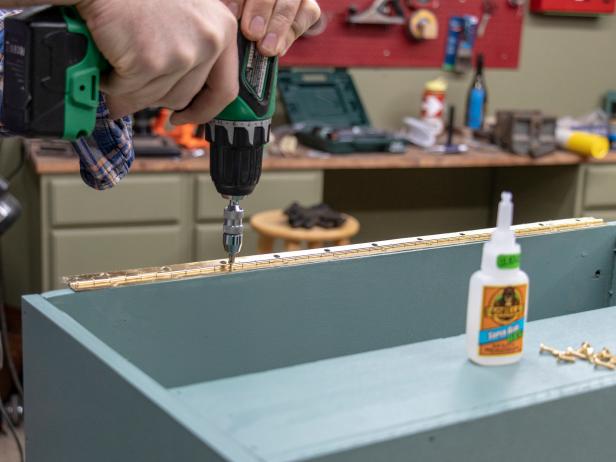
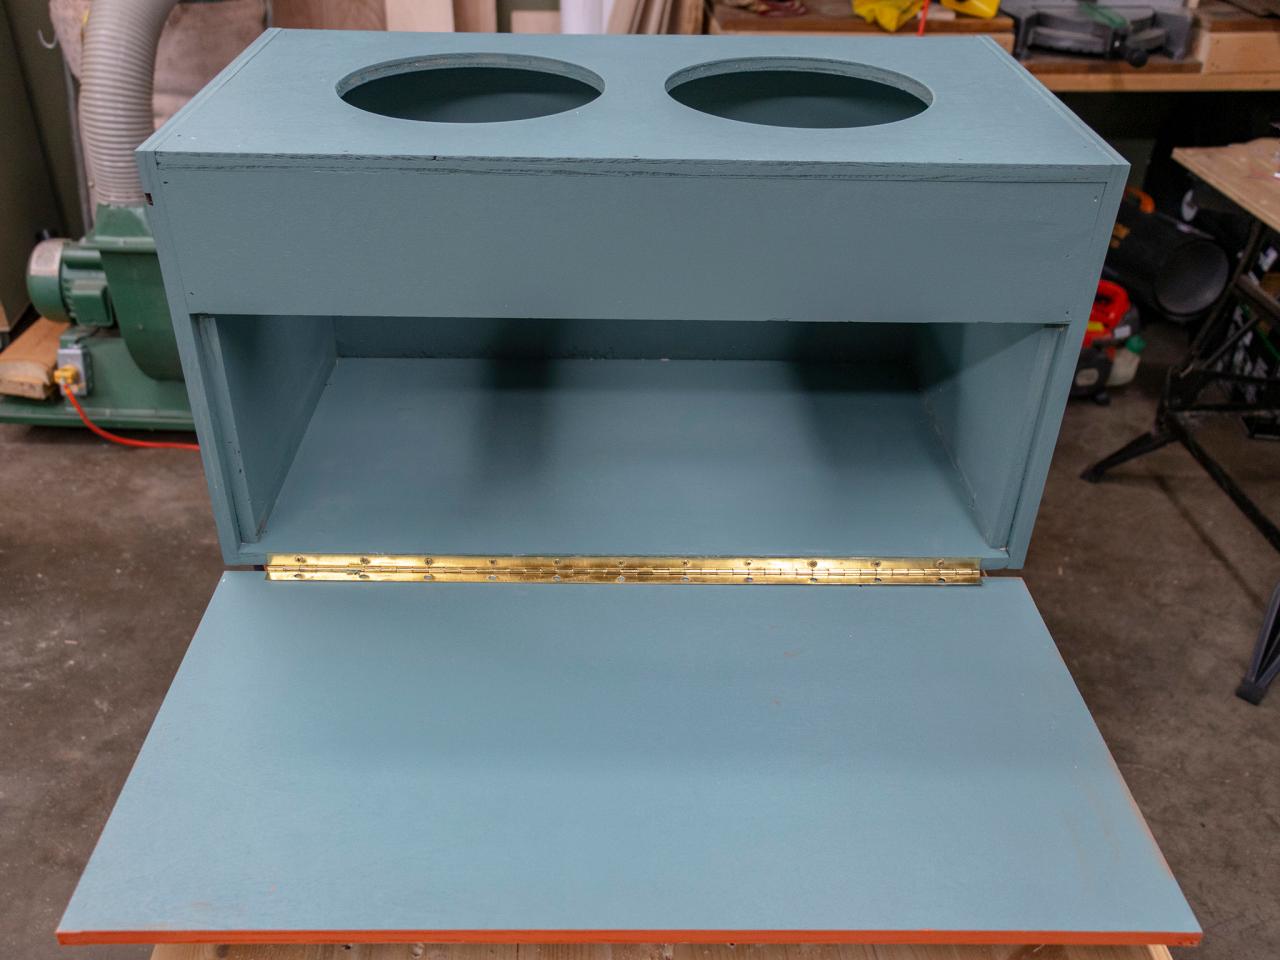
Attach the Piano Hinge
Now here’s a simple way to attach a hinge if you’ve ever had difficulty with it before. Start with the case-side of the box and screw the hinge in place so it opens in the correct direction (Image 1). Then close the hinge, put a few drops of superglue in between the holes and press the front door in place (Image 2). Hold the front door in place with the hinge aligned for a minute so that the glue sets hard (Image 3). Once it’s dry, open the door and screw the rest of the hinge down (Image 4). The end result should be a perfectly aligned door.
Derek Trimble

Derek Trimble

Derek Trimble

Derek Trimble
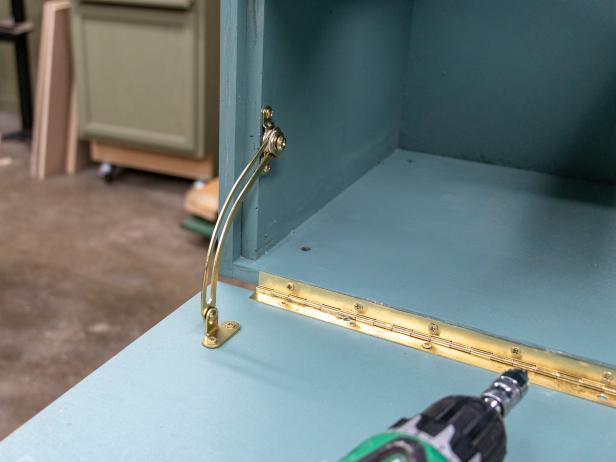
Install Hinge Supports and Knob
To prevent the piano hinge from opening all the way to the floor it’s a good idea to install hinge supports (Image 1). Note: Purchase a left- and a right-side support and install them to the inner side panel first. Then prop the door up until it’s level with the case and install the bottom of the support. You can use the screw on the side to adjust the tension, too, so your dog won’t be able to open it when you’re not looking. Next, add the wooden knob to the outside of the door to finish the door's look (Image 2).
Derek Trimble
Derek Trimble
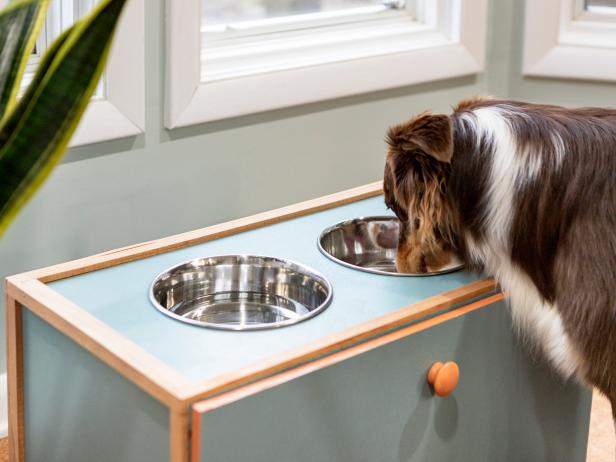
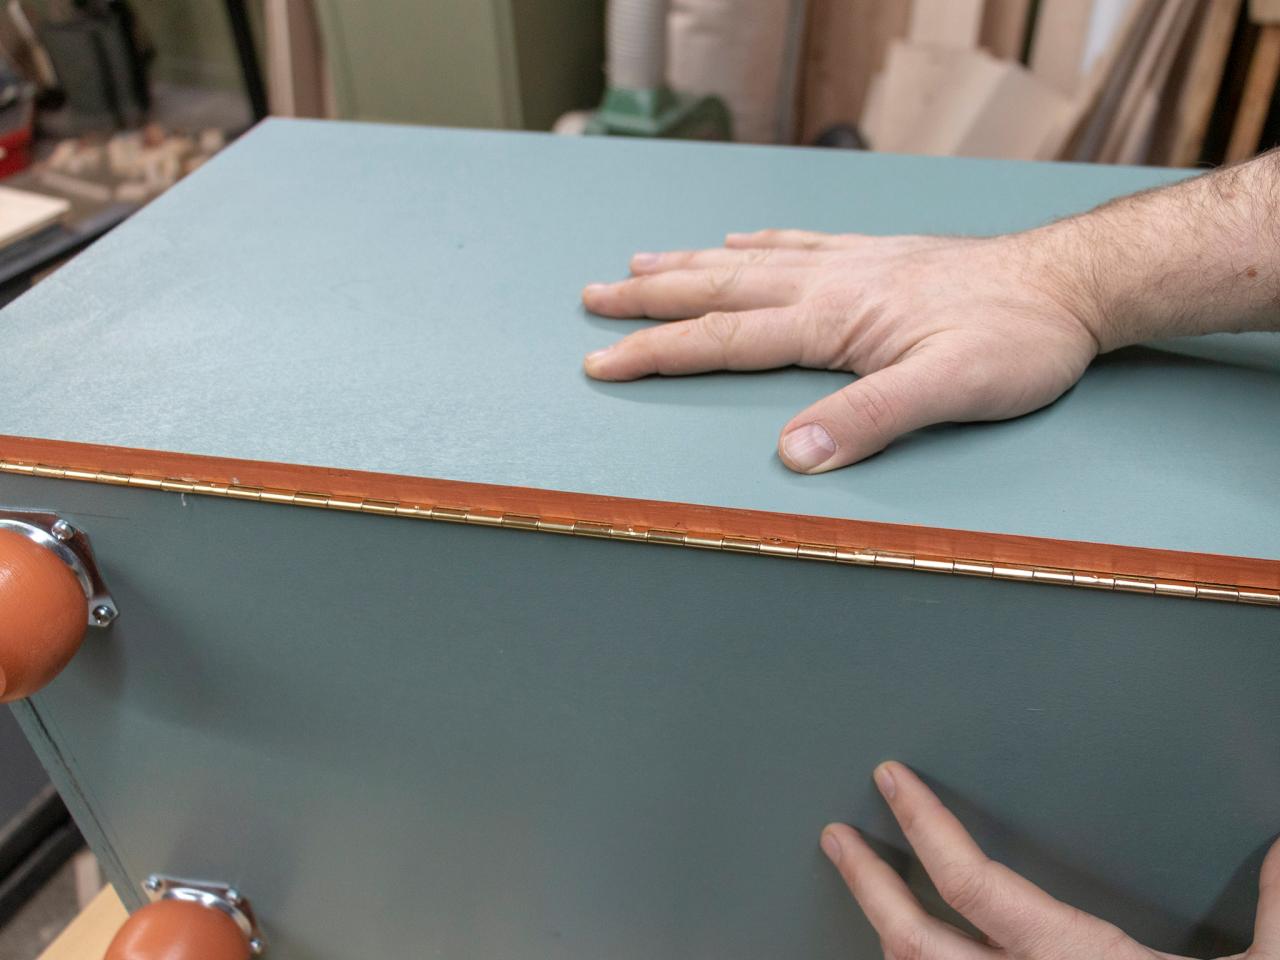
Add Optional Trim for a Finished Look
Using 1/2” trim and finish nails, conceal the plywood edges around the case for a clean, professional look (Image 1). Fill the feeder's interior with your pup's favorite treats or kibble (Image 2). You’re ready to give your pup a place to enjoy their dinner that’ll make the other dogs jealous (Image 3).

Derek Trimble

Derek Trimble
Derek Trimble


