


Plywood-Sheet Wine Rack

Make use of that unused nook under the stairs with this project for a mini wine cellar.
Materials and Tools:
safety glasses
drill
nail gun
plywood sheet
primer
paint
trim (optional)
nails
Steps:
1. Measure the space where you wish to place your wine rack.
2. Wearing protective eyewear, trim the plywood sheet according to the measurements taken.
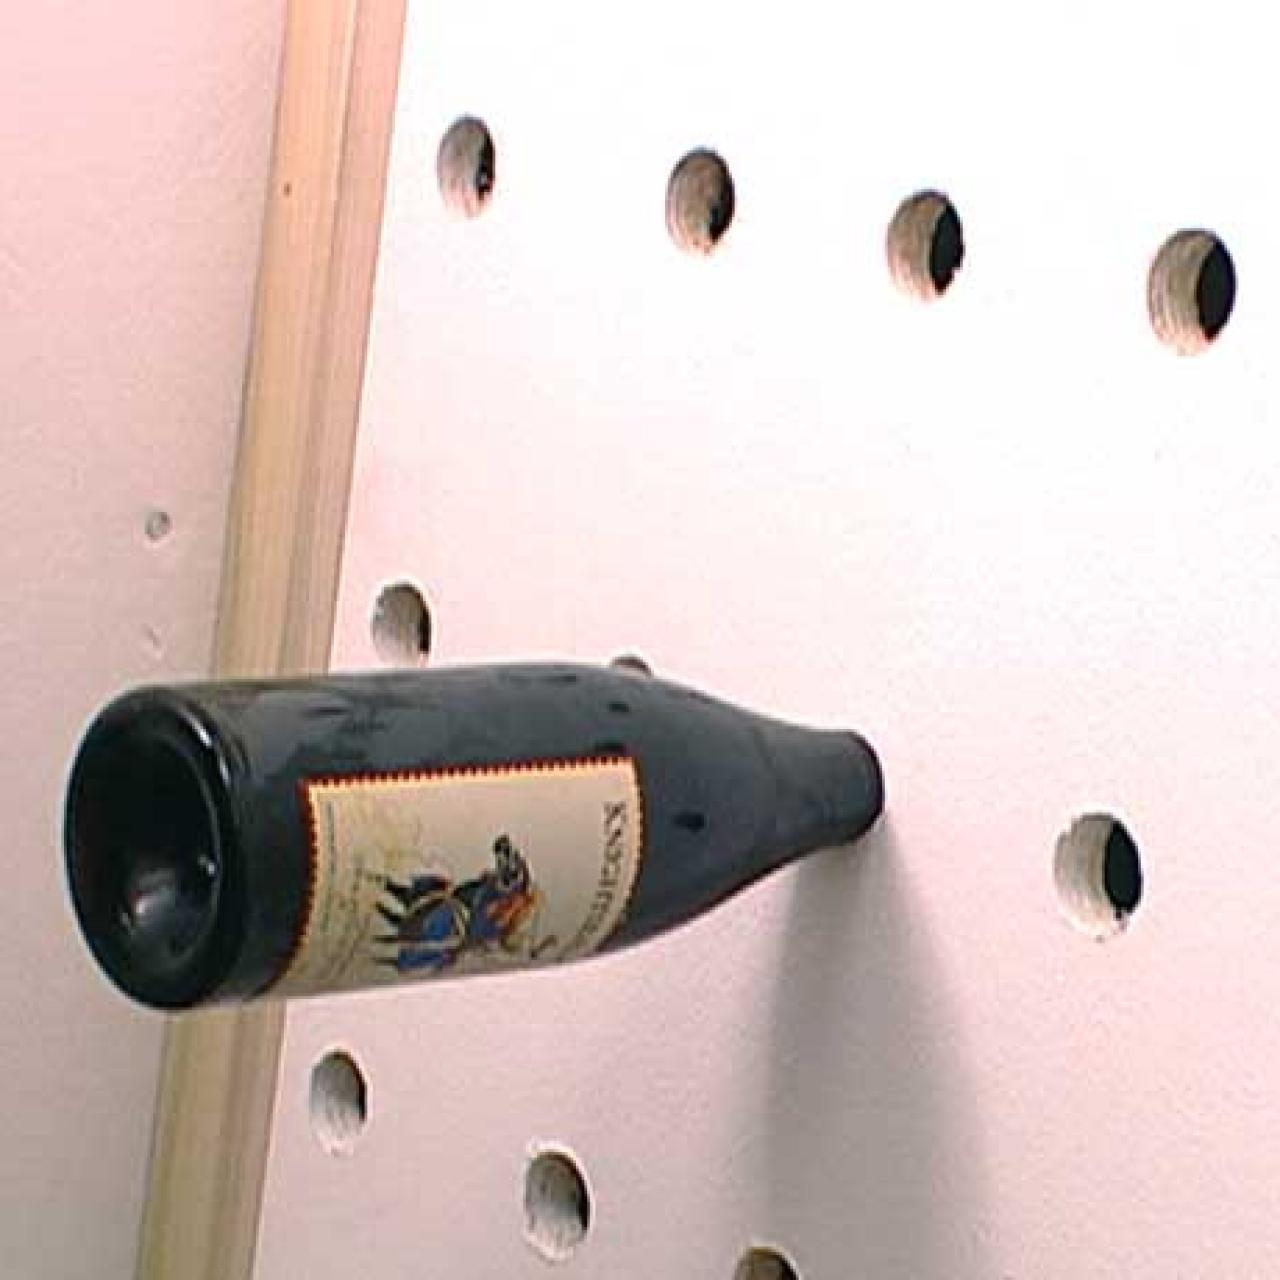
3. Using a tape measure, create a grid on the plywood sheet to determine how far apart the holes need to be for the wine bottles.
4. With a drill, bore holes in the plywood sheet to create a place for the wine-bottle necks.
5. Apply primer to the wine rack.
6. After the primer dries, paint the wine rack to fit the design of the room.
7. Install the wine rack on a slight angle to allow the wine bottles to sit at a 90-degree angle.
8. Dress up the wine rack with trim if you wish.
9. Place wine bottles in the rack.


