


Add Outdoor Living Space With a DIY Paver Patio
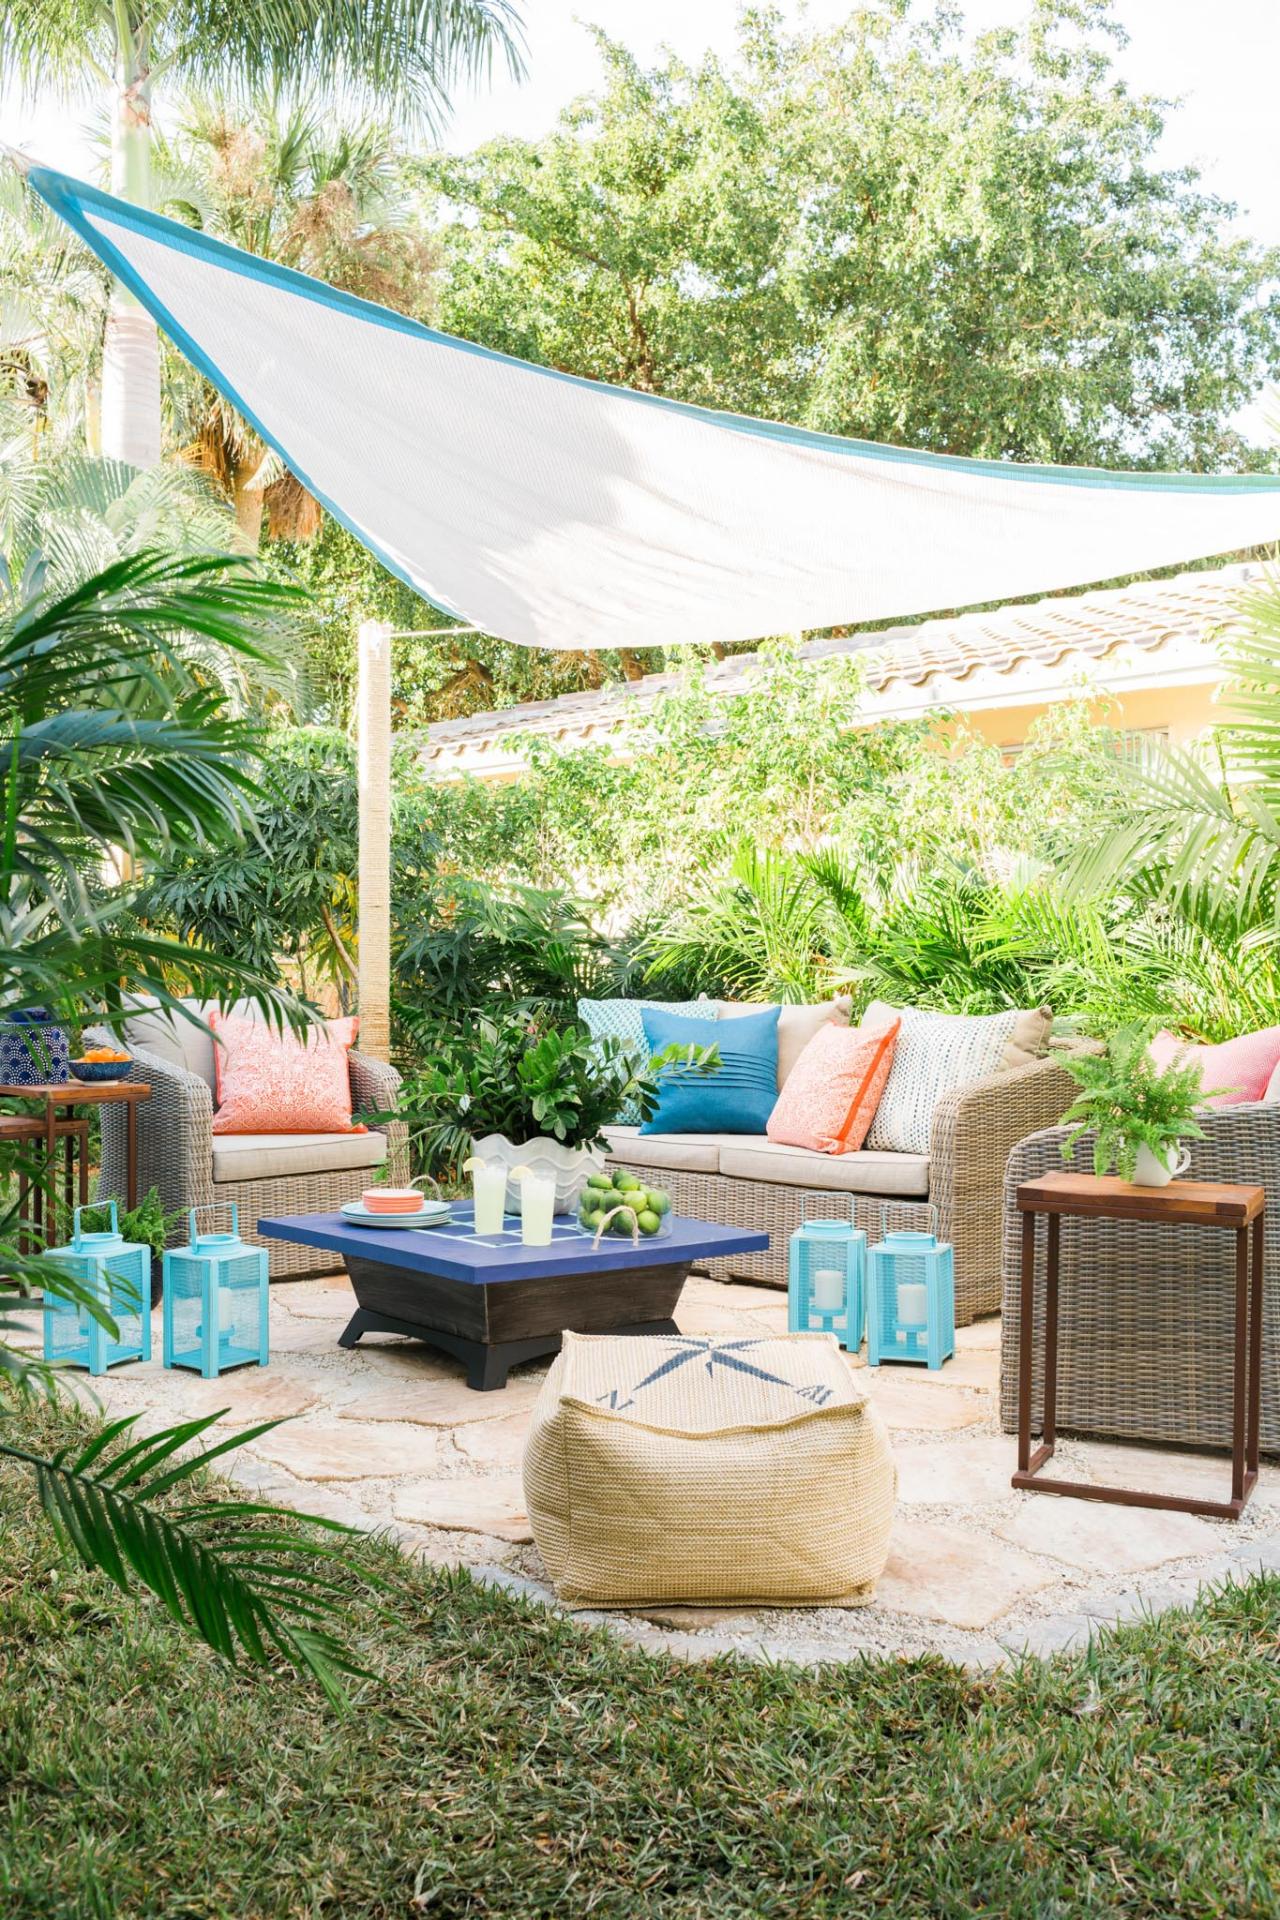
If your backyard is more eyesore than lush landscape, adding a DIY paver patio could be just the ticket to transform a patch of weeds into a relaxing outdoor room.

© Rustic White Photography, LLC

Materials + Tools
- marking spray paint
- weed-block fabric
- utility knife
- rake
- shovel
- sand
- hand tamper
- spirit level
- concrete pavers
- border stones
- pea gravel
- push broom
- hose
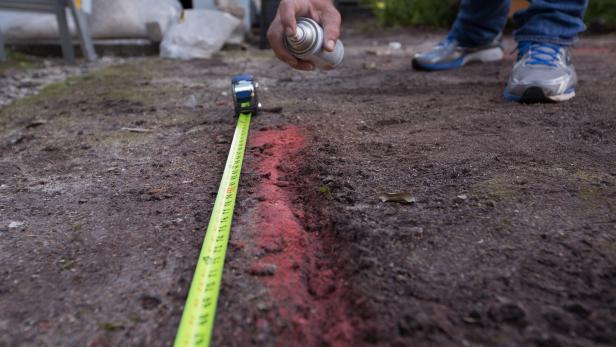
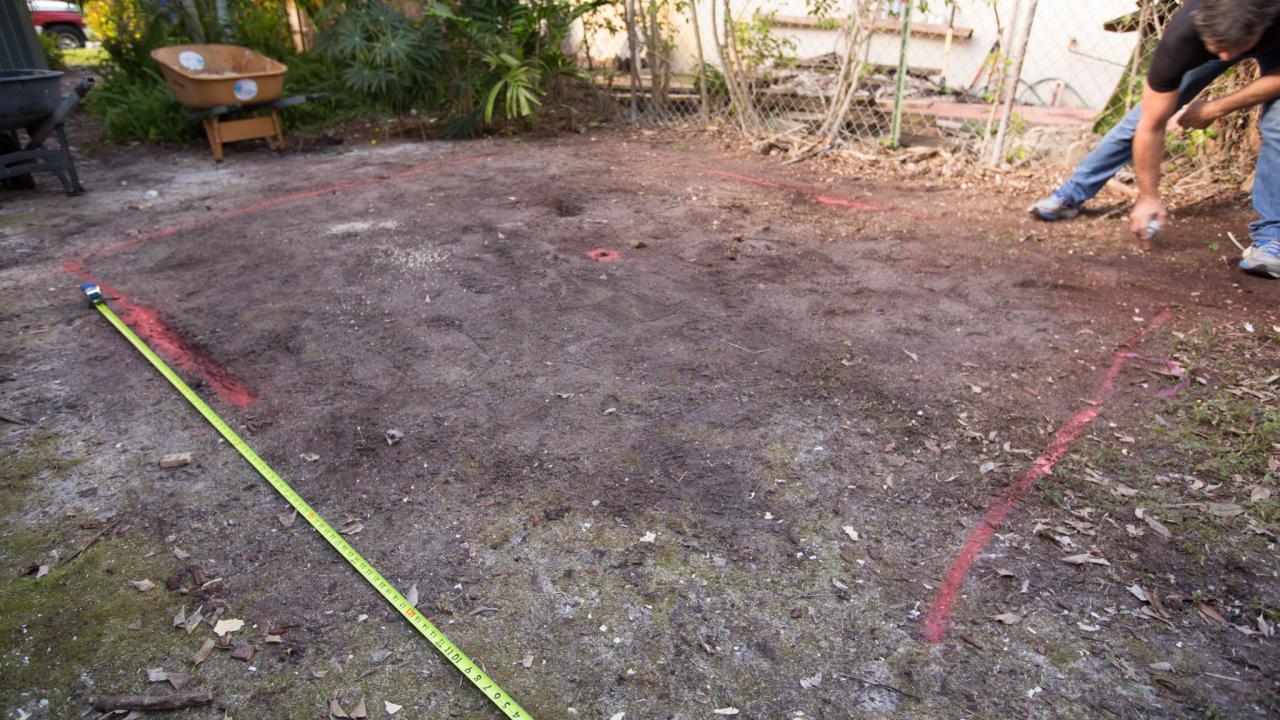
Mark Perimeter
Using a measuring tape and spray paint, mark the perimeter of the new patio space (Images 1 and 2).

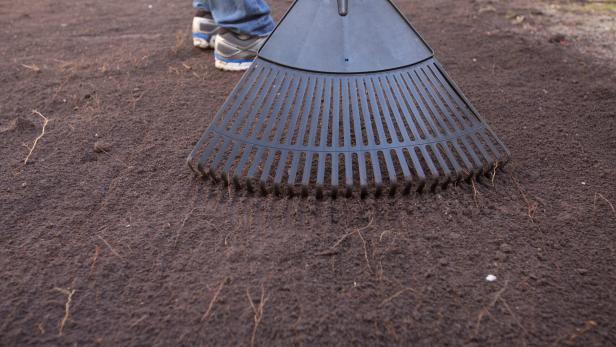
Excavate Area
Next, using a shovel, prep the area by digging down at least 6" to remove any grass, roots or large rocks. Rake out the area (Image 1), then tamp down flat with a hand tamper (Image 2).
Add Weed-Block Fabric
Once the area is flat and level, roll out the weed-block material, making sure to overlap it, so that no weeds find their way through the fabric over time. This also helps the pavers to stay in place and prevent them from sliding around or sinking over time.

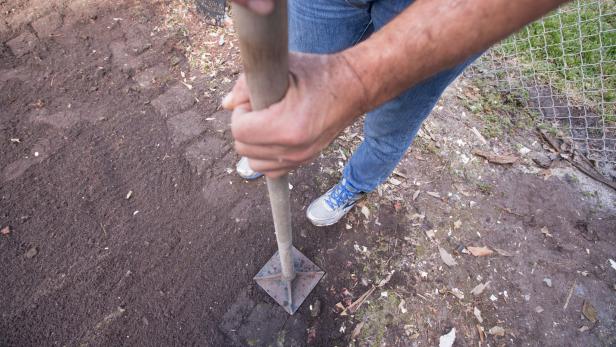
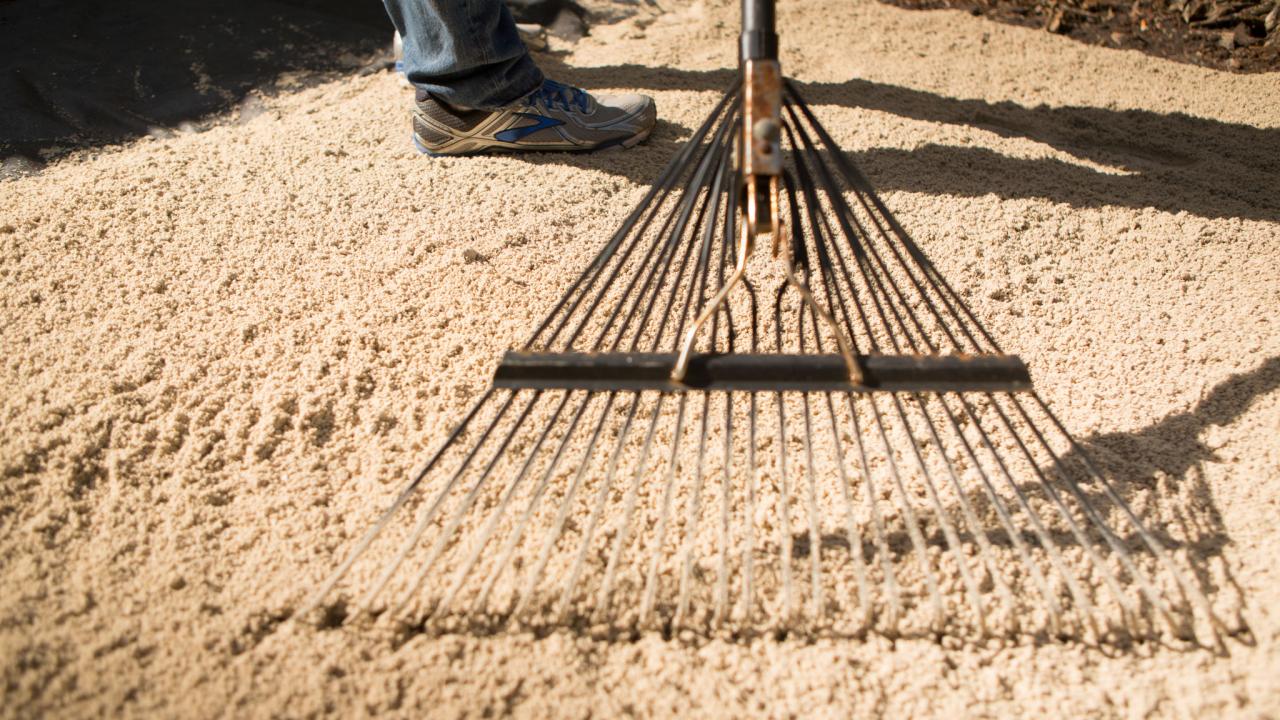
Cover With Sand
Add a layer of sand on top of the weed-block material and rake (Image 1), then tamp down flat, making the sure the surface remains level (Image 2).


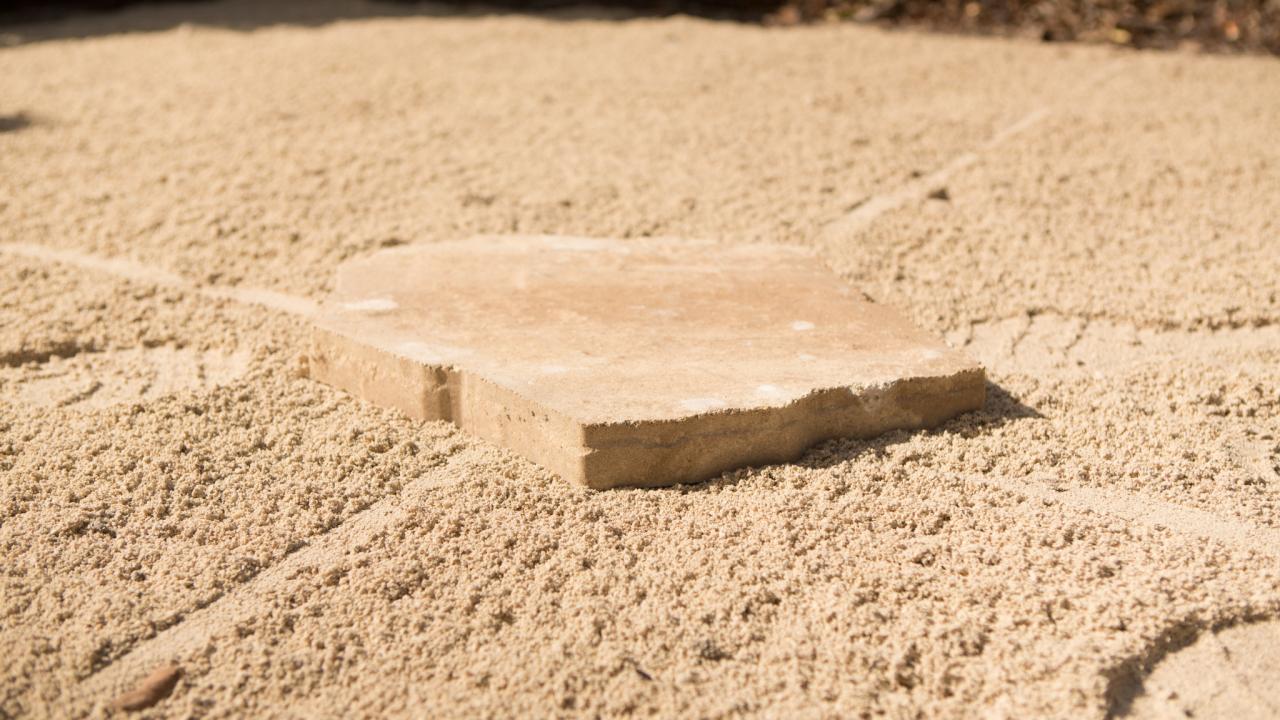
Find Center
Using a tape measure, find the center of the space and place a paver there; work out from this central paver toward the patio's perimeter.

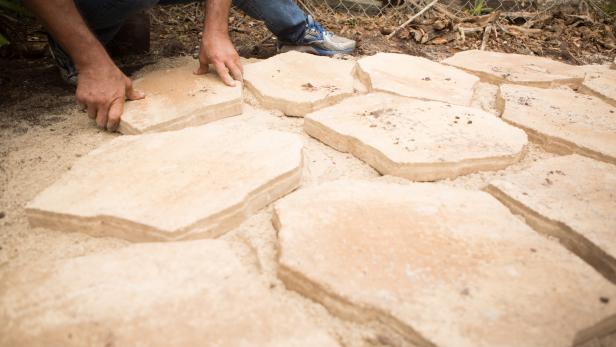
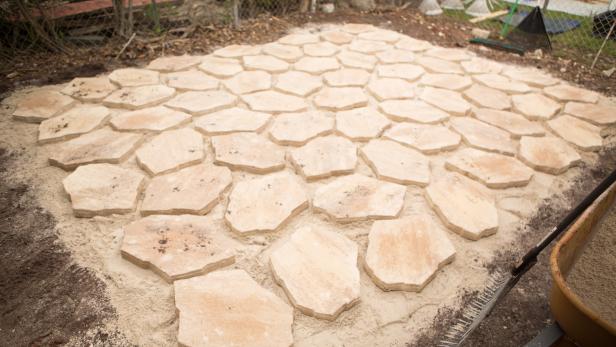
Place Pavers
Continue placing pavers, checking that they're level as you work and leaving somewhat uniform gaps between the stones. As you get close to the perimeter, choose smaller stones and turn appropriately so you don't overstep the patio's border (Images 1 and 2).
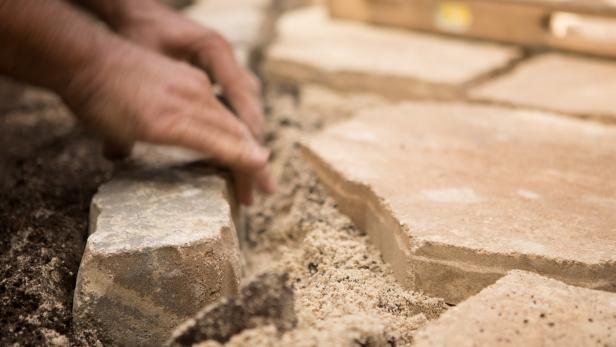
Add Border Stones
Next, dig down slightly and place border stones along the spray painted perimeter markings, keeping them as level and straight as possible. Place the border stones so they are butted up tightly against one another. Once perimeter border is complete, wet the entire area down with a hose to allow stones and sand to set.
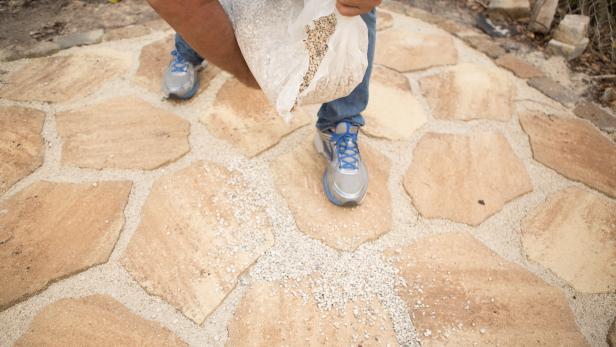
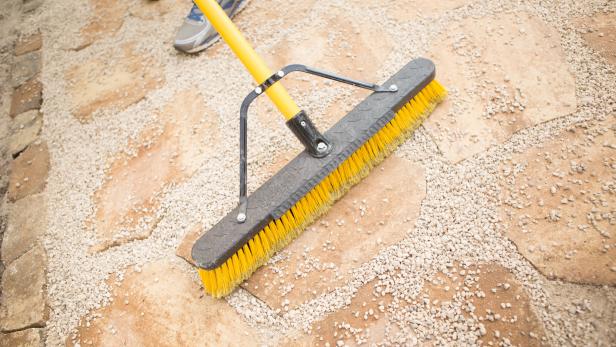
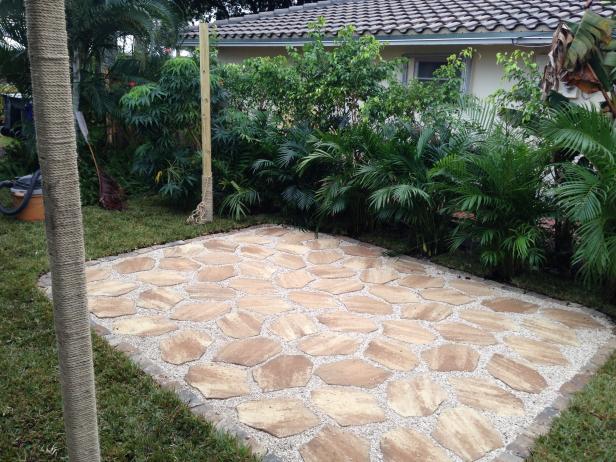
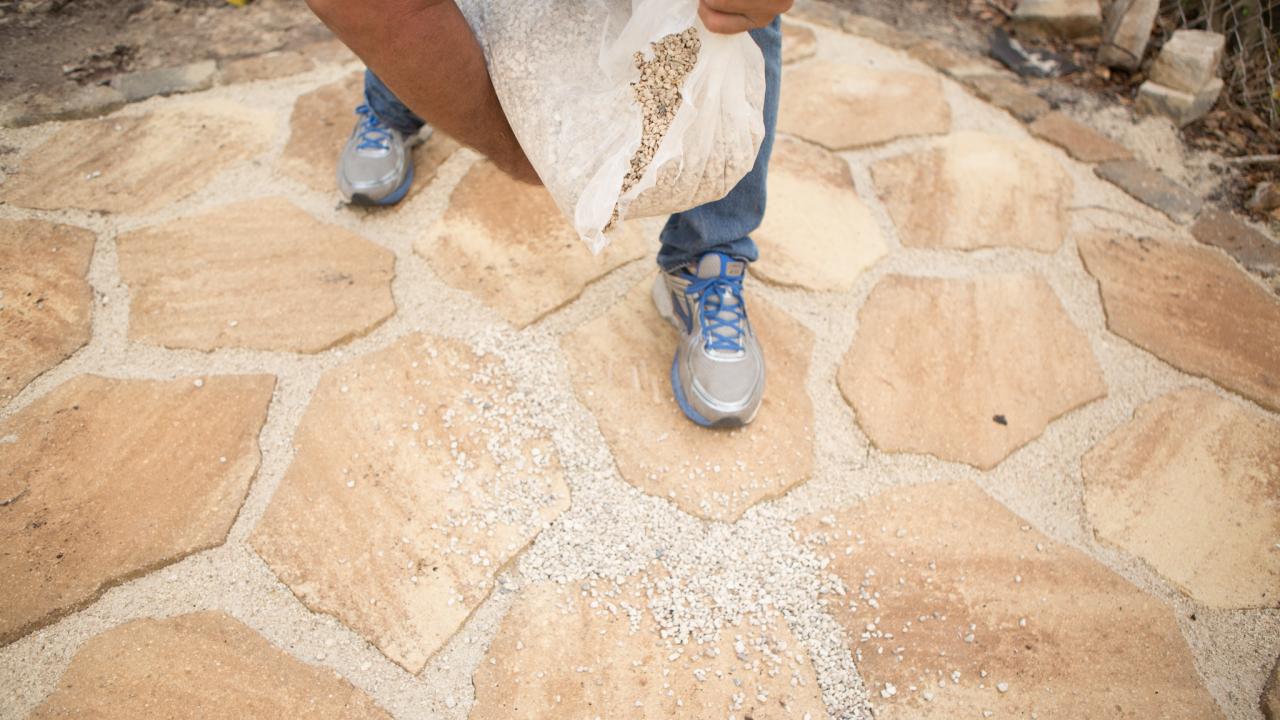
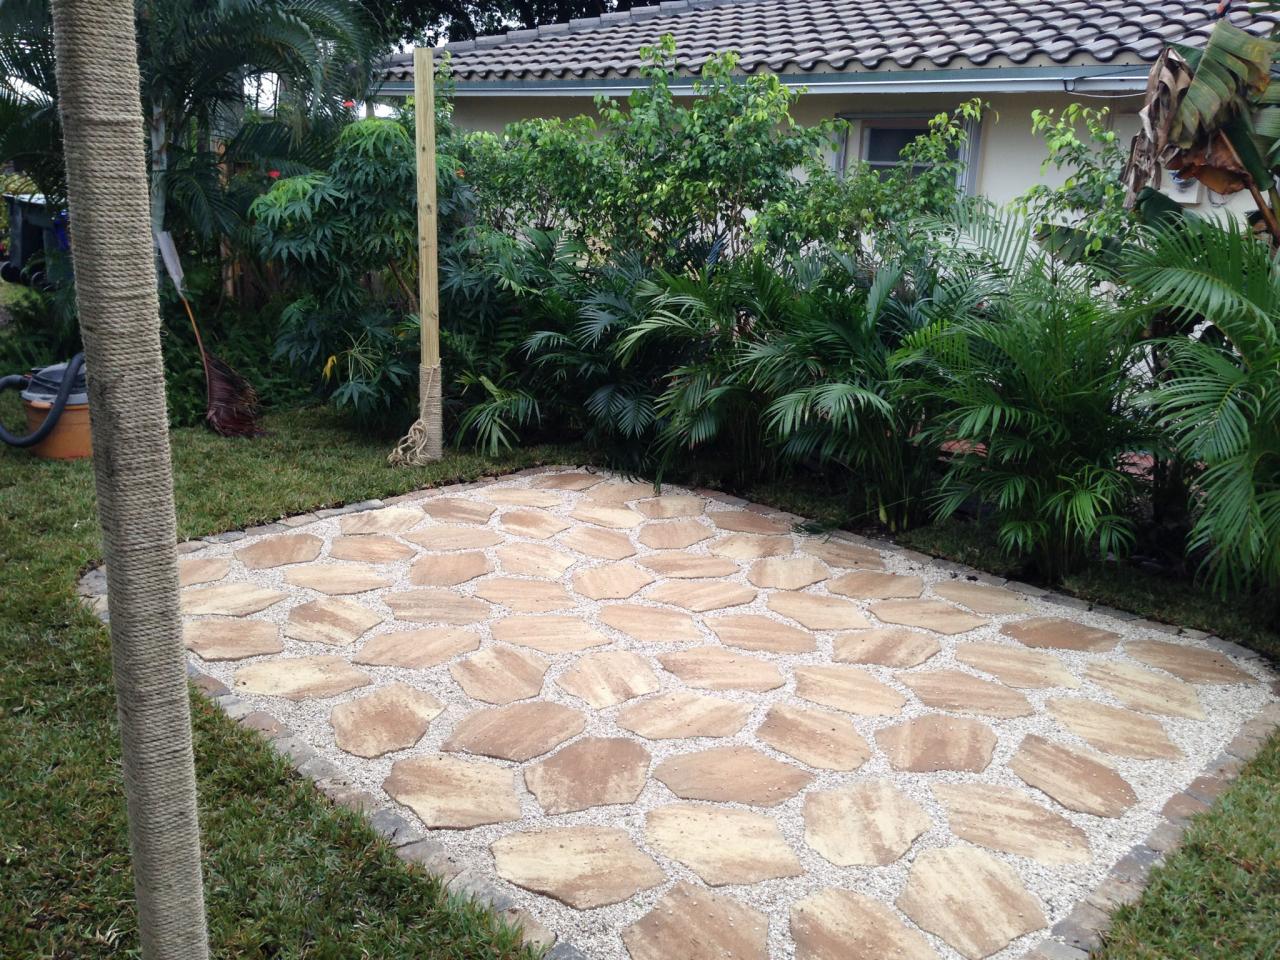
Sweep in Pea Gravel
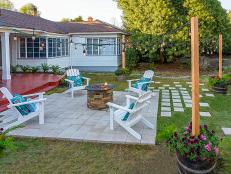
Once the area is dry, pour pea gravel out in small sections (Image 1) and sweep across the patio's surface until the gaps between pavers and border stones are filled and level (Images 2 and 3). Top paver patio with weather-resistant furniture to create an outdoor living room (Image 4).
© Rustic White Photography, LLC


