


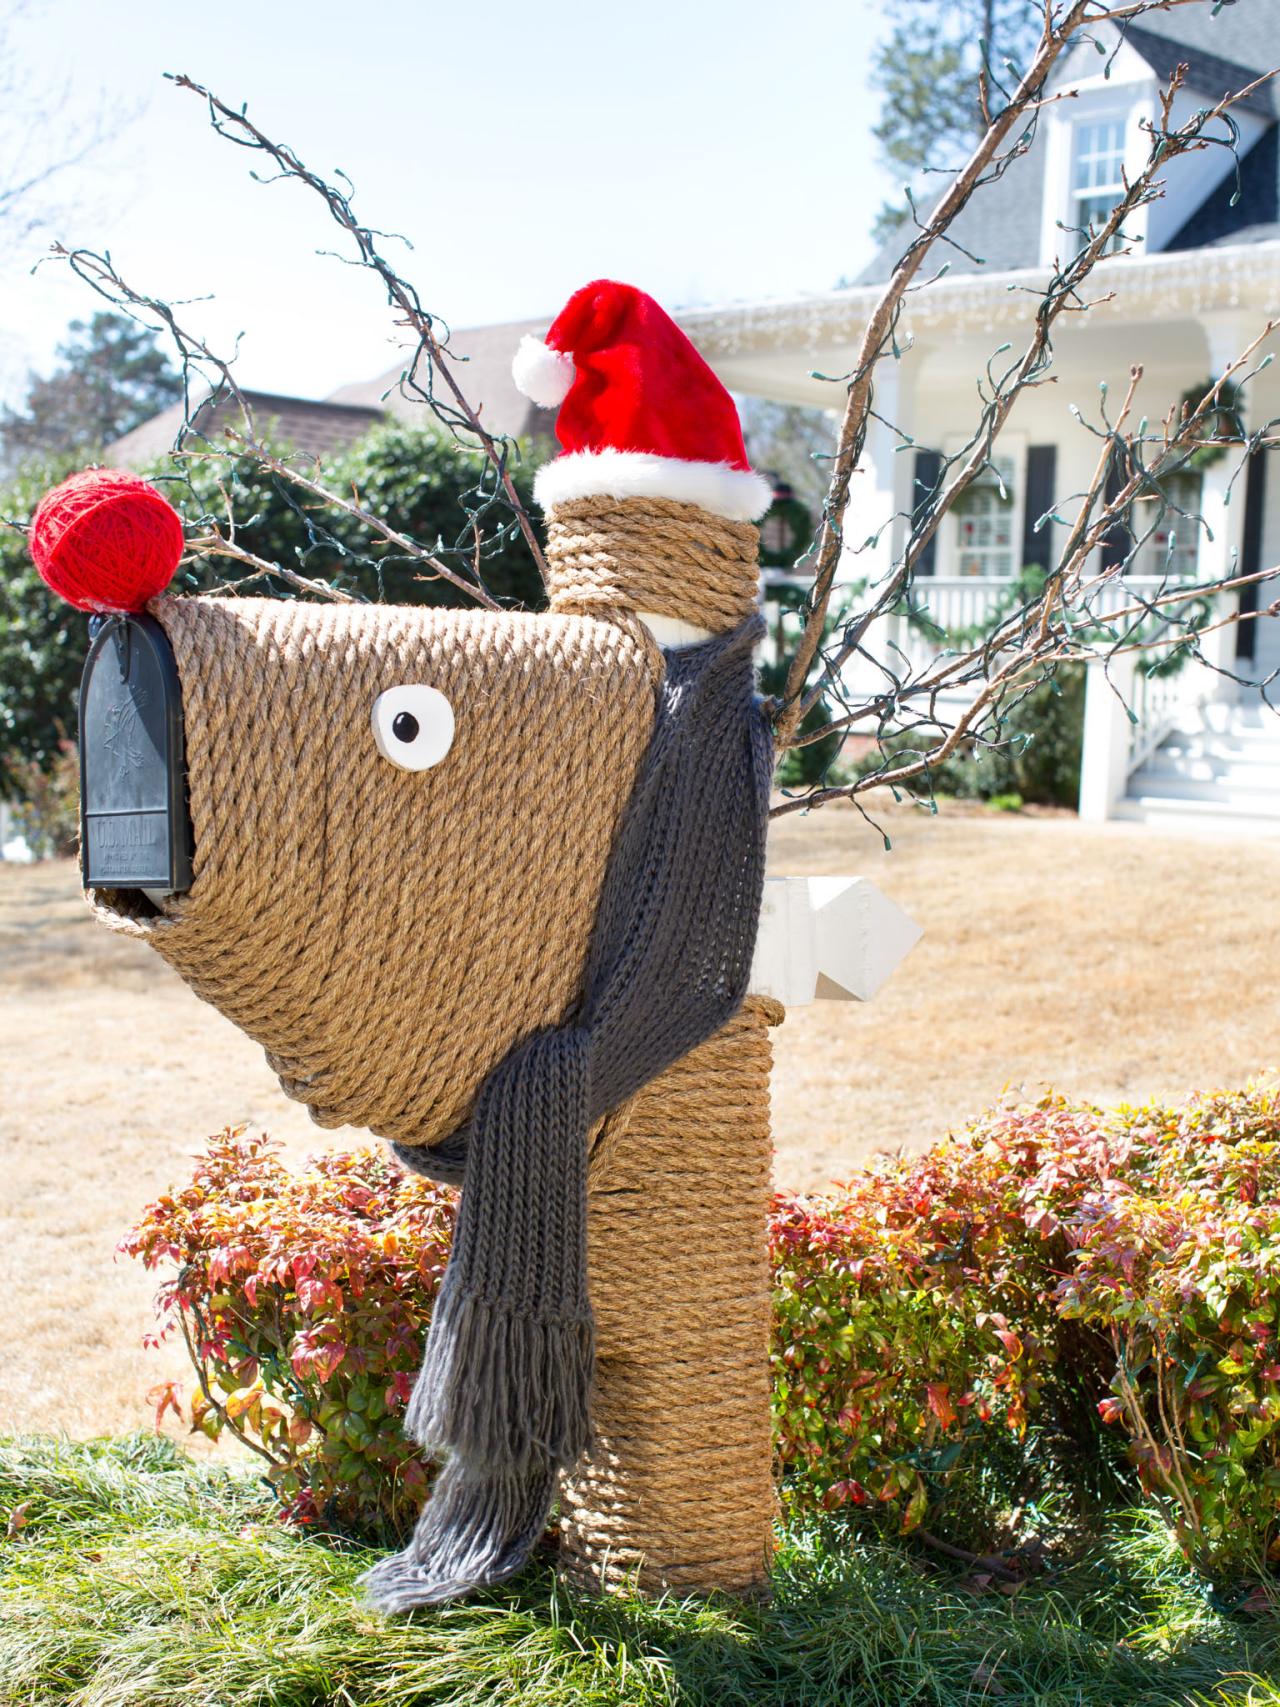
Give Your Mailbox a Festive Holiday Makeover

Materials Needed:
- small handsaw or heavy-duty pruning shears
- small white twinkle lights
- extension cord
- natural sisal rope, 1/2-inch diameter, 200 feet
- 2x3" diameter slice of tree limb
- 3" diameter foam ball
- branches for antlers, at least 1/2" diameter
- red acrylic yarn
- hot glue gun
- hot glue sticks
- marker
- white acrylic paint
- paintbrush
- 2" exterior wood screws
- screw gun
Gather Branches
Search yard for fallen branches at least 1/2 inch in diameter. The width of the branches should be substantial enough to read as antlers from the street.

Brian Patrick Flynn
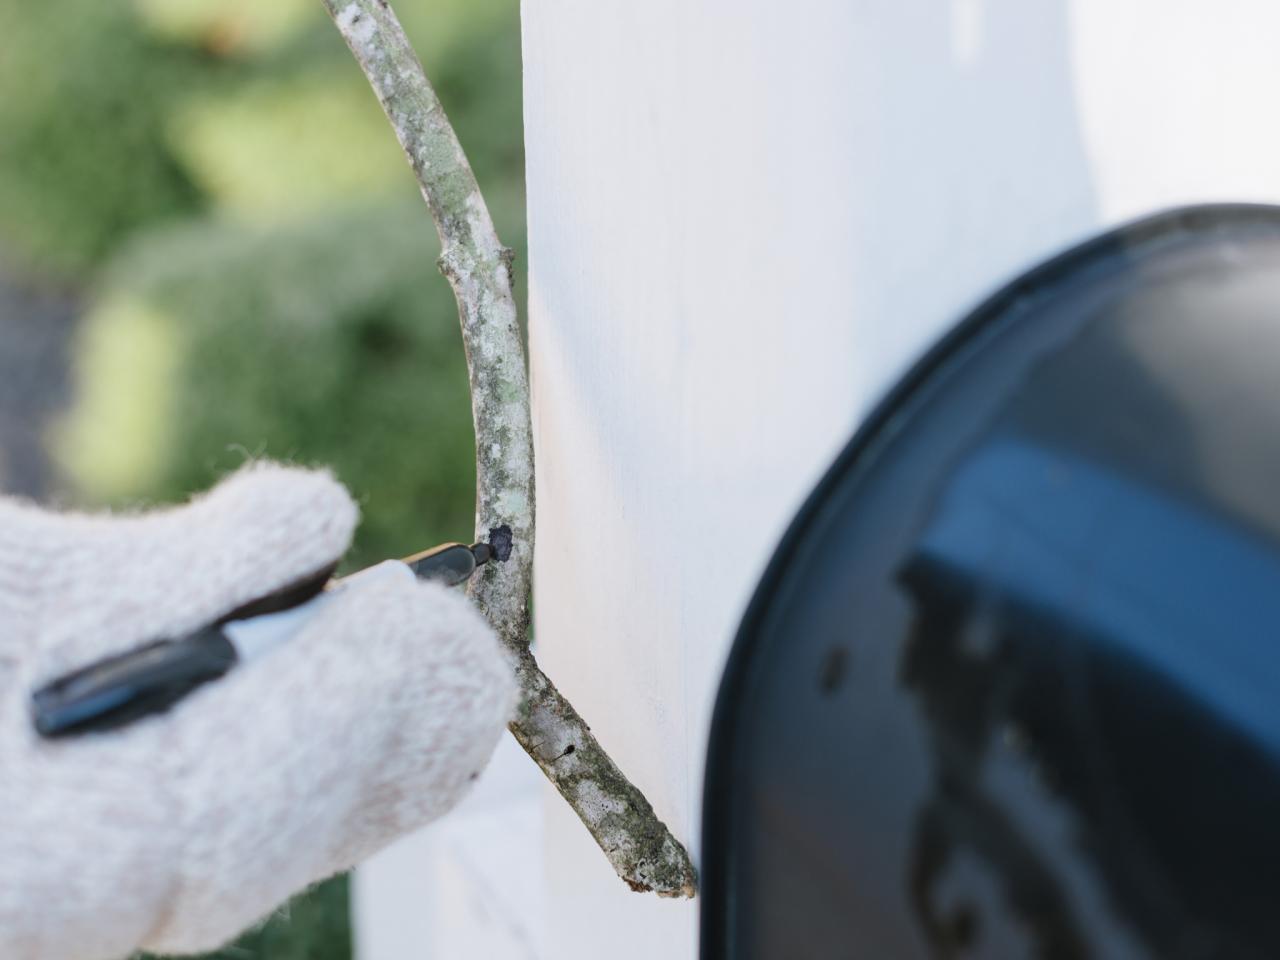
Mark Branches
Hold branches up to the mailbox post and position branch until it has the proper shaping and positioning to read as antlers. Make a mark using marker directly onto the branch. Cut away any excess from branch with small handsaw or heavy-duty pruning shears.

Brian Patrick Flynn
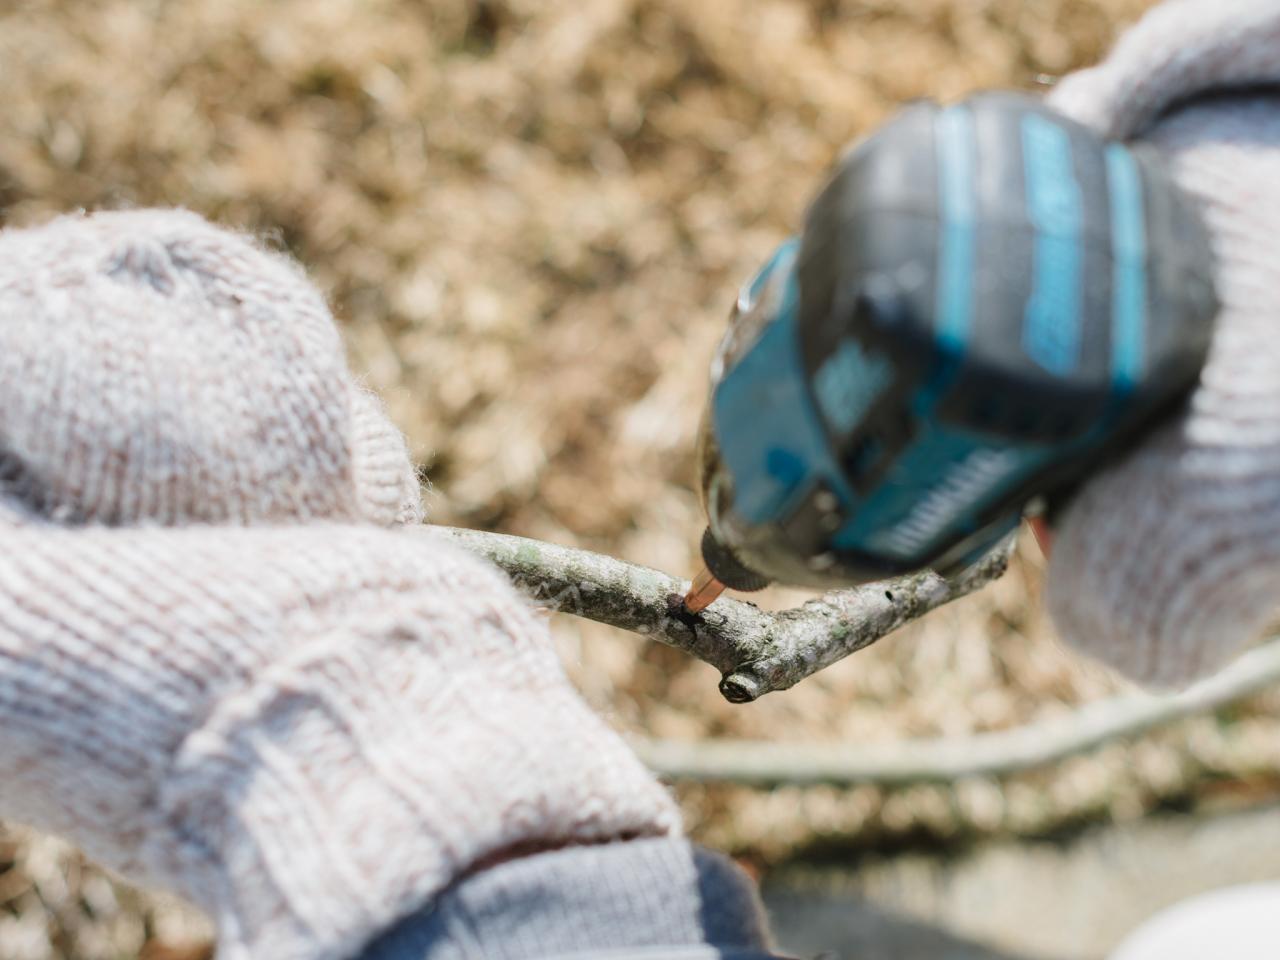
Pre-Drill Holes Into Branches
Use drill to create a pilot hole directly into mark.

Brian Patrick Flynn
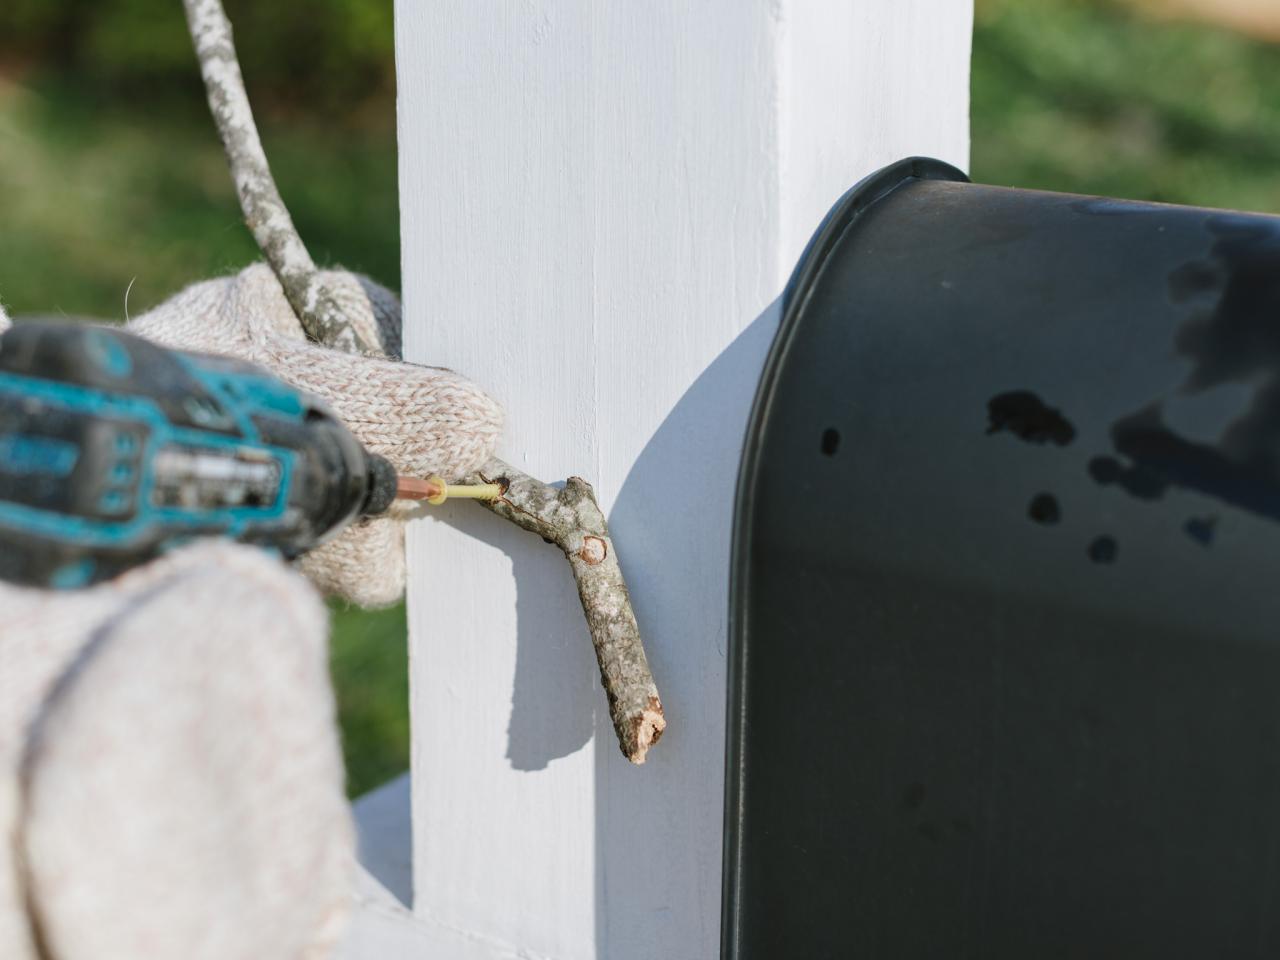
Attach Branches to Post
Hold branches up to mailbox post, then use drill and wood screws to fasten branches securely.

Brian Patrick Flynn
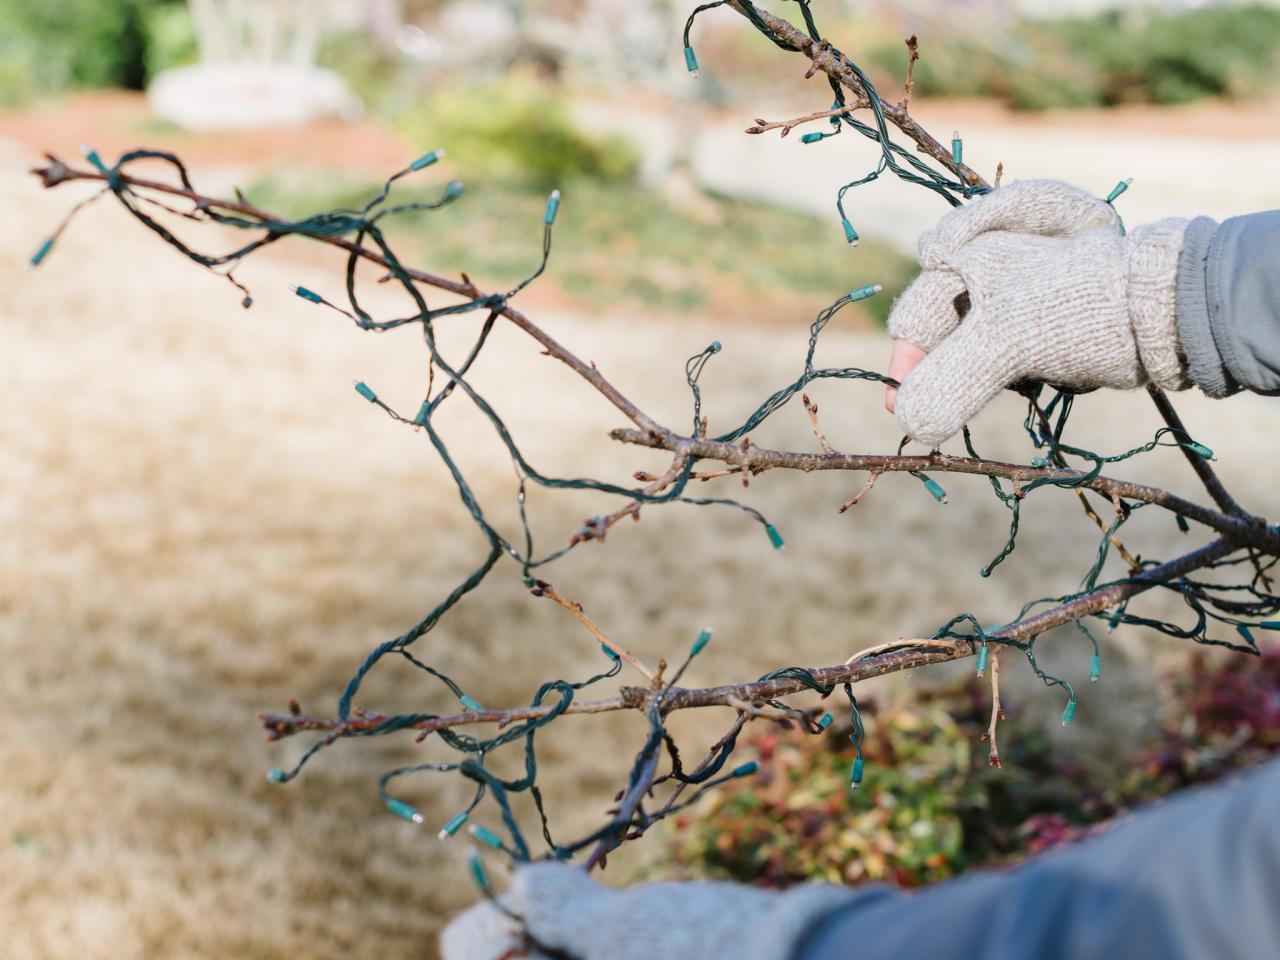
Add Twinkle Lights
Once antlers are in place, wrap them with twinkle lights, then run an extension cord down the back of the post, and through a predetermined route through the yard to the nearest exterior power source. Note: The cord will eventually be hidden from view once rope is added to post.

Brian Patrick Flynn
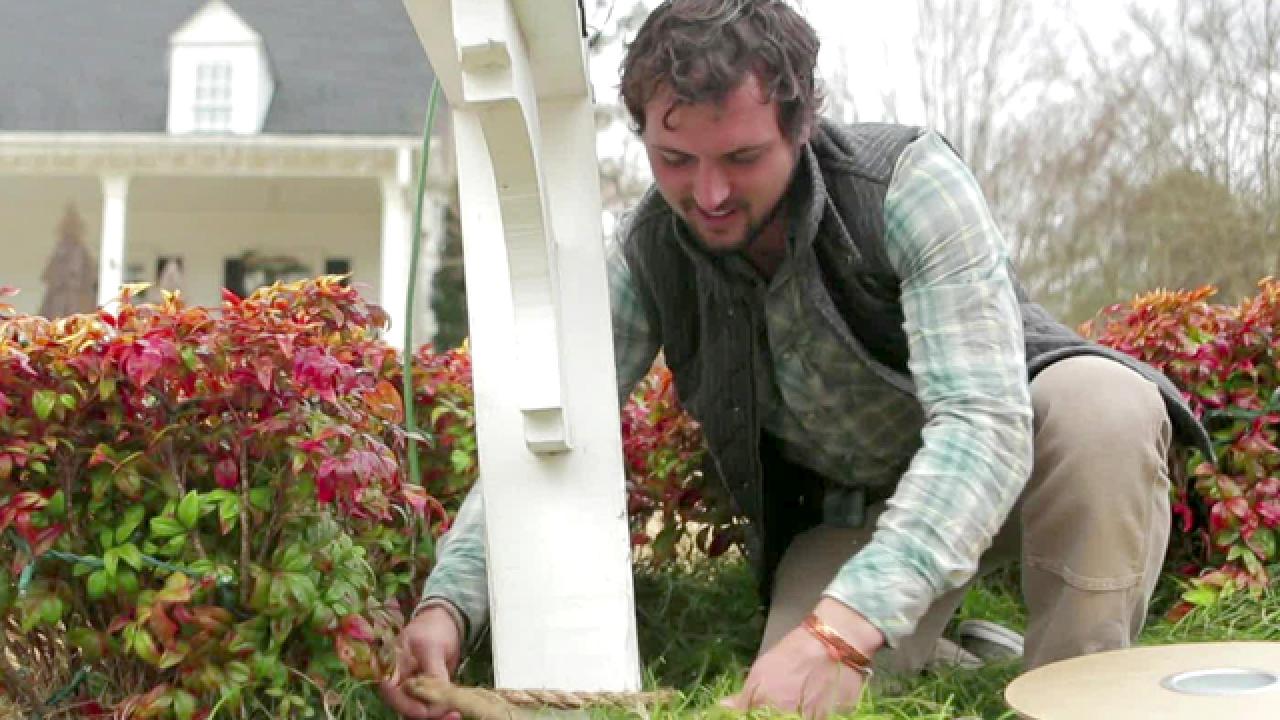
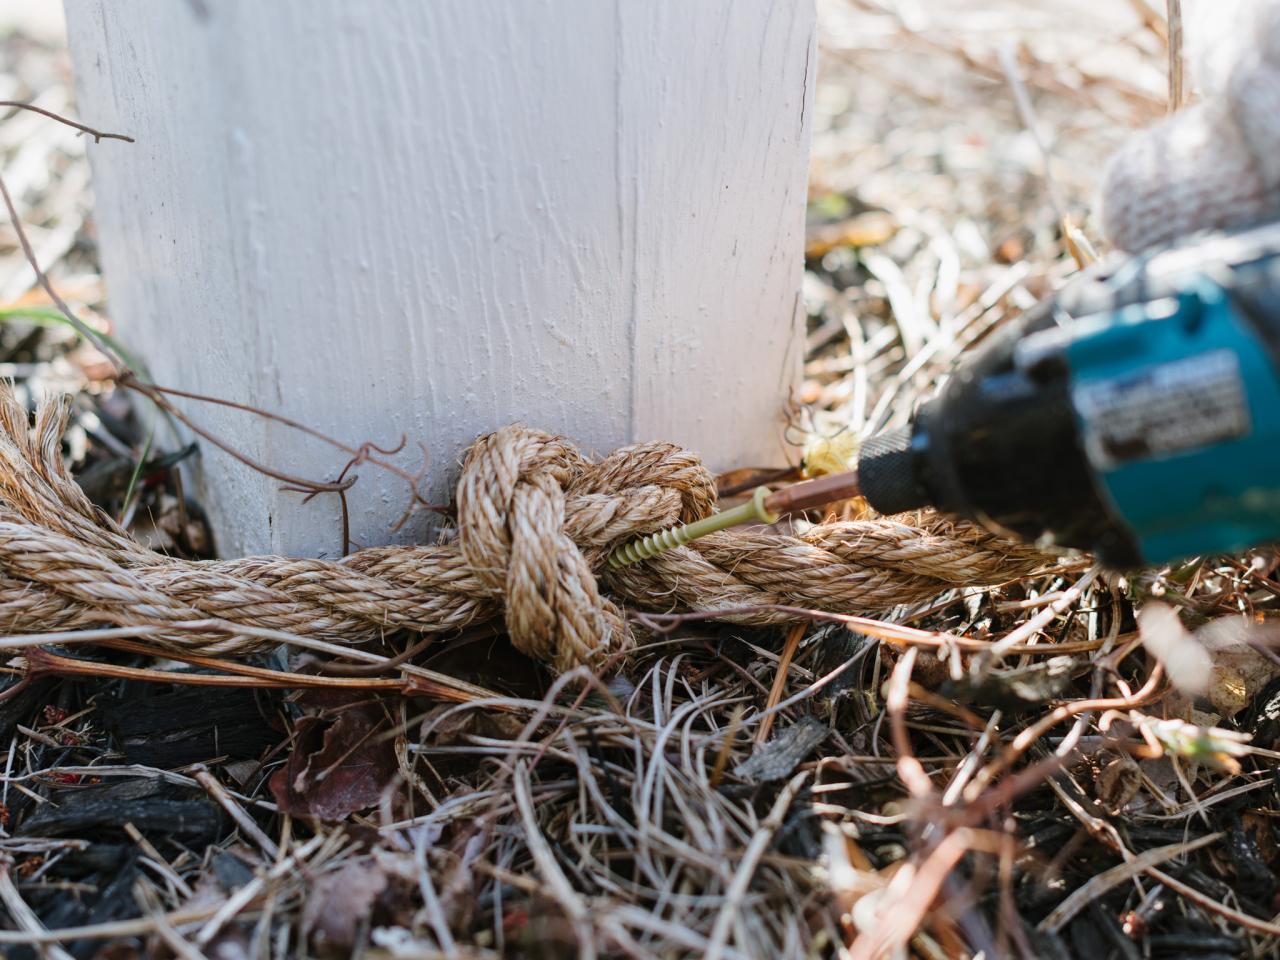
Secure End of Rope
With 200 feet of 1/2-inch diameter sisal rope nearby, unfurl a small portion of rope, then create a knot at the very bottom of the mailbox post. Add wood screw directly through the end of the rope and into mailbox post with screw gun, securing it tightly in place.

Brian Patrick Flynn
Wrap With Rope
Unfurl remainder of sisal rope from spool, keeping each rung tight against those above and below it. Once you reach the actual mailbox, continue to wrap up and around its sides, but leave the front of the mailbox door exposed.

Brian Patrick Flynn
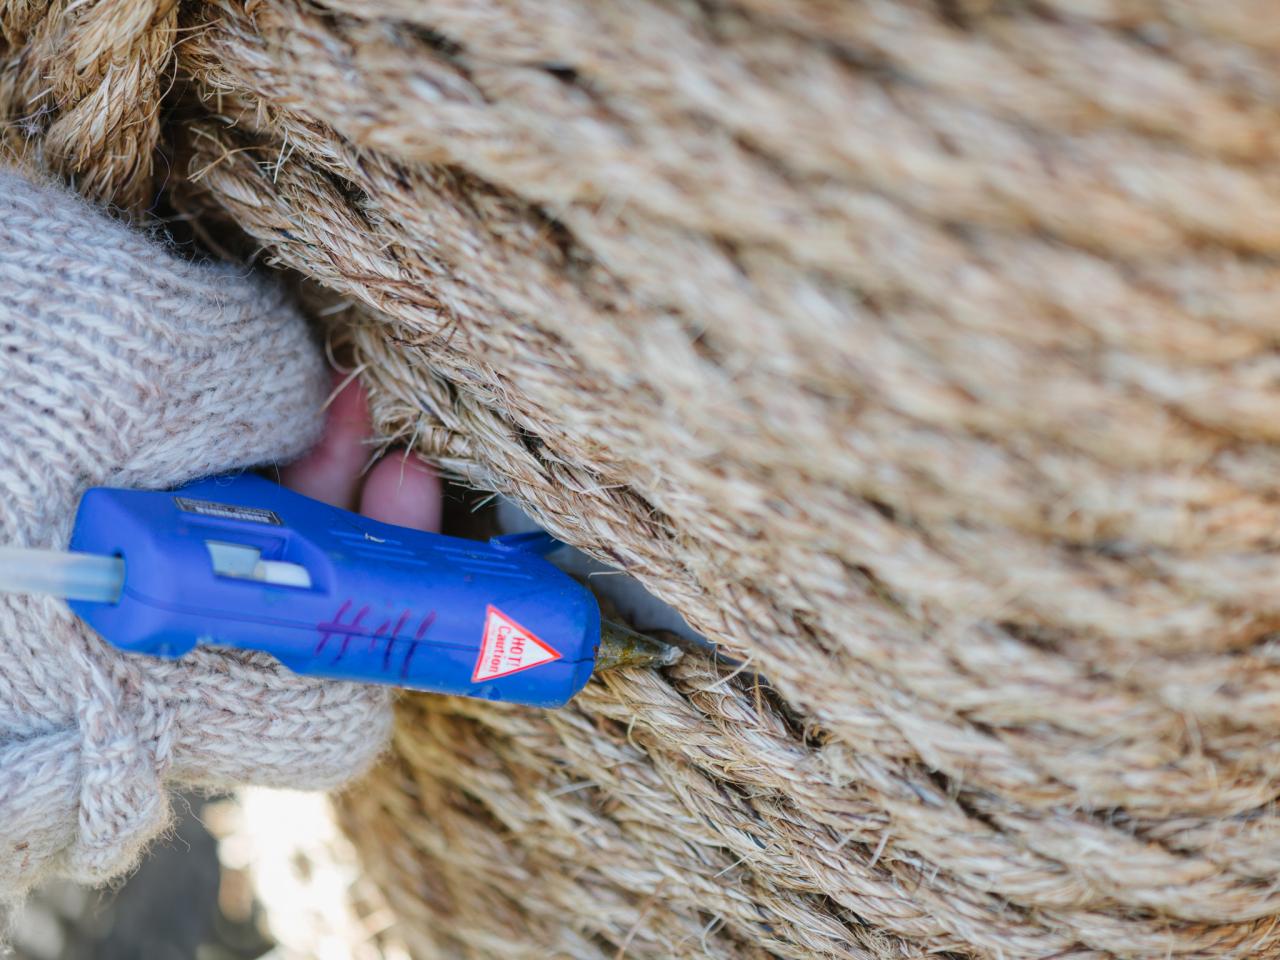
Add Hot Glue
While wrapping sisal rope at the area where the post meets the mailbox, it's likely that some of the rope will become unruly. If so, use hot glue gun to secure several rungs of rope together, keeping them from moving around.

Brian Patrick Flynn
Create a Knot
Once mailbox is completely wrapped, tuck sisal rope along bottom of mailbox, then create a tight top knot.

Brian Patrick Flynn
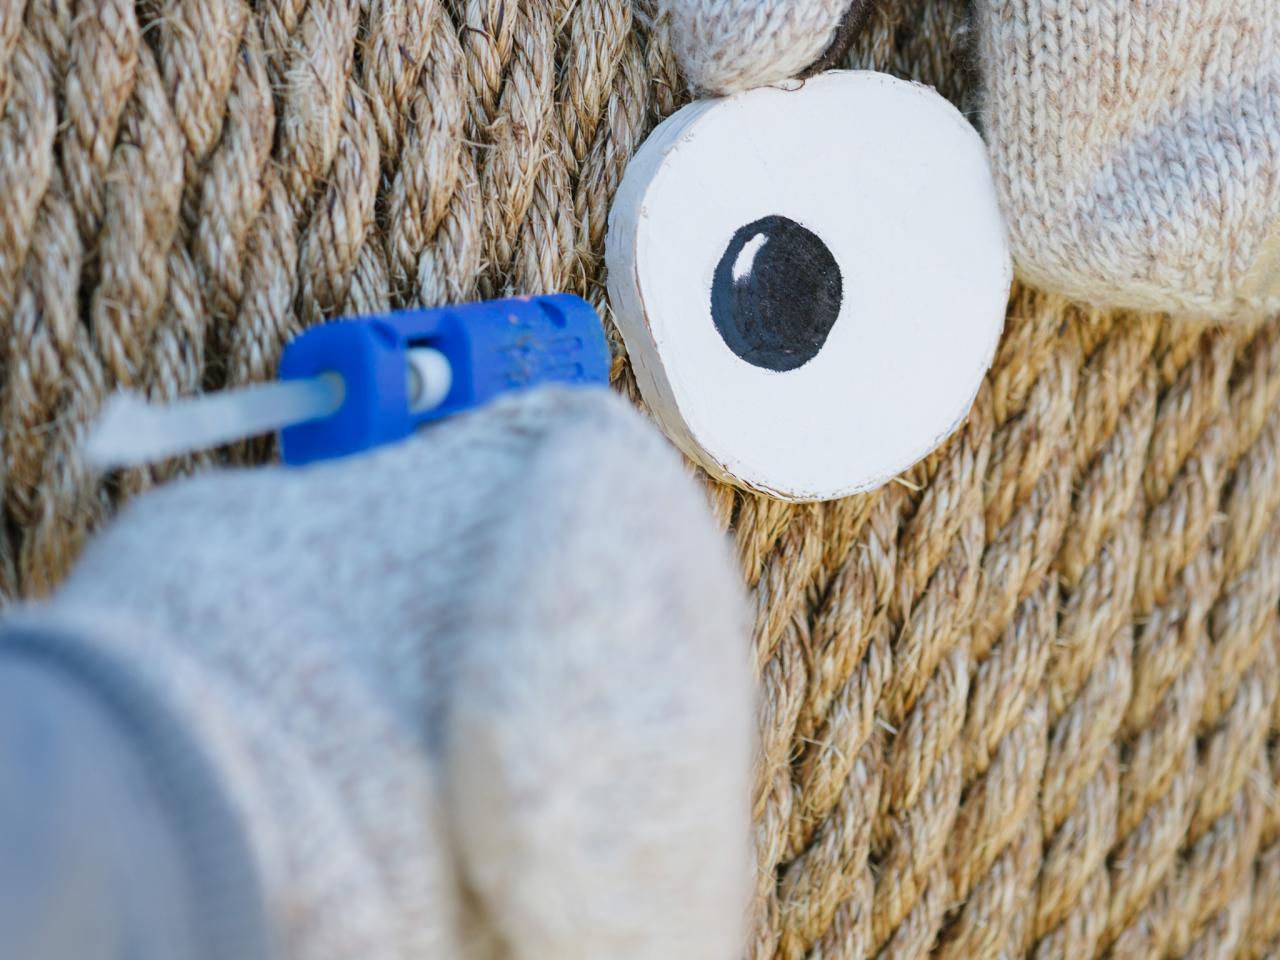
Add Eyes
Use a handsaw to cut firewood or birch log into two 1/4-inch slices. Paint slices with white exterior paint, then use marker to add a small dot as the pupil. Fasten eyes to sides of mailbox with hot glue gun.

Brian Patrick Flynn
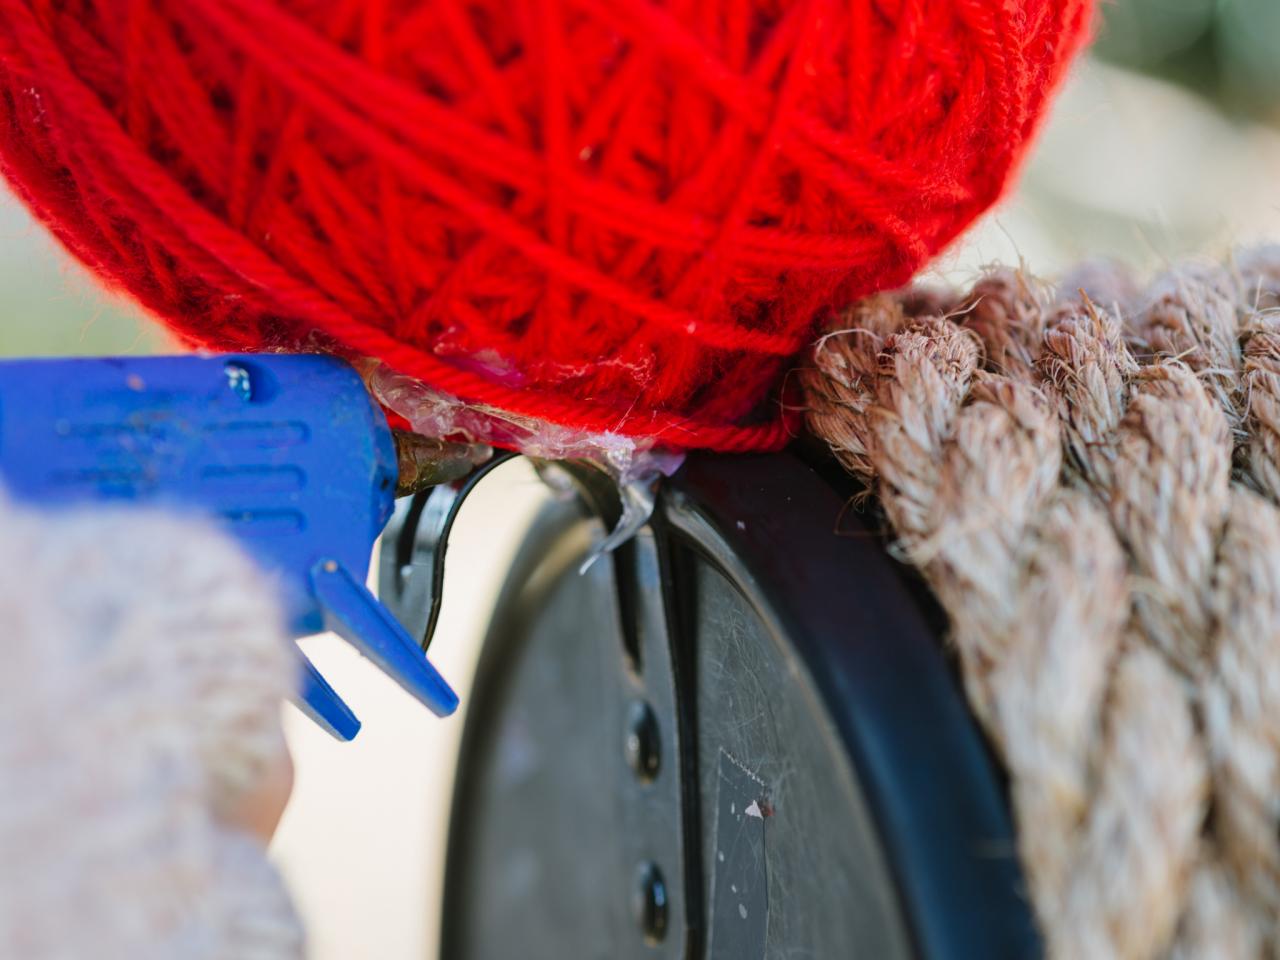
Add Nose
Wrap 3-inch foam ball with red acrylic yarn, creating several layers until the white foam is completely hidden from view. Secure yarn to foam ball with hot glue gun. Next, add nose to the top of the mailbox door with hot glue.

Brian Patrick Flynn
Finishing Touches
Add festive embellishments, like a red Santa Claus hat or knitted scarf, to give the reindeer a more playful look. During the day and night, your mailbox will be a showstopper.

Brian Patrick Flynn


