


Upcycle a Plain Kids' Chair With a Decoupaged Map
Put an old map to new use as a colorful addition to plain wooden kids' chairs.


Materials Needed:
- wooden chairs
- paper maps
- orbital sander
- HVLP paint sprayer
- white lacquer paint
- scissors
- decoupage glue
- 1-1/2" paintbrush
- utility knife
- damp cloth
- unused credit card or burnisher
Sand and Paint Chairs
Using an orbital sander, remove the existing finish from each chair (Image 1) then wipe down with a damp cloth to remove dust from sanding. Using an HVLP paint sprayer, cover each chair with a minimum of two coats of white lacquer or a solid color which complements the chosen map (Image 2). Be sure to move the sprayer in a sweeping, controlled motion, ensuring any areas which will remain uncovered by the paper map are thoroughly painted.


Choose Portion of Map for Coverage
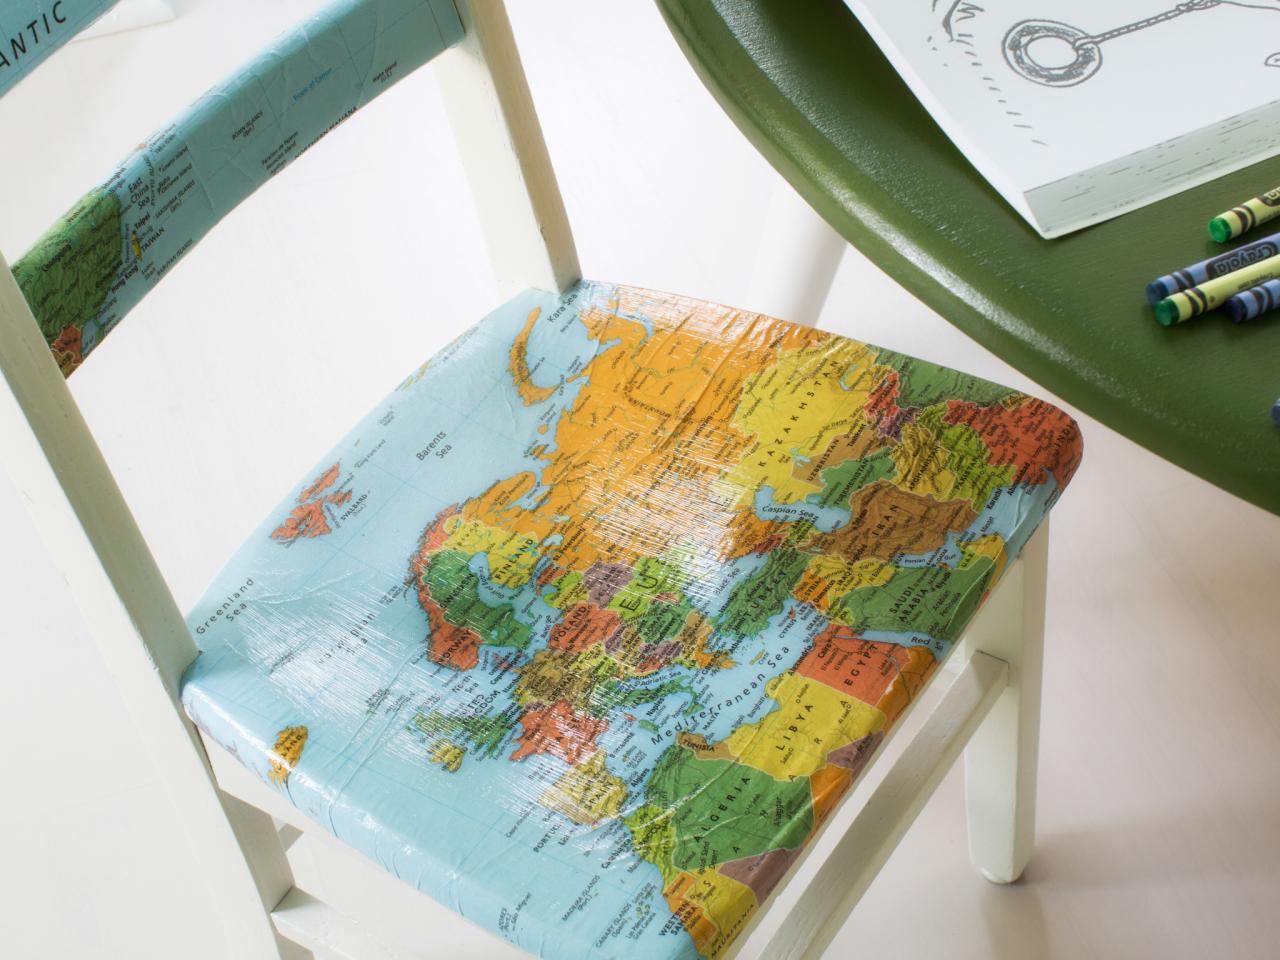
Choose the desired area of the map to feature as well as which portions of the chair to keep painted versus covered with paper map. Next, use scissors to cut the paper map to size. Tip: We chose to cover just the chair's backrest and seat with the map, leaving the legs and support pieces painted.

Apply Decoupage Glue and Position Map
Apply the decoupage medium directly to the chair's surface using 1-1/2" paintbrush (Image 1). Be sure to create an even, thin layer of glue on all areas you plan to cover with the map. Allow the glue to tack up (around 30 seconds to 1 minute) to avoid wrinkles and bubbles. Carefully lay the map over the glued areas, checking frequently for proper alignment (Image 2). Gently smooth out all bubbles and wrinkles in the paper using a credit card or burnisher.


Trim Excess
Press the map into each corner or transition, then trim the excess with utility knife. In areas where two perpendicular edges meet (such as where the back meets the seat or seat support), cut one section away first then press the other section into the corner and cut. Wrap the overhanging edges under the bottom edge of the seat, then trim away any excess. Wipe off any excess glue with a damp cloth throughout the installation.

Repeat Positioning, Cutting and Cleanup
Repeat the above steps for each map-covered area of the chair. Allow the glue to set for 30 minutes to cure properly. Tip: Always check the label on the product for specific drying times as well as re-coating times to avoid adding a finish coat too soon.
Apply Finishing Coat of Decoupage Medium
To add a protective layer over the map, apply a coat of decoupage medium over the map sections of each chair (Image 1). Allow proper dry time for curing and apply a second coat if needed (Image 2). Tip: An extra coat of decoupage medium will add more durability for chairs used by active children.


