


How to Paint a Faux Marble Tabletop
Real stone surfaces out of your price range? Get the look of Carrara marble (for way less) with our easy DIY.

Do you ever find yourself dreaming of and drooling over gorgeous marble countertops or furniture pieces only to be crushed when you see the hefty price tag? What if I told you there was a cheaper option that looks and feels just like the real thing?

Jalynn Baker
I was a little weary at first, but my journey into the world of faux marbling has completely changed my mind about faux finishes. They can be done and done right. All you need is a full day, a little patience and marble surfaces can be yours at a fraction of the cost. This is seriously THE best DIY project I've ever done. And it looks even better in person.
The Before
A few months ago, I bought a gorgeous solid wood banquette on a Facebook yard sale page for $100, then found a round dining table (see the before below) on Craigslist that was just 'ok' but fit my space, so I bought it. I painted the banquette a bright white, made some cushions, then, as with all DIY projects, lost my steam. So the poor mismatched table sat in my dining room for months while I tried to figure out what to do with it.

Cassidy Garcia Photography
Then, voila! I was scrolling through Pinterest and stumbled across this awesome faux Carrara marble tutorial from Gorgeous Shiny Things and knew I had to try it.
So I did my research, read and watched about ten other tutorials and came up with a process that resulted in the most gorgeous piece of furniture I've ever owned. I have to be honest, I'm pretty proud of the way it turned out. Here's what I did:
The Process
I followed Gorgeous Shiny Things' instructions to a T, with a few exceptions: Instead of buying white and gray glazes, I used the leftover white paint I had from my banquette project and some gray paint I had stashed in a cabinet. The white paint is Valspar Signature Paint + Primer in Blanched Pine, and the gray is Valspar Signature Paint + Primer in Urban Sunrise mixed with a few squirts of black craft paint to darken it up. I mixed a little water in the paints instead of using a paint extender. Also, instead of buying an expensive softening brush, I used a large chip paintbrush I had on hand.
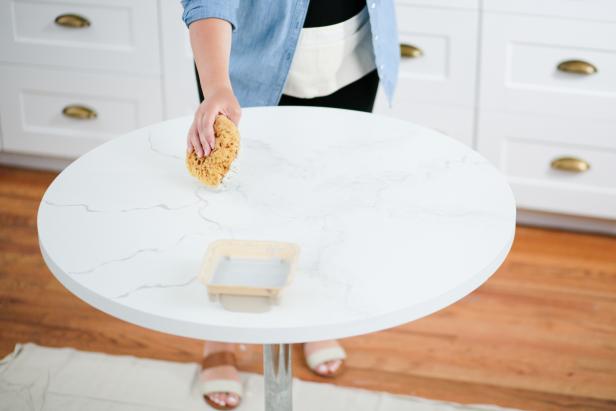
First, I primed the tabletop with two coats of white paint, letting it dry completely between coats. Once it was dry, I dabbed another thin layer of white all over with a sea sponge to create my first layer of texture.

Cassidy Garcia Photography

Cassidy Garcia Photography
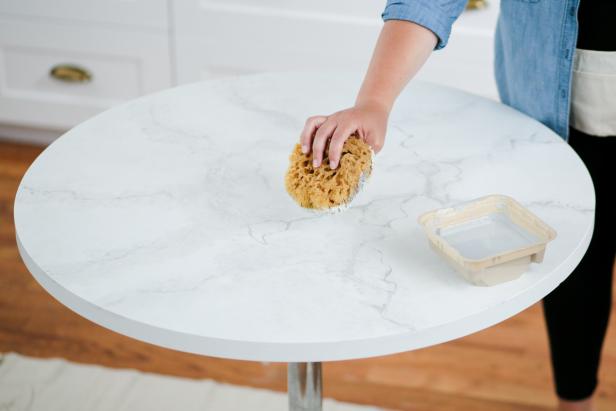
Now for the fun stuff. Using an inspiration image of Carrara marble as a guide, I roughly drew out the veining lines with a medium paintbrush, then immediately sponged over them with the dry side of my sponge, blurring the veins (see below). I then sponged completely over the entire table with white paint. I repeated this process about three times to create a gorgeous base layer. I think this is what gave my final product that deep "underwater" look.

Cassidy Garcia Photography
Cassidy Garcia Photography
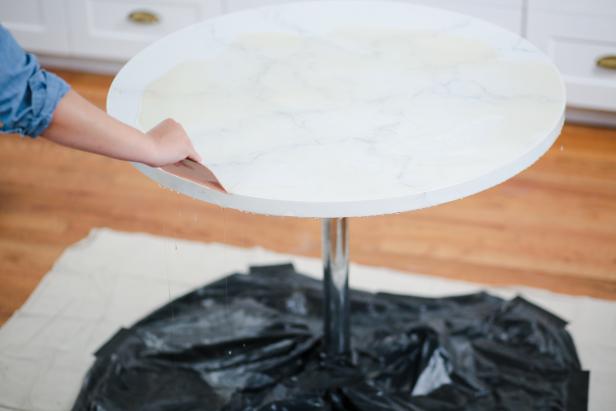
Once I was happy with the base layer, I created smaller, more defined veins using a thin paintbrush. Following the video instructions, I painted, sponged, then dry-brushed each vein. Then, no joke, I repeated this process about four times, repainting, sponging and dry-brushing each vein until I was happy with the results. There was no need to let the paint dry between layers — the final result looks more organic if each new layer is added to a slightly-tacky underlayer. For an authentic look, make sure the veins wrap around the edges of the table.

Cassidy Garcia Photography

Cassidy Garcia Photography
Cassidy Garcia Photography
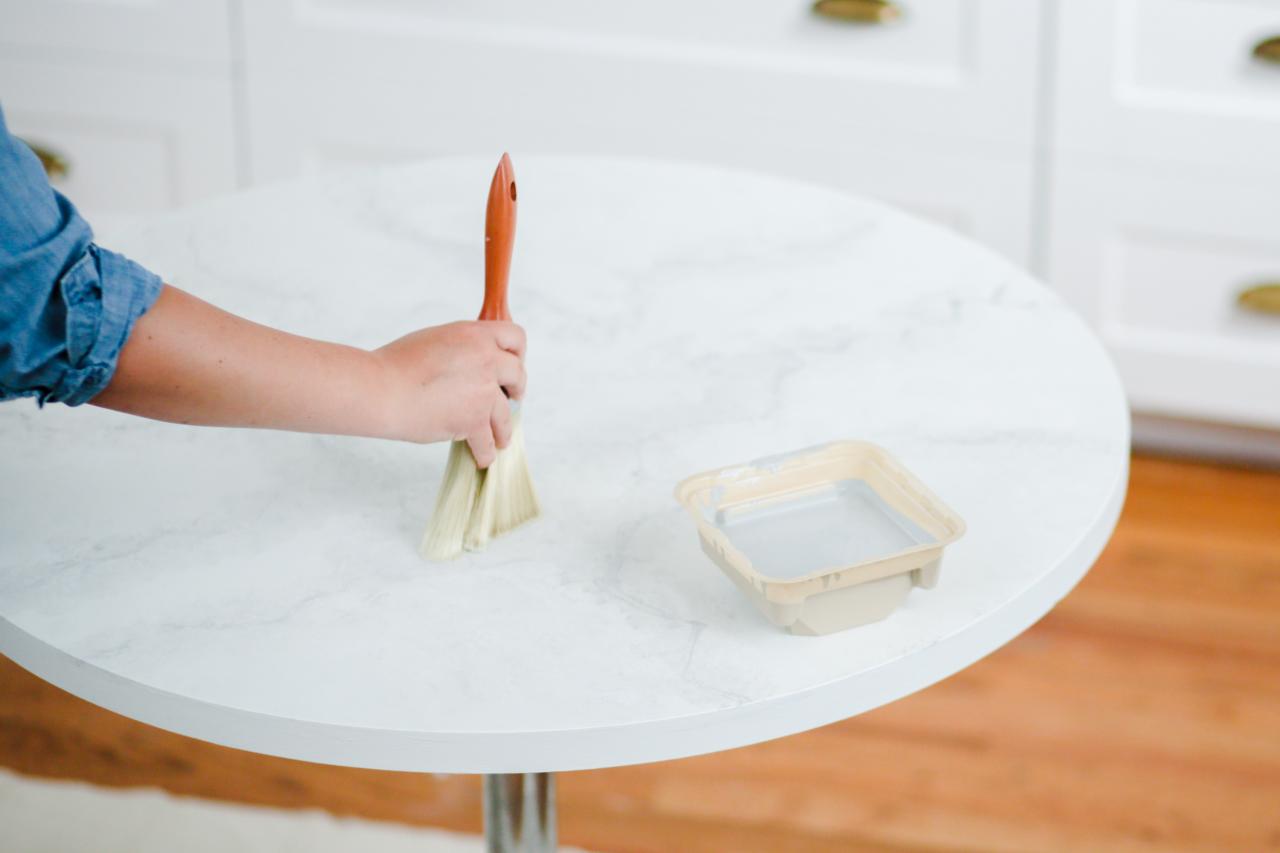
I let the paint dry for about 30 minutes, then poured a thick coat (about 3/4 of a bottle) of Parks Super Glaze in the center of the table. I then used a plastic spreader to distribute the glaze from the middle to the edges, making sure I completely coated the edges with glaze (not an easy feat on a round table). I covered the legs of the table with a drop cloth and multiple trash bags to protect my floor and catch any glaze drips. That stuff is super sticky.

Cassidy Garcia Photography
Cassidy Garcia Photography
Then, I stood around the table for about an hour blowing out air bubbles with a straw and scraping drips from the bottom edge with the scraper until the glaze stopped dripping. Thank goodness my kitchen has a direct view of the living room TV! This project made for a long night.

Cassidy Garcia Photography
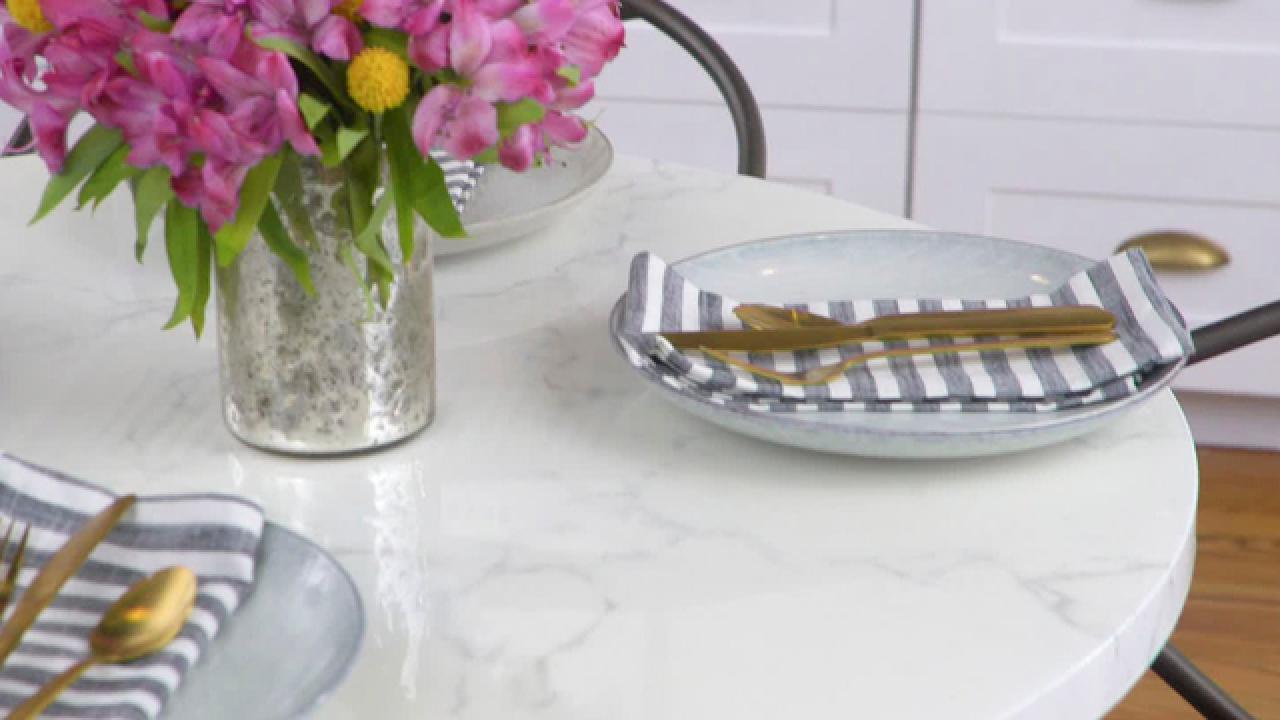
The After

Jalynn Baker
I let the table dry and cure for about a day and a half before moving it back to its corner and adding decor. I'm so happy with the final product! I've had several people comment on how real it looks. My dad didn't even believe me when I told him that I faux painted it. I'll call that a win.
Jalynn Baker
The Budget Breakdown
Budget: $100, What I Spent: $75
- table: $25
- leftover gray and white paint: free
- 1-quart Gloss Super Glaze: $25
- plastic spreader: $2
- mini paint tray: $3
- 6-inch sea sponge: $8
- paintbrushes, various sizes: $12
- large chip paintbrush from previous project: free
What I Learned
You don't need fancy paint to get a great result. Leftover paint from other projects worked just fine and saved me about $30!
You do need to invest in good brushes. I bought cheap paintbrushes and ended up spending way too much time picking shedding brush bristles out of my paint. If I could do it over again, I would have invested in sturdy, chip paintbrushes or project brushes from the hardware store. I've linked to some better brushes above.
Layering and patience are key. If you feel discouraged after the first layer of veining, don't give up! Just sponge over it and try again. I honestly think this is why my final product has so much depth.
You definitely want to do this project inside, over a drop cloth. Dust and bugs are not friends to layers of paint and super thick acrylic glaze. So, unless you want to spend your evening picking gnats out of your table, this project is best executed indoors — just don't forget to ventilate.


