


Create a Gallery Wall in a Stairwell


Materials Needed:
- assorted picture frames ranging in size, shape, finish, texture and color
- printer
- photo paper
- vintage photos
- hammer
- picture nails
- measuring tape
- painter's tape
- ladder
- pencil
- notepad
- museum putty
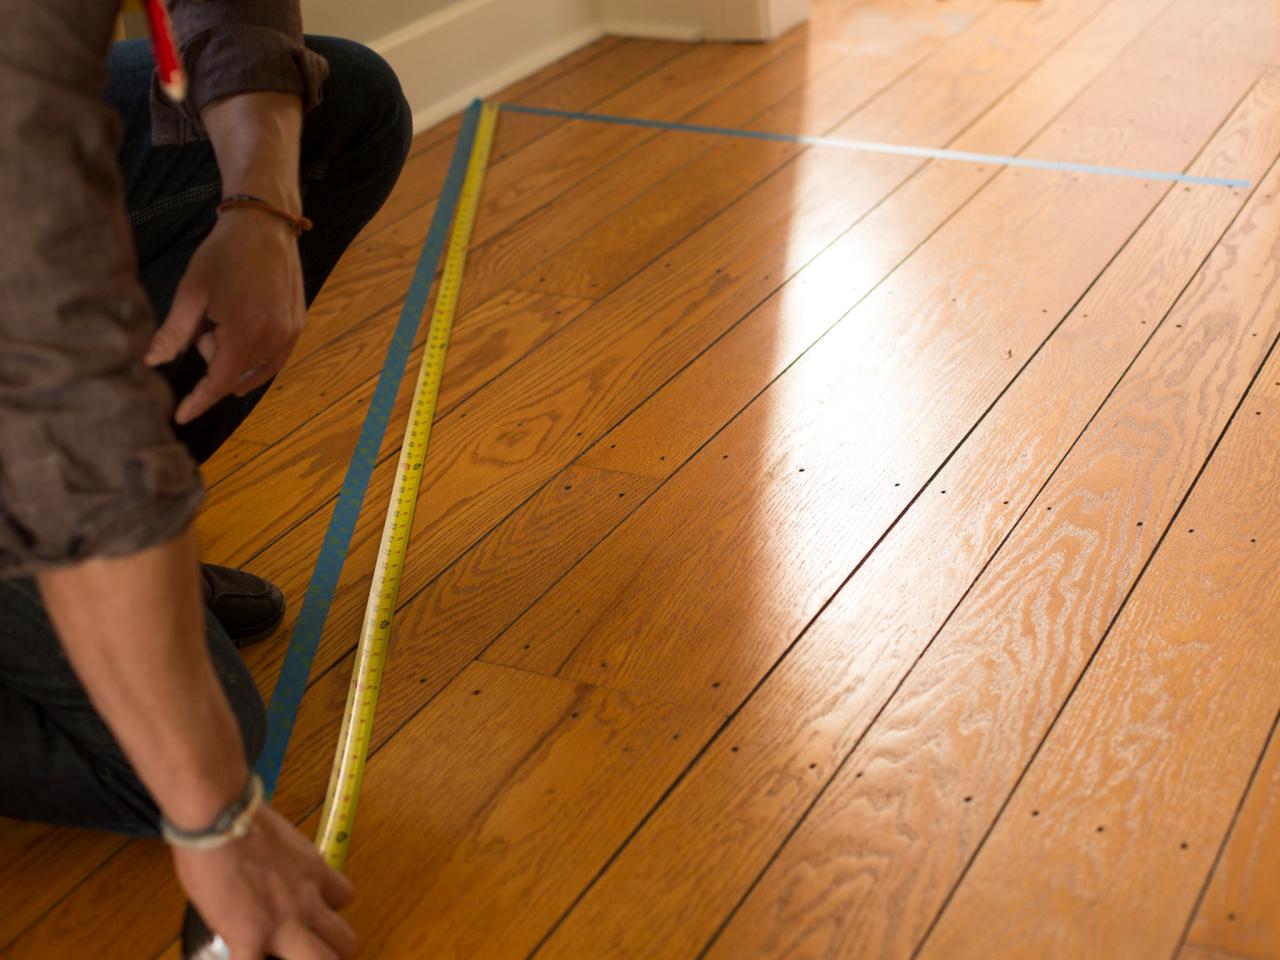
Measure Wall and Tape Off Floor
The key to properly arranging framed photos in a balanced manner is to re-create the shape and scale of the angled stairwell wall on the ground with painter's tape. To do this, use measuring tape to determine the height, width and pitch of the stairwell wall. Jot down the measurements, then sketch the shape of the wall on a notepad. Use painter's tape to re-create the shape and scale of the wall directly onto the floor.

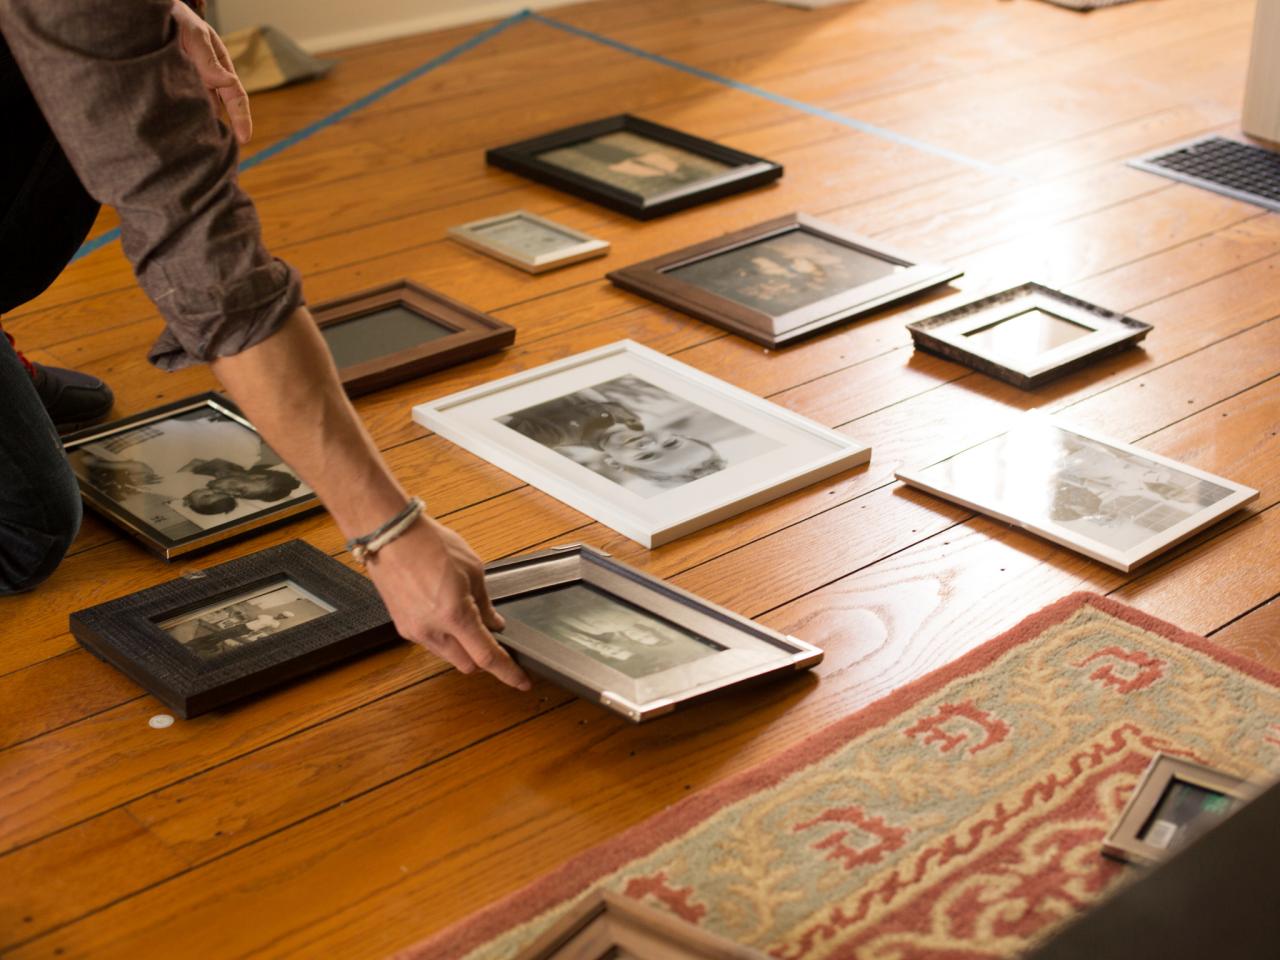
Lay Out Frames
Place each frame, one at a time, inside the taped-off area of the floor, leaving approximately 6 to 10 inches of empty space along the bottom to allow enough clearance for foot traffic up and down the stairs. The success of the finished look will contribute to a balanced mixture of different frames properly distanced from one another with a variance of negative space, as well as a collection of photos with different compositions, shapes and moods. Move filled and empty frames around until a well-collected look between the frames themselves and the featured images begins to form. Tip: It's wise to leave several frames empty until the arrangement is decided on. This will allow you to choose photos to properly add interesting shapes and compositions toward the end, helping achieve a curated look.

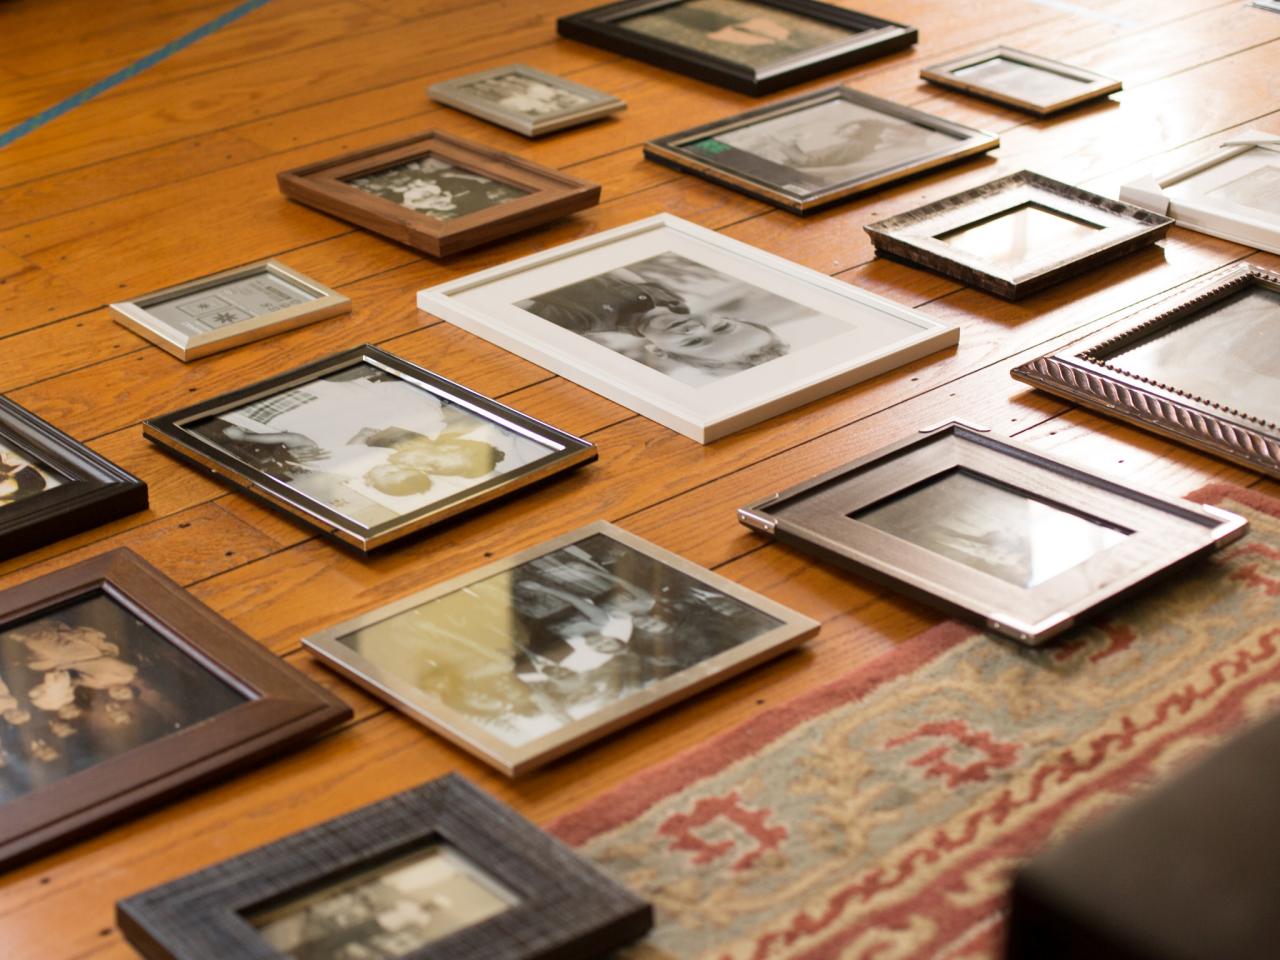
Take a Photo
Once the arrangement is complete, ensure that the empty space left along the bottom of the taped-off area is even. Since salon galleries are meant to evolve over time, it's okay to leave several frames empty or fill them with temporary images or drawings. This will allow new images to be added later on. Be sure to take a photo of the final layout.

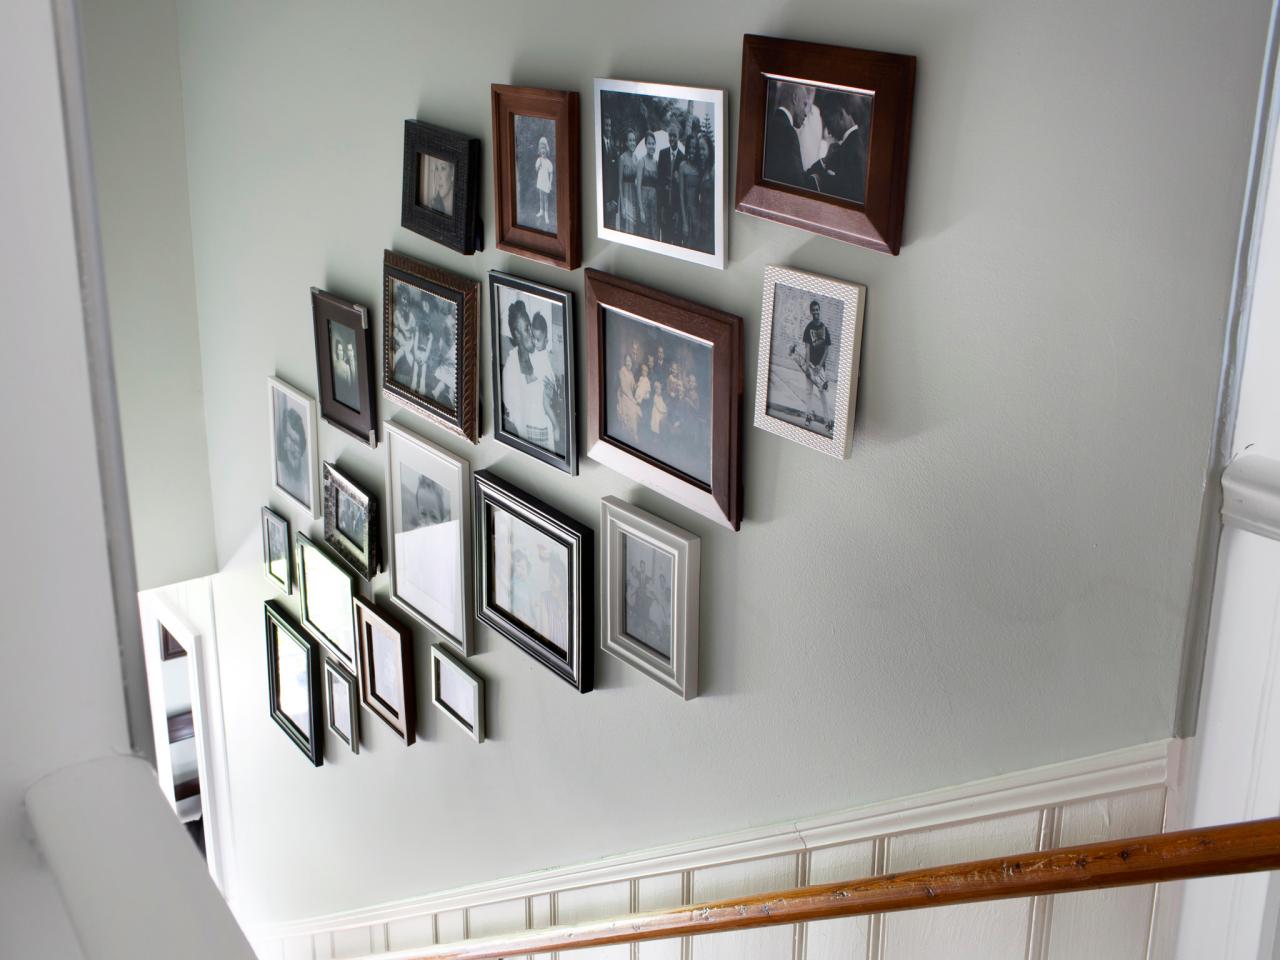
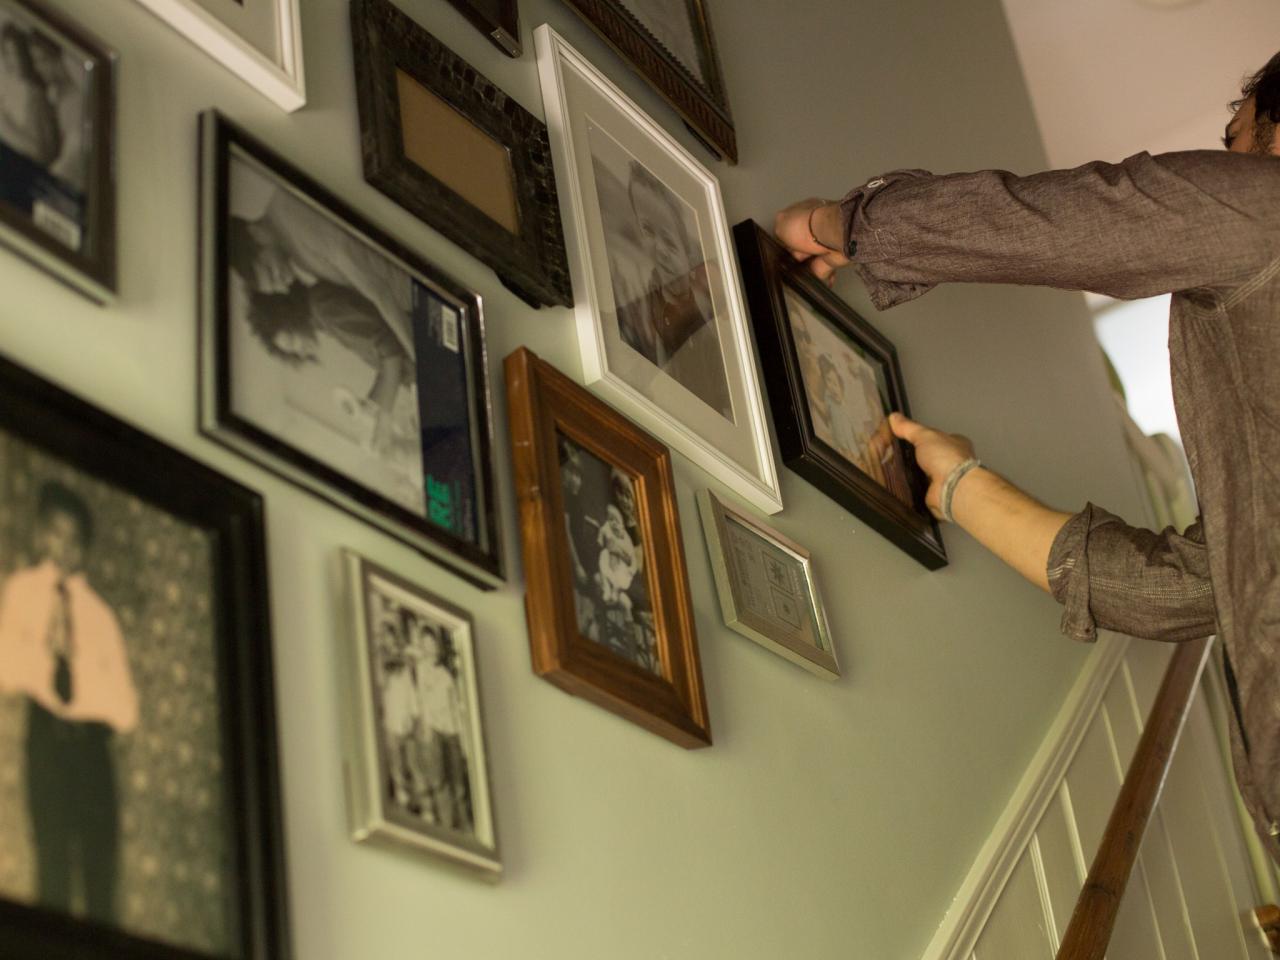
Arrange On the Wall
Referring to photo, hang each picture frame in its intended spot using hammer and picture nails. Once all frames are in place, use museum putty to keep them held in place to avoid shifting.


